Unlocking Hidden Value: The Modern Data Architecture for AI-Powered Insurance Claims Insights
Overview
This guide walks through how to build a modern data architecture on Snowflake and AWS that reads open table format Iceberg data from AWS and combines it with Snowflake Native tables, transforms and enriches the data using Snowpark Connect for Apache Spark, and delivers AI-powered insights through Cortex Analyst and Snowflake Intelligence. It provides an end-to-end blueprint for combining open table formats, feature engineering, and natural language analytics to accelerate fraud detection and claims processing.
Prerequisites
- Snowflake account with ACCOUNTADMIN role
- AWS account with permissions to create and manage S3 buckets, IAM roles/policies, AWS Glue Data Catalog, and Lake Formation
- Cortex Code CLI (CoCo) installed and configured with a valid connection to the Snowflake account
What You'll Learn
- Snowflake Horizon Catalog — How the unified catalog now enables discovery and governance of both external Apache Iceberg tables and Snowflake Native tables from a single pane of glass, without moving data
- Snowpark Connect for Apache Spark — How to use familiar PySpark APIs to join, enrich, and score data across external Iceberg tables and internal Native tables in a single Spark job running on Snowflake compute
- Snowflake Intelligence — How to publish a Cortex Agent that lets business users ask natural language questions on the aggregated, fraud-scored claims data without writing SQL
- Cortex Code (CoCo) — How to use CoCo and interactively deploy the entire solution end-to-end, from creating Snowflake objects and running Spark jobs to setting up Cortex Analyst and Snowflake Intelligence
Solution Architecture

Architecture Overview
This solution leverages AWS and Snowflake services to create an end-to-end data pipeline for insurance claims analytics.
Components
AWS Account (US-West-2)
- Amazon S3 - Raw data storage in Apache Iceberg format
- AWS Glue Data Catalog - Metadata management for Iceberg tables
Snowflake (US-West-2)
- Catalog Linked Database - Connects to AWS Glue Catalog for accessing external Iceberg data
- Snowflake Native Tables - Persistent storage for transformed data
- Snowflake Horizon Catalog - Central governance layer
- Snowpark Connect for Apache Spark - Data transformation and feature engineering
- Snowflake Intelligence - AI-powered agent interactions
- Cortex Analyst - Natural language to SQL generation
Phase 1: Data Ingestion & External Cataloging (AWS to Snowflake)
| Step | Component | Claims Scenario |
|---|---|---|
| Claims Data Landing | Amazon S3 | Raw claims data (e.g., FNOL reports, adjuster notes, images, etc.) is stored in the data lake using Apache Iceberg table format |
| Metadata Registration | AWS Glue Data Catalog | The Glue Catalog is updated with Iceberg table metadata, acting as the "source of truth" pointer to the Iceberg data files in S3 |
| Catalog Synchronization | Catalog Linked Database | Snowflake's Catalog Linked Database connects to AWS Glue Catalog, ingesting the Iceberg metadata and creating a schema and table that points directly to the external Iceberg data in S3 |
Phase 2: Data Transformation & Feature Engineering
| Step | Component | Claims Scenario |
|---|---|---|
| Data Processing & Feature Creation | Snowpark Connect for Apache Spark | The Spark job reads claims data from the Catalog Linked Database, performs ML-based feature engineering (e.g., NLP for claims description, embeddings, calculating loss ratios, geo-spatial analysis, etc.) and writes the enriched features to a Snowflake Native Table using the Iceberg REST API |
| Data Persistence | Snowpark Connect for Apache Spark (Write-back) | The resulting enriched and curated data is written back to a new Snowflake Native Table. This table is optimized for querying and AI/ML workloads |
Phase 3: Insight Generation & Agent Interaction
| Step | Component | Claims Scenario |
|---|---|---|
| Agent Query & Query Orchestration | Snowflake Intelligence, Cortex Agents | A claims agent, without writing SQL, asks a natural language question (e.g., "Show me the top 5 high-risk claims filed this week"). Cortex Analyst receives the request, understands the context, and generates the appropriate SQL query to Cortex Analyst |
| SQL Generation & Execution | Cortex Analyst | The Cortex Analyst component receives a user question, translates it into an optimized Snowflake SQL query, and executes it against the Snowflake Native Tables |
| Insight Delivery | Snowflake Intelligence | The end-to-end flow delivers instant answers to complex analytical questions, allowing users to act quickly by converting them to summary alerts or remediation actions |
Cross-Cutting Layer: Governance
The Snowflake Horizon Catalog acts as the central governance layer throughout this entire process, ensuring every user and component (from Snowpark job to Snowflake Intelligence) only accesses data according to defined security policies.
Solution Deployment
Step 1: Configure AWS Infrastructure (S3, Glue, IAM, Lake Formation)
S3 Bucket for Iceberg Data Files
- Navigate to AWS Console → S3 → Create bucket
- Enter the bucket name:
<account-id>-us-west-2-insurance-claims-iceberg-data - Select the AWS Region:
us-west-2(must match your Glue catalog region) - Leave Block all public access enabled (default)
- Enable Bucket Versioning (recommended for Iceberg table consistency)
- Click Create bucket
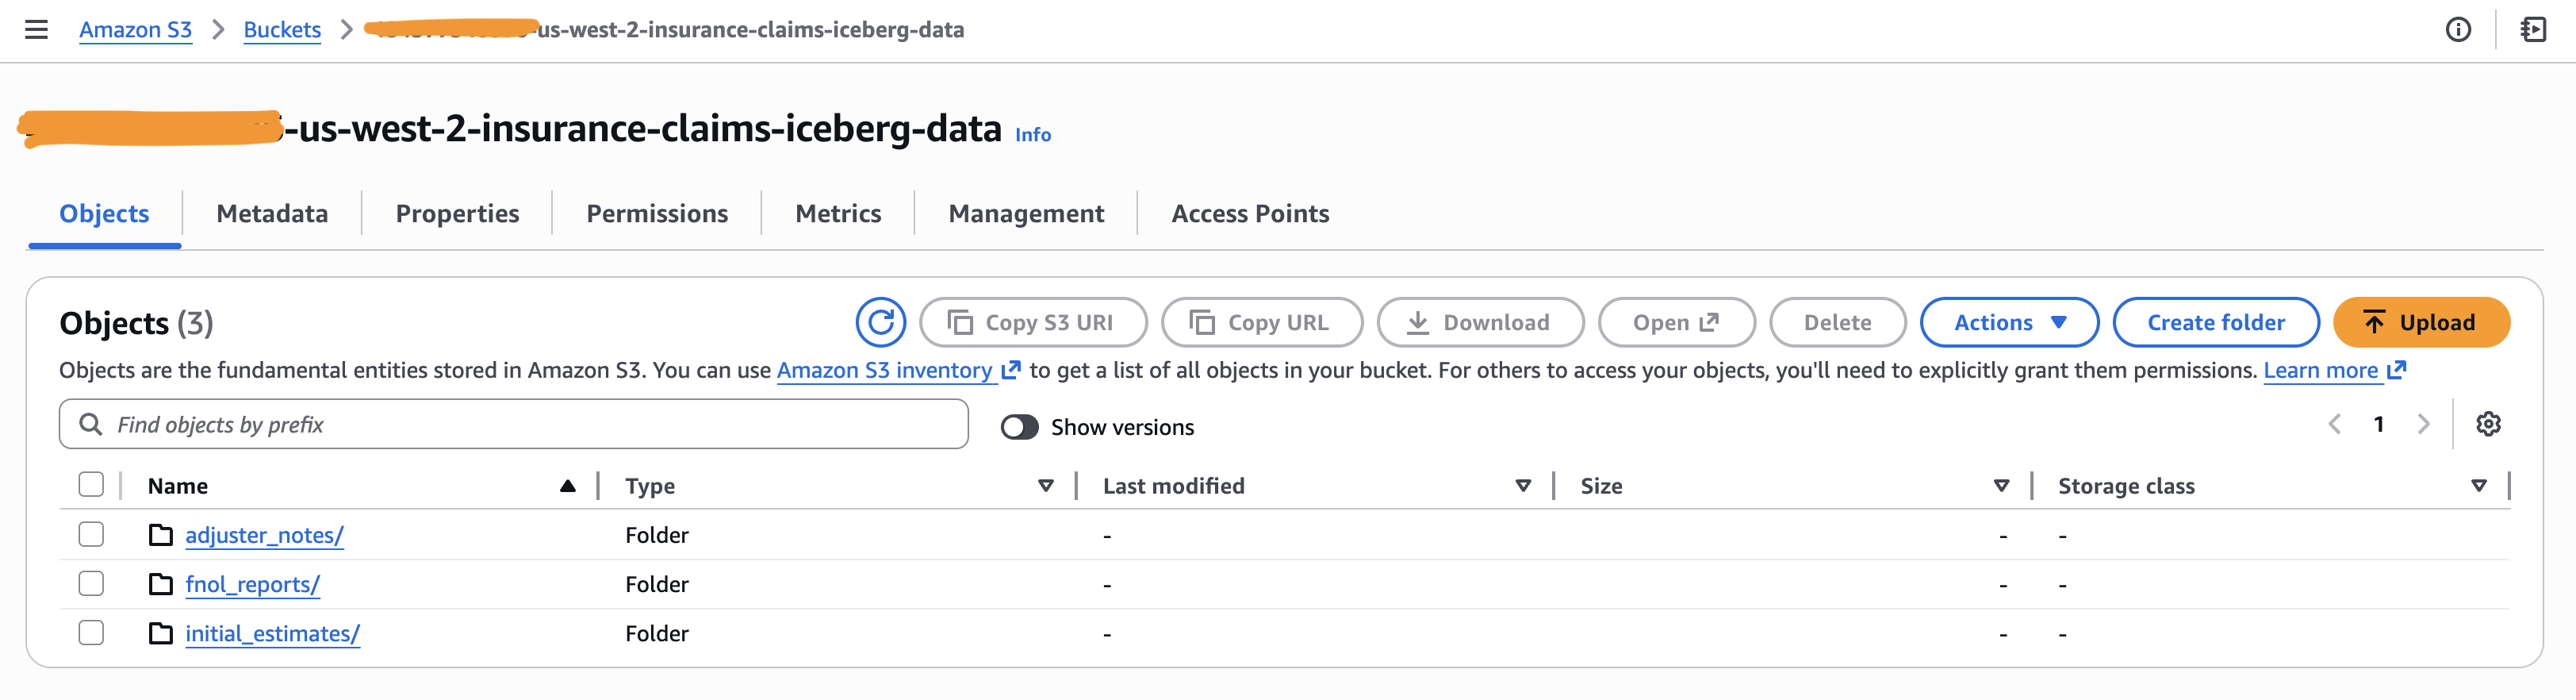
- Once created, create the following folder structure inside the bucket:
fnol_reports/— First Notice of Loss reportsadjuster_notes/— Adjuster notes and assessmentsinitial_estimates/— Initial claim estimates
AWS Glue Data Catalog
- Verify that the Glue Data Catalog is enabled in your region (enabled by default in most regions)
- Navigate to AWS Console → Glue → Data Catalog → Databases
- Create a Glue Database
- Navigate to AWS Console → Glue → Databases → Add database
- Database name:
insurance_claims_iceberg_glue_db - Location:
s3://<account-id>-us-west-2-insurance-claims-iceberg-data/ - Click Create database

IAM Role with Glue/Lake Formation Permissions
-
Create an IAM Policy
- Navigate to AWS Console → IAM → Policies → Create policy
- Select the JSON tab and paste the following policy. Update the
account-idplaceholder before saving the policy. - Policy name:
insurance-claims-iceberg-data-policy
{ "Version": "2012-10-17", "Statement": [ { "Sid": "GlueAndS3ScopedAccess", "Effect": "Allow", "Action": [ "glue:CreateTable", "glue:DeleteDatabase", "glue:GetTables", "glue:GetPartitions", "glue:UpdateTable", "glue:DeleteTable", "glue:GetDatabases", "glue:GetTable", "glue:GetDatabase", "glue:GetPartition", "glue:GetCatalogs", "glue:CreateDatabase", "glue:GetCatalog", "s3:ListBucket", "s3:GetBucketLocation" ], "Resource": [ "arn:aws:glue:*:*:table/*/*", "arn:aws:glue:*:*:catalog", "arn:aws:glue:*:*:database/insurance_claims_iceberg_glue_db", "arn:aws:s3:::<account-id>-us-west-2-insurance-claims-iceberg-data" ] }, { "Sid": "GlueAndS3GlobalAccess", "Effect": "Allow", "Action": [ "glue:GetTables", "glue:GetCatalog", "glue:GetTable", "s3:ListAllMyBuckets", "s3:AbortMultipartUpload", "s3:ListMultipartUploadParts", "s3:GetBucketCors", "s3:GetBucketVersioning", "s3:GetBucketAcl", "s3:GetBucketNotification", "s3:GetBucketPolicy", "lakeformation:GetDataAccess" ], "Resource": "*" }, { "Sid": "S3DataAccess", "Effect": "Allow", "Action": [ "s3:GetObject", "s3:PutObject", "s3:DeleteObject", "s3:ListBucket", "s3:GetBucketLocation", "s3:ListAllMyBuckets" ], "Resource": [ "arn:aws:s3:::<account-id>-us-west-2-insurance-claims-iceberg-data", "arn:aws:s3:::<account-id>-us-west-2-insurance-claims-iceberg-data/*" ] } ] } -
Create an IAM Role
- Navigate to AWS Console → IAM → Roles → Create role
- Trusted entity type: AWS account
- Select Another AWS account (enter a placeholder account ID for now; this will be updated after the Snowflake catalog integration is created)
- Role name:
insurance-claims-iceberg-data-role - Attach the
insurance-claims-iceberg-data-policycreated above - Click Create role
Lake Formation Setup
Note: This section uses
ACCESS_DELEGATION_MODE = VENDED_CREDENTIALSin your Snowflake catalog integration. Vended credentials allow Snowflake to obtain temporary, scoped credentials from Lake Formation to access S3 data directly.
-
Enable Lake Formation
- Navigate to AWS Console → Lake Formation → Get started
- Accept the default settings to initialize Lake Formation in your account
-
Register the S3 Data Lake Location
- Navigate to Lake Formation → Data lake locations → Register location
- S3 path:
s3://<account-id>-us-west-2-insurance-claims-iceberg-data/ - IAM role: Select
insurance-claims-iceberg-data-role(created in the previous step) - Permission mode: Select Lake Formation
- Click Register location

-
Grant Data Permissions to the IAM Role
- Navigate to Lake Formation → Data permissions → Grant
- Principal type: IAM users and roles
- IAM role:
insurance-claims-iceberg-data-role - Database:
insurance_claims_iceberg_glue_db - Table: All tables
- Table permissions: Select, Describe
- Click Grant


-
Register the S3 Data Location
- Navigate to Lake Formation → Data locations → Grant
- Storage locations:
s3://<account-id>-us-west-2-insurance-claims-iceberg-data/ - IAM users and roles: Select
insurance-claims-iceberg-data-role(created in the previous step) - Registered account location should be the AWS Account ID
- Checkmark Grantable
- Click Grant

-
Verify Lake Formation Permissions
- Navigate to Lake Formation → Data permissions
- Confirm that
insurance-claims-iceberg-data-rolehas all the permissions on all tables ininsurance_claims_iceberg_glue_db
Step 2: Connect Snowflake to AWS Glue via Catalog Integration
-
Create the Catalog Integration
Run the following SQL in Snowflake (via Cortex Code CLI, Snowsight, or SnowSQL). Replace the placeholder values with your AWS account details:
CREATE OR REPLACE CATALOG INTEGRATION glue_db_catalog_integration CATALOG_SOURCE = ICEBERG_REST TABLE_FORMAT = ICEBERG REST_CONFIG = ( CATALOG_URI = 'https://glue.<region>.amazonaws.com/iceberg' CATALOG_API_TYPE = AWS_GLUE CATALOG_NAME = '<12_digit_aws_account_id>' ACCESS_DELEGATION_MODE = VENDED_CREDENTIALS ) REST_AUTHENTICATION = ( TYPE = SIGV4 SIGV4_IAM_ROLE = 'arn:aws:iam::<account_id>:role/insurance-claims-iceberg-data-role' SIGV4_SIGNING_REGION = '<region>' ) ENABLED = TRUE; -
Retrieve Snowflake's IAM User ARN and External ID
Run the following to get the values needed for the AWS trust policy:
DESCRIBE CATALOG INTEGRATION glue_db_catalog_integration;Note the values for:
- IAM_USER_ARN — e.g.,
arn:aws:iam::<aws-account-id>:user/gqx31000-s - EXTERNAL_ID — e.g.,
IWB00000_SFCRole=7_Hz7Ebsyt1q+08P9P7XXXXXXX=
- IAM_USER_ARN — e.g.,
-
Update the AWS IAM Trust Policy
Go back to AWS Console → IAM → Roles →
insurance-claims-iceberg-data-role→ Trust relationships → Edit trust policy and replace the<SNOWFLAKE_IAM_USER_ARN>and<SNOWFLAKE_EXTERNAL_ID>placeholders with the values from the previous step.{ "Version": "2012-10-17", "Statement": [ { "Sid": "SnowflakeAccess", "Effect": "Allow", "Principal": { "AWS": "<SNOWFLAKE_IAM_USER_ARN>" }, "Action": "sts:AssumeRole", "Condition": { "StringEquals": { "sts:ExternalId": "<SNOWFLAKE_EXTERNAL_ID>" } } }, { "Sid": "GlueAndLakeFormationAccess", "Effect": "Allow", "Principal": { "Service": [ "lakeformation.amazonaws.com", "glue.amazonaws.com" ] }, "Action": [ "sts:AssumeRole", "sts:SetContext" ] } ] } -
Verify the Integration
SELECT SYSTEM$VERIFY_CATALOG_INTEGRATION('glue_db_catalog_integration'); SELECT SYSTEM$LIST_NAMESPACES_FROM_CATALOG('glue_db_catalog_integration');- The first command should return a success status confirming Snowflake can connect to AWS Glue
- The second command should list the
insurance_claims_iceberg_glue_dbnamespace
Step 3: Provision Iceberg Tables & Snowflake Objects (Database, Schema, Stages, Tables)
Clone the git repository into your local machine and navigate to the folder site/sfguides/src/modern-data-architecture-for-ai-powered-insurance-claims-insights/assets/
All SQL commands for this step are in
assets/setup.sql.Run the following prompt using Cortex Code CLI (replace the AWS ACCOUNT ID with yours.
Run the setup.sql script by replacing the <account-id> with <01234554634> and access the data to upload into the stage from the data folder in this path

The setup script performs the following sub-steps in order:
| Sub-step | What it does |
|---|---|
| 3a | Creates the INSURANCE_CLAIMS_WH warehouse, INSURANCE_CLAIMS_INSIGHTS_DB database, CLAIMS_ANALYTICS schema, and two stages (DATA_STAGE, ML_MODELS) |
| 3b | Creates the Catalog Linked Database (glue_database_linked_db) that connects to AWS Glue via the catalog integration from Step 2 |
| 3c | Uploads sample CSV/Parquet data files and the fraud detection model to the Snowflake stages using PUT commands |
| 3d | Creates three Iceberg tables (fnol_reports, adjuster_notes, initial_estimates) in the linked database with S3 base locations and auto-refresh enabled |
| 3e | Loads the staged Parquet files into the Iceberg tables using COPY INTO with column name matching |
| 3f | Creates two Snowflake native tables (FRAUD_FLAGS, POLICY_DETAILS) in the CLAIMS_ANALYTICS schema |
| 3g | Loads the staged CSV files into the native tables |
| 3h | Runs verification queries to confirm row counts across all five tables |
Step 4: Run Feature Engineering with Snowpark Connect for Apache Spark
-
Create a Notebook in Snowsight
- Navigate to Snowsight → Notebooks → Create Notebook
- Upload the notebook from the cloned repository located in assets folder

- Also, Upload the
fraud_model.pyscript to the notebook environment
-
Install the Snowpark Connect package
- In the notebook, install the
snowpark-connectpackage from the Packages panel
- In the notebook, install the
-
Run the Feature Engineering notebook
- Run through
Insurance-Claims-Feature-Engineering.ipynbnotebook from SnowSight UI - This notebook reads from both Iceberg tables (via Catalog Linked Database) and Native tables, performs feature engineering and fraud scoring, and writes the enriched output to the
CLAIMS_PROCESSED_FEATUREStable
- Run through
Step 5: Enable Cortex Analyst, Cortex Agent, and Snowflake Intelligence
Run through the cortex_analyst_snowflake_intelligence_setup.sql script using CoCo CLI with the following prompt:
Run the cortex_analyst_snowflake_intelligence_setup.sql script to create the semantic view by uploading the claims_semantic_view.yaml from assets folder, setup Cortex Analyst, Cortex Agent and enable Snowflake Intelligence
This runs through the following steps:
- Upload the semantic model YAML to
SEMANTIC_MODEL_STAGE - Create the Semantic View using
SYSTEM$CREATE_SEMANTIC_VIEW_FROM_YAML - Create the Snowflake Intelligence database and schema (
SNOWFLAKE_INTELLIGENCE.AGENTS) - Create the Cortex Agent with the
cortex_analyst_text_to_sqltool pointing to the semantic view - Grant access permissions to the agent, semantic view, and underlying table
Step 6: Query Claims Data with Snowflake Intelligence
- Verify by navigating to Snowsight → AI & ML → Snowflake Intelligence and selecting the "Insurance Claims Analyst" agent
- Ask Questions
- "Show me all high risk fraud claims"
- "What is the total claim amount by loss type?"
- "How many claims are under SIU investigation?"

This content is provided as is, and is not maintained on an ongoing basis. It may be out of date with current Snowflake instances