Use Segment Reverse ETL to sync your Snowflake customer table to Salesforce
Overview
The nature of iterative development cycles is that you find yourself at some point with multiple systems that need to be integrated. Maybe you built your customer database in Snowflake and your frontend applications are integrated with it, but now that your organization has grown, you’re investing in a CRM like Salesforce. You could eliminate the database and try to sync everything directly to Salesforce, but that’s probably a huge lift. You can’t just leave the systems separate, because having two sources of truth is not a good idea; you’ll introduce endless bugs and mismatches that affect your organization’s reputation and effectiveness. If your data warehouse could sync with your Salesforce, though… you’d be able to run both without the worry about divergent databases! In this recipe we’ll explore how to set up this synchronization so that your systems don’t diverge, and you don’t have extra work to keep them that way.
Prerequisites
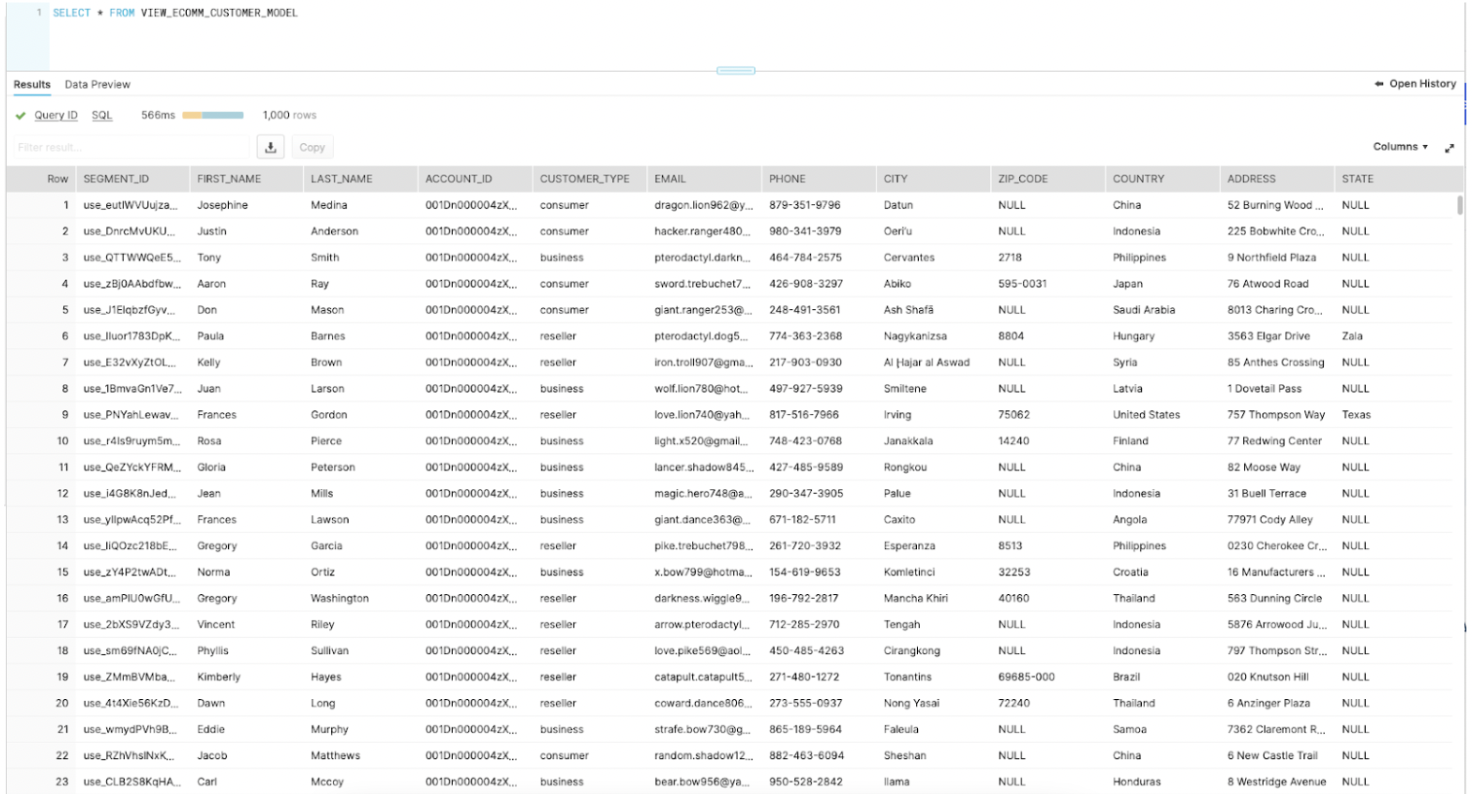
- A "Customers" table in your Snowflake DB. Here's our example:
What You’ll Learn
- how to configure Reverse ETL to keep disparate systems (in this case, Salesforce) in sync with your Snowflake DB
What You’ll Need
- A Segment Workspace with Reverse ETL enabled
- A Salesforce instance
What You’ll Build
- For our scenario, our sales team has recently adopted Salesforce and would like to easily import Business and Reseller customers into their new CRM. We are going to use Segment’s Reverse ETL to accomplish this.
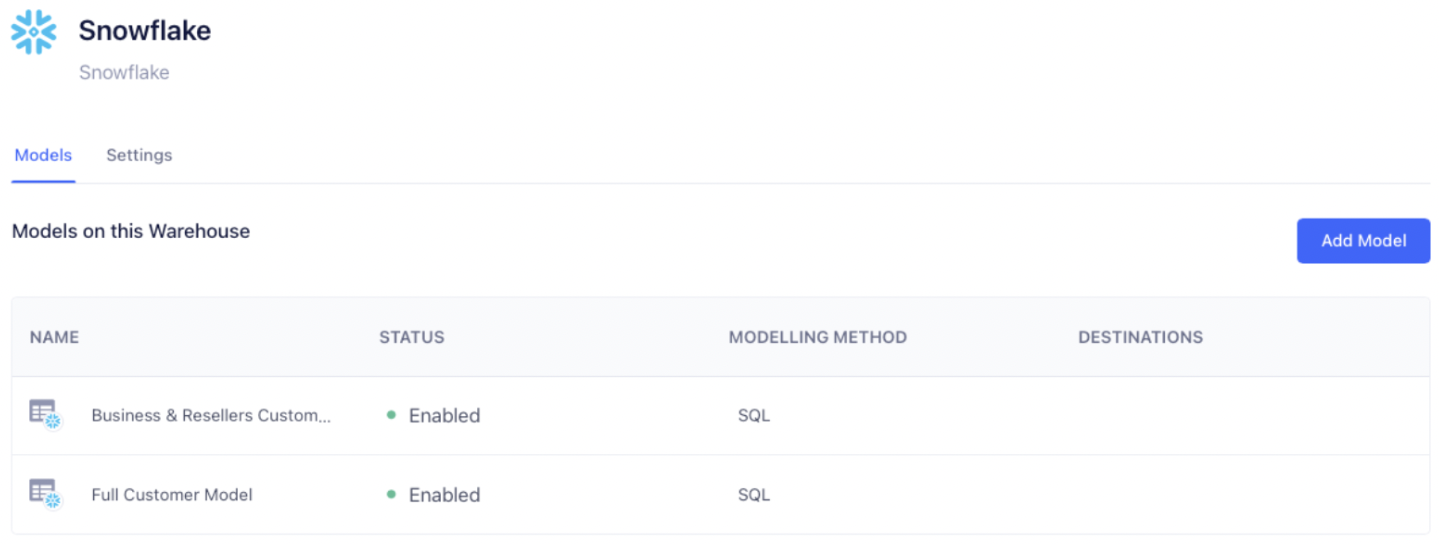
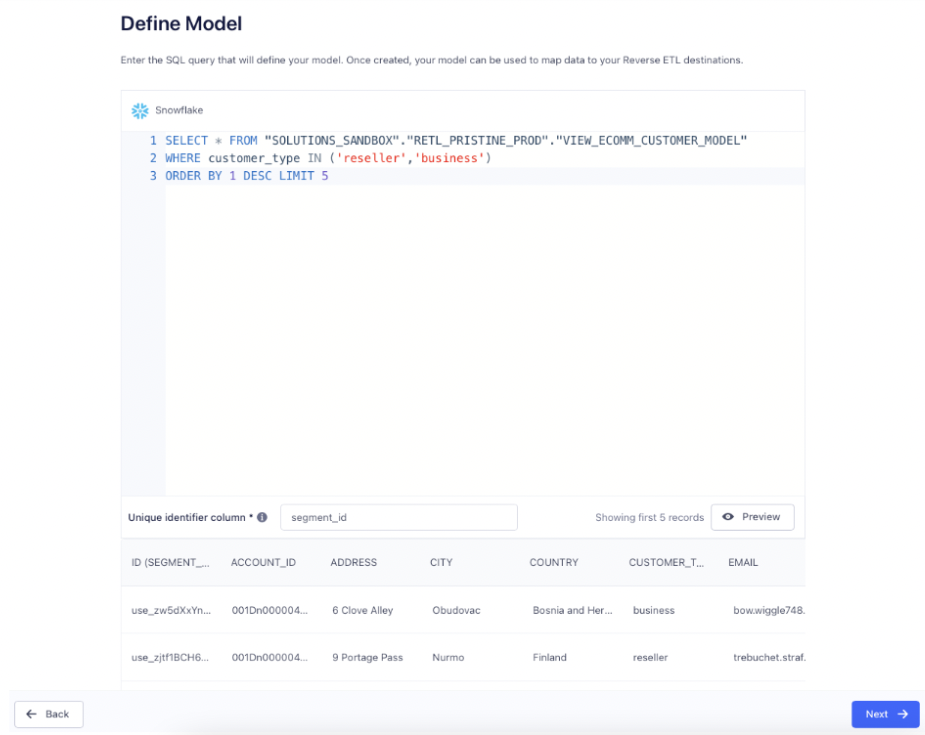
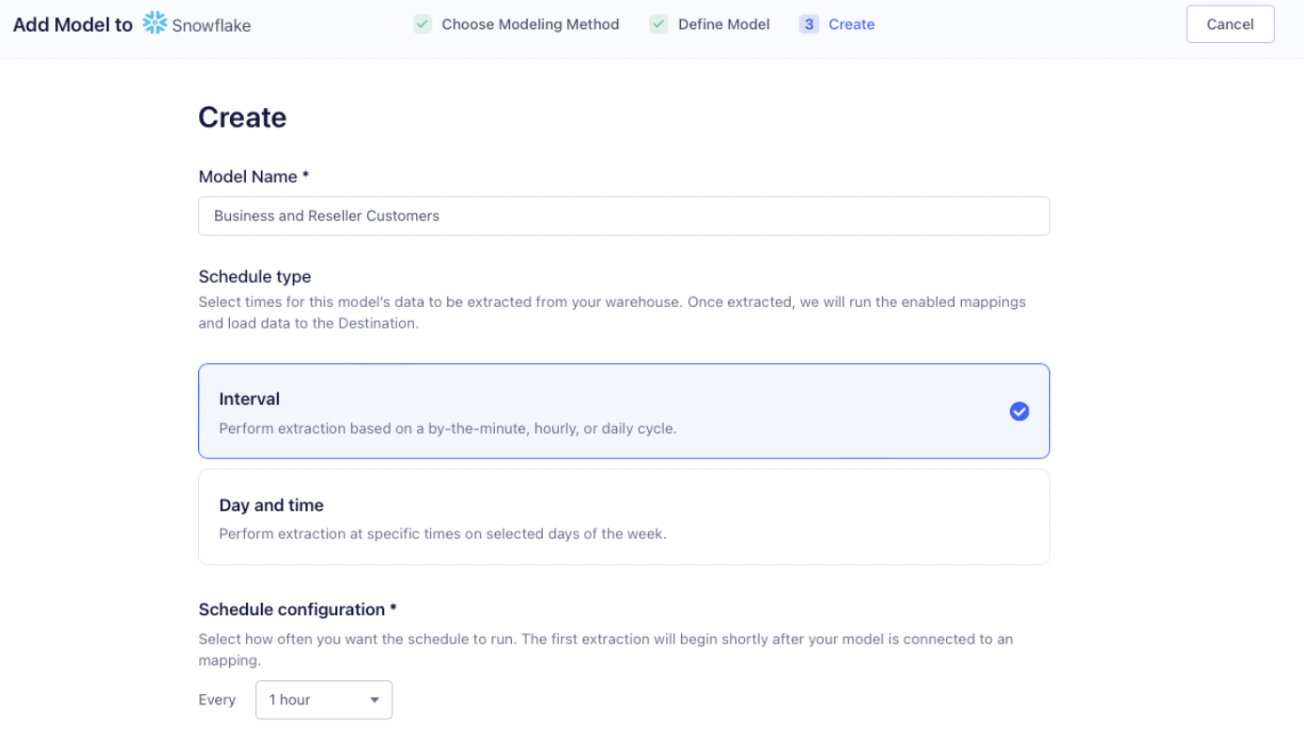
Set up the Reverse ETL model
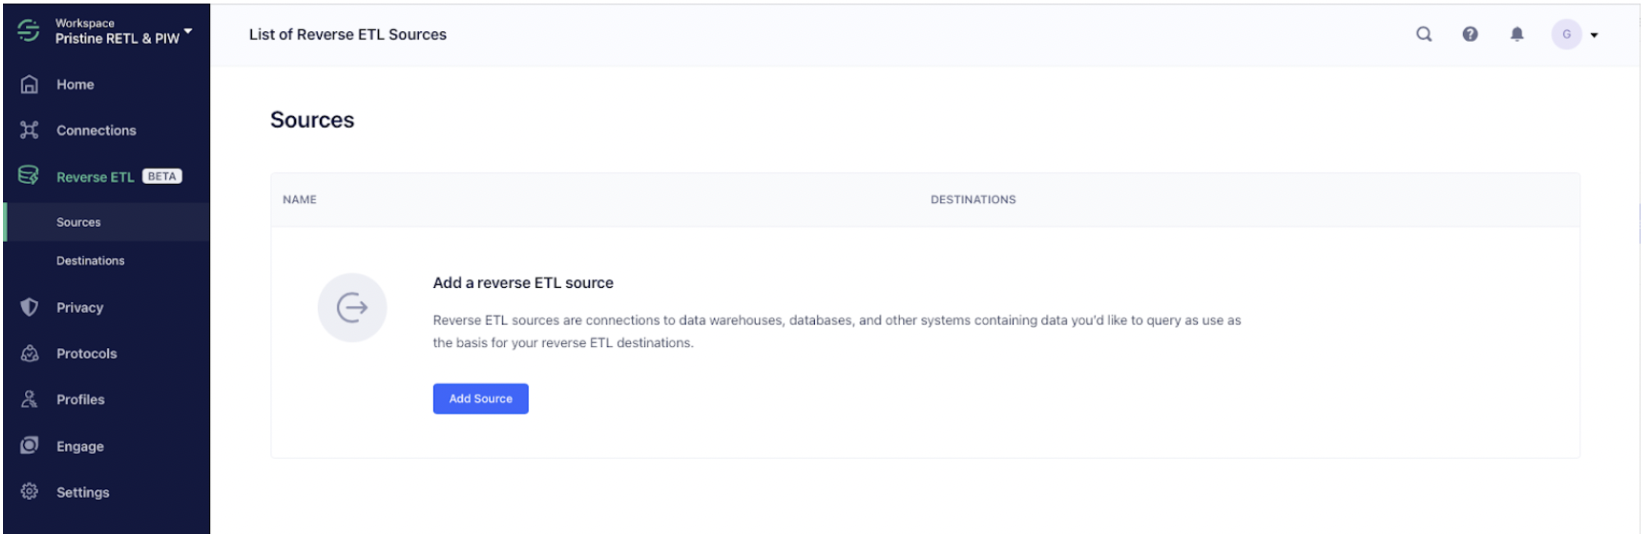
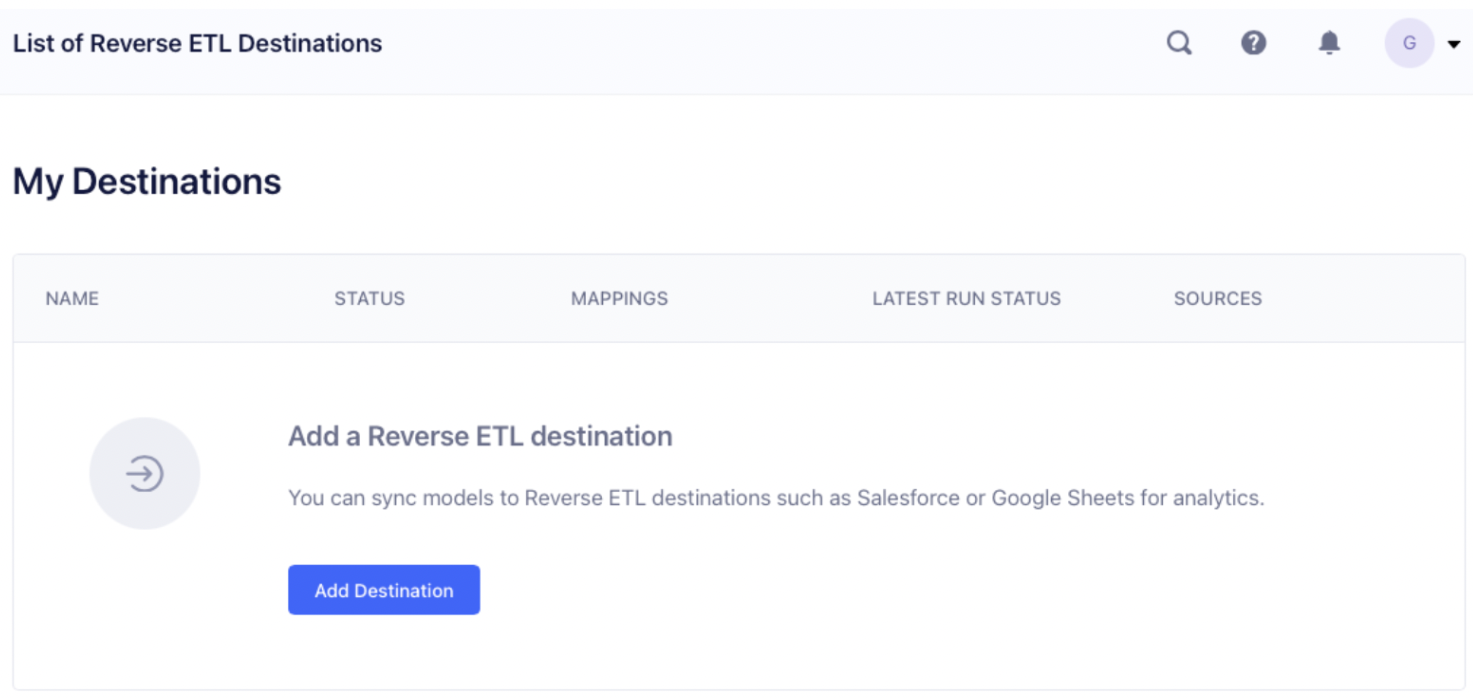
Add a Destination for our Model

Click on Salesforce (Actions), and you’ll be presented several dialogs in order to add and configure Salesforce. After successfully adding Salesforce as a destination, we are going to add a Mapping from our Model to our Destination. Click the “Add Mapping” button to start.
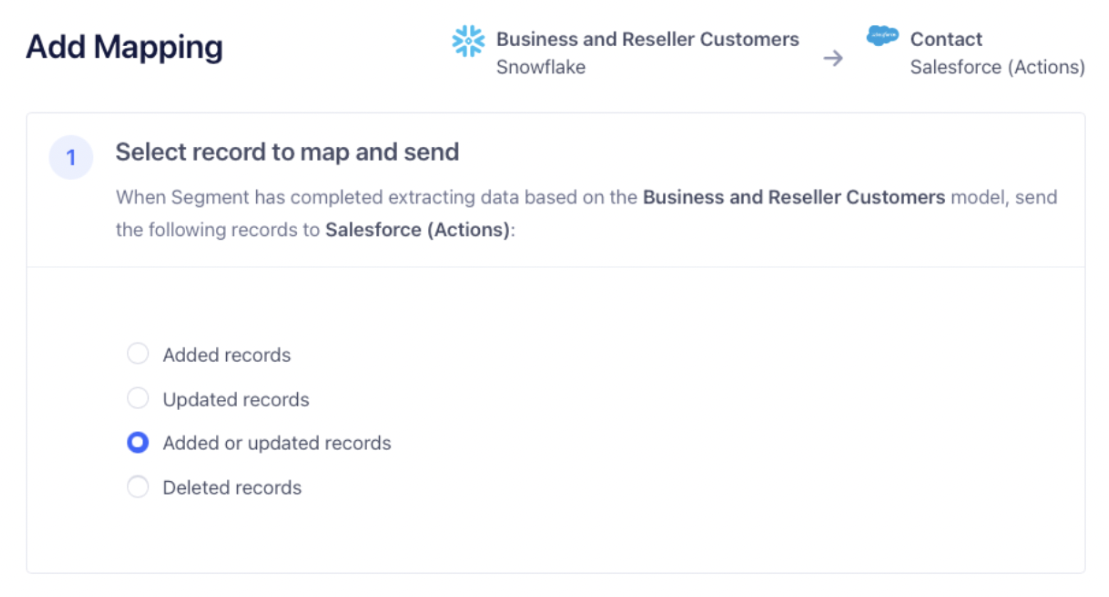
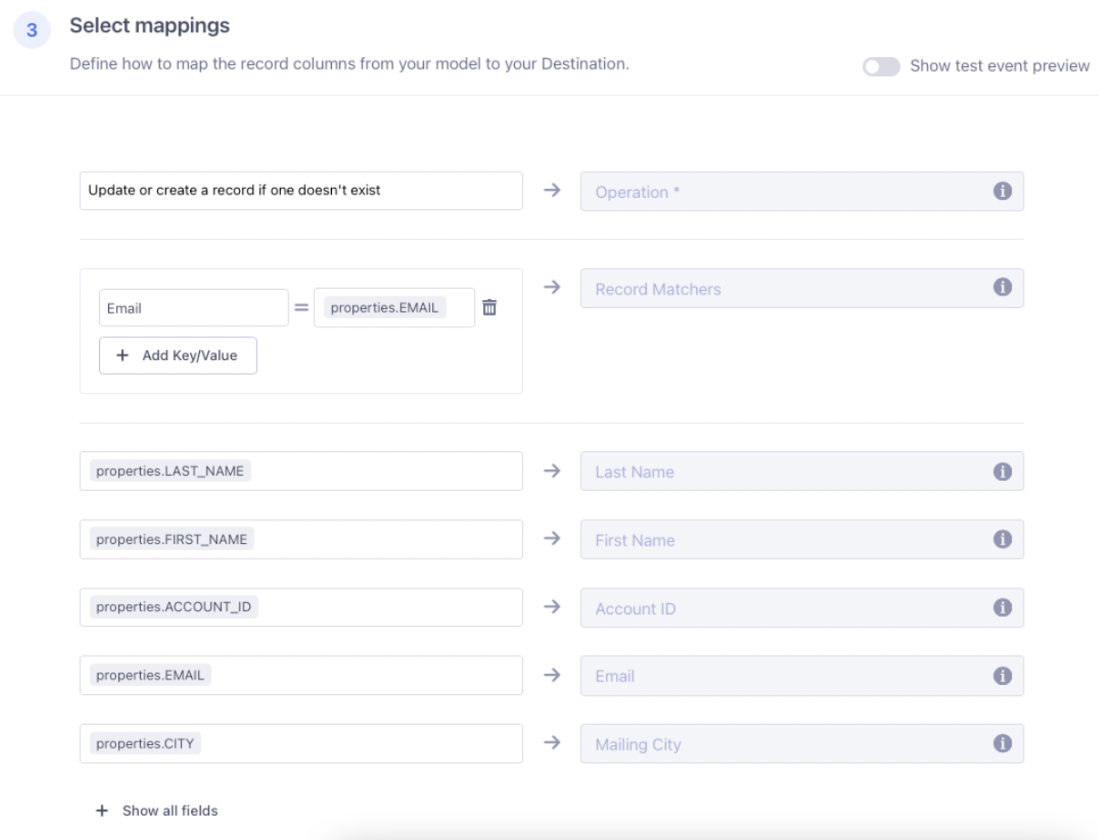
The first thing we will do is select what operation we want to perform for each row. Since our model can change based on what information our customers provide us, we will select the “Added or updated rows”, this will sync any new records or updated records.
-
For “Operation”, select “Update or create a record if one doesn’t exist.”
-
For “Record Matchers”, use “Email” and map it to our Email column from our model (properties.EMAIL).
-
For the reminder of the fields, simply map the column from our model to the corresponding field in Salesforce’s Contact object.

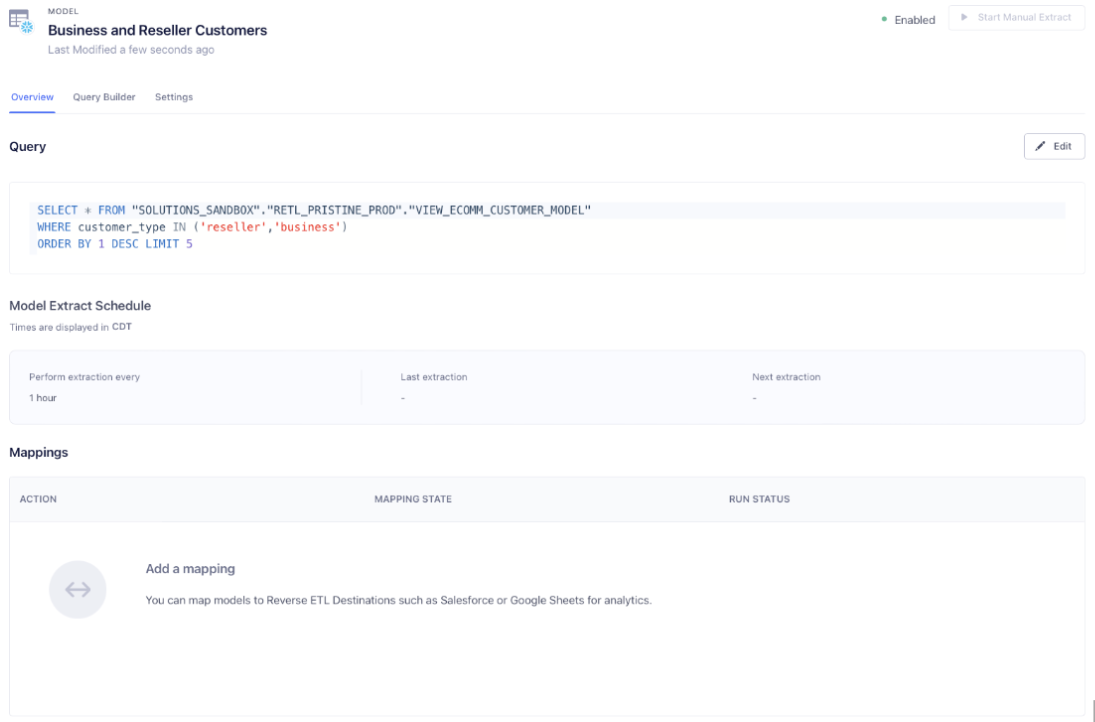
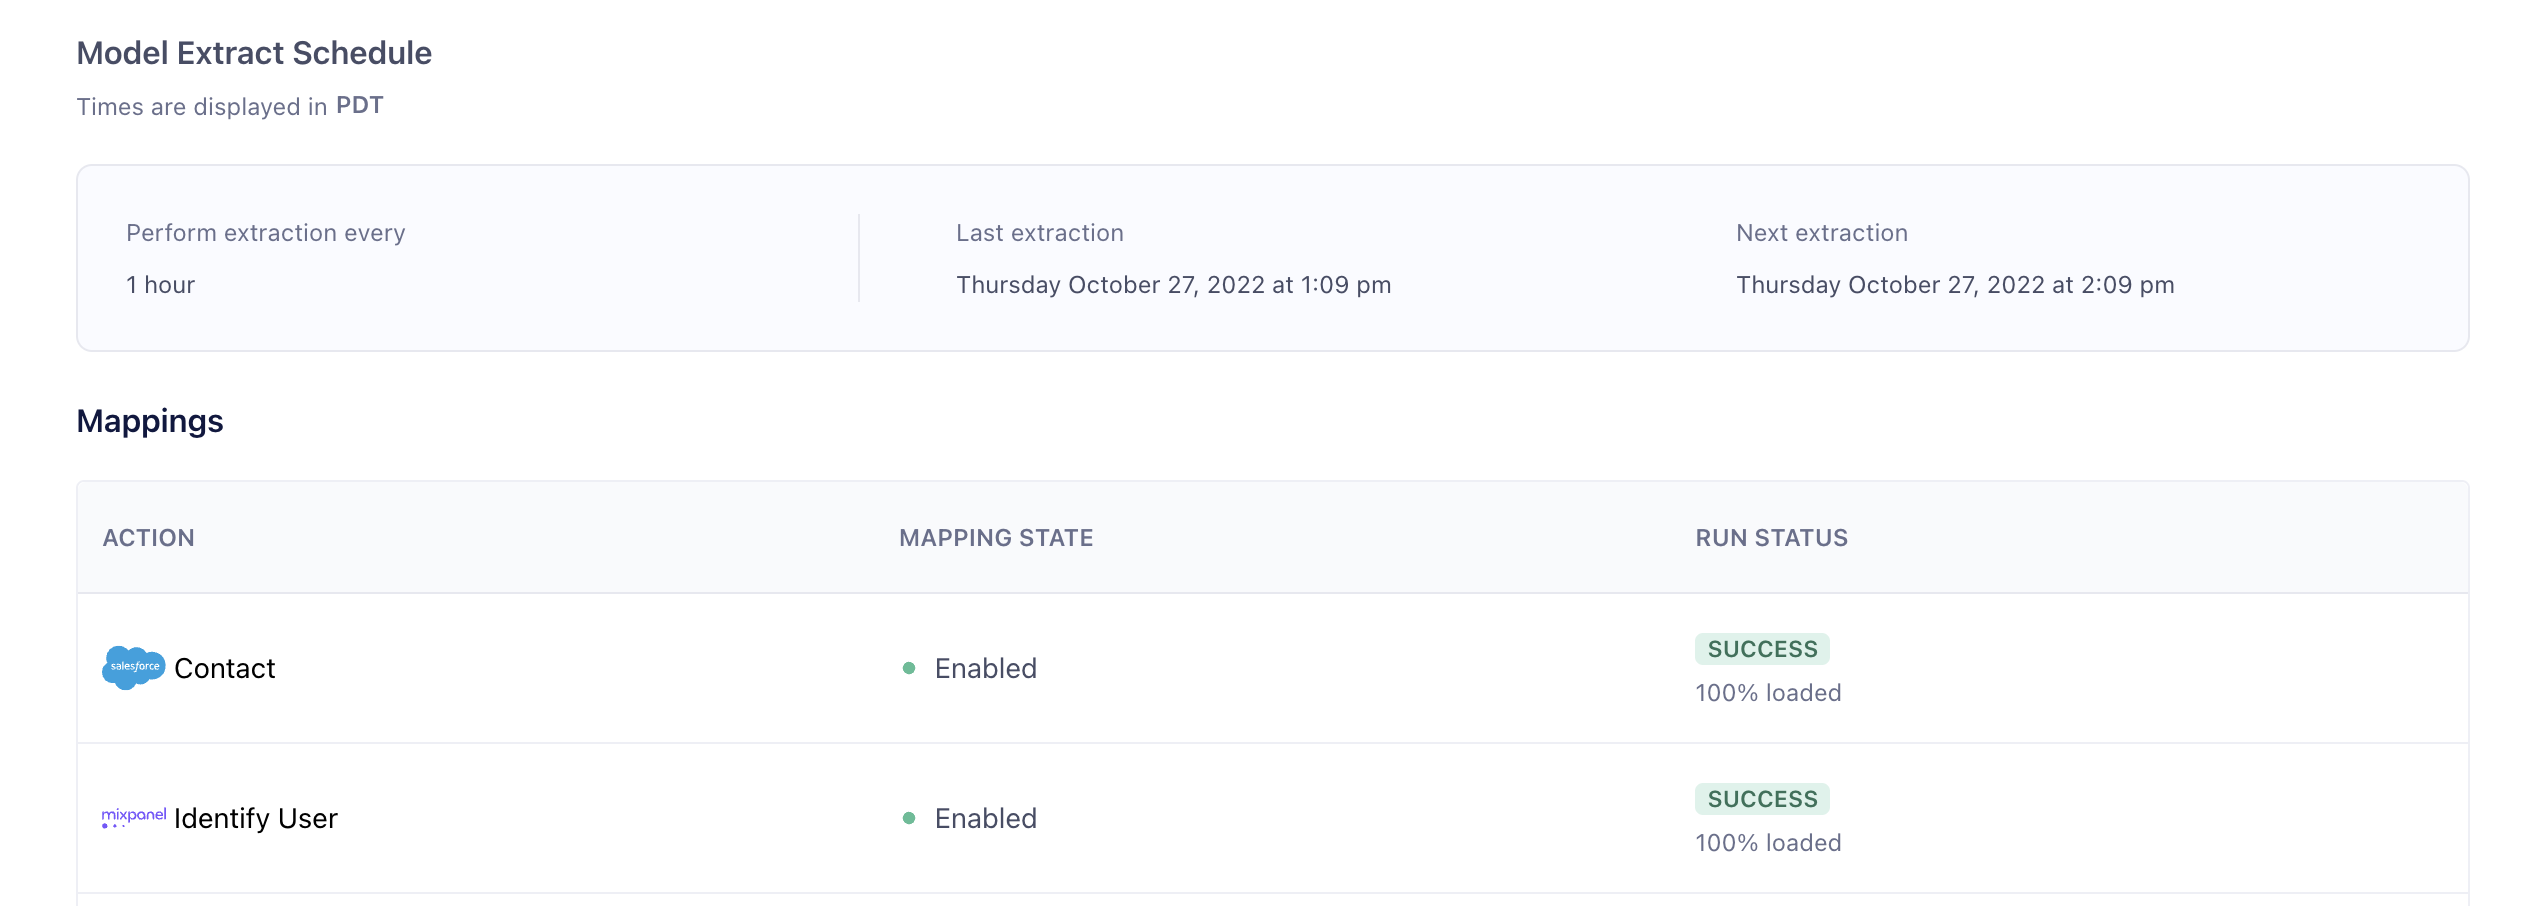
Your Mapping is now saved, and will run automatically the next time your model is updated. You can manually start an extract of your model by selecting your model on the “Sources” page, and when you reach the Model Overview page, clicking “Start Manual Extract”.

Wrapping up
It’s easy to set up a sync of your customer data from Snowflake to Salesforce using Segment’s Reverse ETL. And it’s even easier to use Segment to add additional tools to this sync process. How much maintenance time could you save?
What we've covered
- setting up a Model with Segment Reverse ETL
- setting up Salesforce as a destination
- mapping the fields between our database and Salesforce
- telling Segment to sync the model to the destination
This content is provided as is, and is not maintained on an ongoing basis. It may be out of date with current Snowflake instances