HubSpot to Snowflake and Back: ELT and Reverse ETL with Skyvia
Overview
Customer data often lives in a CRM like HubSpot, while analysis happens in Snowflake, where it can be combined with billing, product usage and other sources. For that analysis to pay off, data has to move both ways. HubSpot data needs to reach Snowflake and stay up to date. The results, such as a customer segment or a score, need to go back to HubSpot, where sales and marketing teams use them in lists, filters and workflows.
These two directions are often handled separately: one tool or script loads data into the warehouse, and another one sends the results back. That means two setups to build, schedule and monitor.
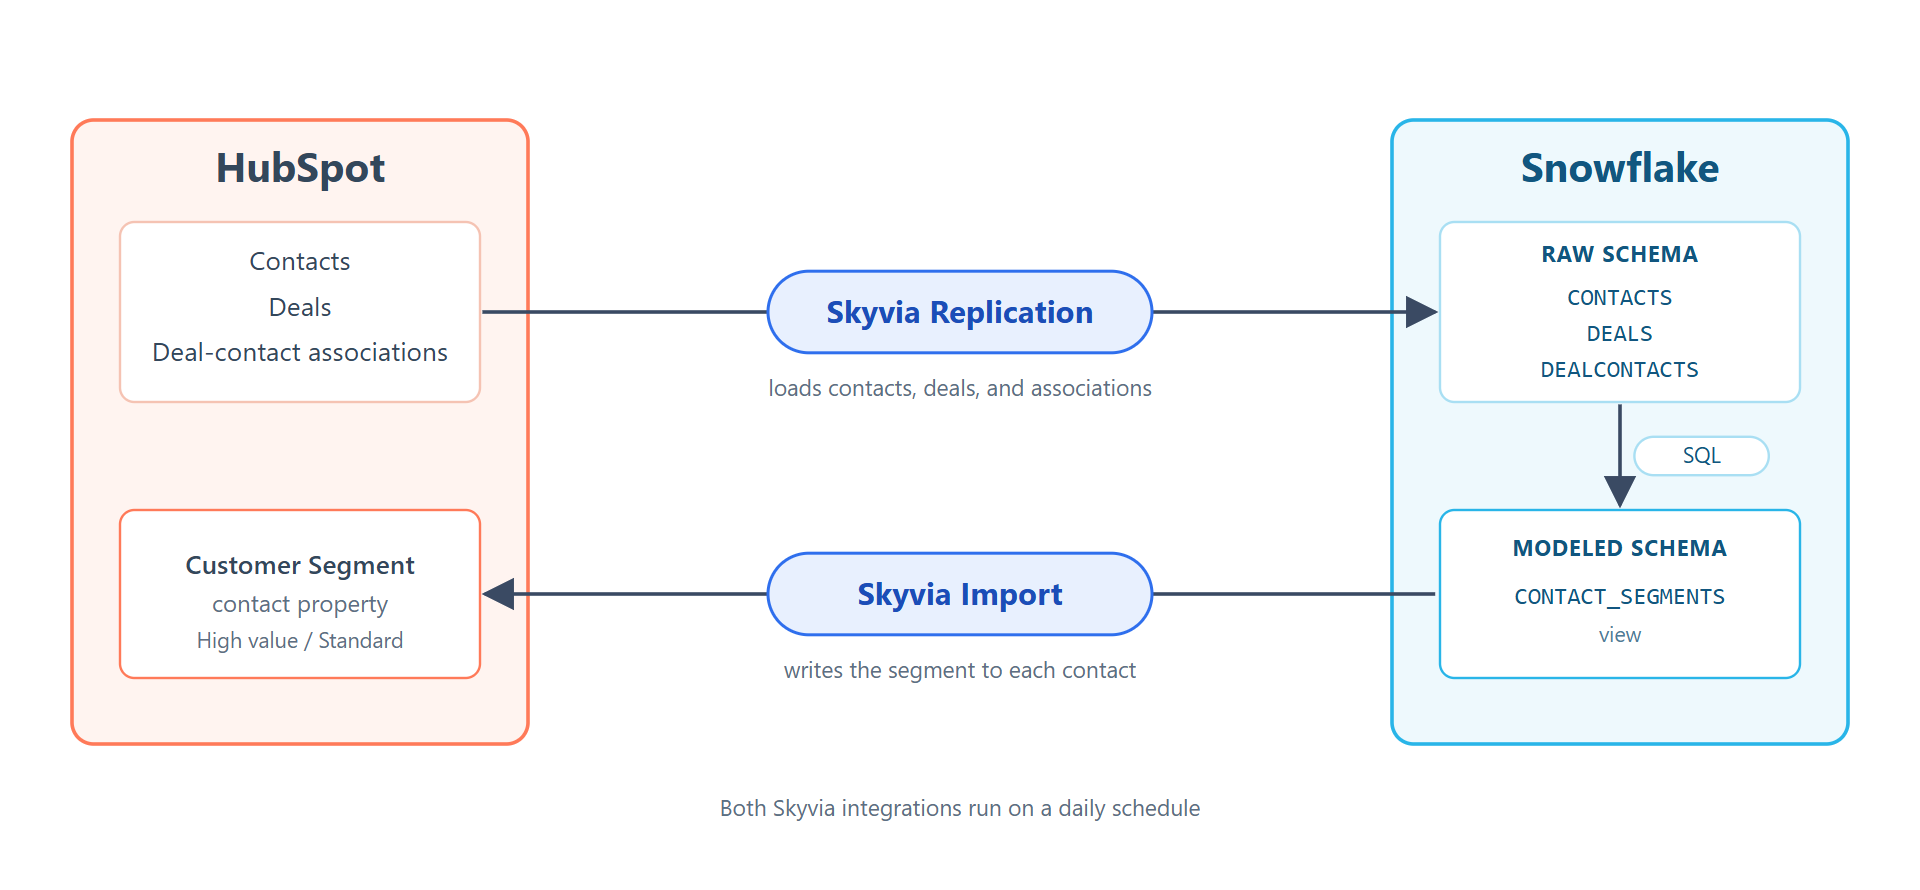
In this quickstart, you build both directions in Skyvia, a managed cloud data integration platform. A simple customer segment serves as the example:
- Load. Skyvia Replication loads HubSpot contacts, deals and their associations into Snowflake and keeps them up to date.
- Transform. A SQL view in Snowflake labels each contact High value or Standard based on the total of their closed-won deals.
- Sync back. Skyvia Import writes the label to a HubSpot contact property. This step is reverse ETL: data goes from the warehouse back to a business app.
Both integrations run on a daily schedule. The only code you write is the SQL for the segment.
To keep the example small, the segment uses only HubSpot deals. In a real project, the same setup works for any result you calculate in Snowflake, for example a churn risk score based on product usage and support tickets.
Prerequisites
- Basic knowledge of SQL
- Familiarity with HubSpot contacts and deals
What You'll Need
- A Snowflake account or a free trial
- A Skyvia account. New accounts start with a free trial of the Professional plan, which covers everything in this guide.
- A new free HubSpot account. Don't use your production CRM: the last steps write data to HubSpot contacts.
- The test data, two CSV files with fictional contacts and deals: contacts.csv and deals.csv
What You'll Learn
- How to connect Skyvia to Snowflake with a programmatic access token and to HubSpot with OAuth
- How to replicate HubSpot objects to Snowflake
- How to build a customer segment as a SQL view
- How to sync the segment back to HubSpot with reverse ETL
- How to schedule both integrations
What You'll Build
- A daily pipeline that keeps a Customer Segment property in HubSpot up to date with a segment calculated in Snowflake
Set Up Your Accounts
This guide uses three accounts: Snowflake, HubSpot, and Skyvia. If you already have them, skip to the next section.
Create a HubSpot Account
Create a new HubSpot account even if you already have one. The last steps of this guide write data to HubSpot, so a separate account keeps your real CRM data safe.
- Sign up for a free HubSpot account with your email address.
- Confirm your email address and follow the setup wizard steps.
- If the wizard offers to create a deal pipeline, click Continue without a pipeline. This guide uses the default Sales Pipeline.
Create a Snowflake Trial Account
- Fill out the Snowflake trial form. Use an email address that isn't associated with an existing Snowflake account.
- Select any edition, cloud provider, and region. They don't affect this guide.
- Open the activation email from Snowflake and finish setting up your account.
- Save the account URL from the email. You need it later to connect Skyvia to Snowflake.
Create a Skyvia Account
-
Sign up for a Skyvia account.
-
Confirm your email address and sign in.
-
Complete the setup wizard:
- On the About You page, enter your details.
- On the Your Role page, select any suitable role.
- On the Your Goals page, select I'm just checking out the product and click Continue.
- On the Choose how to start your journey page, select I'm ready and click Continue.
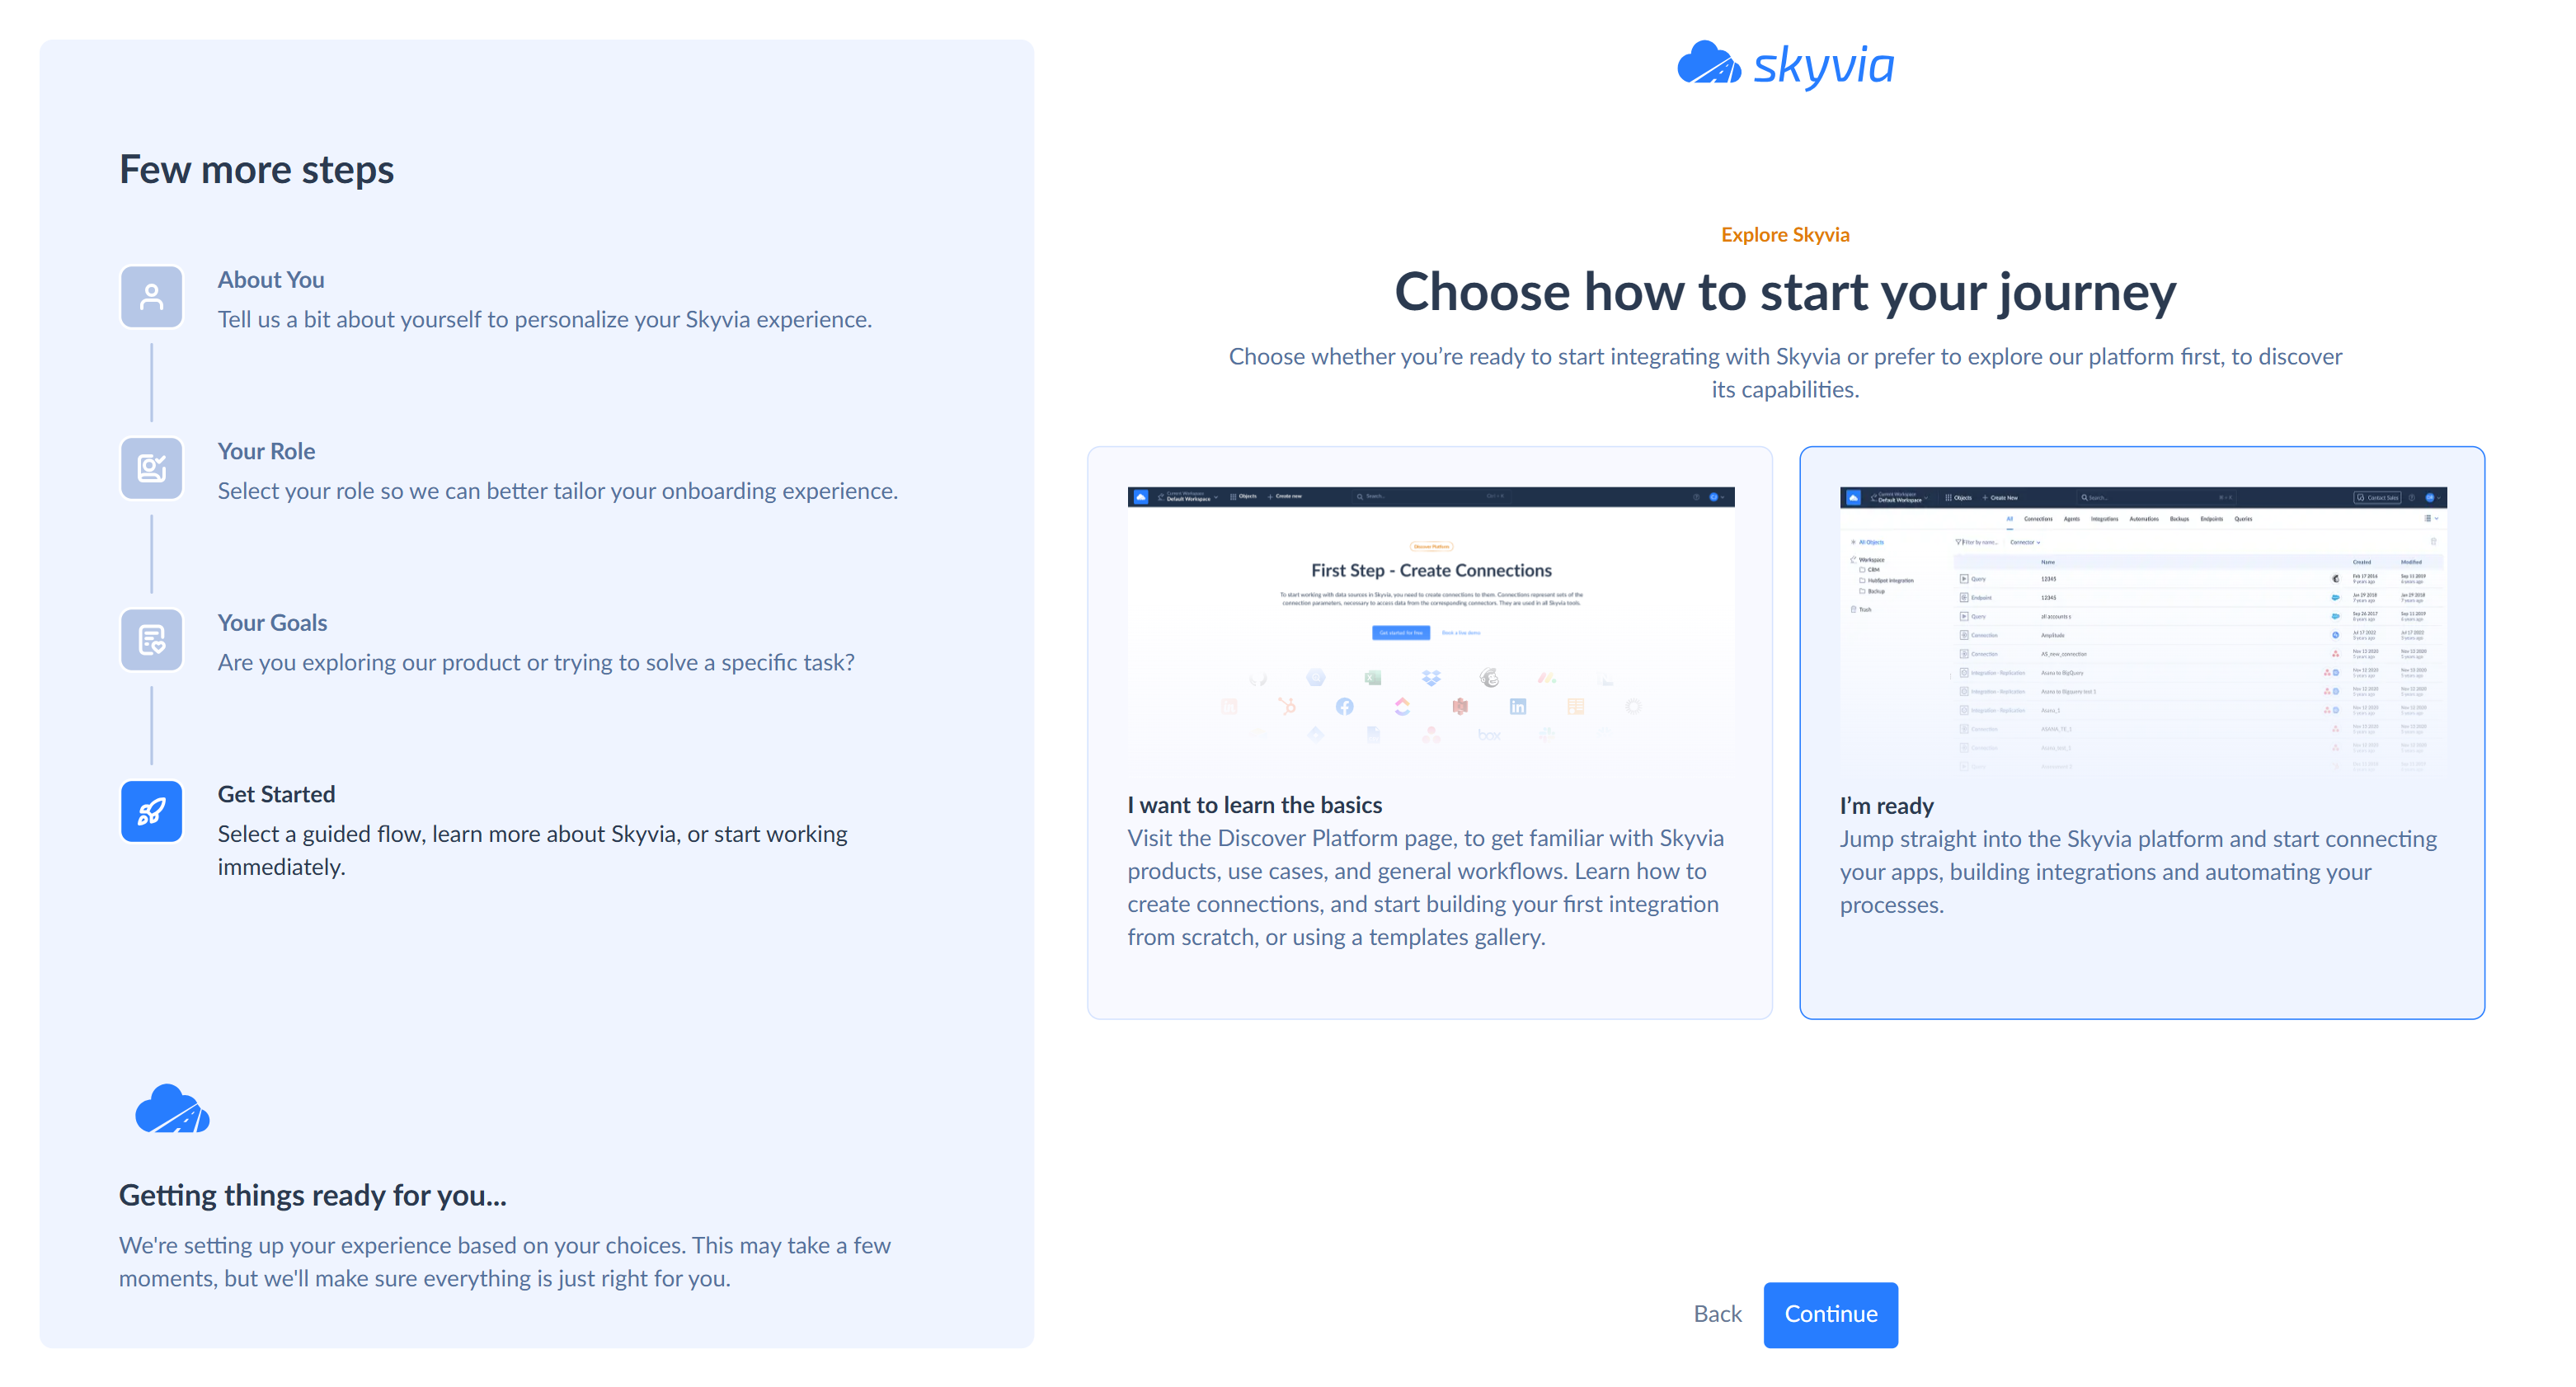
A new Skyvia account starts with a free trial of the Professional plan, which covers everything in this guide.
Prepare Snowflake
Run the setup script below to prepare Snowflake for Skyvia. It creates:
- The
SKYVIA_WHwarehouse - The
HUBSPOT_DEMOdatabase with two schemas:RAWfor the data Skyvia loads from HubSpot, andMODELEDfor the segment you build with SQL - The
SKYVIA_ROLErole that Skyvia uses to work with these objects - The
SKYVIA_USERservice user that Skyvia signs in as, with a network policy that allows connections only from Skyvia's IP addresses - A programmatic access token (PAT) for
SKYVIA_USER
-
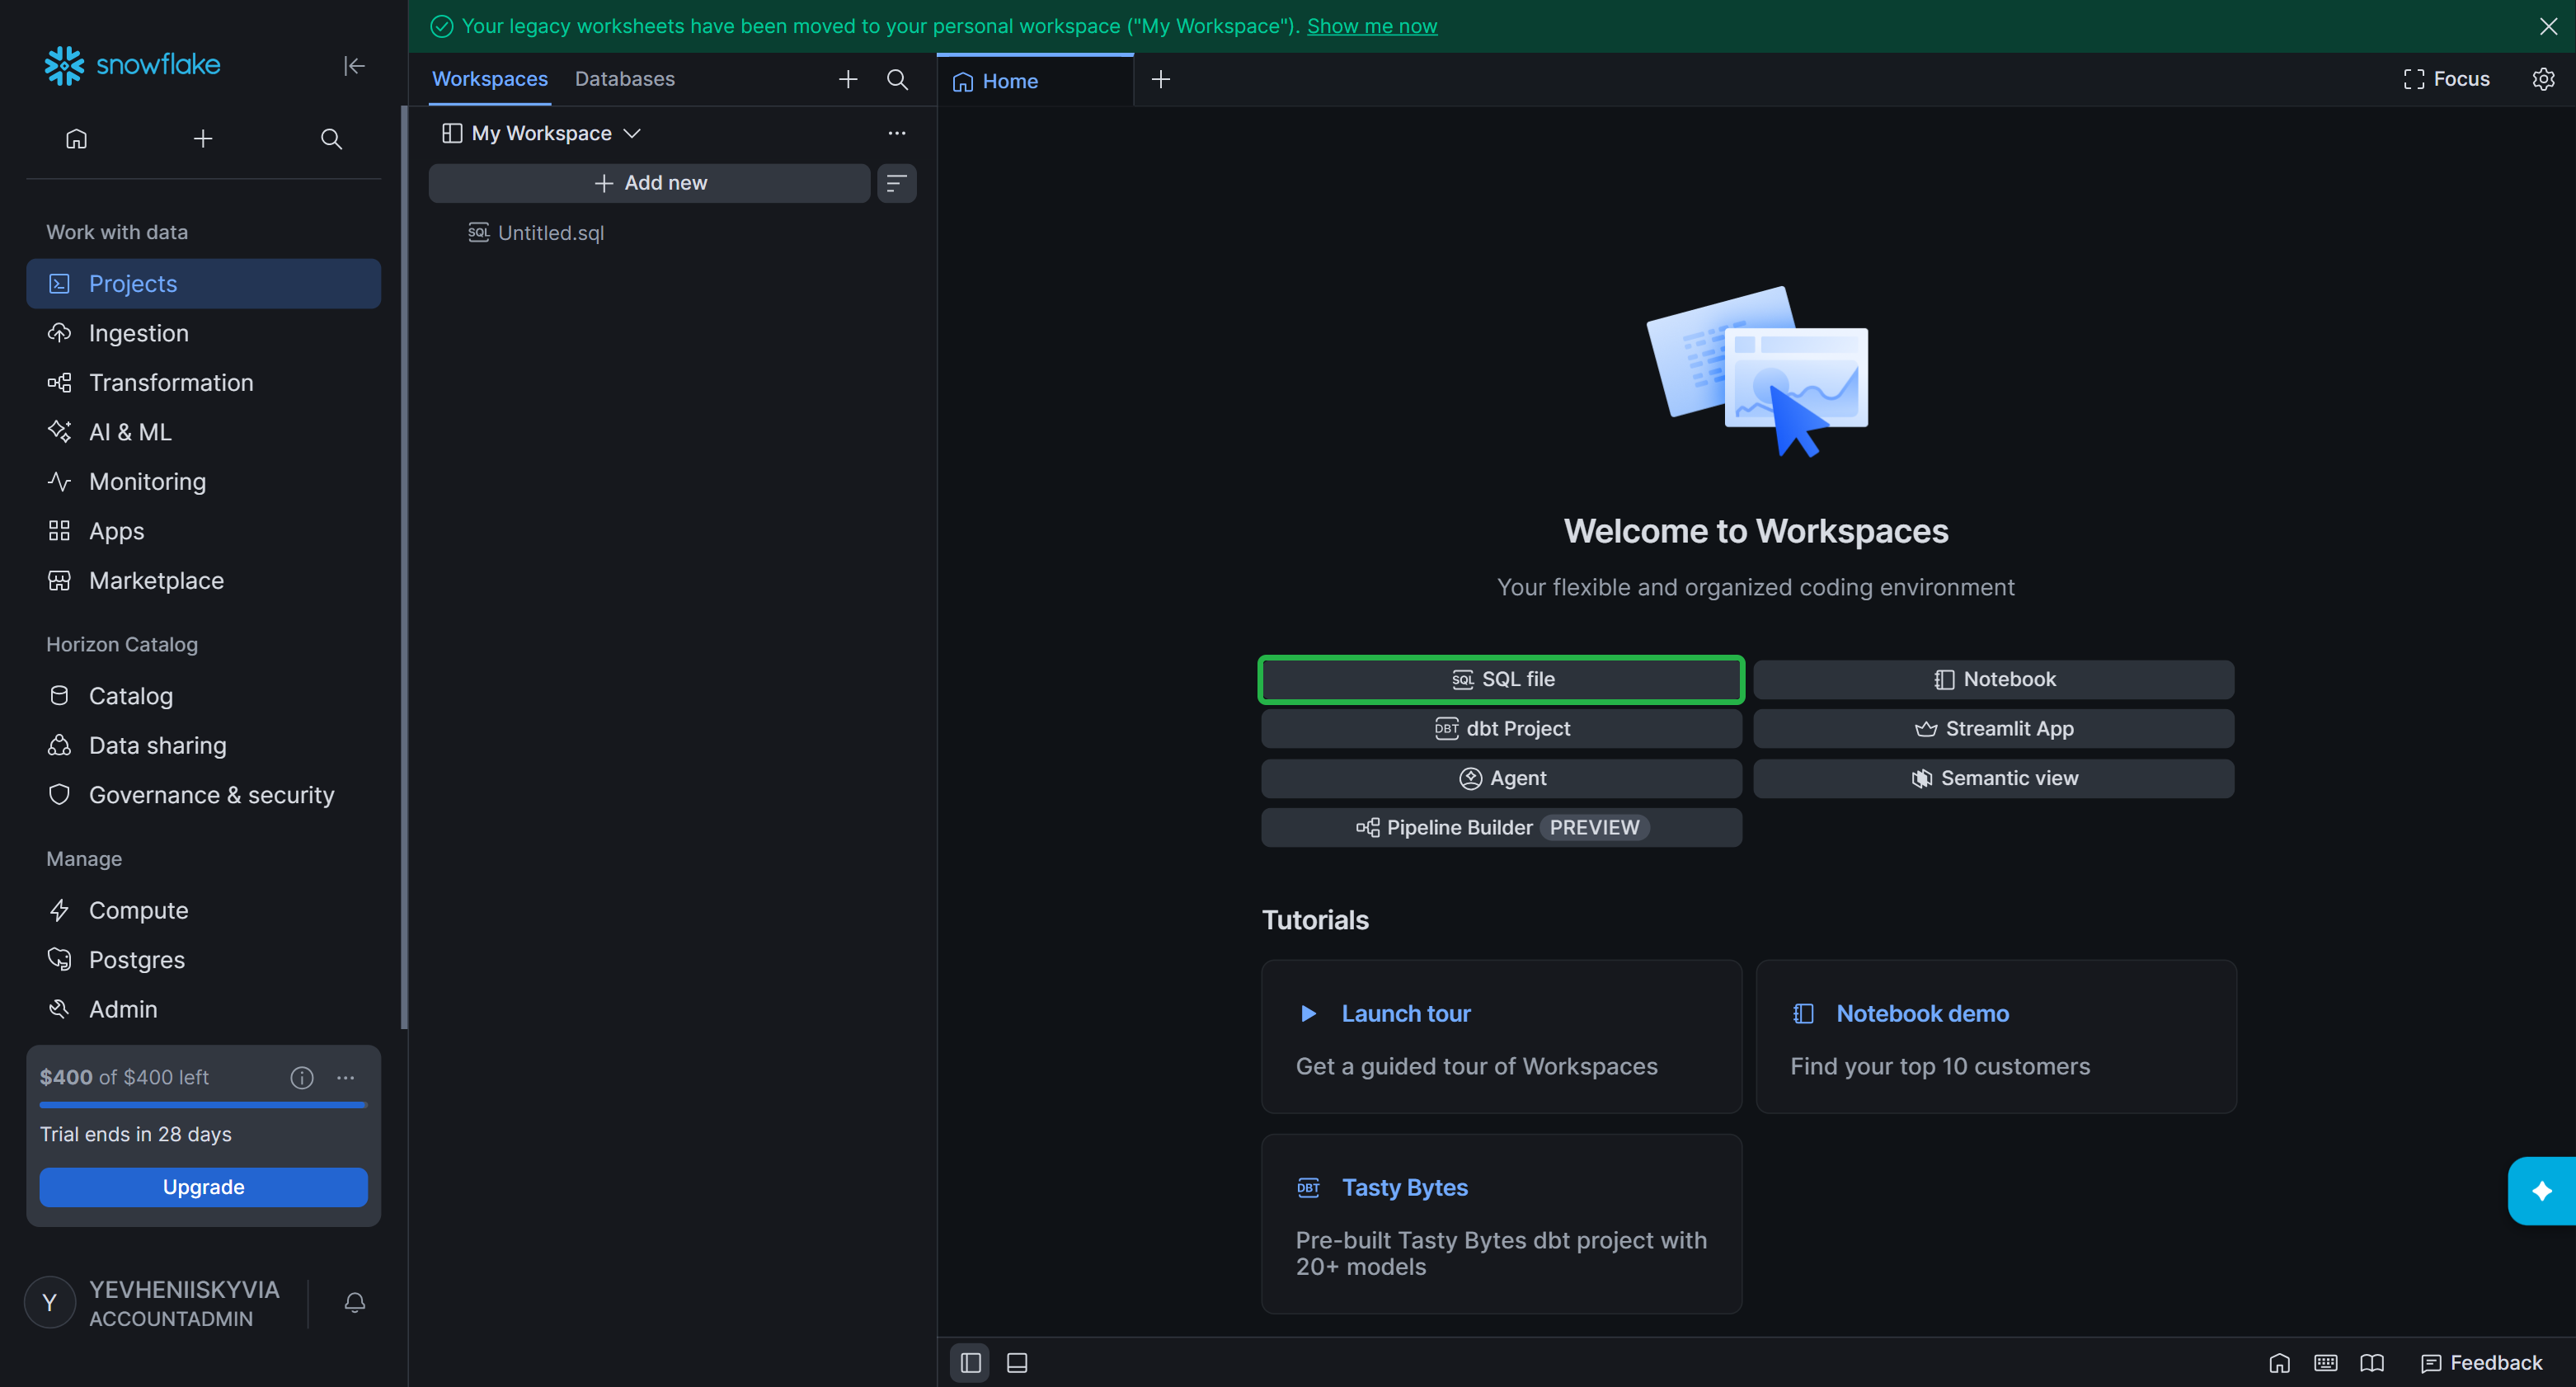
In Snowsight, go to Projects > Workspaces and click SQL file.
-
Paste the following script:
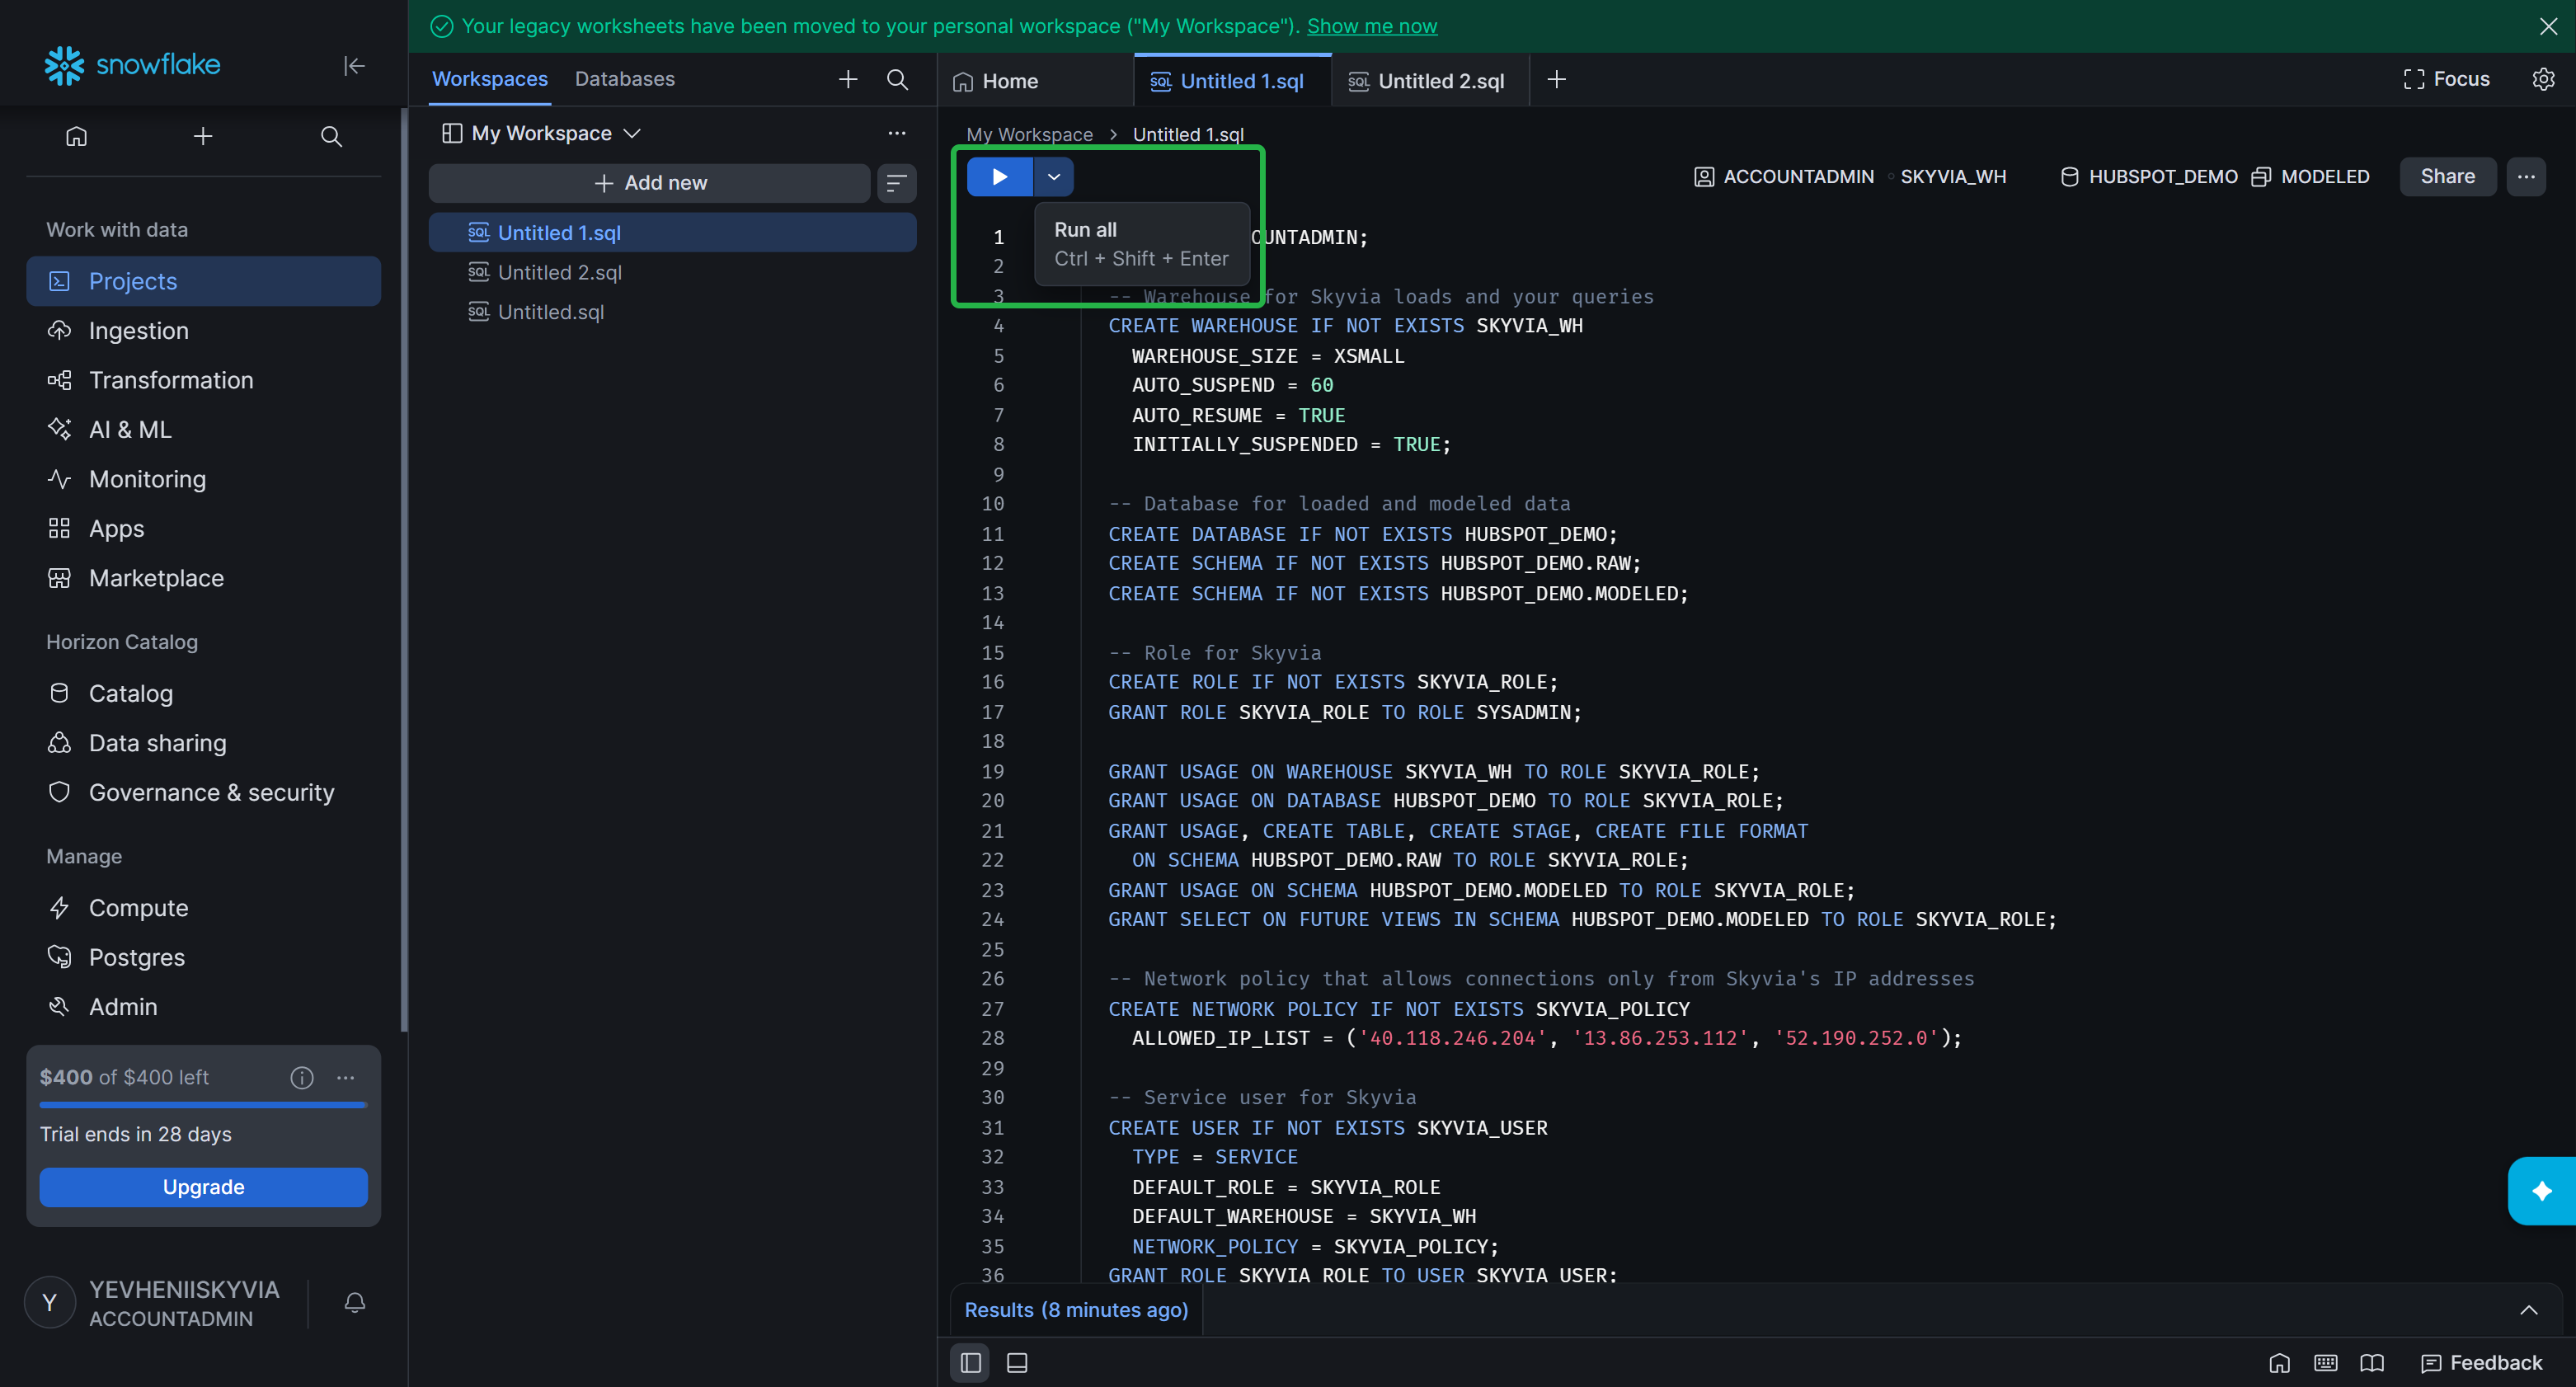
USE ROLE ACCOUNTADMIN; -- Warehouse for Skyvia loads and your queries CREATE WAREHOUSE IF NOT EXISTS SKYVIA_WH WAREHOUSE_SIZE = XSMALL AUTO_SUSPEND = 60 AUTO_RESUME = TRUE INITIALLY_SUSPENDED = TRUE; -- Database for loaded and modeled data CREATE DATABASE IF NOT EXISTS HUBSPOT_DEMO; CREATE SCHEMA IF NOT EXISTS HUBSPOT_DEMO.RAW; CREATE SCHEMA IF NOT EXISTS HUBSPOT_DEMO.MODELED; -- Role for Skyvia CREATE ROLE IF NOT EXISTS SKYVIA_ROLE; GRANT ROLE SKYVIA_ROLE TO ROLE SYSADMIN; GRANT USAGE ON WAREHOUSE SKYVIA_WH TO ROLE SKYVIA_ROLE; GRANT USAGE ON DATABASE HUBSPOT_DEMO TO ROLE SKYVIA_ROLE; GRANT USAGE, CREATE TABLE, CREATE STAGE, CREATE FILE FORMAT ON SCHEMA HUBSPOT_DEMO.RAW TO ROLE SKYVIA_ROLE; GRANT USAGE ON SCHEMA HUBSPOT_DEMO.MODELED TO ROLE SKYVIA_ROLE; GRANT SELECT ON FUTURE VIEWS IN SCHEMA HUBSPOT_DEMO.MODELED TO ROLE SKYVIA_ROLE; -- Network policy that allows connections only from Skyvia's IP addresses CREATE NETWORK POLICY IF NOT EXISTS SKYVIA_POLICY ALLOWED_IP_LIST = ('40.118.246.204', '13.86.253.112', '52.190.252.0'); -- Service user for Skyvia CREATE USER IF NOT EXISTS SKYVIA_USER TYPE = SERVICE DEFAULT_ROLE = SKYVIA_ROLE DEFAULT_WAREHOUSE = SKYVIA_WH NETWORK_POLICY = SKYVIA_POLICY; GRANT ROLE SKYVIA_ROLE TO USER SKYVIA_USER; -- Programmatic access token for the Skyvia connection ALTER USER SKYVIA_USER ADD PROGRAMMATIC ACCESS TOKEN SKYVIA_PAT ROLE_RESTRICTION = 'SKYVIA_ROLE' DAYS_TO_EXPIRY = 90; -
Click the arrow next to the Run button and select Run all, or press Ctrl+Shift+Enter.
-
Copy the
token_secretvalue from the result of the last statement. You need it in the next step. Snowflake displays the token only once.The token expires in 90 days. To get a new one, run
ALTER USER SKYVIA_USER ROTATE PROGRAMMATIC ACCESS TOKEN SKYVIA_PAT;and update the token in the Skyvia connection.
Connect Skyvia
A connection stores credentials and settings that Skyvia needs to access a data source. You create a connection once and then reuse it in any integration that works with that data source.
Create two connections, one to Snowflake and one to HubSpot. The integrations in the next steps use them to read and write data.
Create a Snowflake Connection
-
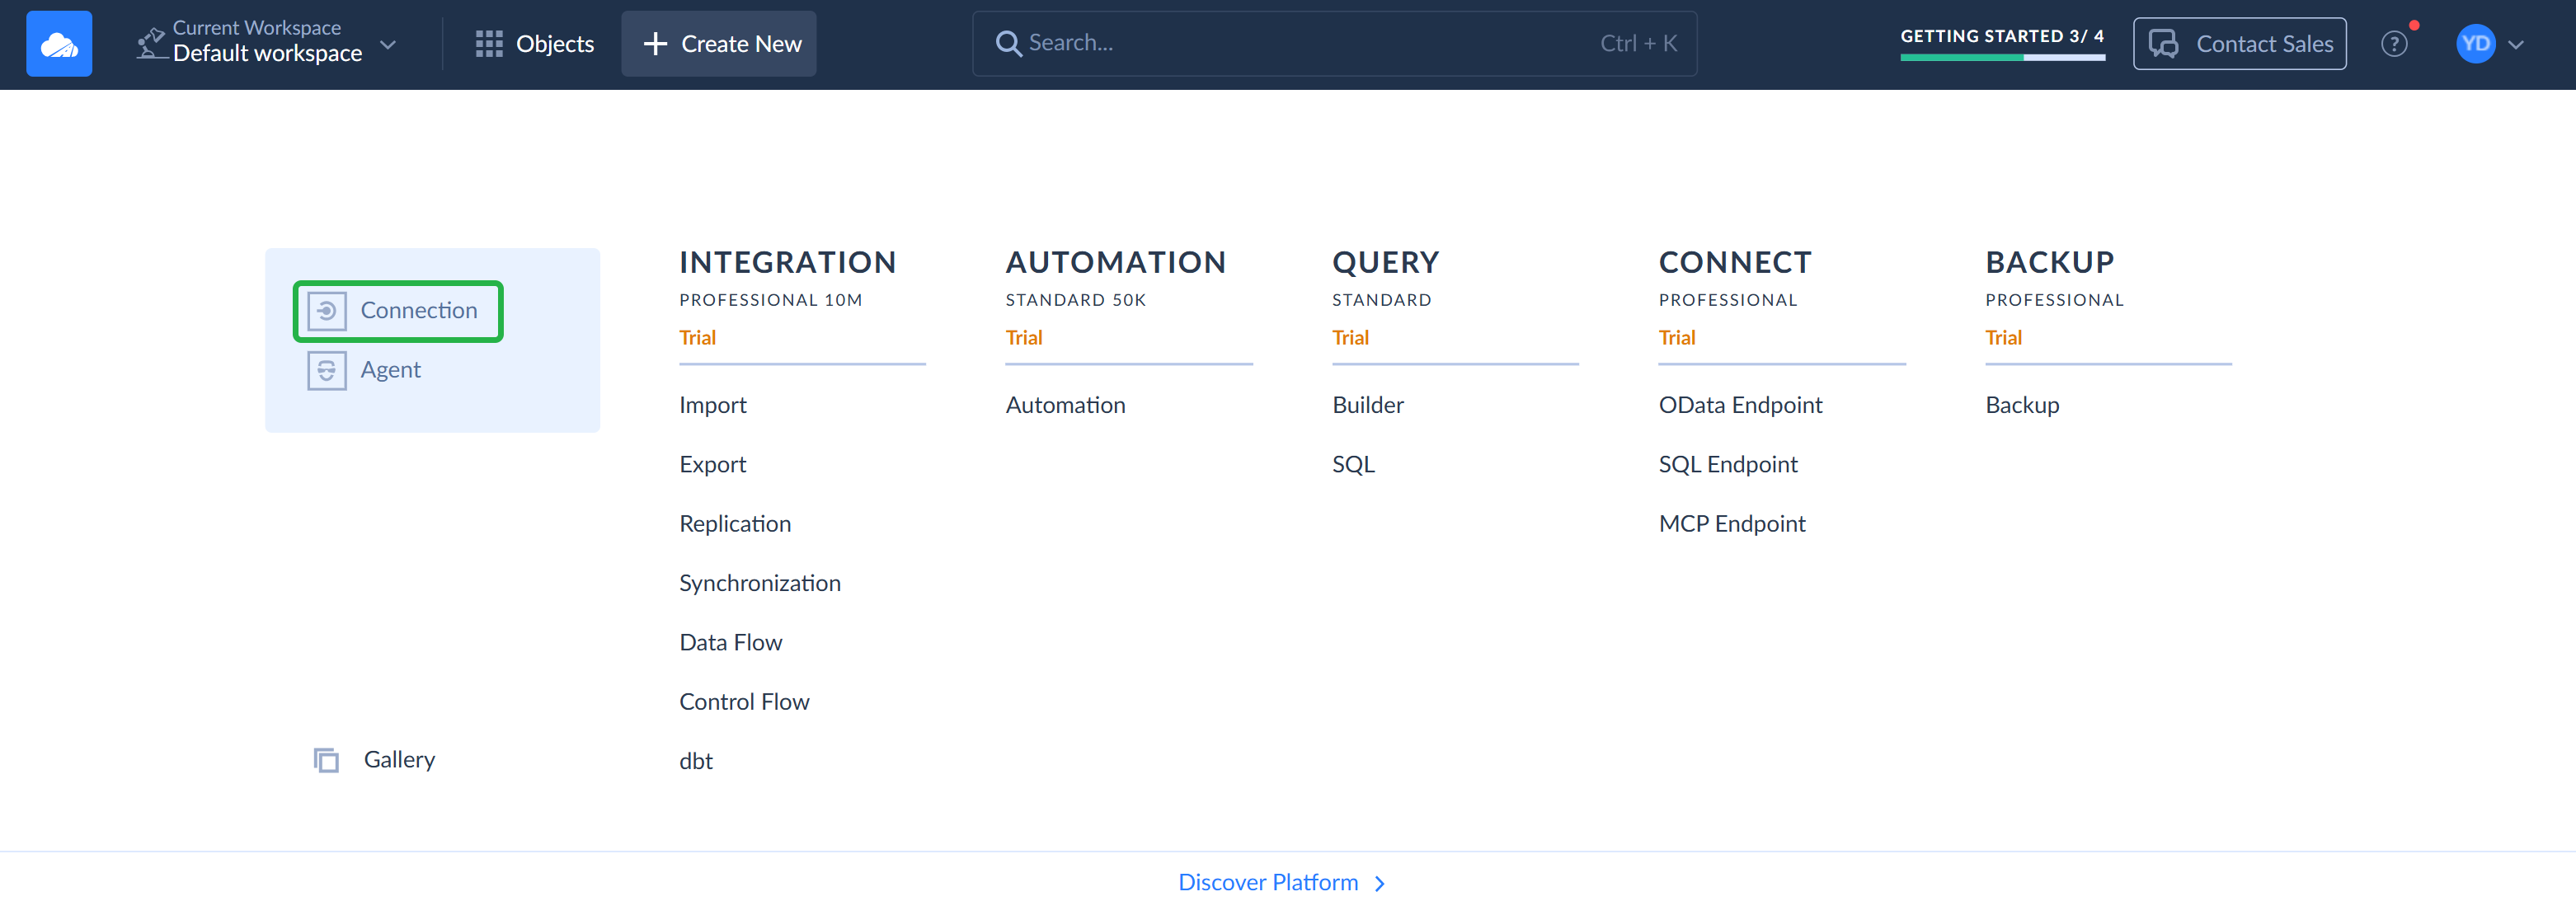
In Skyvia, click + Create New and select Connection.
-
Find and select Snowflake.
-
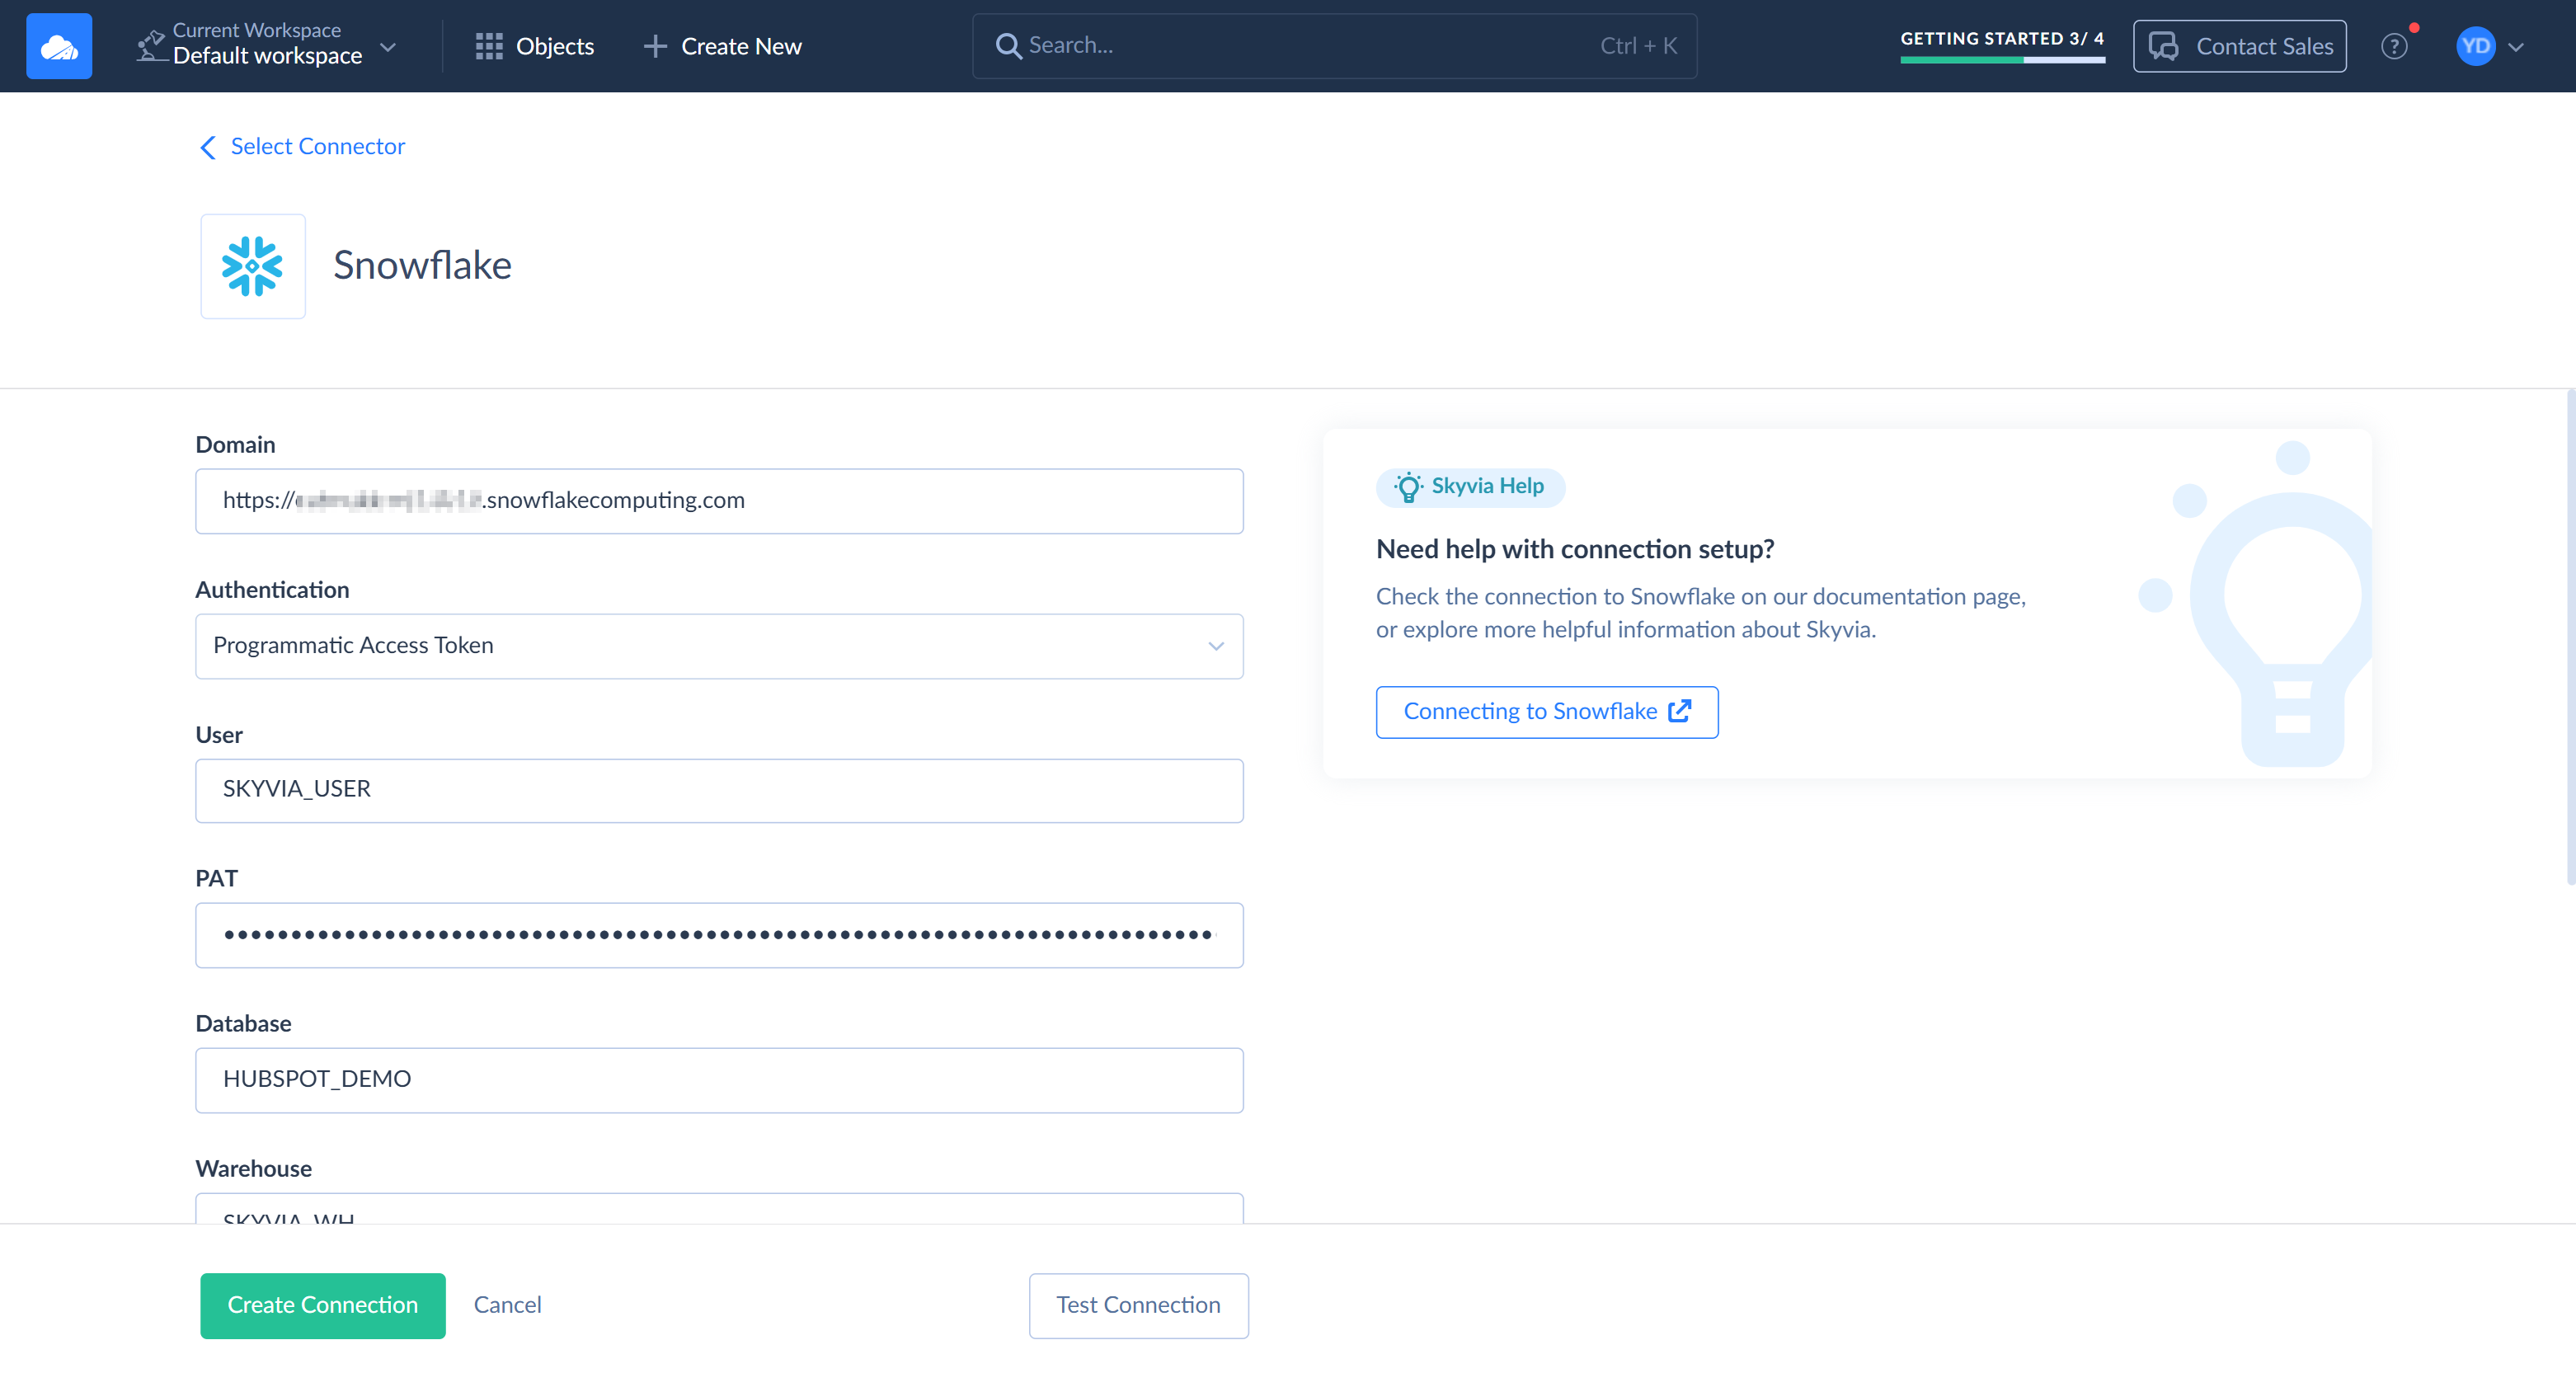
Specify the connection parameters:
- Domain: your Snowflake account URL, for example,
https://<account_identifier>.snowflakecomputing.com - Authentication: Programmatic Access Token
- User:
SKYVIA_USER - PAT: the token you copied in the previous step
- Database:
HUBSPOT_DEMO - Warehouse:
SKYVIA_WH - Schema:
RAW - Role:
SKYVIA_ROLE
- Domain: your Snowflake account URL, for example,
-
In File Storage for Bulk, select Internal.
-
Click Test Connection to check that Skyvia can connect to Snowflake.
-
Click Create Connection.
Create a HubSpot Connection
-
Click + Create New and select Connection.
-
Find and select HubSpot.
-
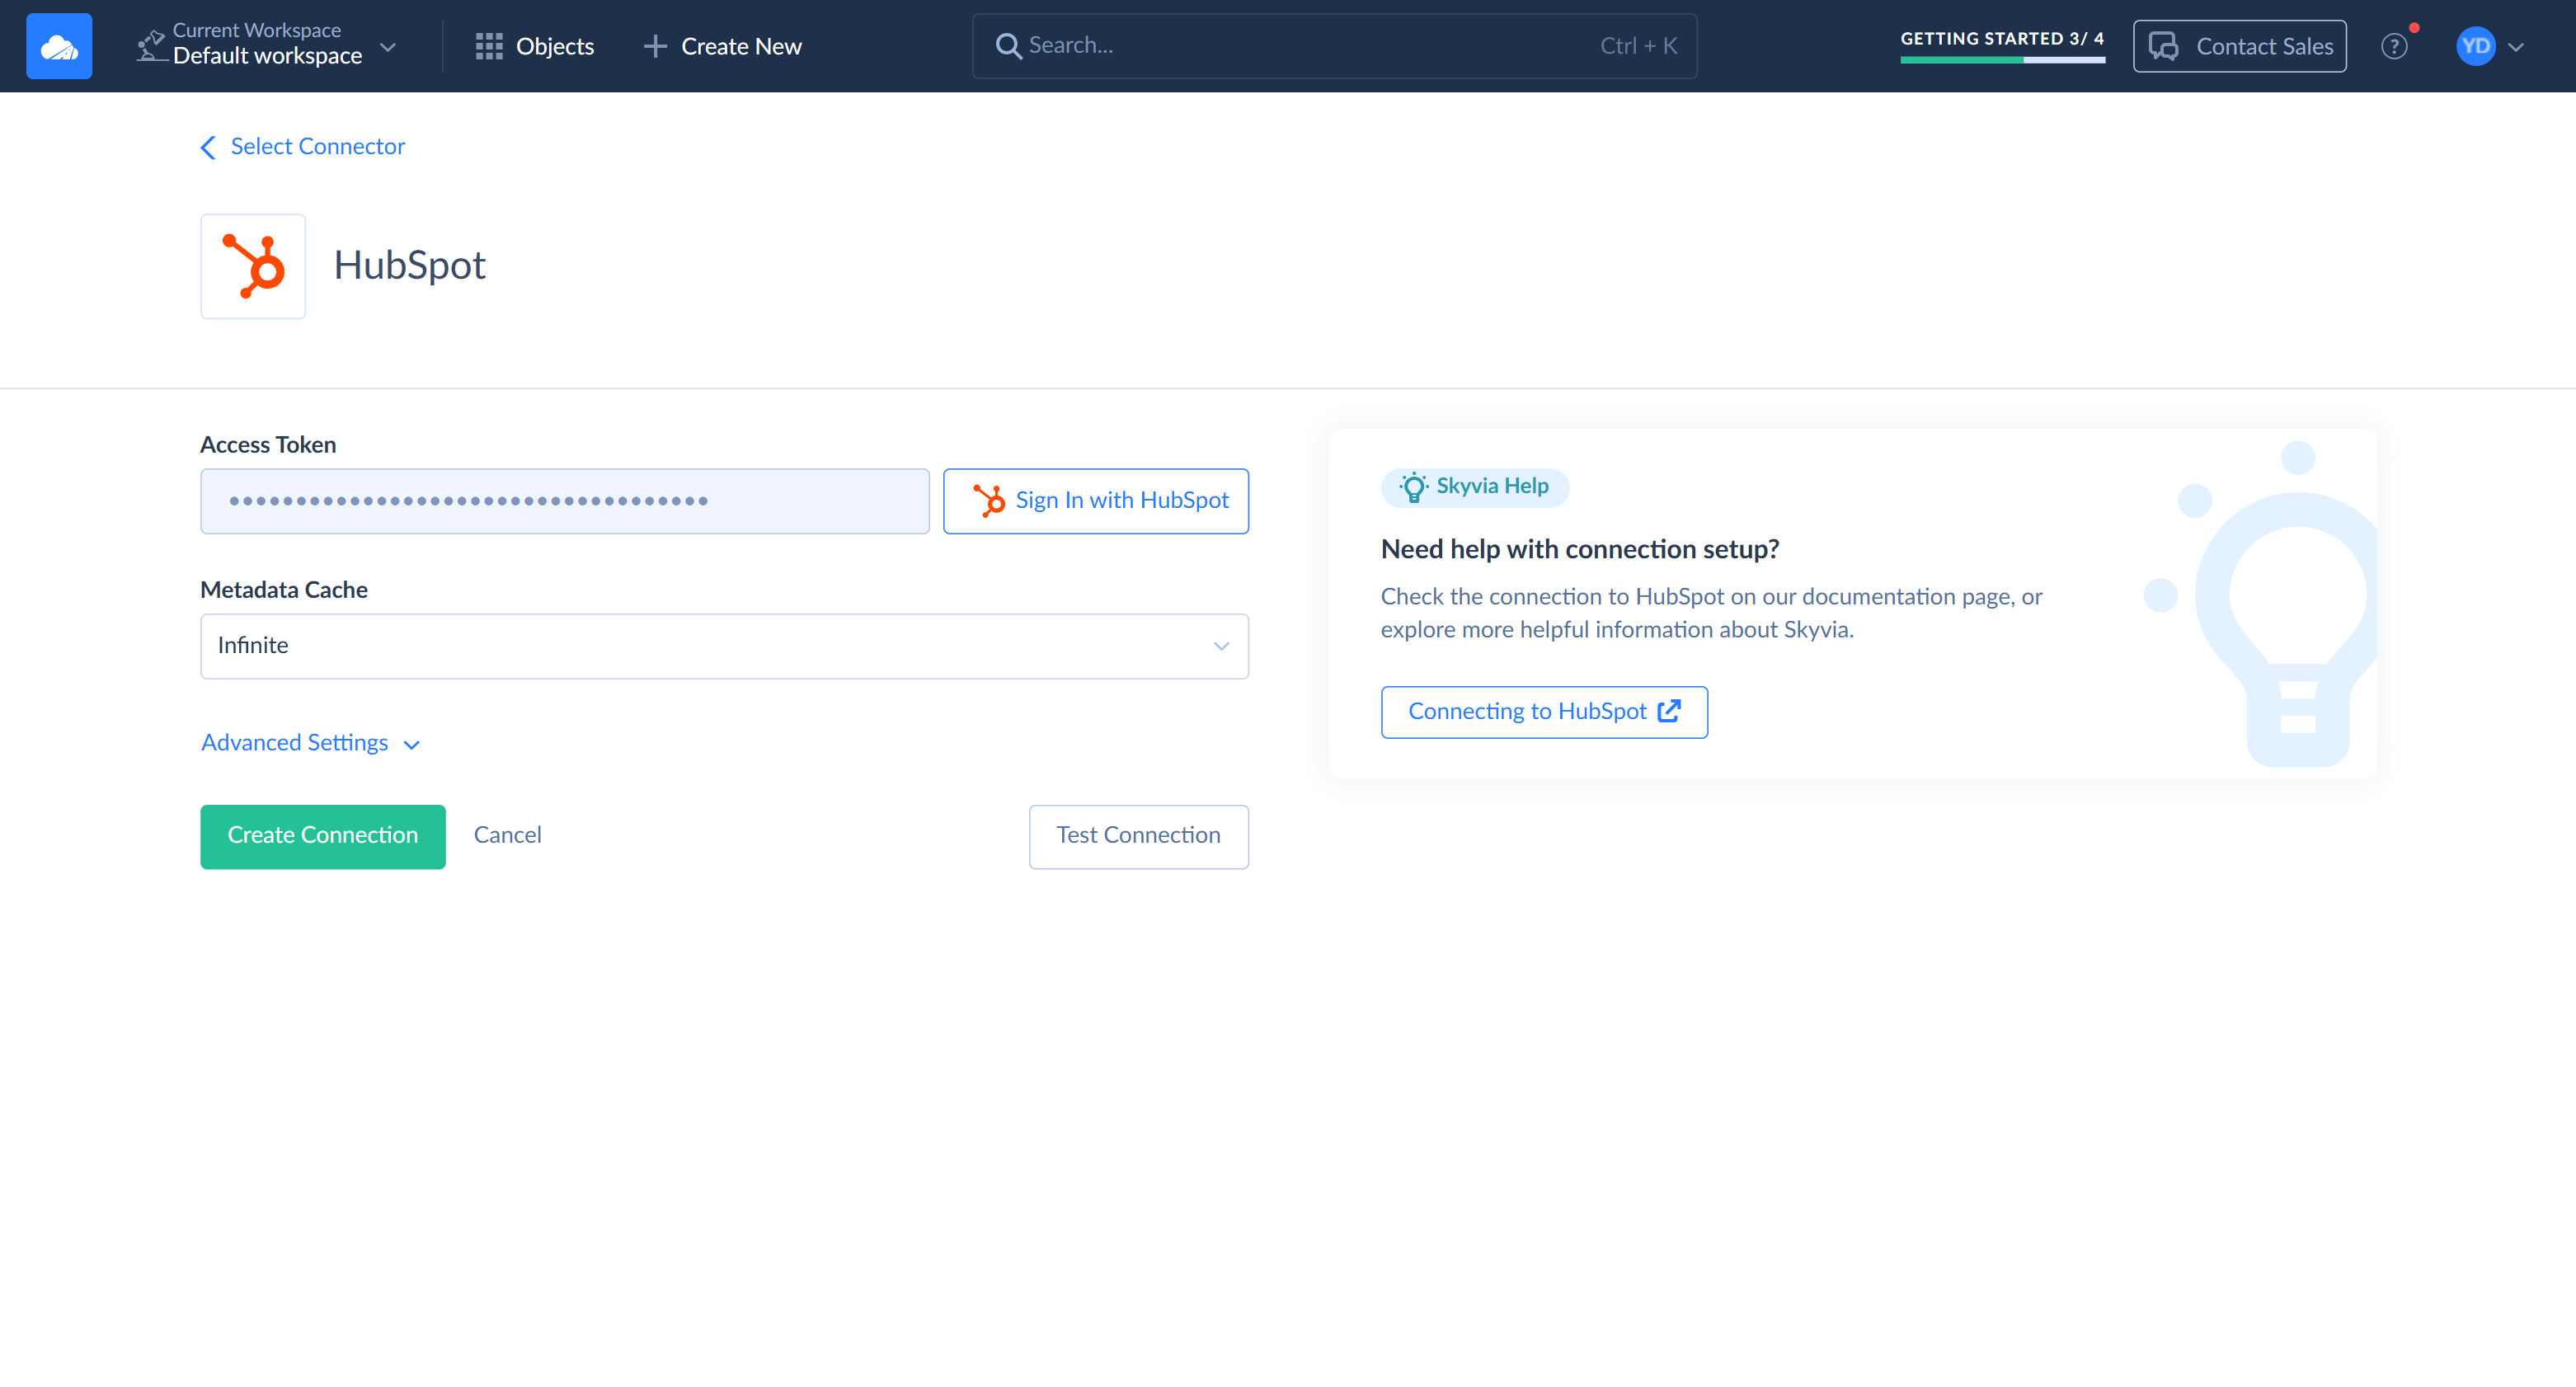
Click Sign In with HubSpot and log in to the HubSpot account you created for this guide.
-
Select the account and click Choose Account.
-
Scroll to the bottom of the permission page, select the checkbox, and click Connect app. Skyvia fills in the Access Token field.
-
Click Test Connection to check that Skyvia can connect to HubSpot.
-
Click Create Connection.
Load Test Data
In Skyvia, integrations perform different jobs on data. Import is an integration that loads data from CSV files, databases, or cloud apps into a target. Import consists of tasks, where each task reads one source, writes to one target object, and maps the source columns to the target fields.
Load sample contacts and deals into HubSpot using Skyvia import. The test data consists of two CSV files:
- contacts.csv with 100 fictional contacts
- deals.csv with 100 deals, each linked to a contact by email address
Download both files before you start. You can also load them with the HubSpot import tool instead of Skyvia.
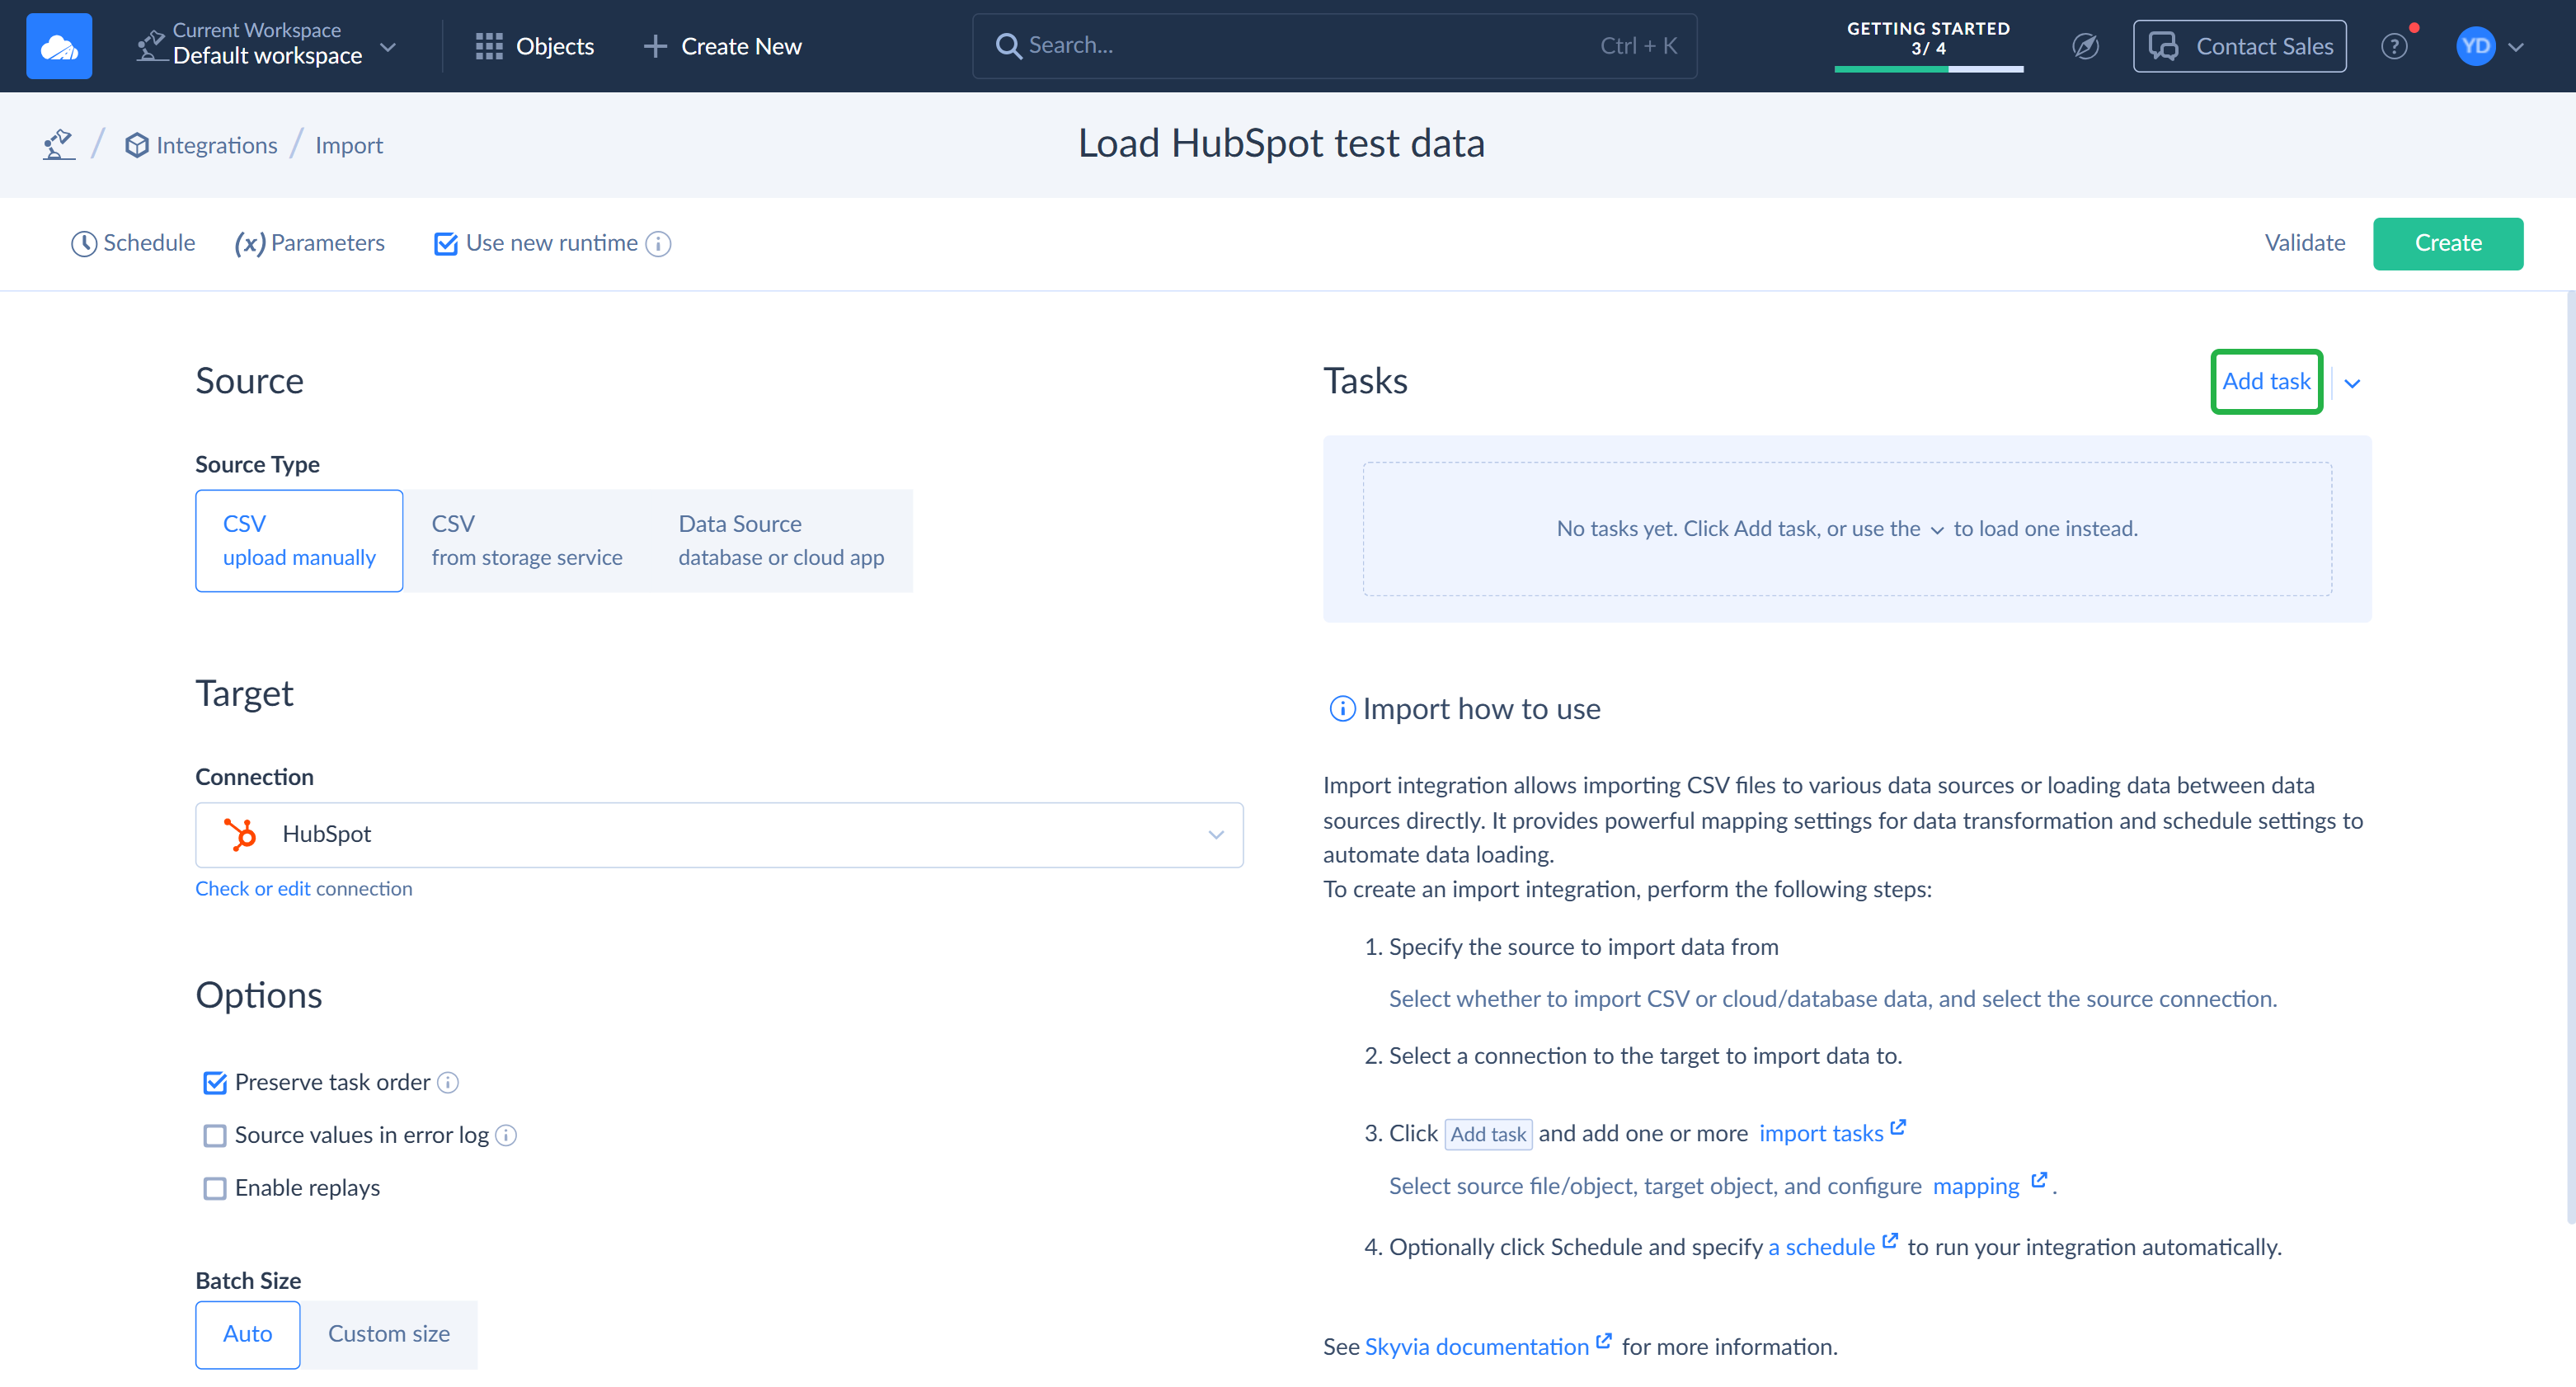
Create the Import
-
Click + Create New and select Import under Integration.
-
Click the default Untitled name and rename the import, for example, to Load HubSpot test data.
-
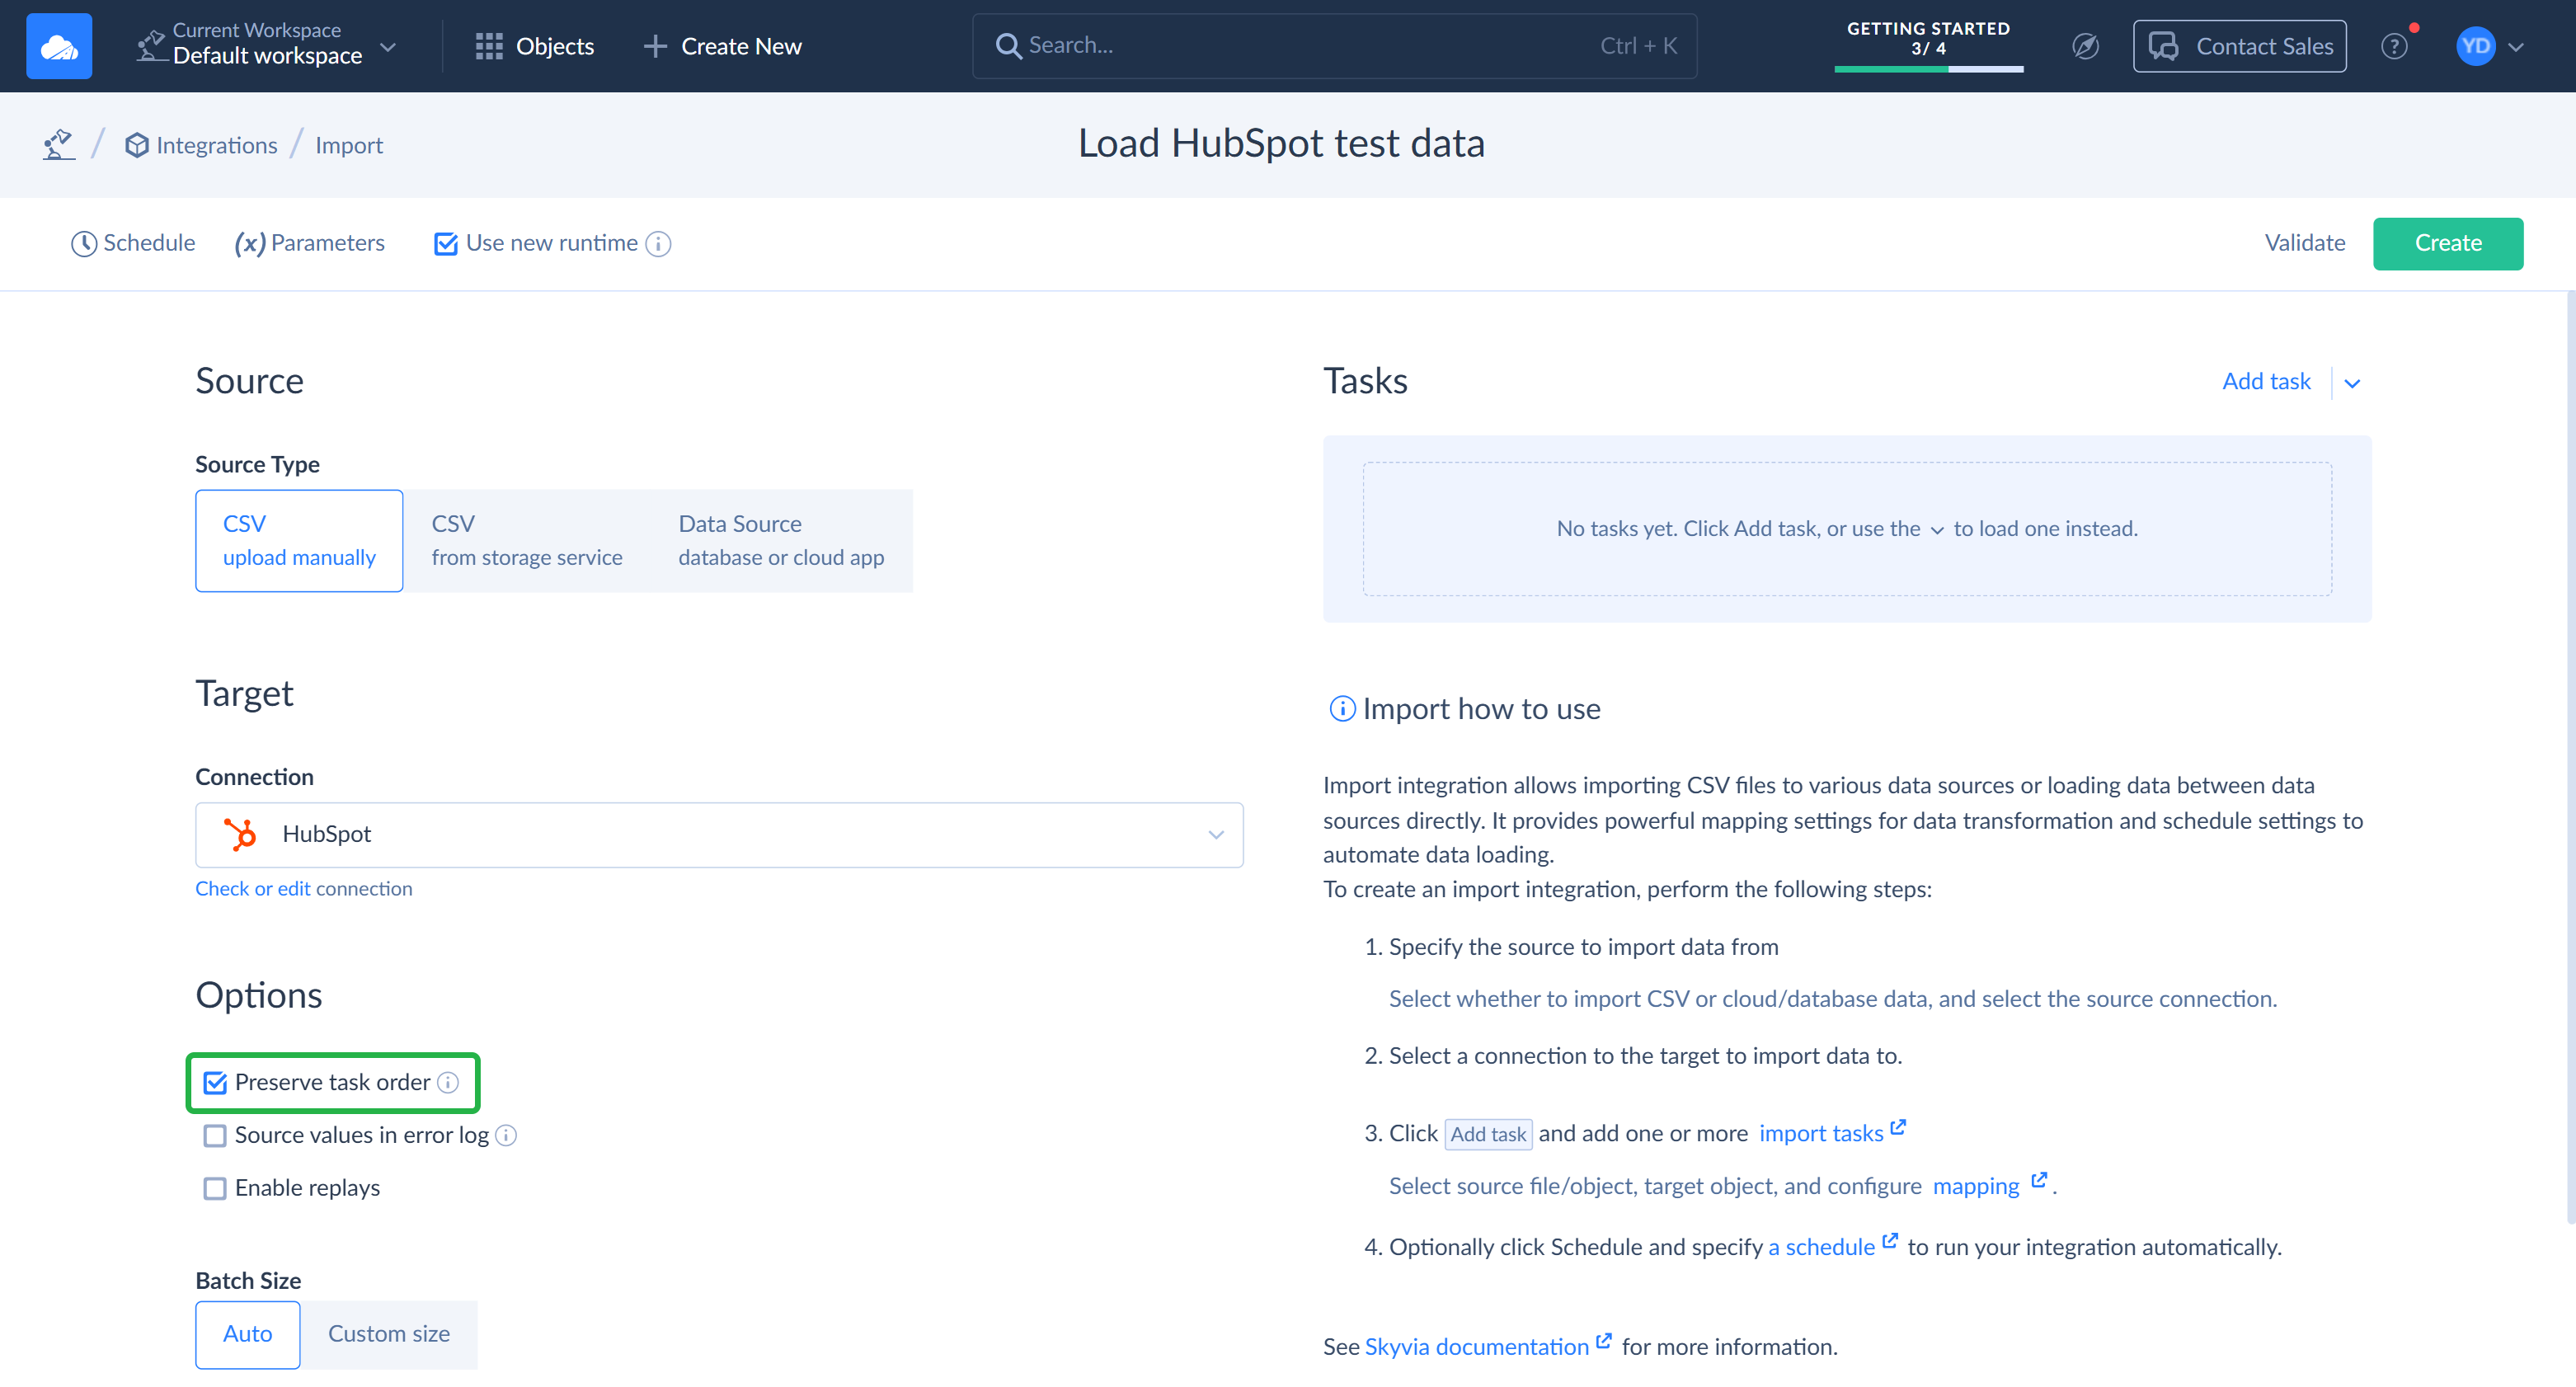
Under Source Type, keep CSV upload manually selected.
-
Under Target, select your HubSpot connection in the Connection list.
-
Under Options, select the Preserve task order checkbox. The last task links deals to contacts, so both must be loaded before it runs.
Add the Contacts Task
-
Click Add task.
-
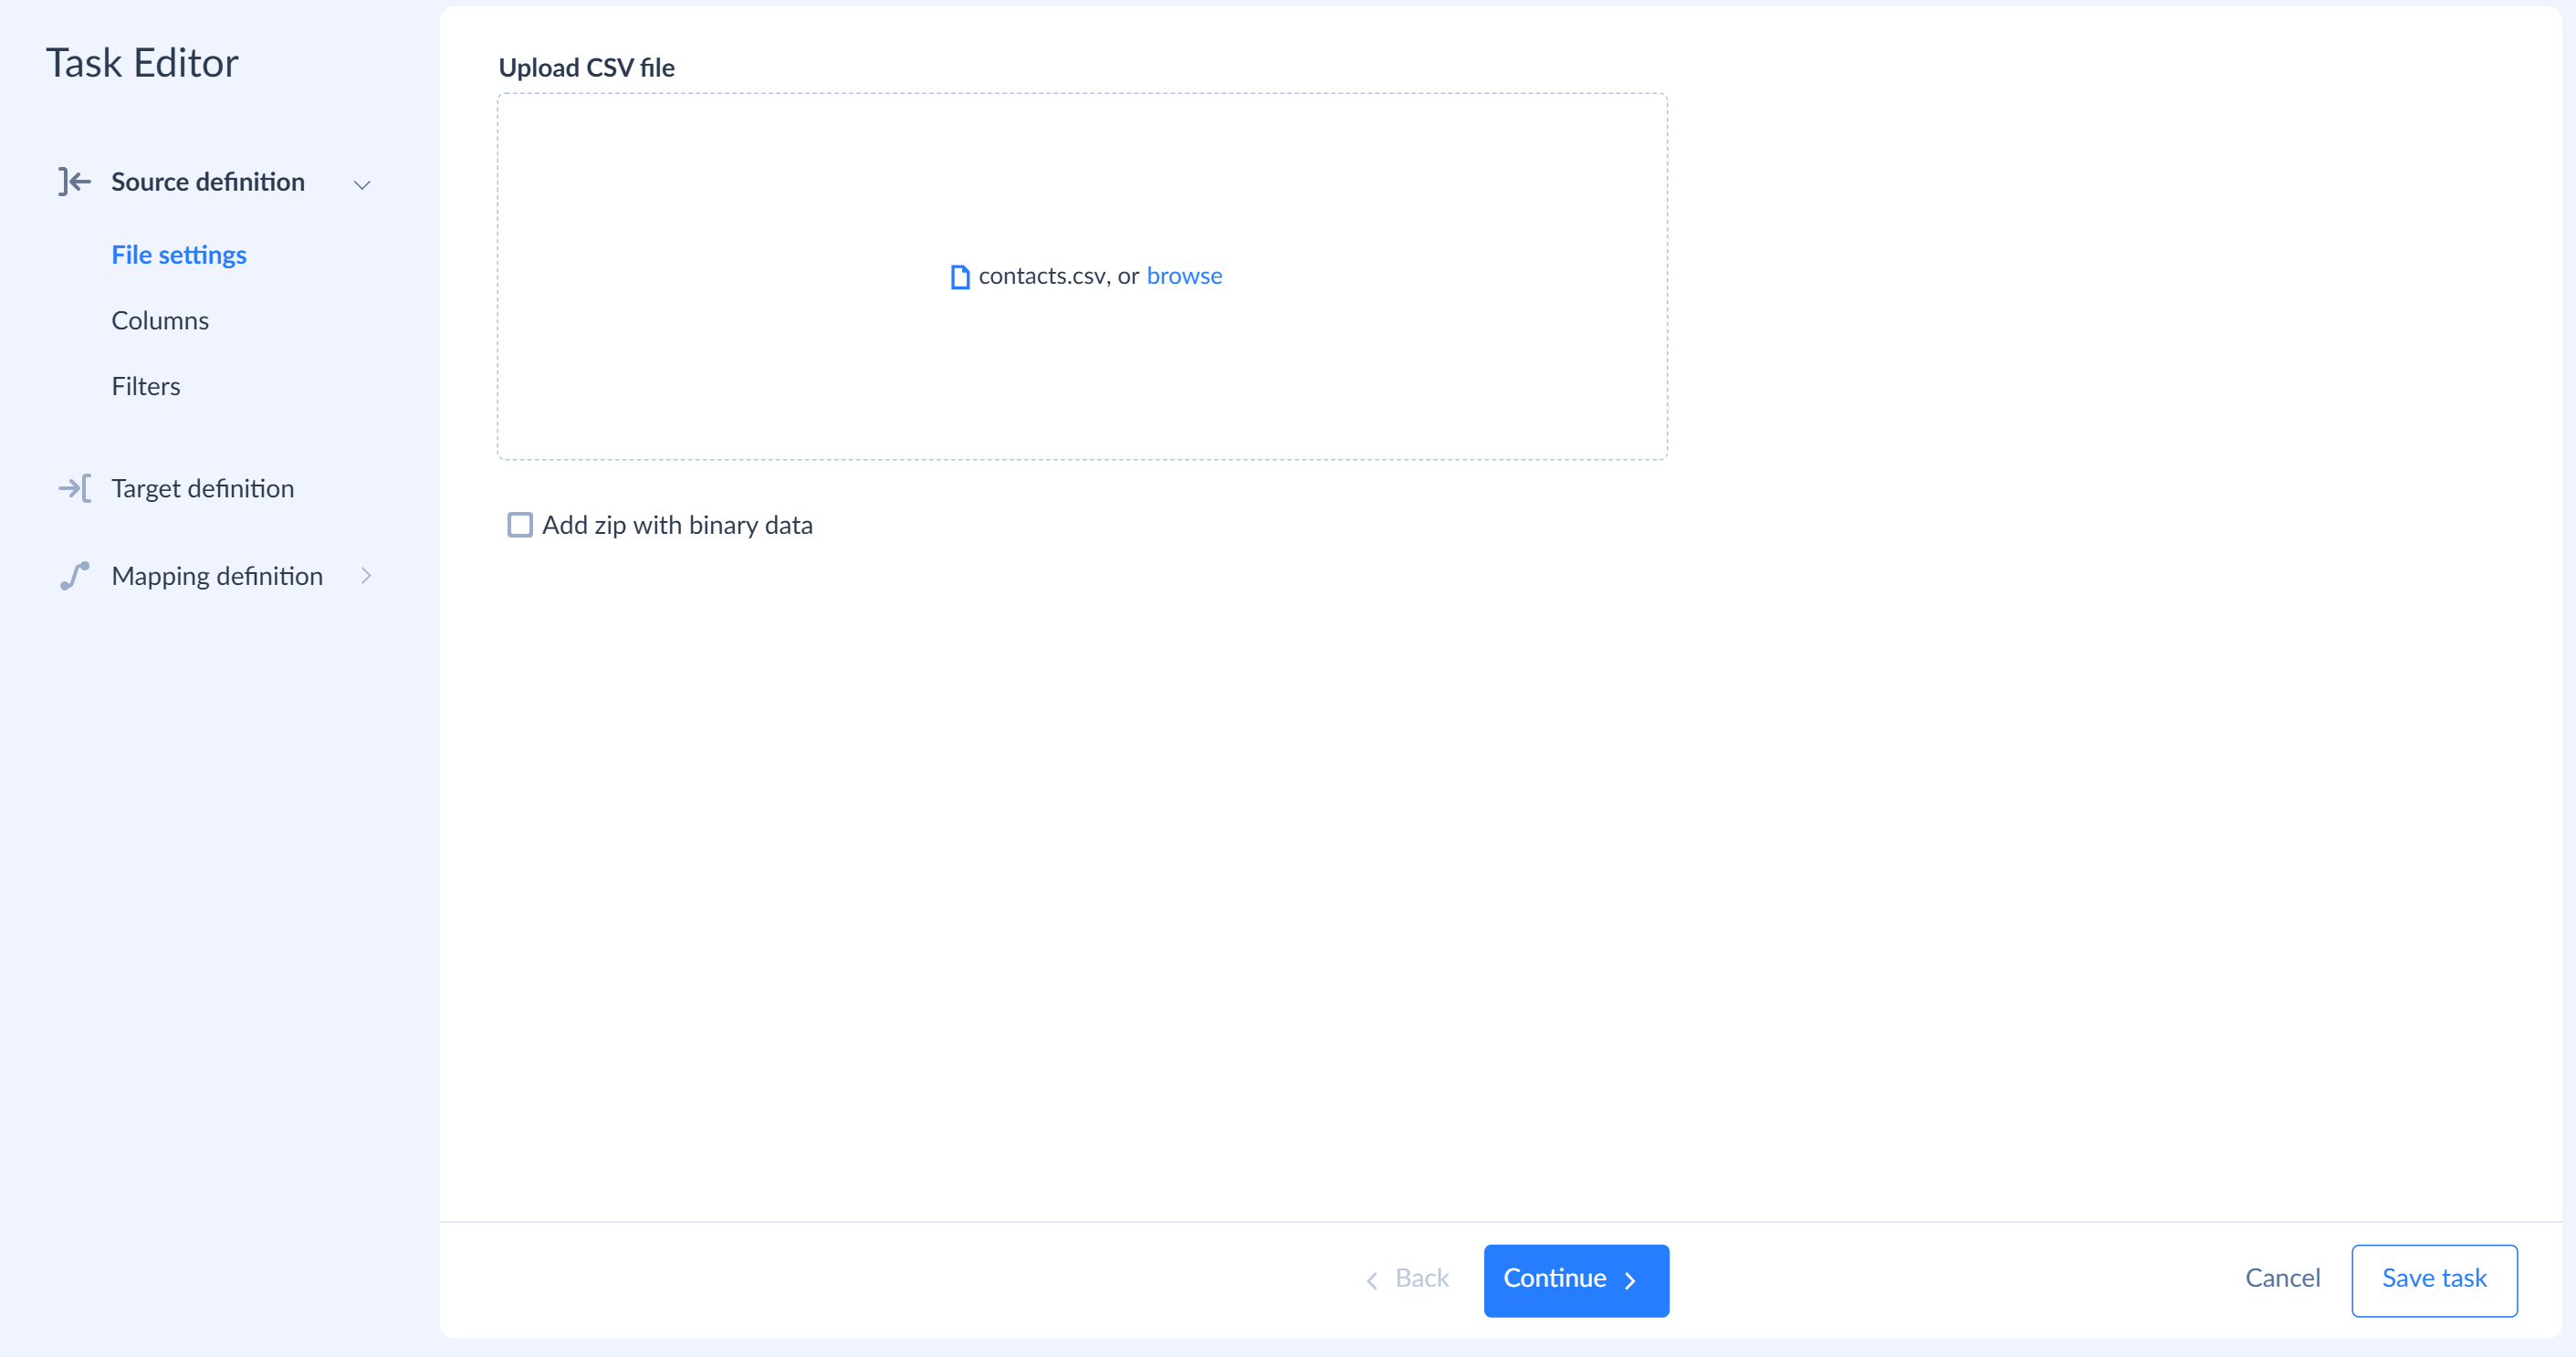
Drag contacts.csv to the Upload CSV file area, or click browse and select the file.
-
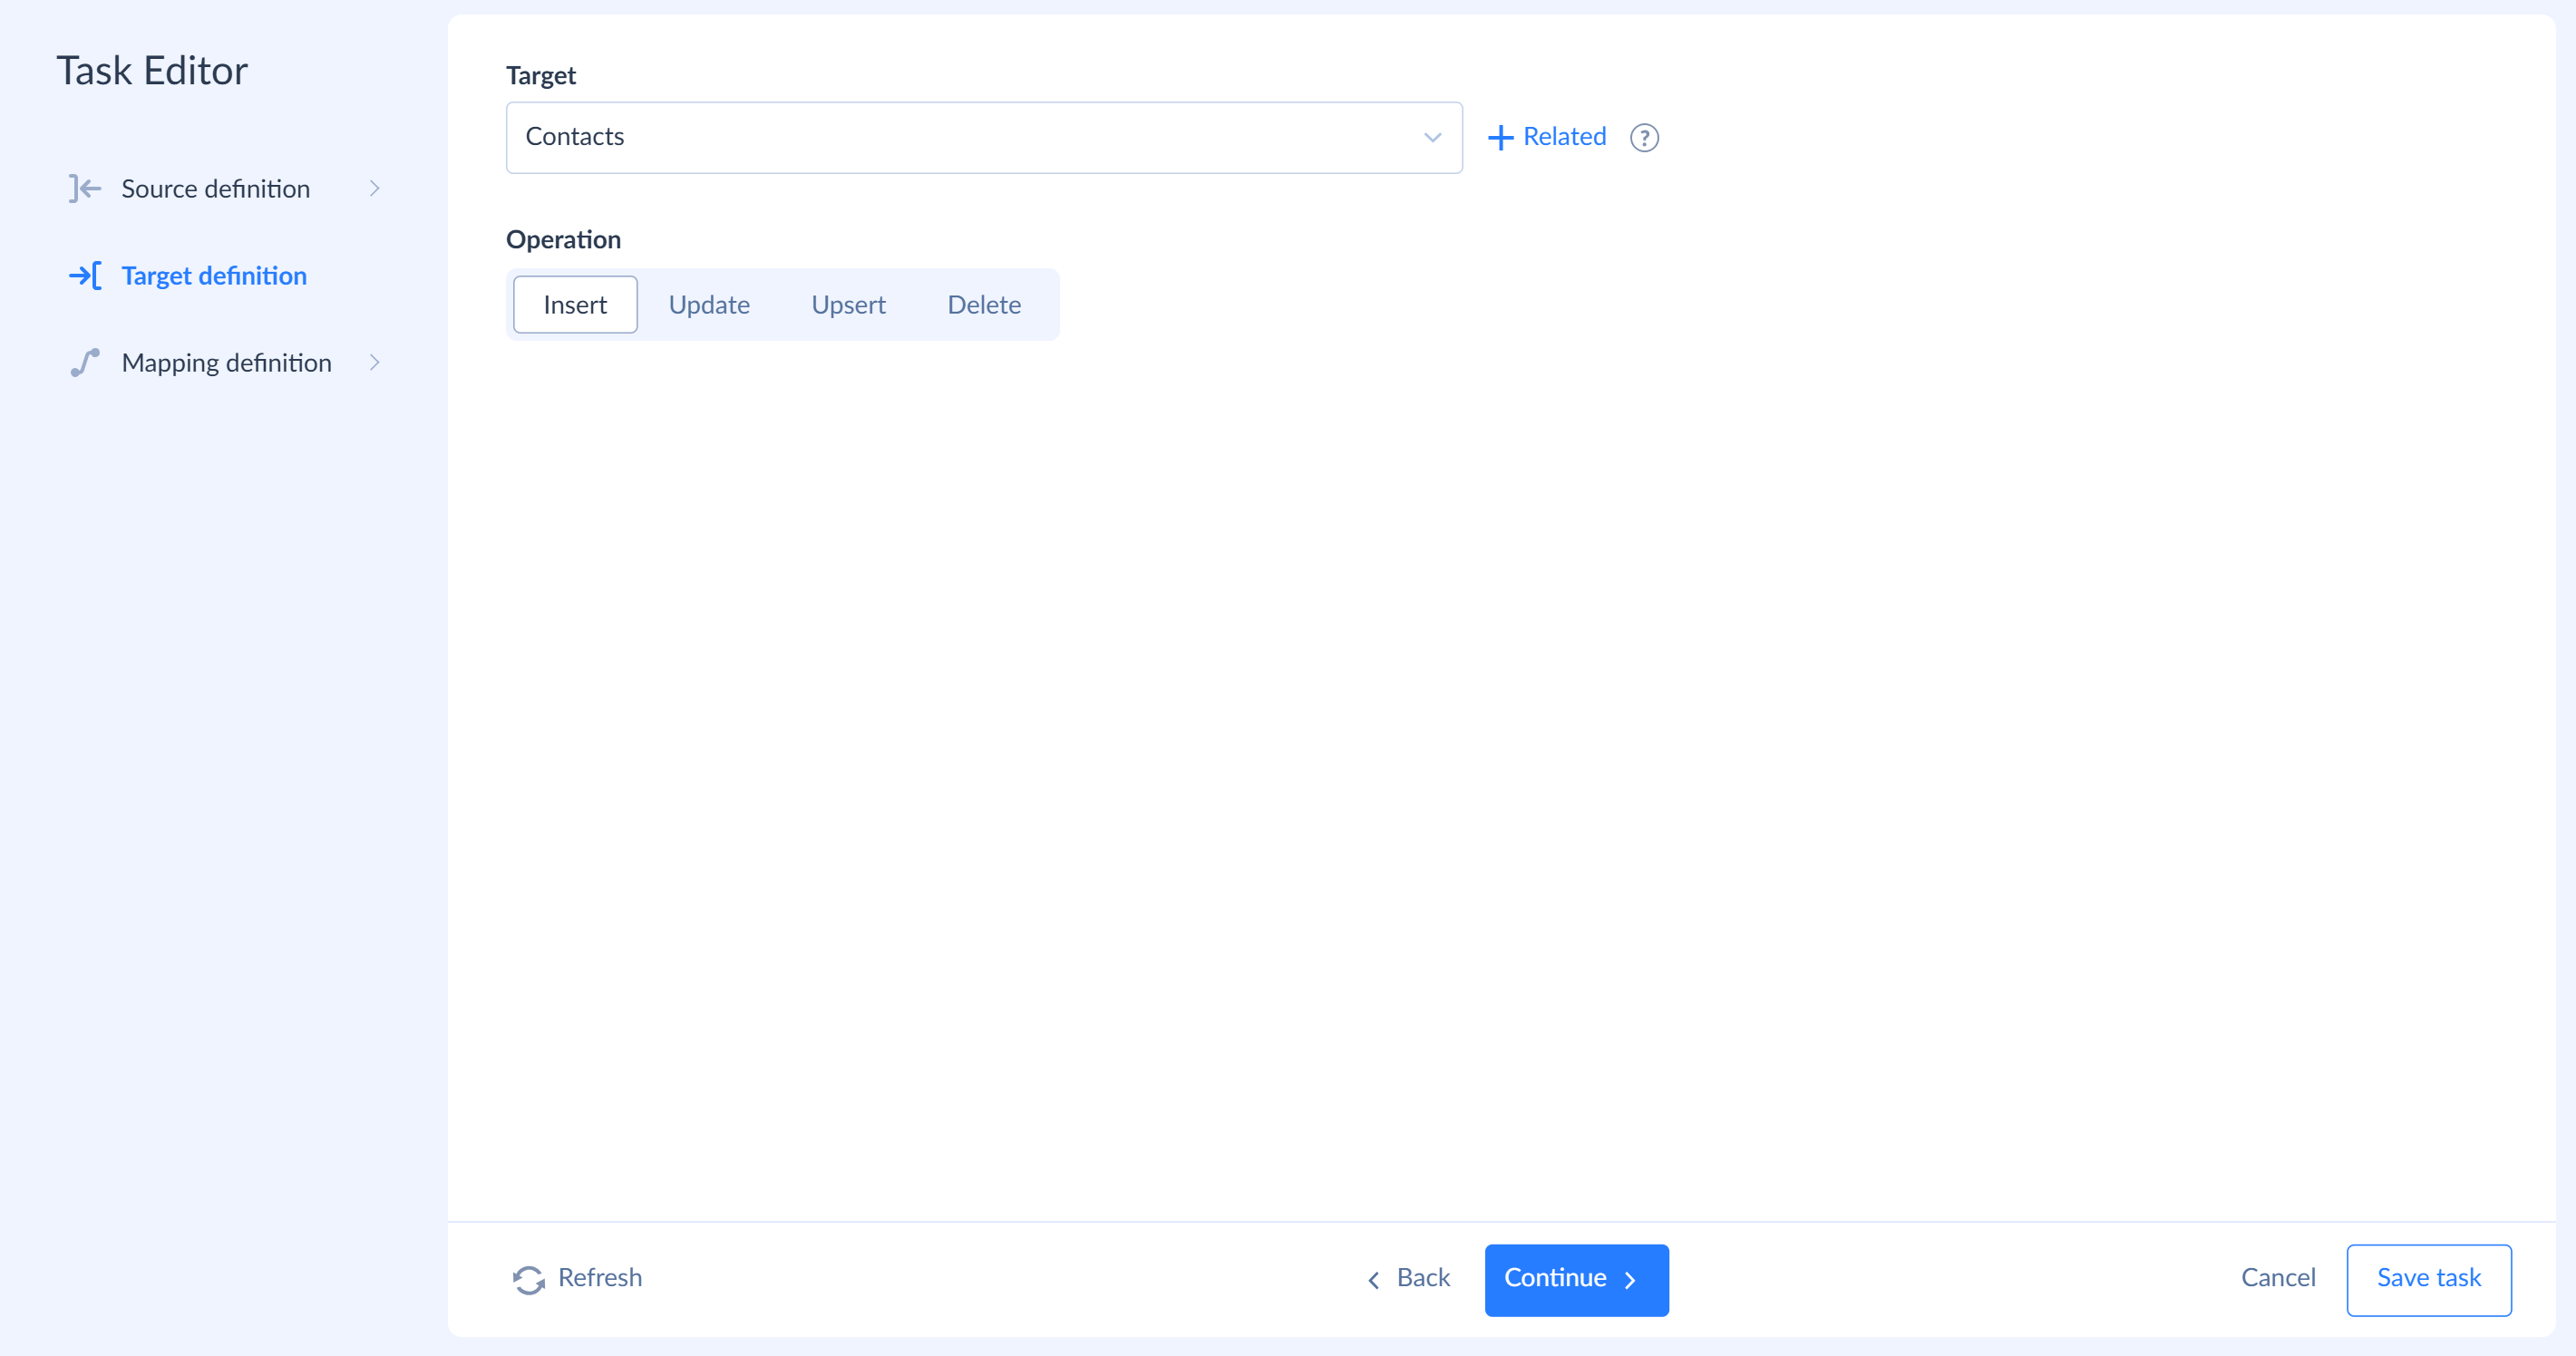
Click Target definition. In the Target list, select Contacts and keep the Insert operation.
-
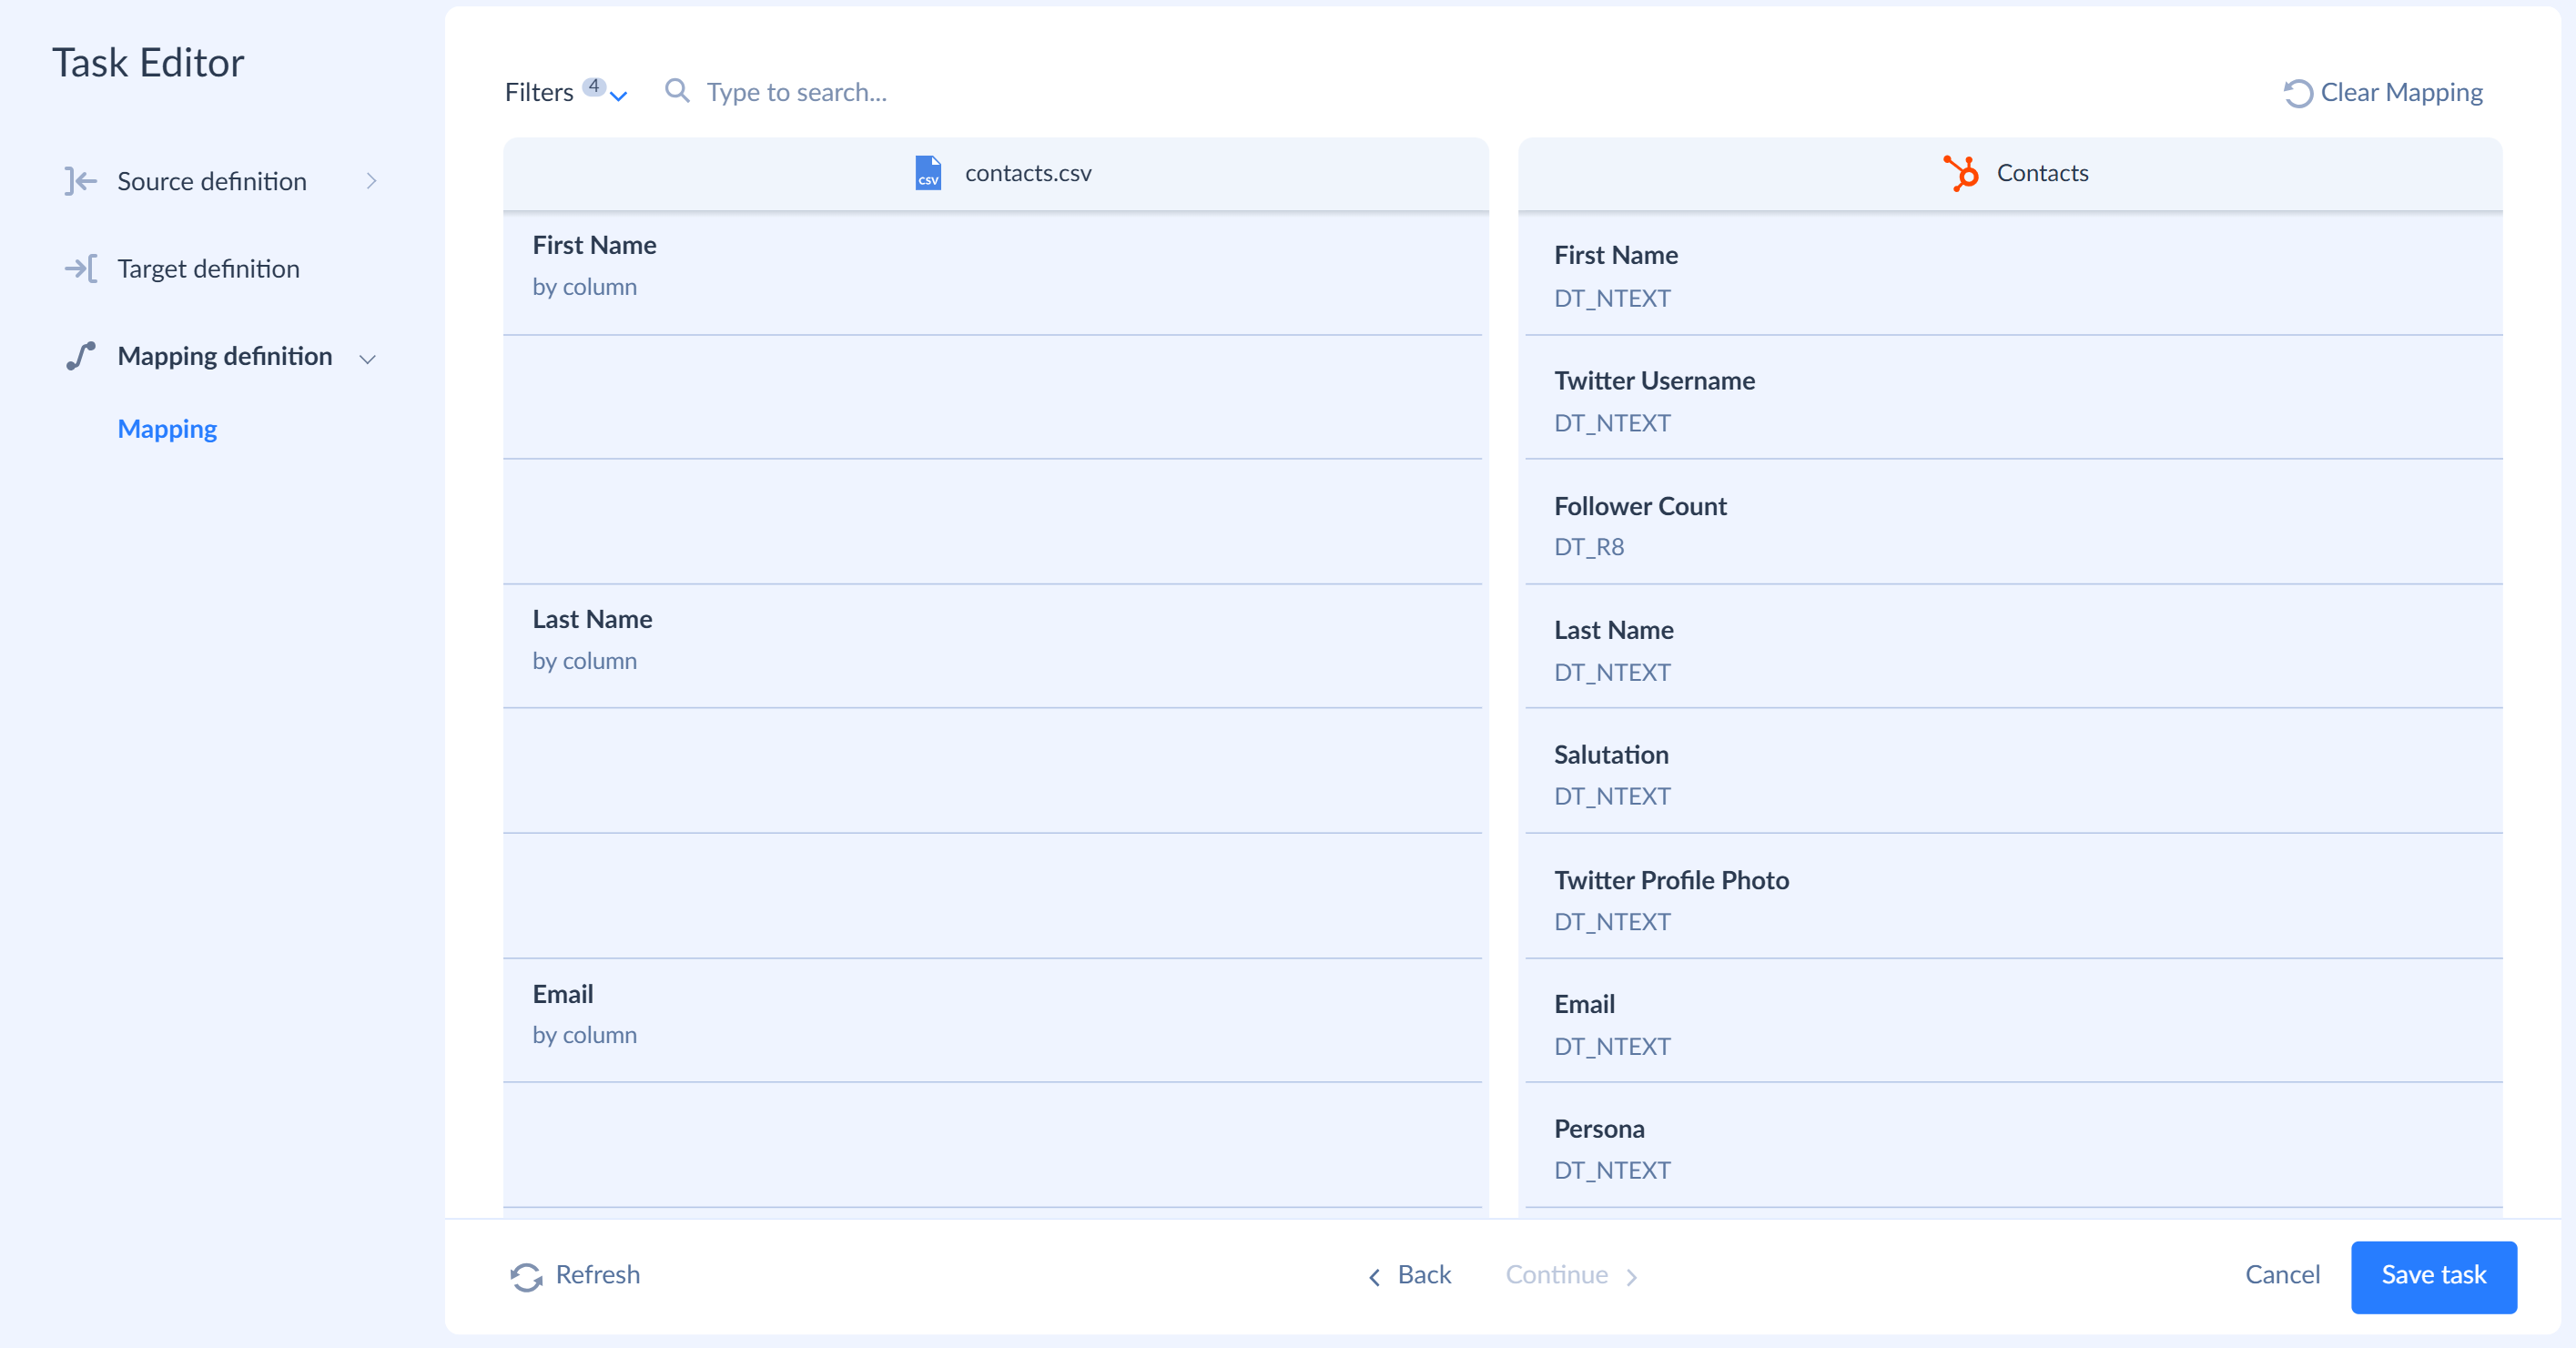
Click Mapping definition and check that all CSV columns are mapped. Mapping defines which source column fills each target field. The columns have the same names as the HubSpot fields, so Skyvia maps them automatically.
-
Click Save task.
Add the Deals Task
-
Click Add task.
-
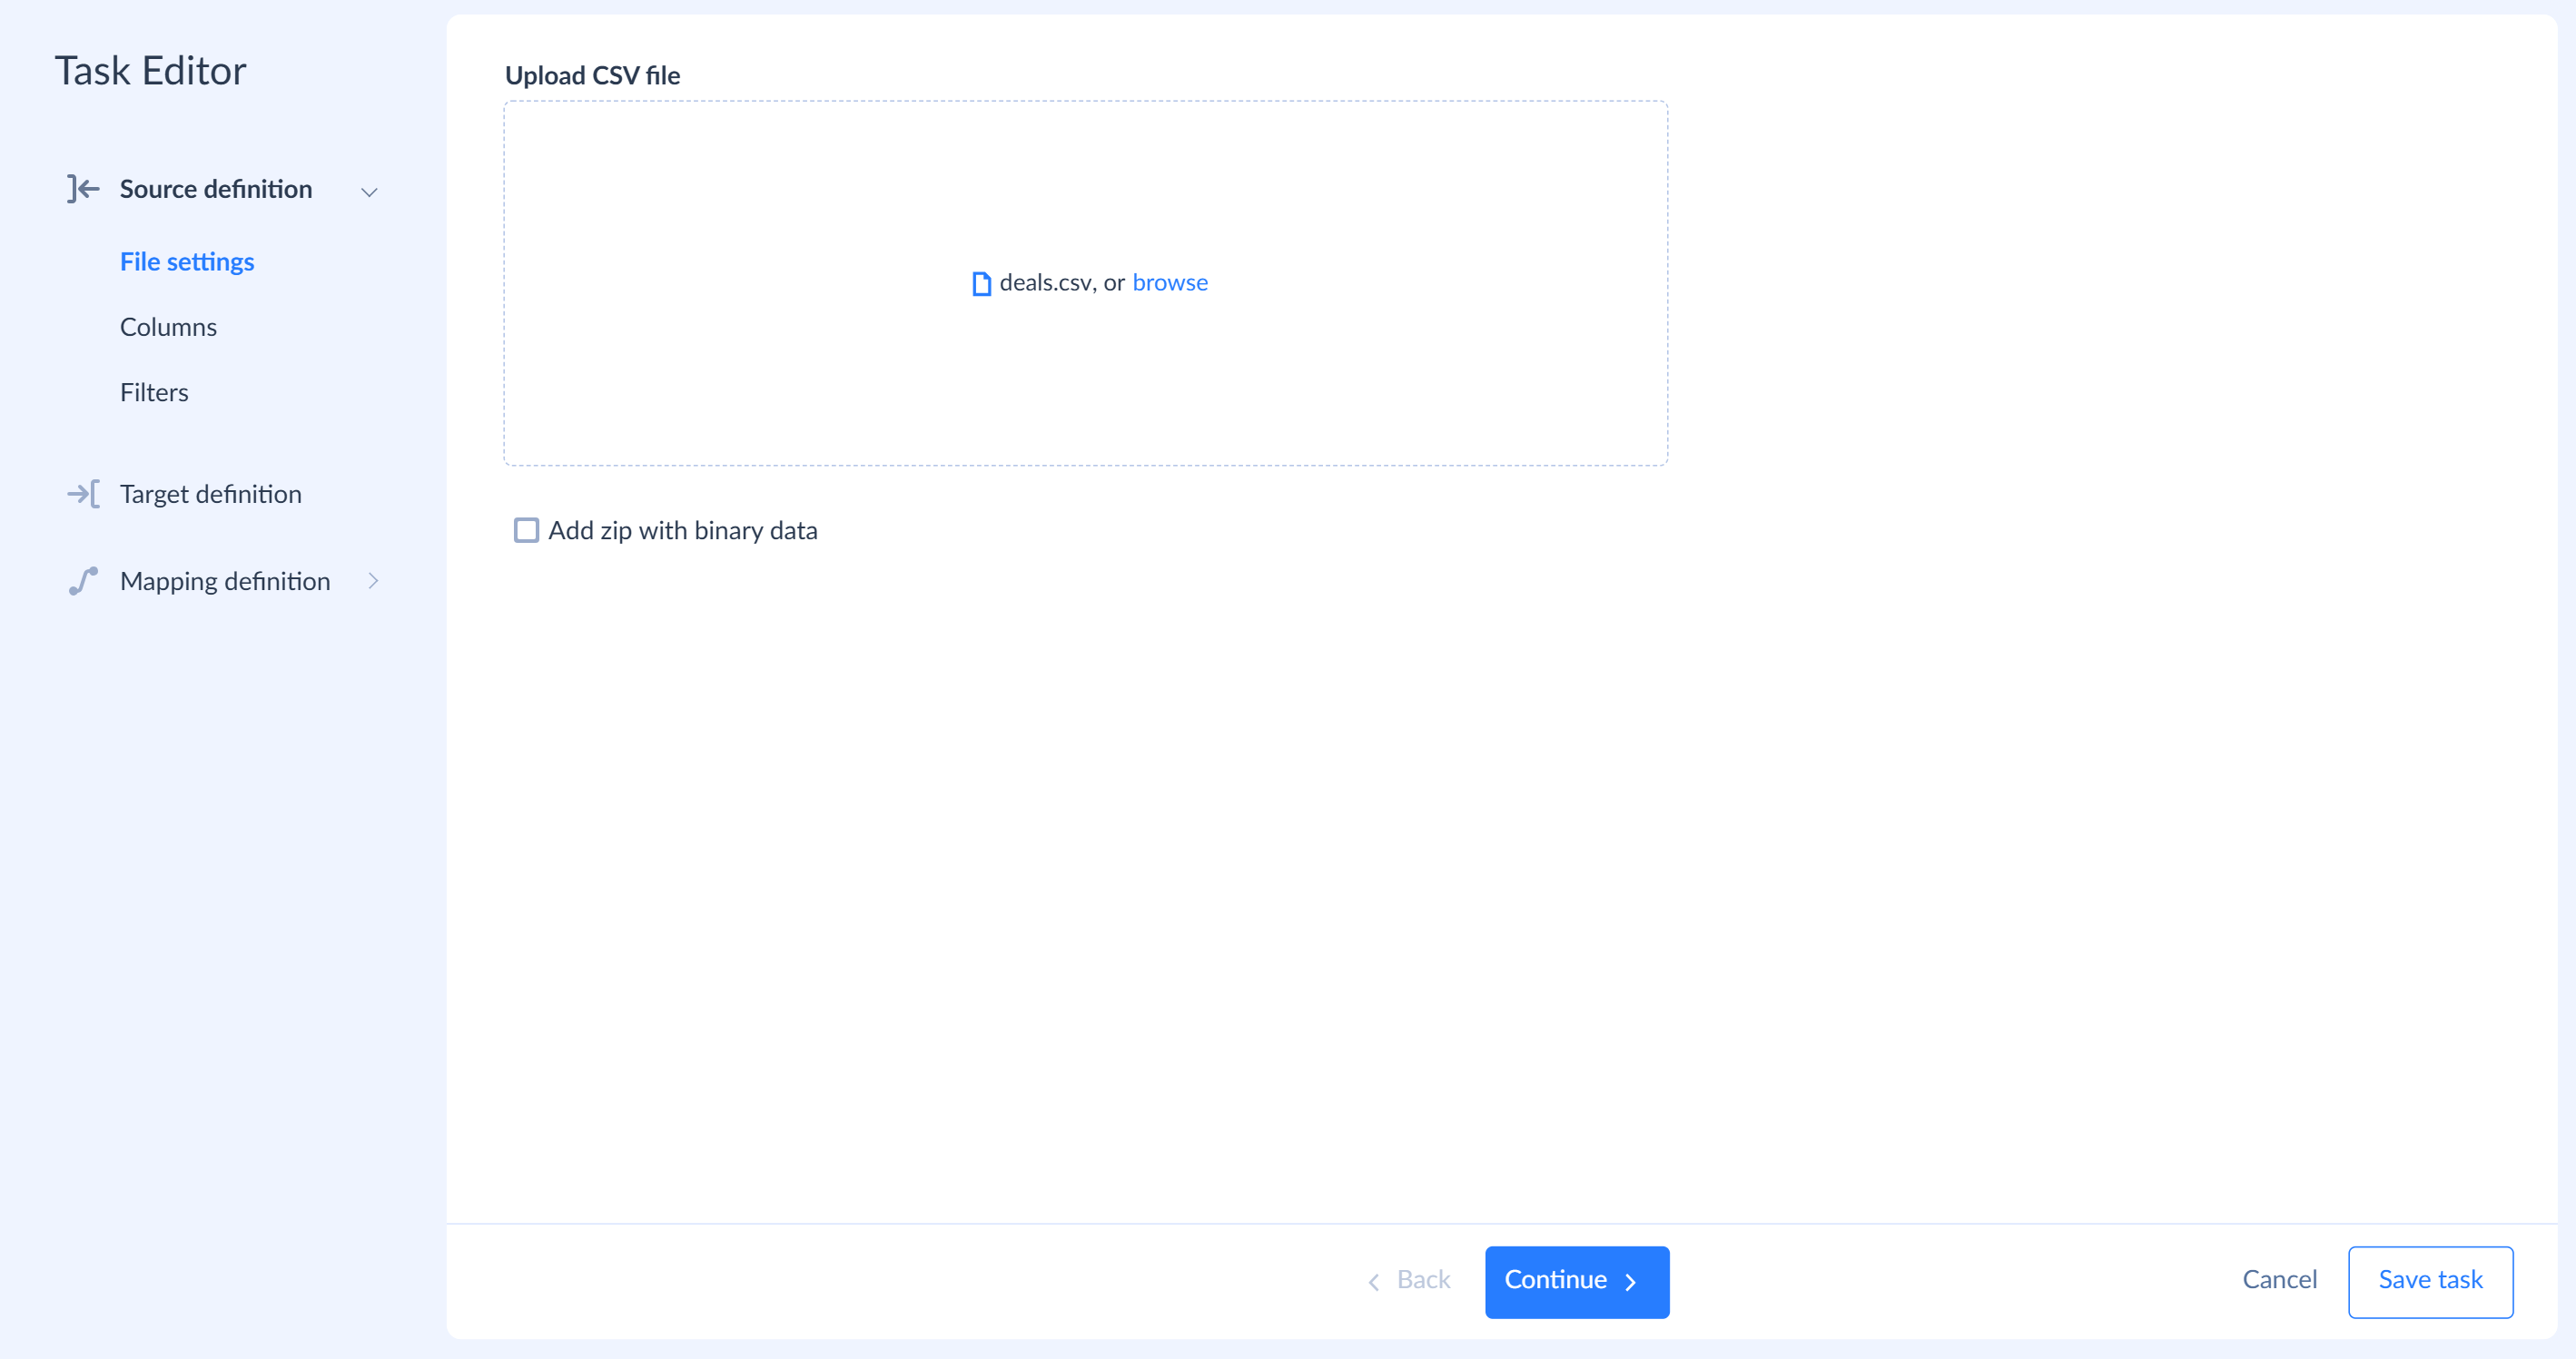
Drag deals.csv to the Upload CSV file area, or click browse and select the file.
-
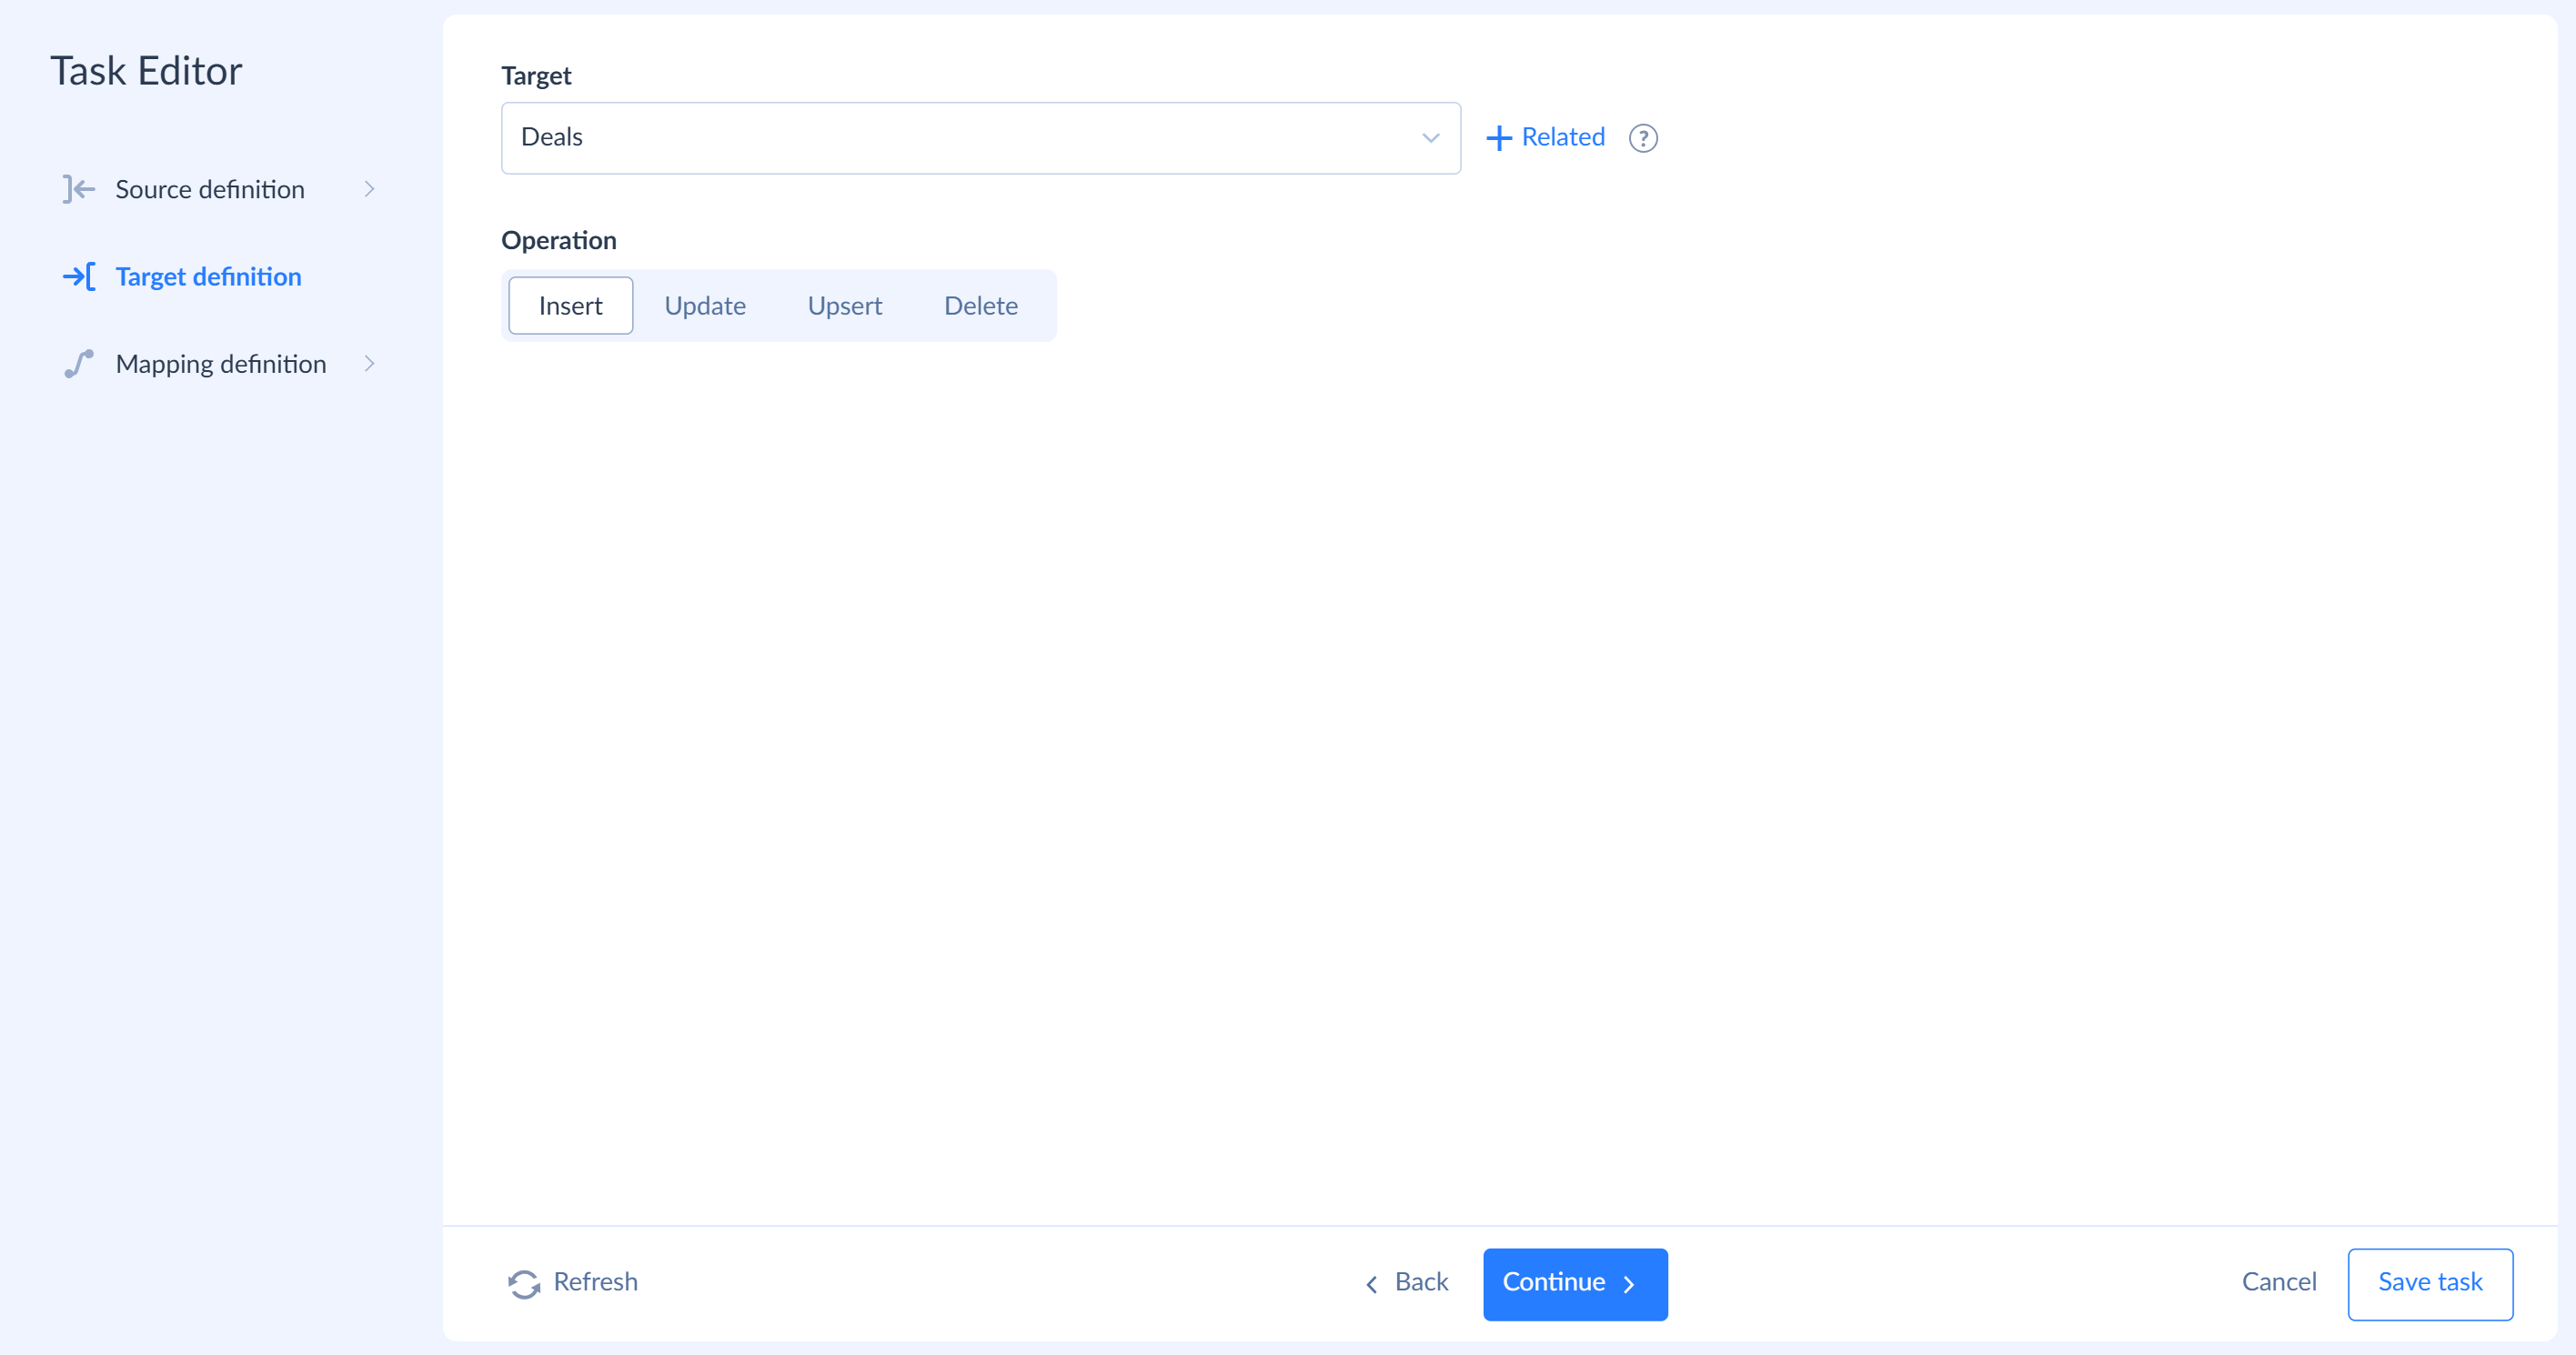
Click Target definition. In the Target list, select Deals and keep the Insert operation.
-
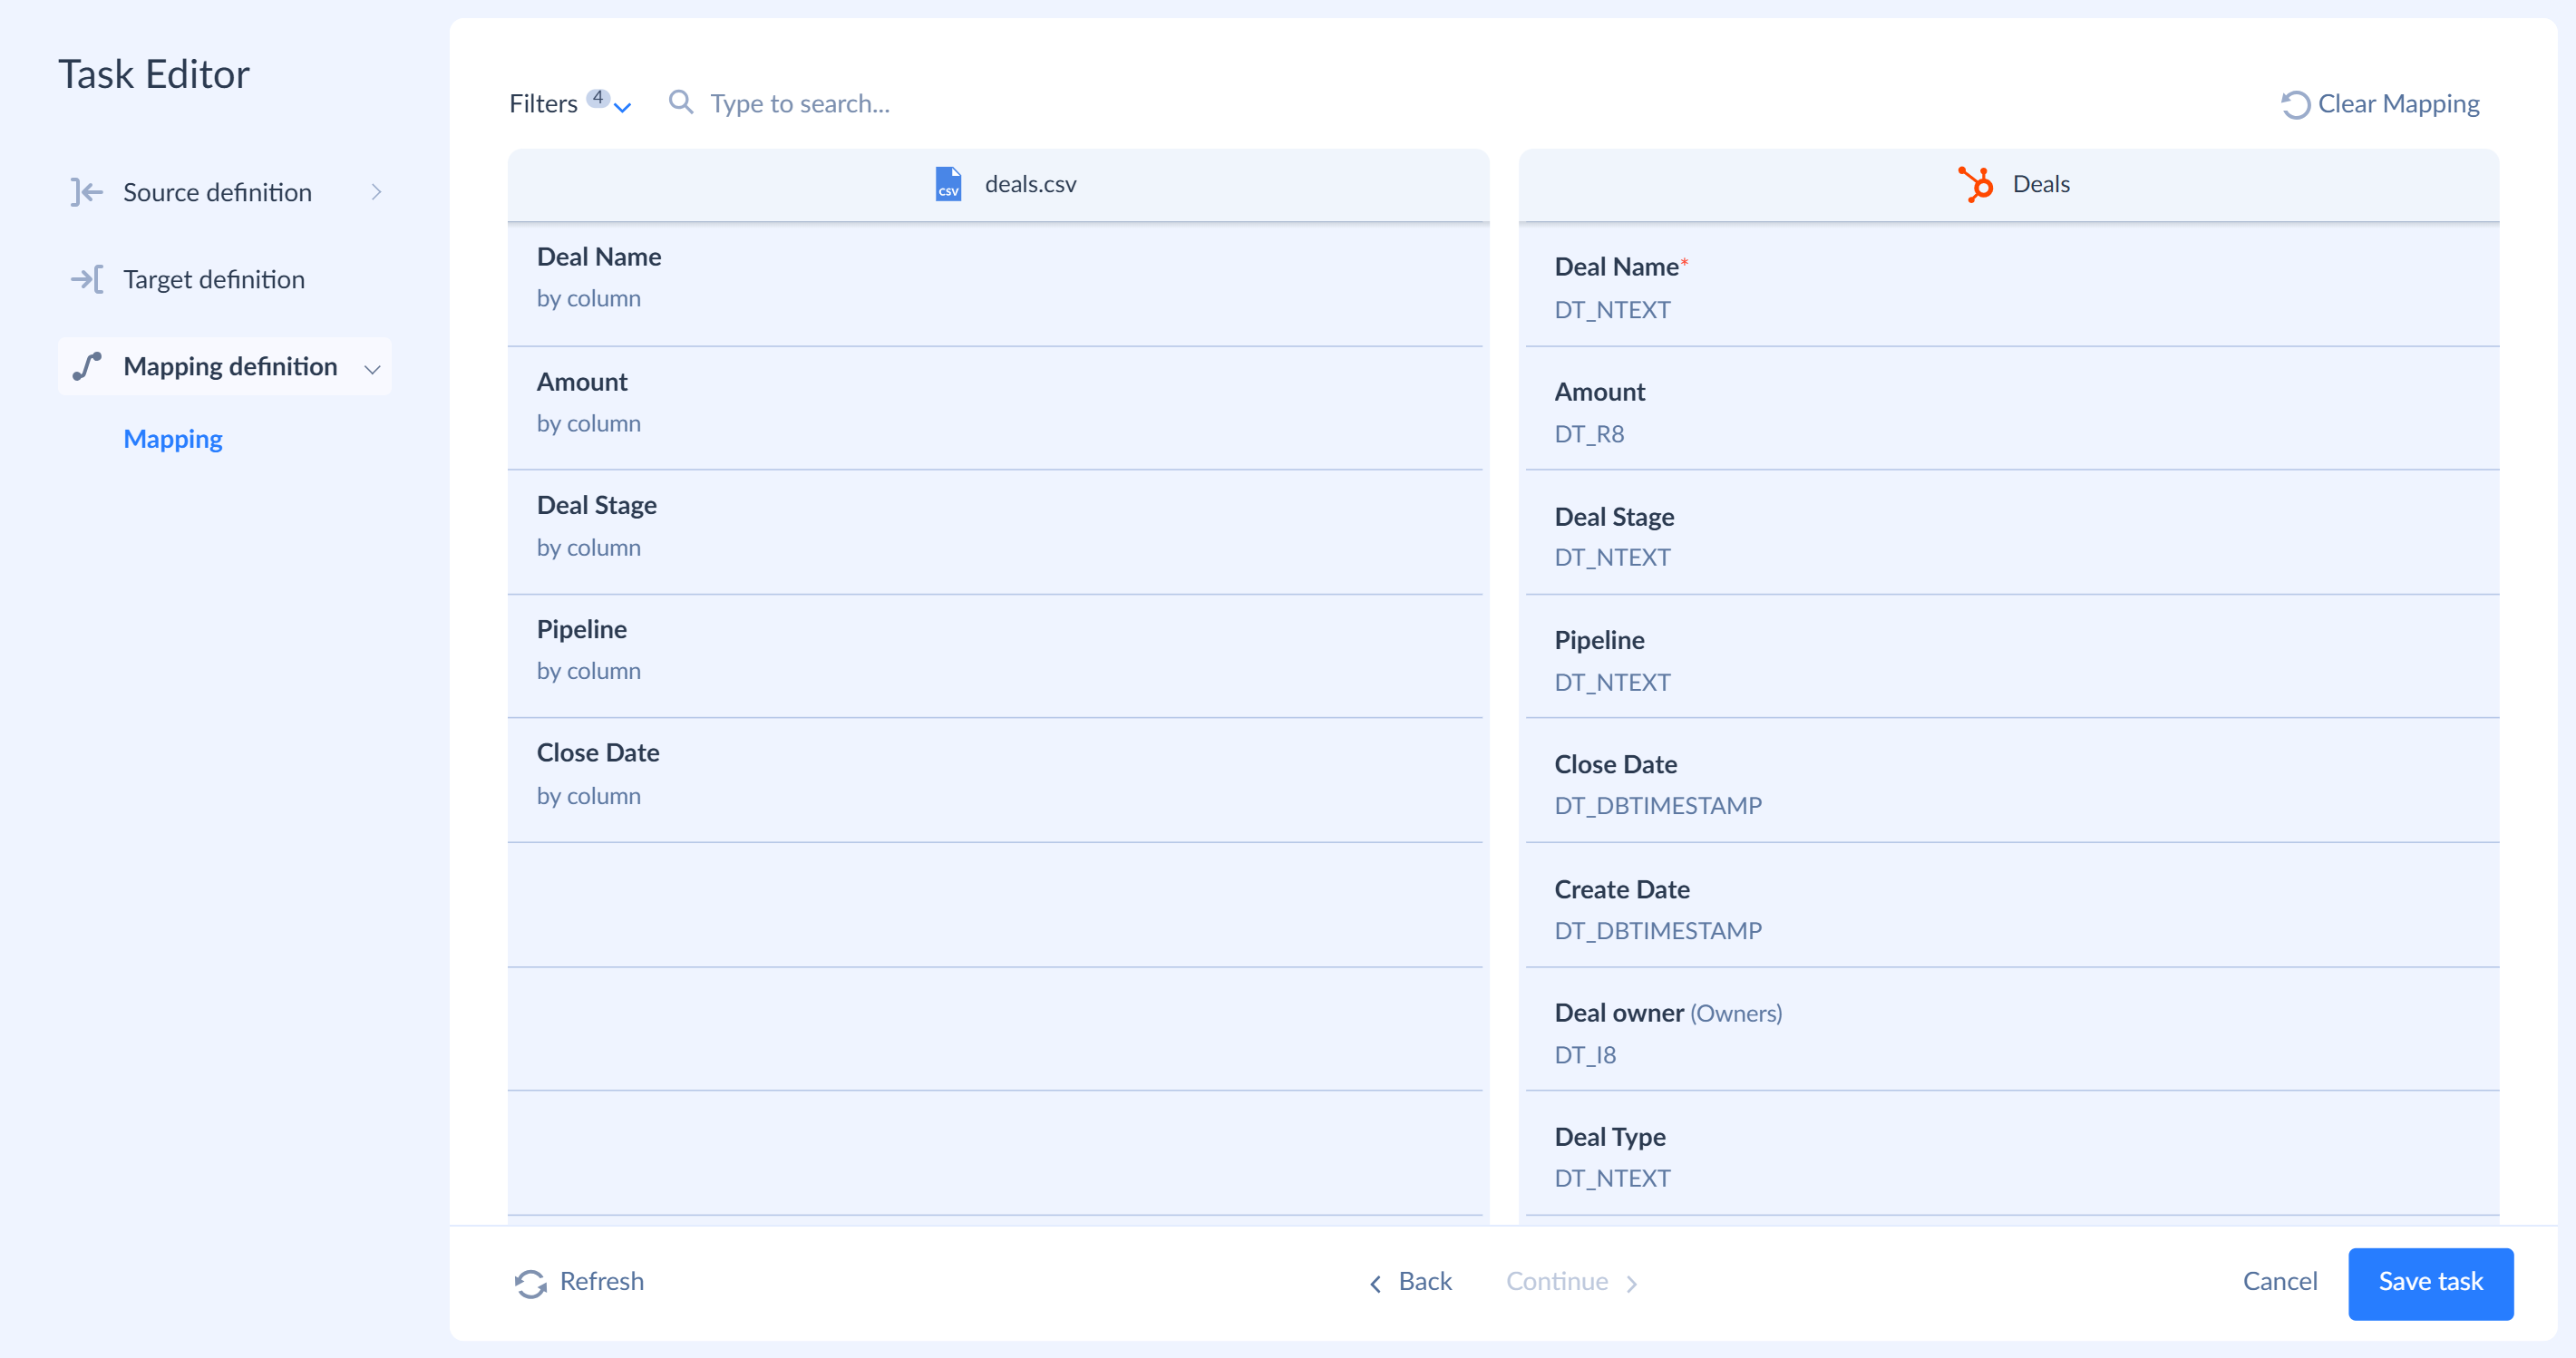
Click Mapping definition and check that the Deal Name, Amount, Deal Stage, Pipeline, and Close Date columns are mapped automatically.
-
Click Save task.
Link Deals to Contacts
In HubSpot, a deal is linked to a contact through an association. Skyvia shows deal-contact associations as the DealContacts object, where each record is a pair of a deal ID and a contact ID. This task creates these records. It finds each deal by its name and each contact by its email address.
-
Click Add task.
-
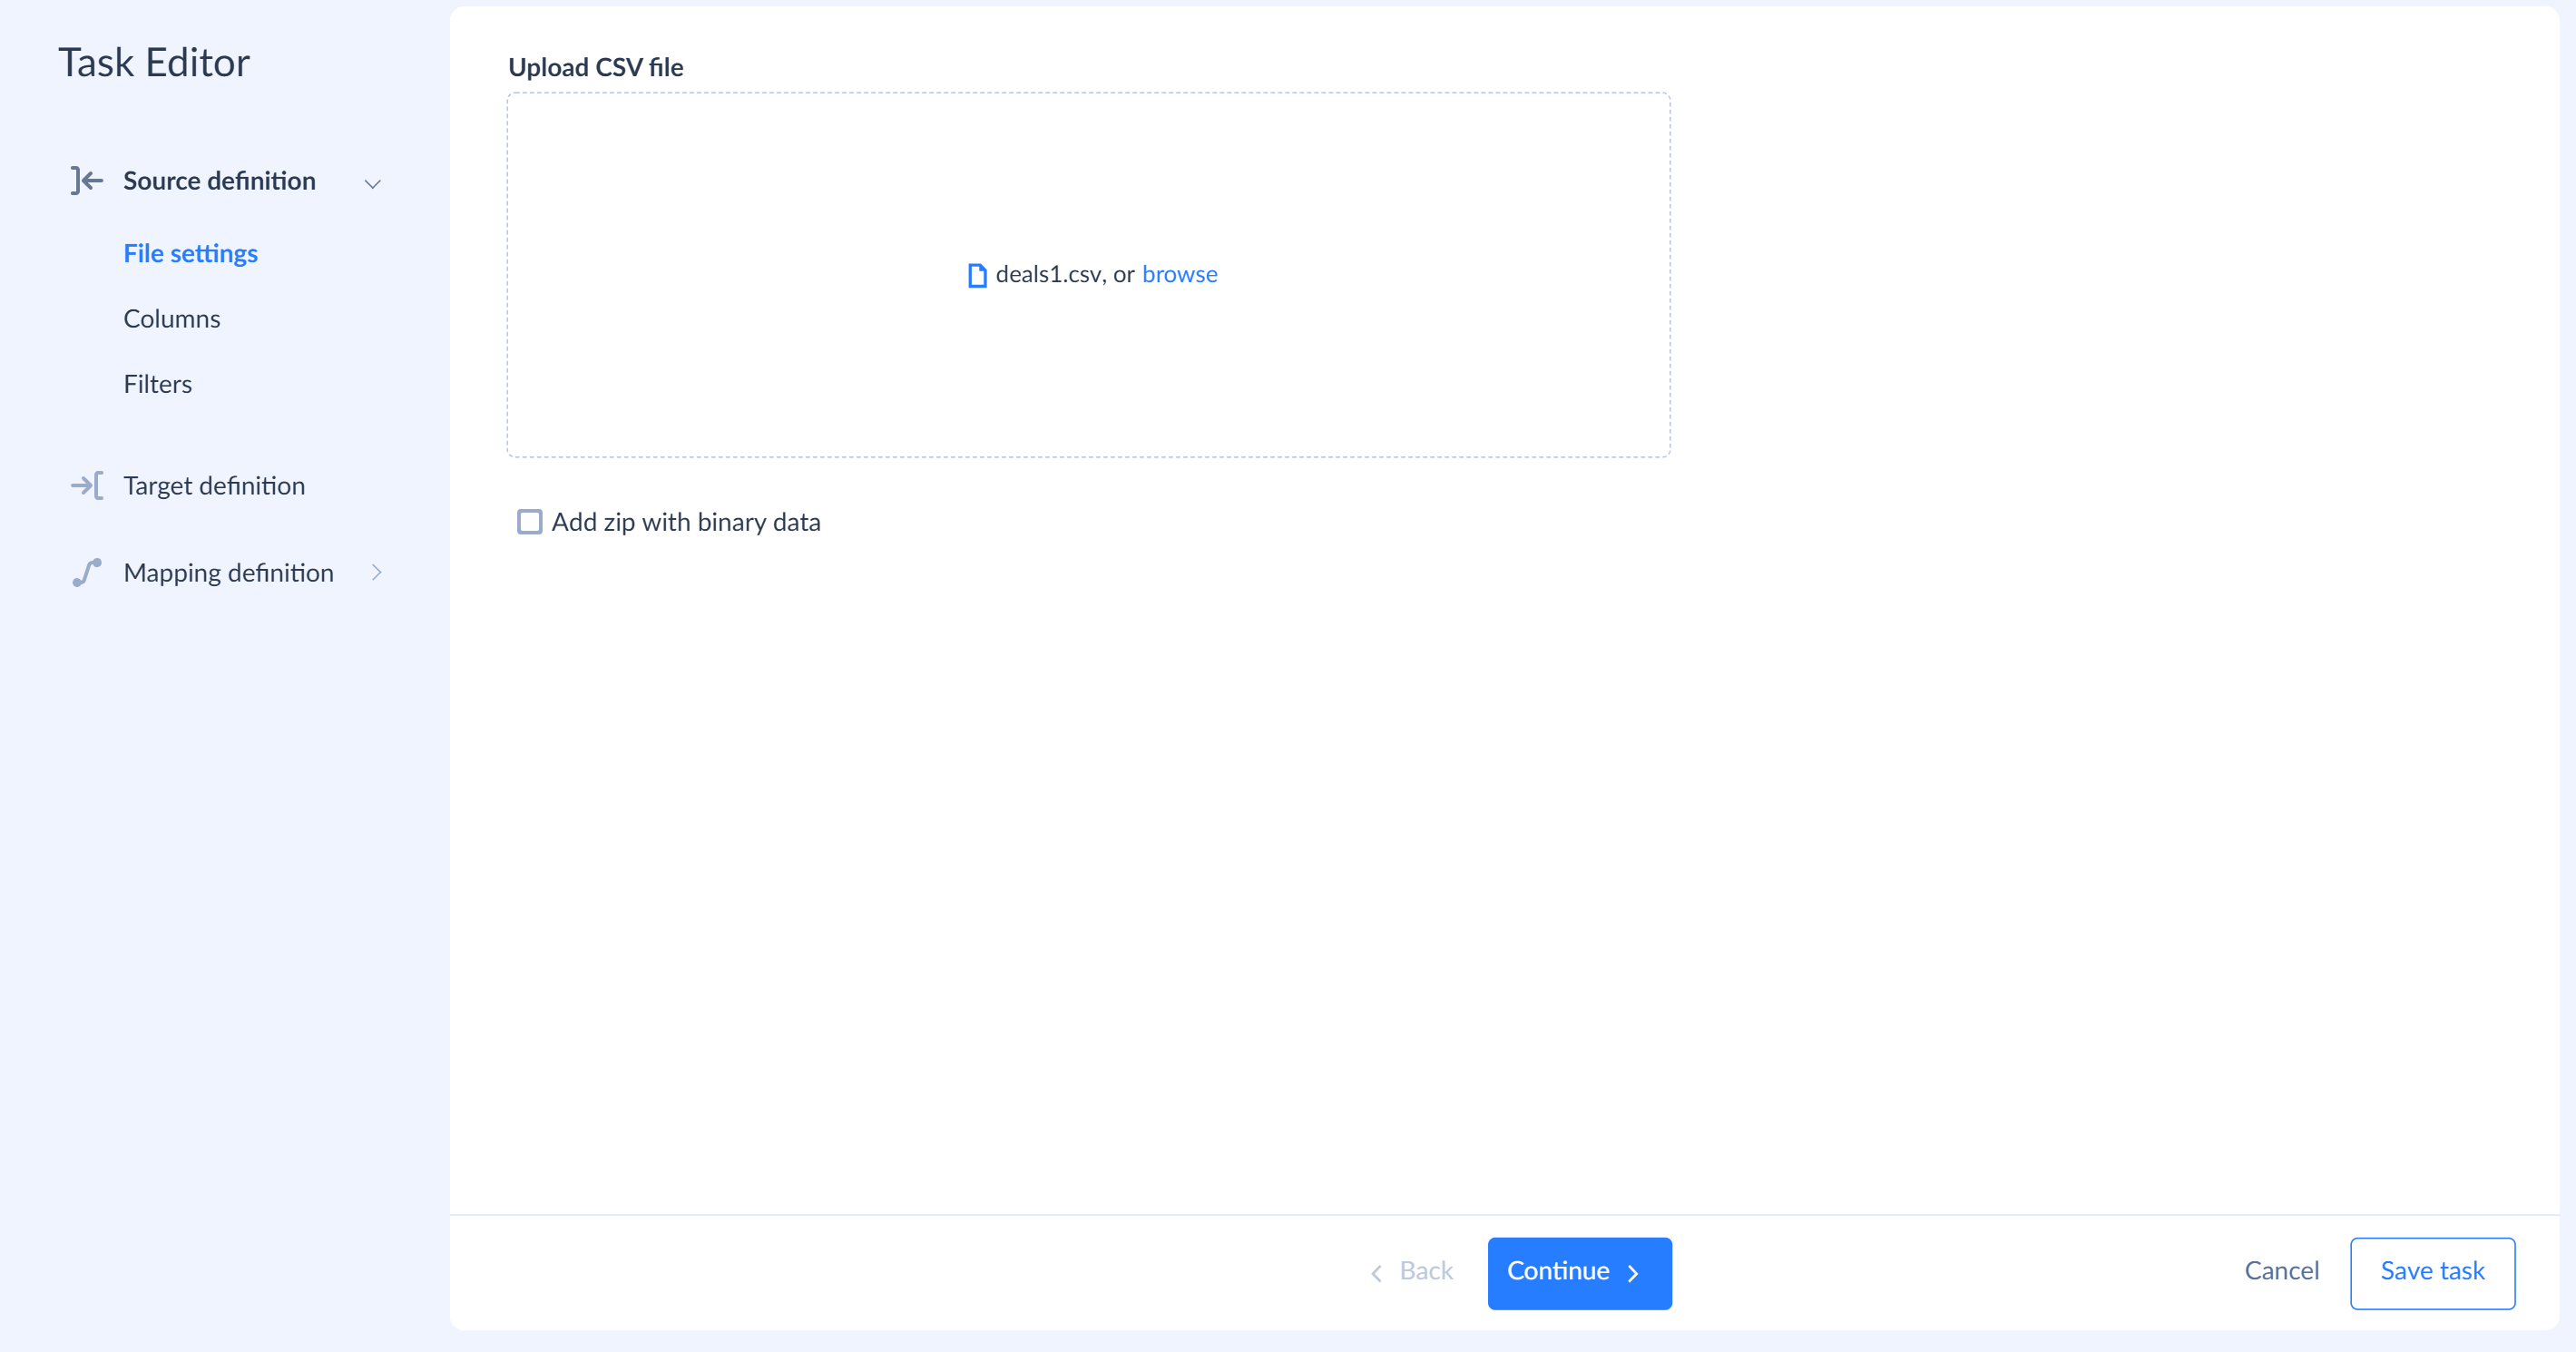
Upload deals.csv to the Upload CSV file area again. Skyvia renames the second copy to deals1.csv.
-
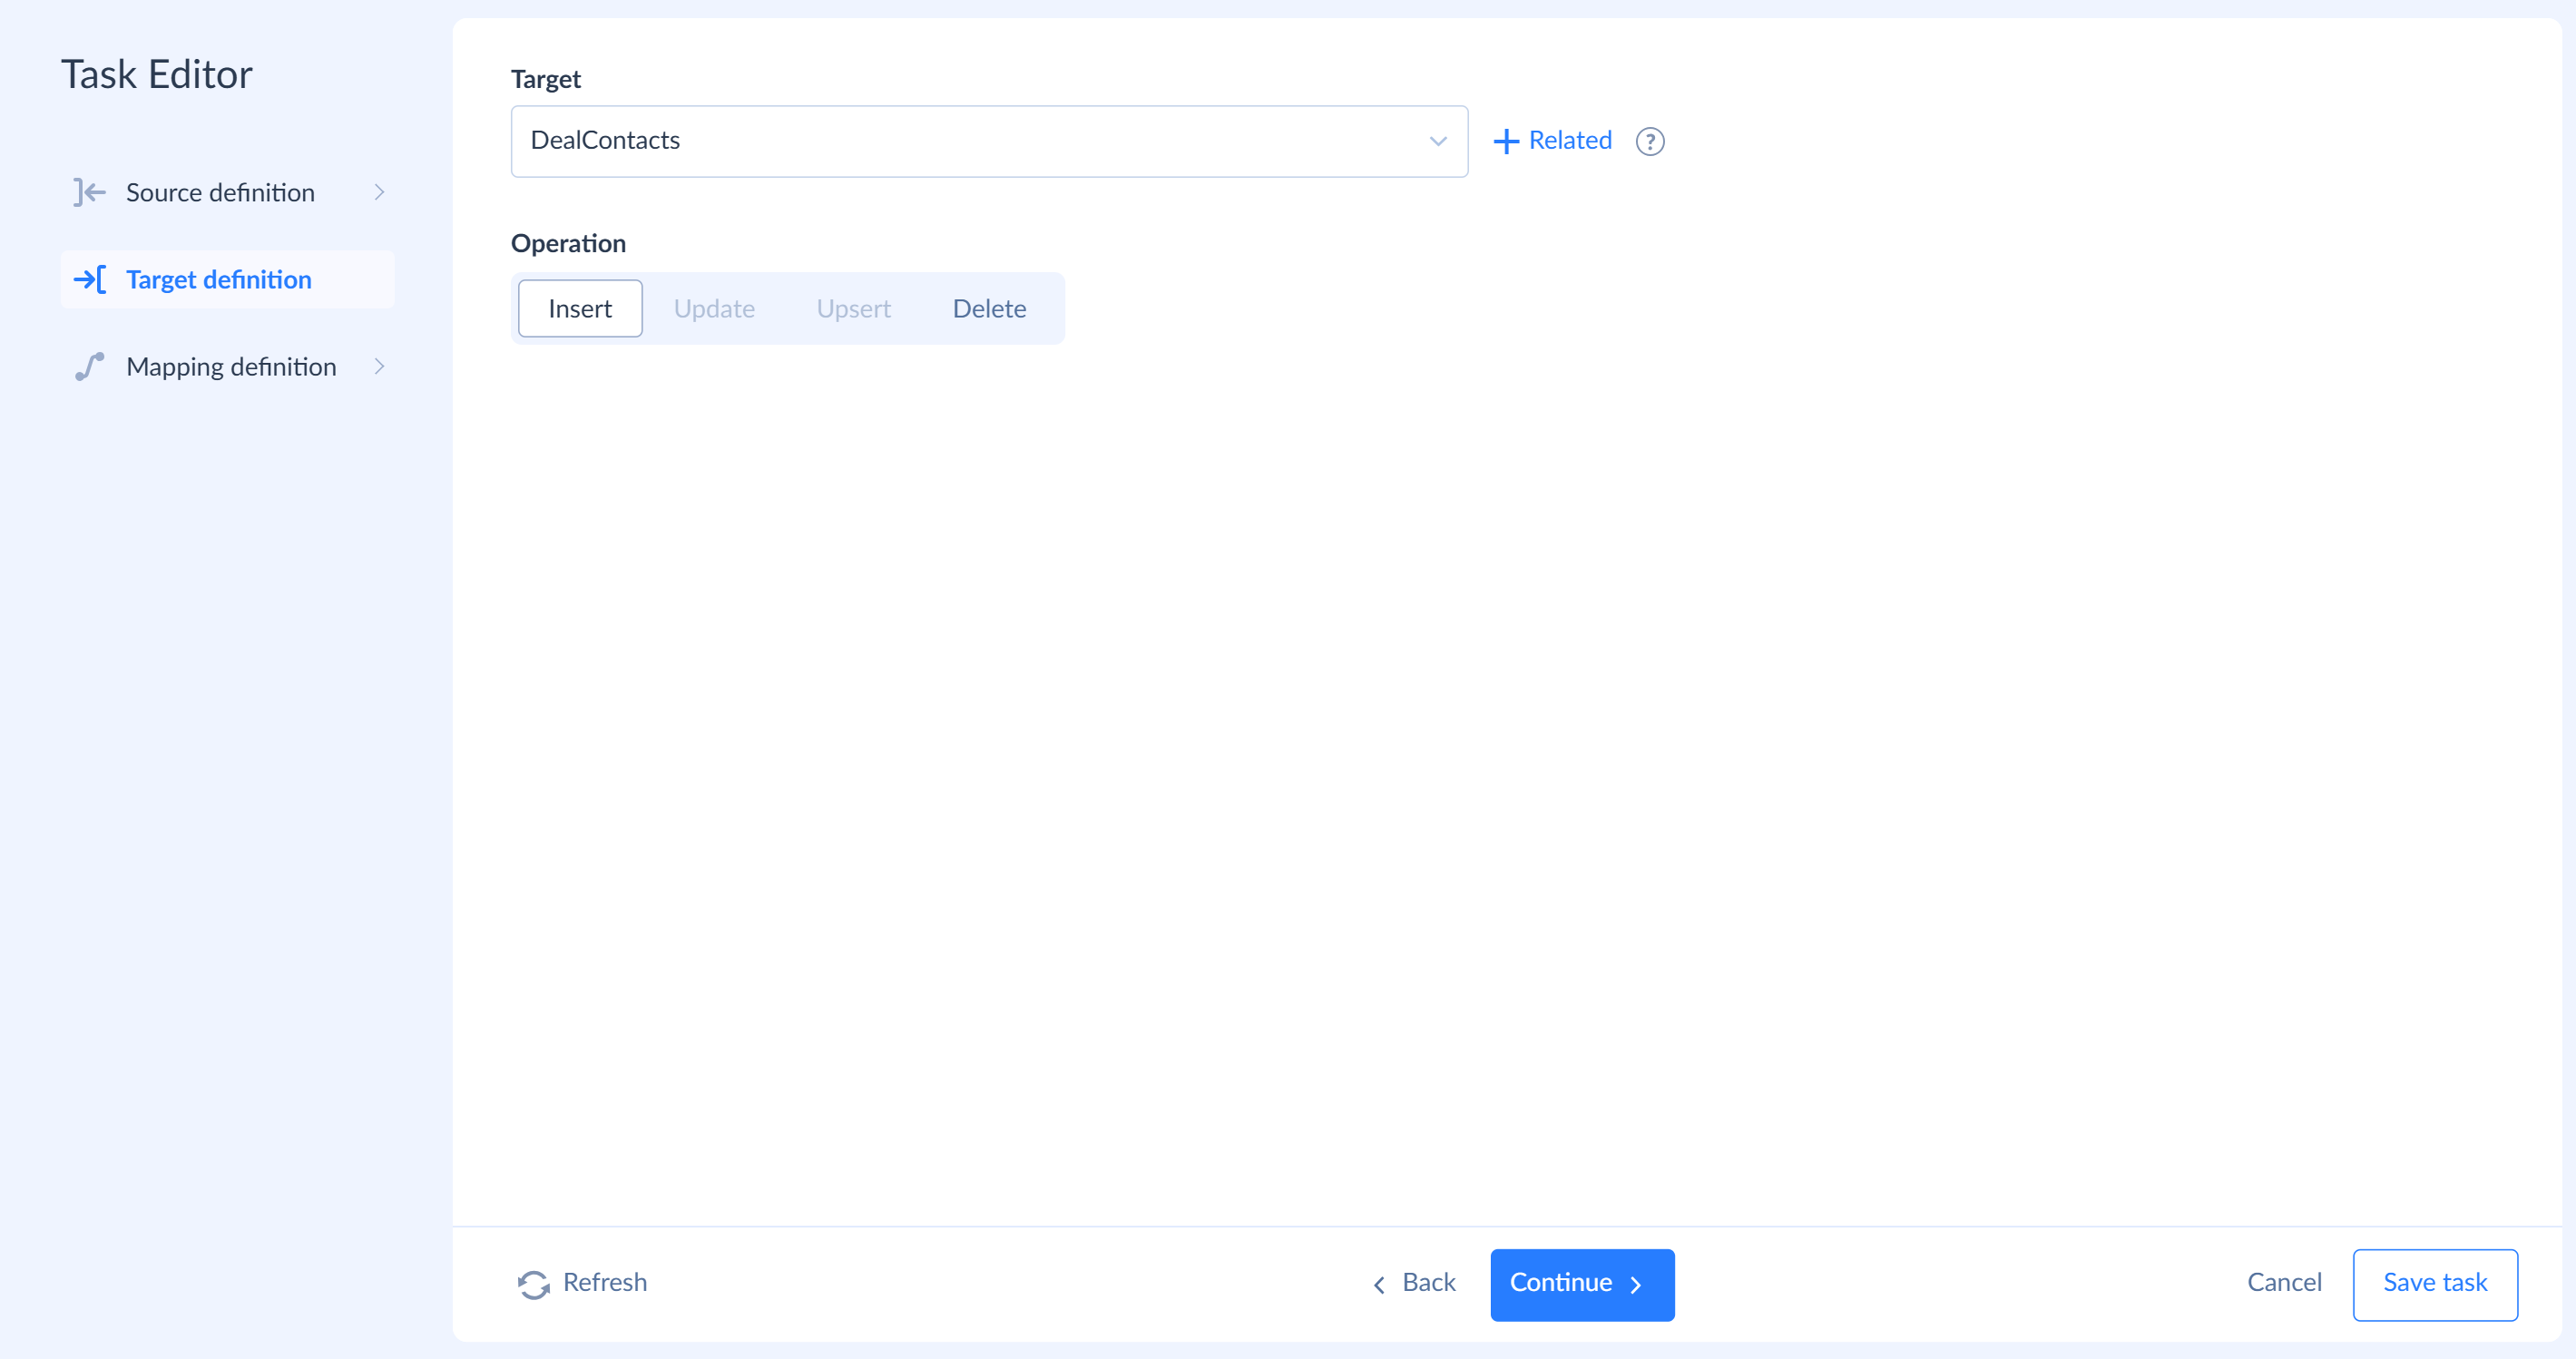
Click Target definition. In the Target list, select DealContacts and keep the Insert operation.
-
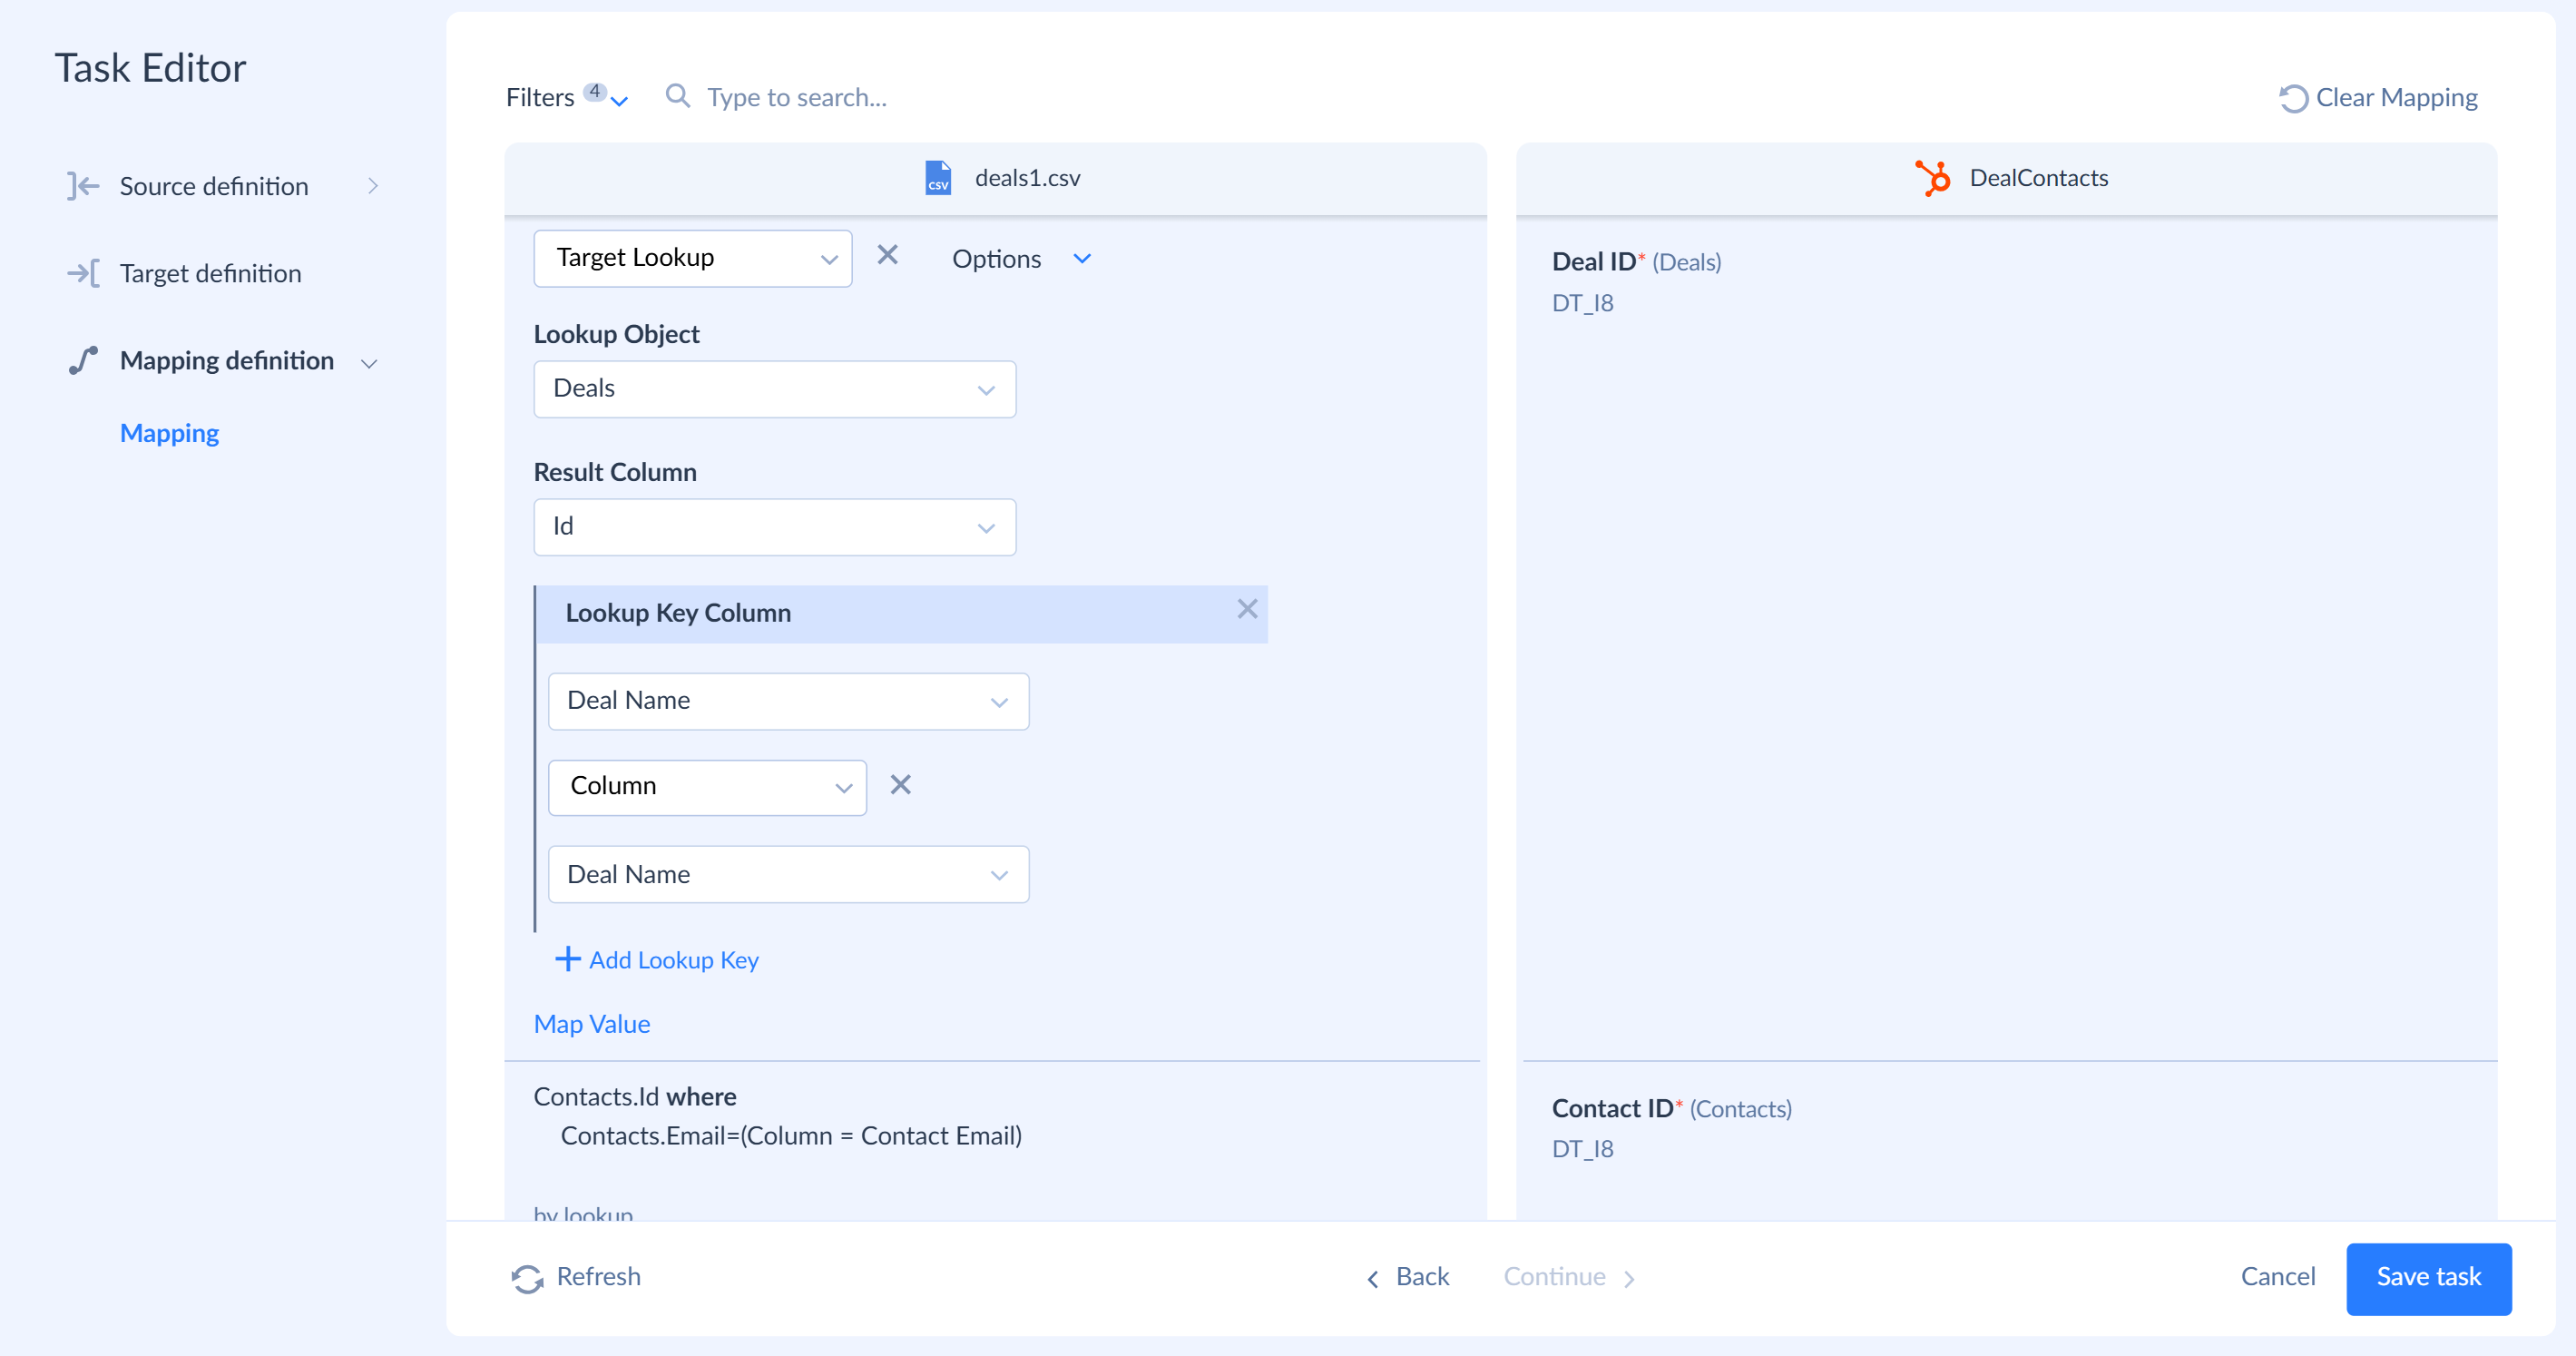
Click Mapping definition. The file has no HubSpot IDs, so get them with a target lookup: it finds a record in HubSpot by a value from the file and returns that record's ID. Click the Deal ID column and select Target Lookup. Then specify the lookup:
- Lookup Object: Deals
- Result Column: Id
- Under Lookup Key Column, select Deal Name. Keep Column and select the Deal Name column of the file.
-
Click the Contact ID column and select Target Lookup. Then specify the lookup:
- Lookup Object: Contacts
- Result Column: Id
- Under Lookup Key Column, select Email. Keep Column and select the Contact Email column of the file.
-
Click Save task.
Run the Import
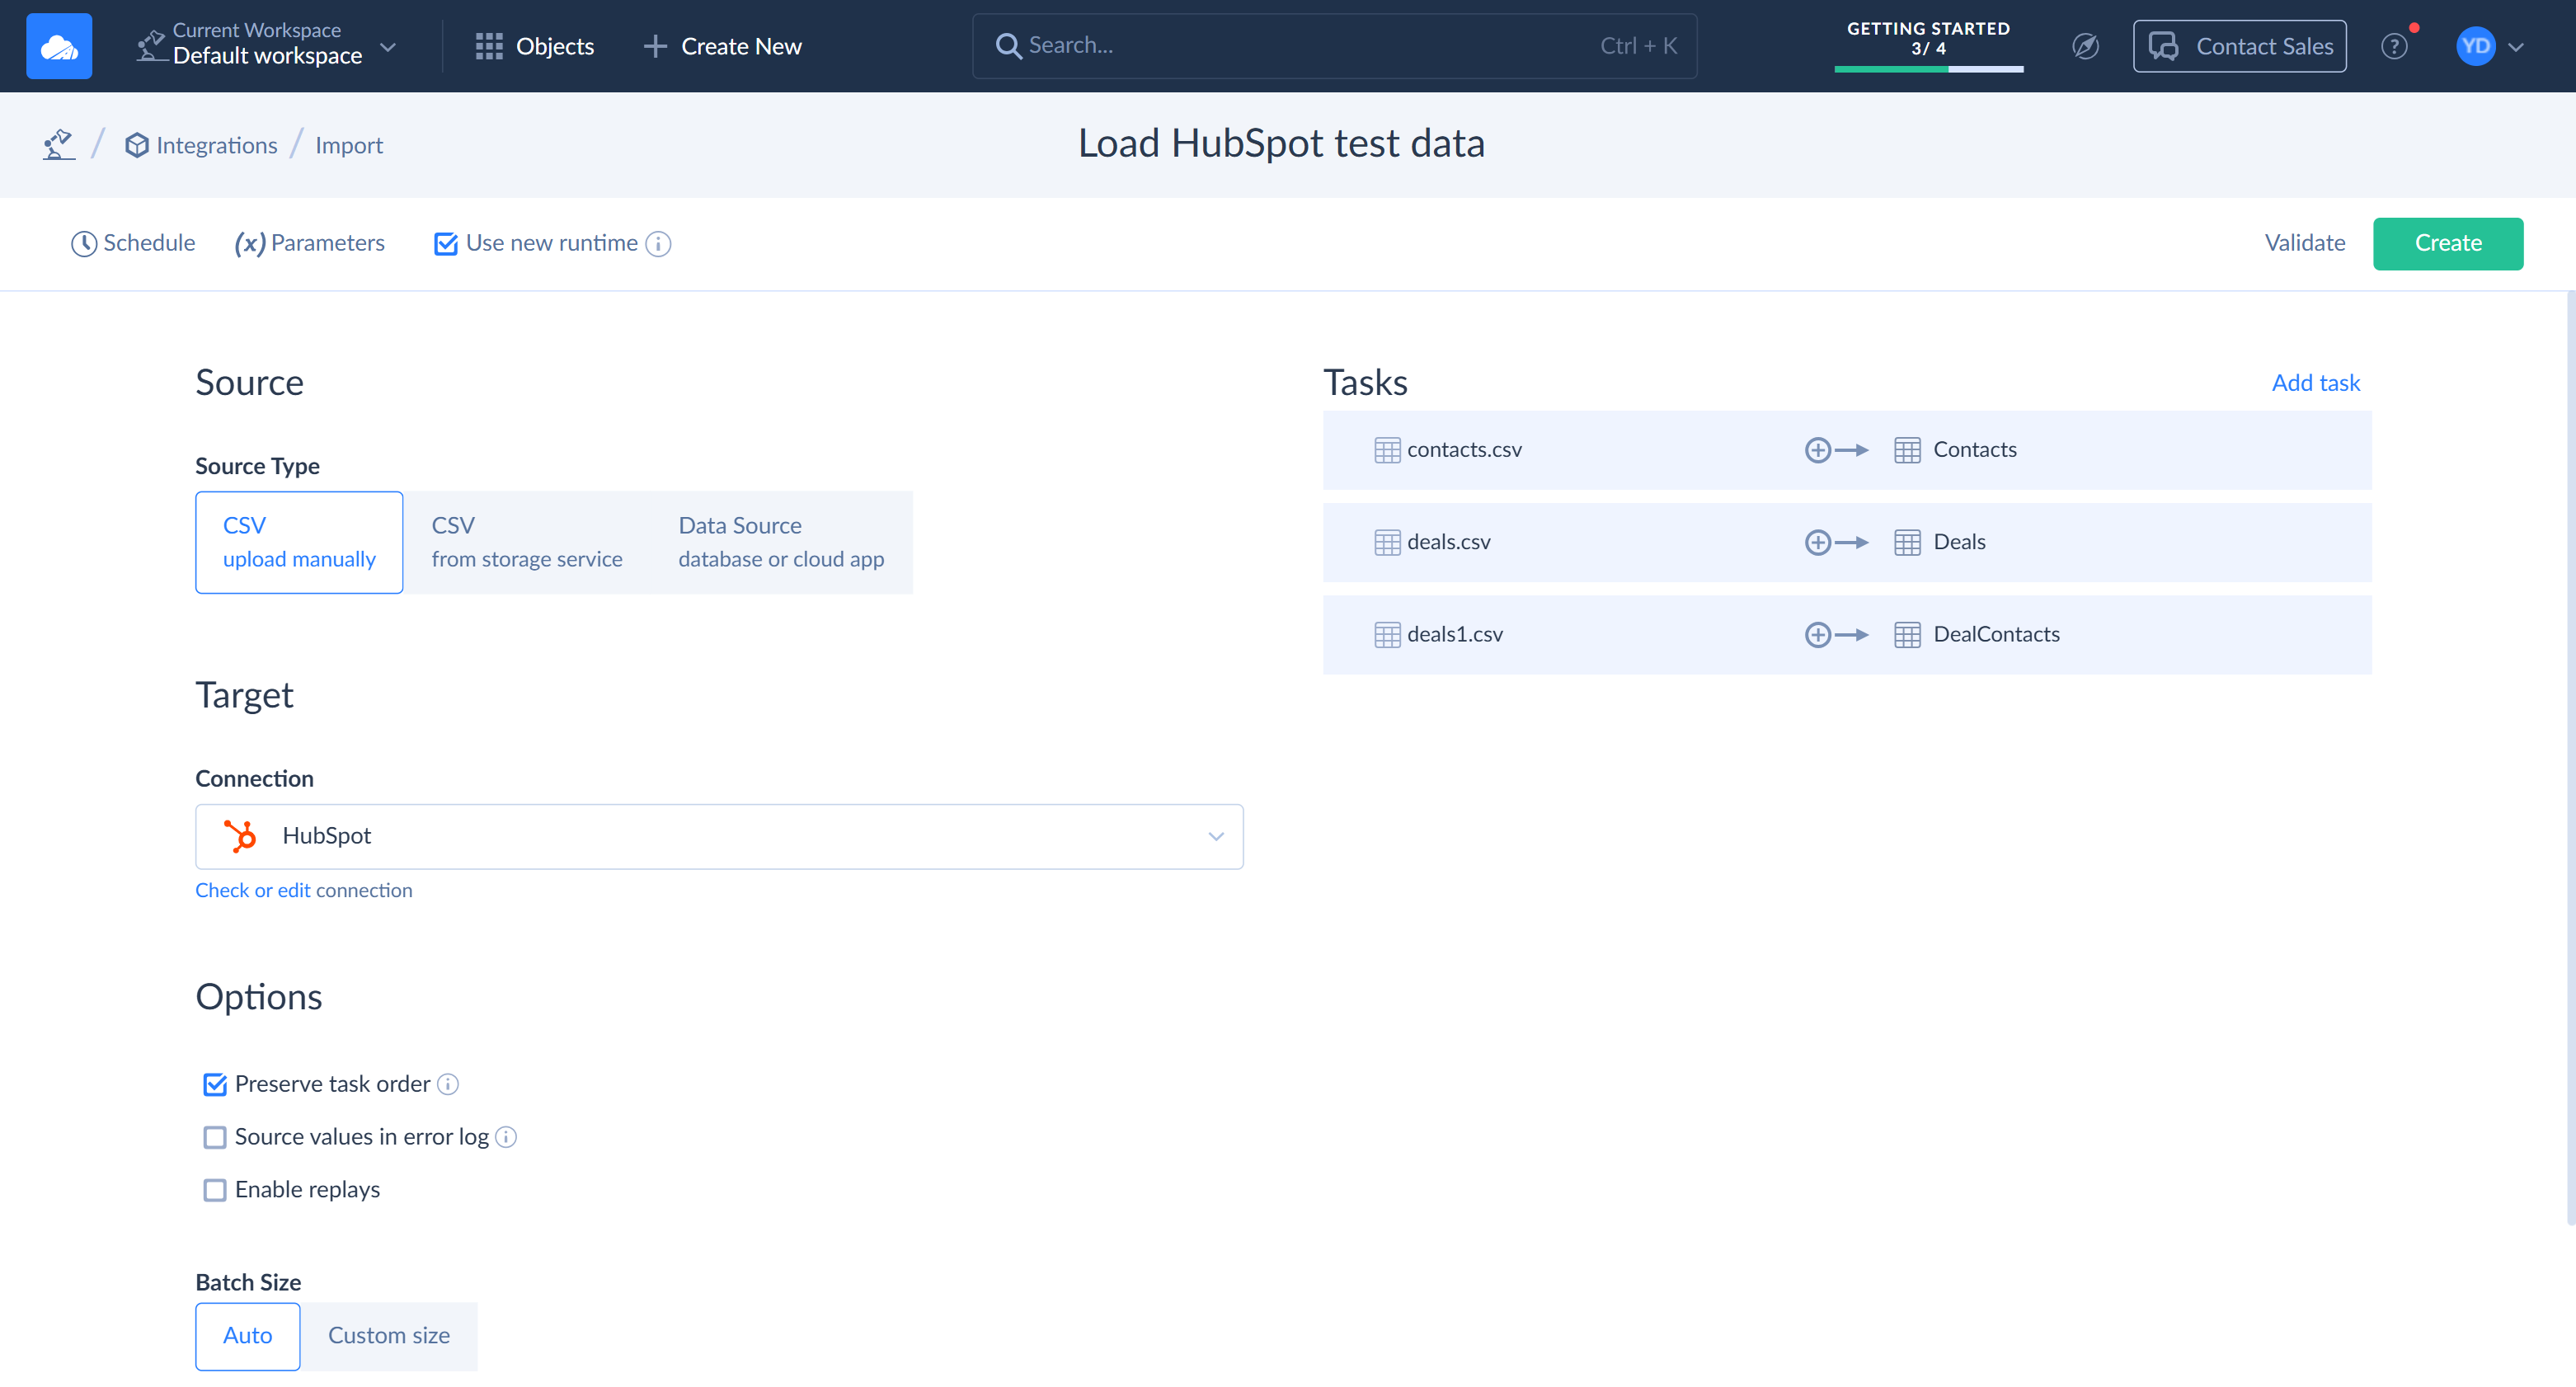
The import now has three tasks. Because Preserve task order is on, Skyvia runs them from top to bottom, so contacts and deals are added before the link task looks them up.
-
Click Create to save the import.
-
Click Run.
-
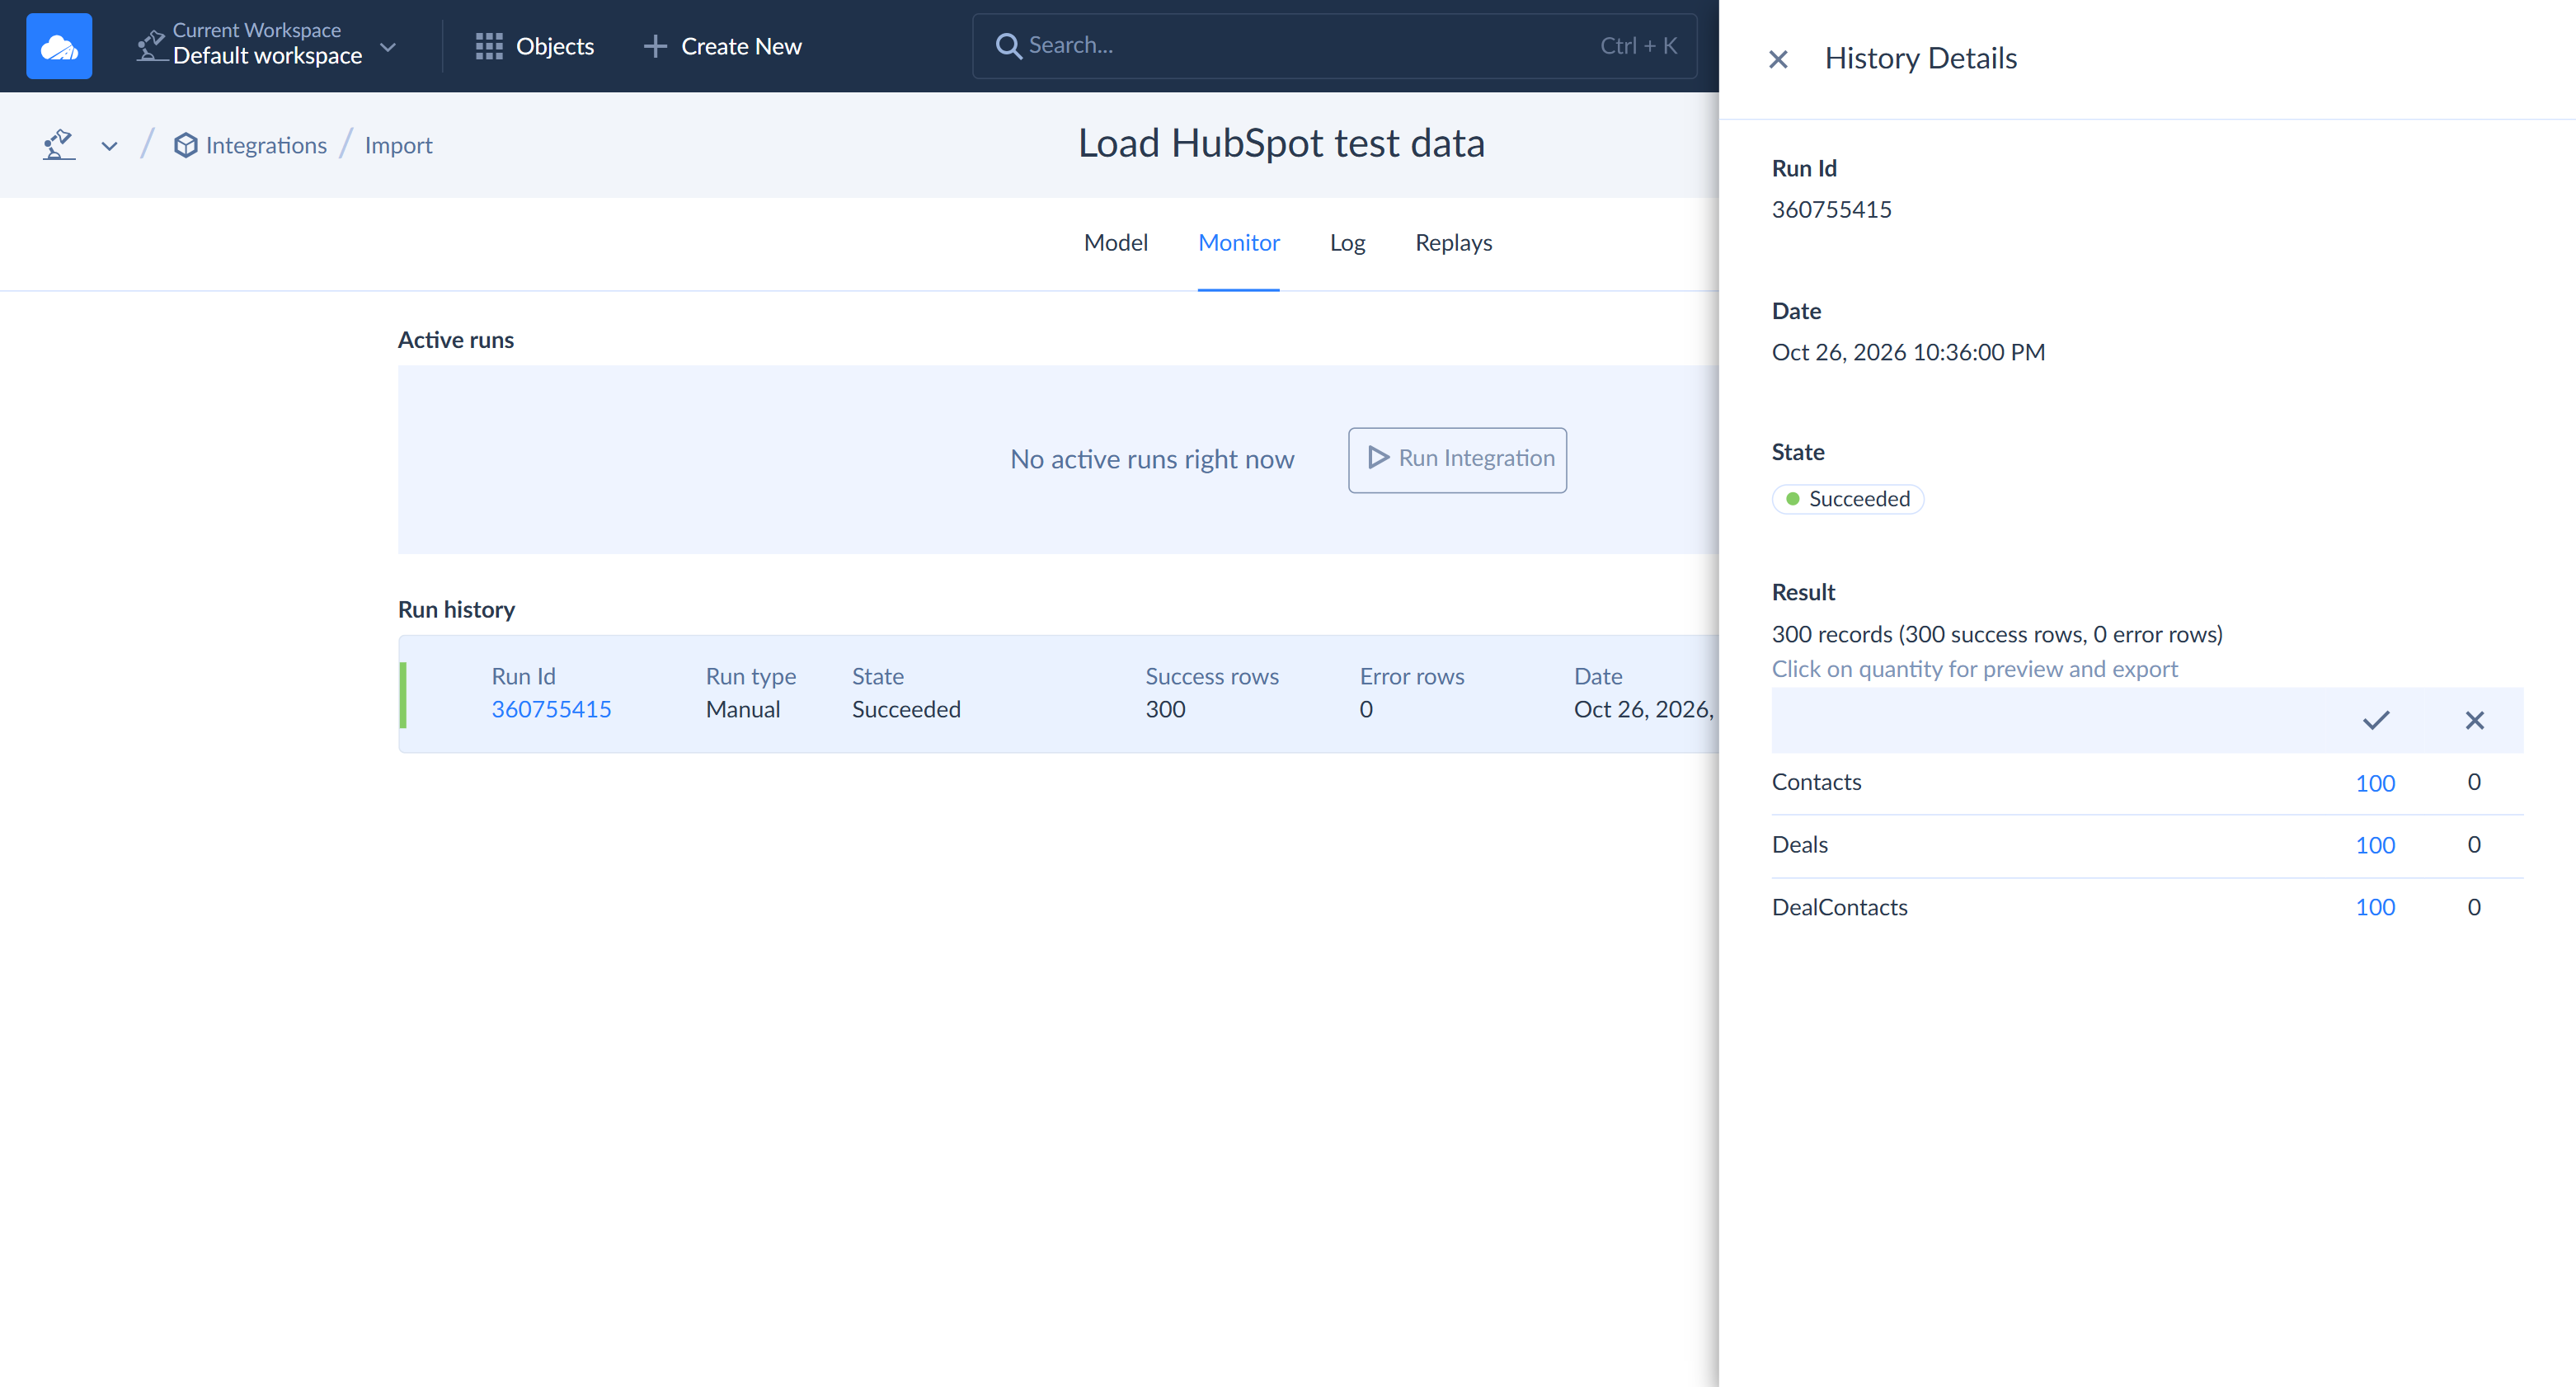
When the run completes, open the Monitor tab. It lists every run of the integration with the number of successfully processed and failed rows. Click the run in Run history to see the results for each task. Each task should show 100 success rows and 0 error rows.
Replicate HubSpot Data
A replication copies HubSpot objects to Snowflake and creates the tables for them. The first run loads all records. Later runs load only the records that changed since the previous run.
Create the Replication
-
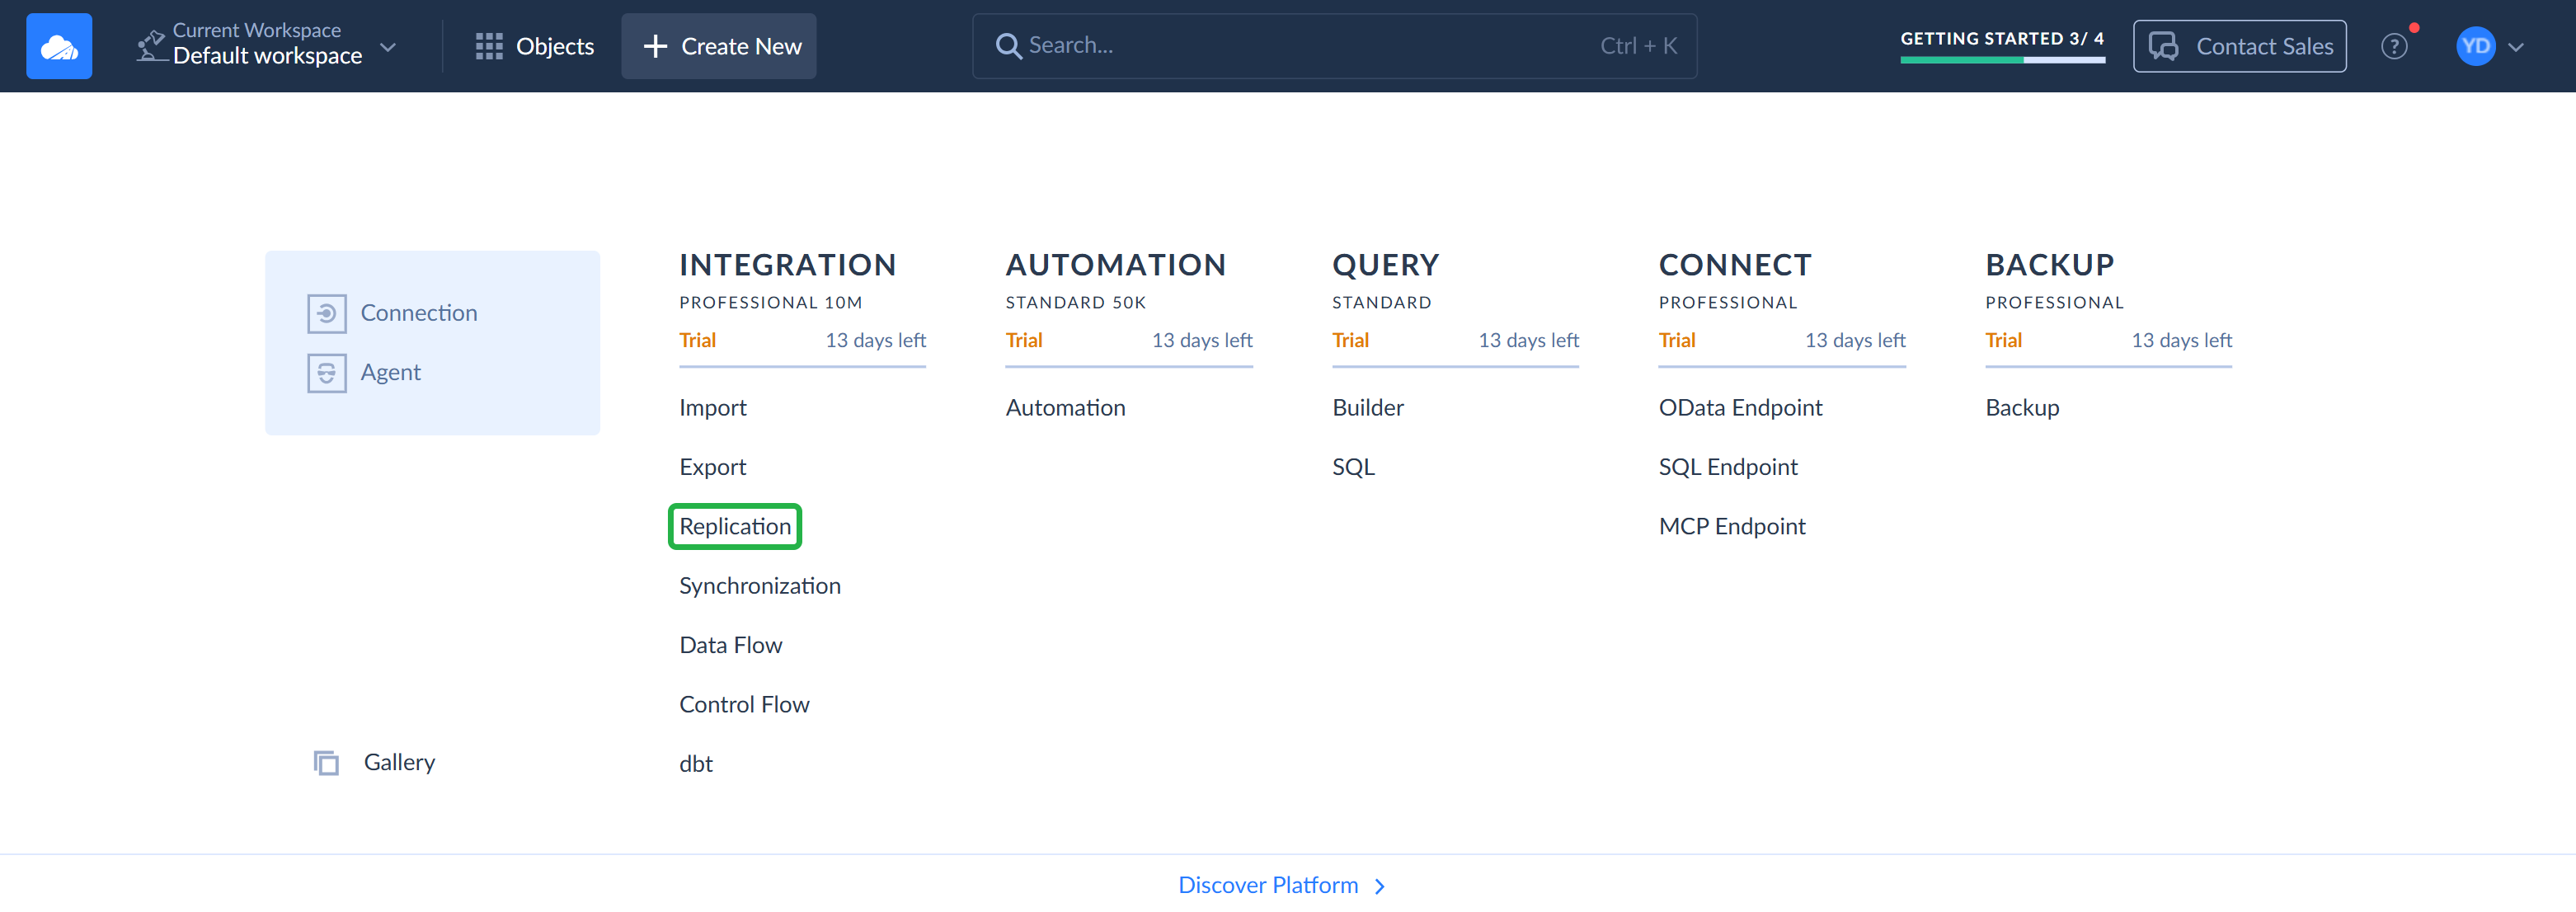
Click + Create New in the top menu and select Replication. The replication wizard opens.
-
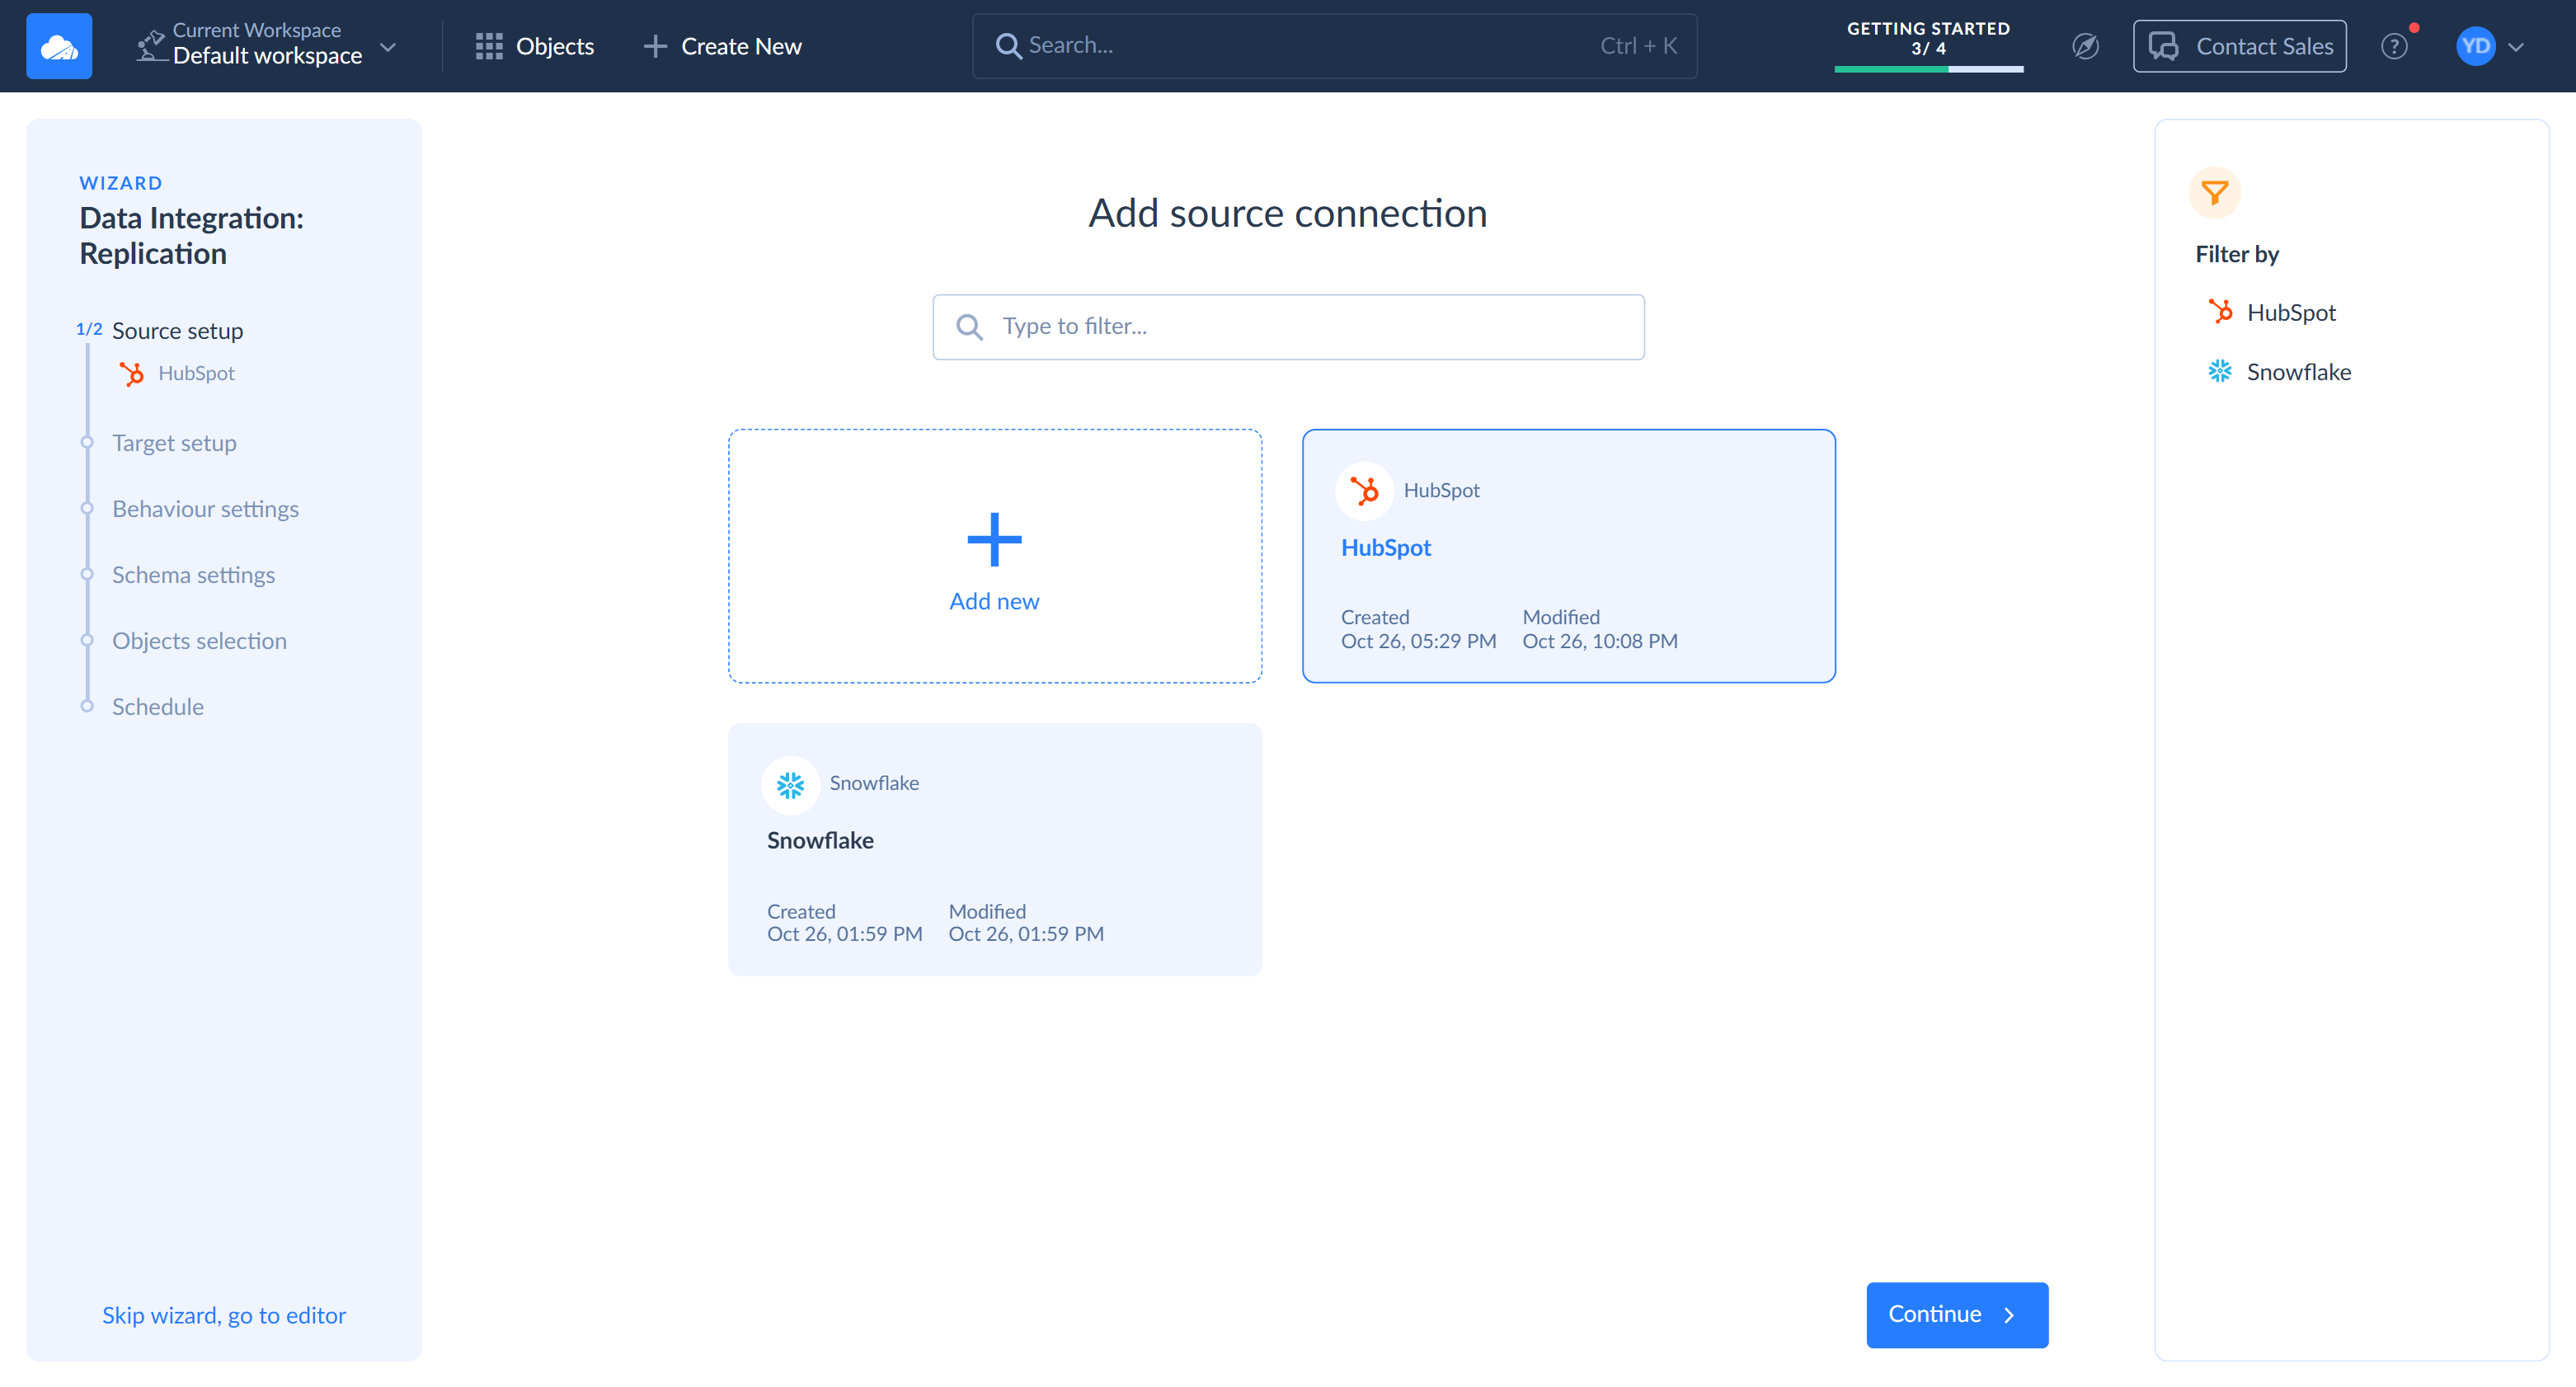
On the Source setup step, select the HubSpot connection and click Continue.
-
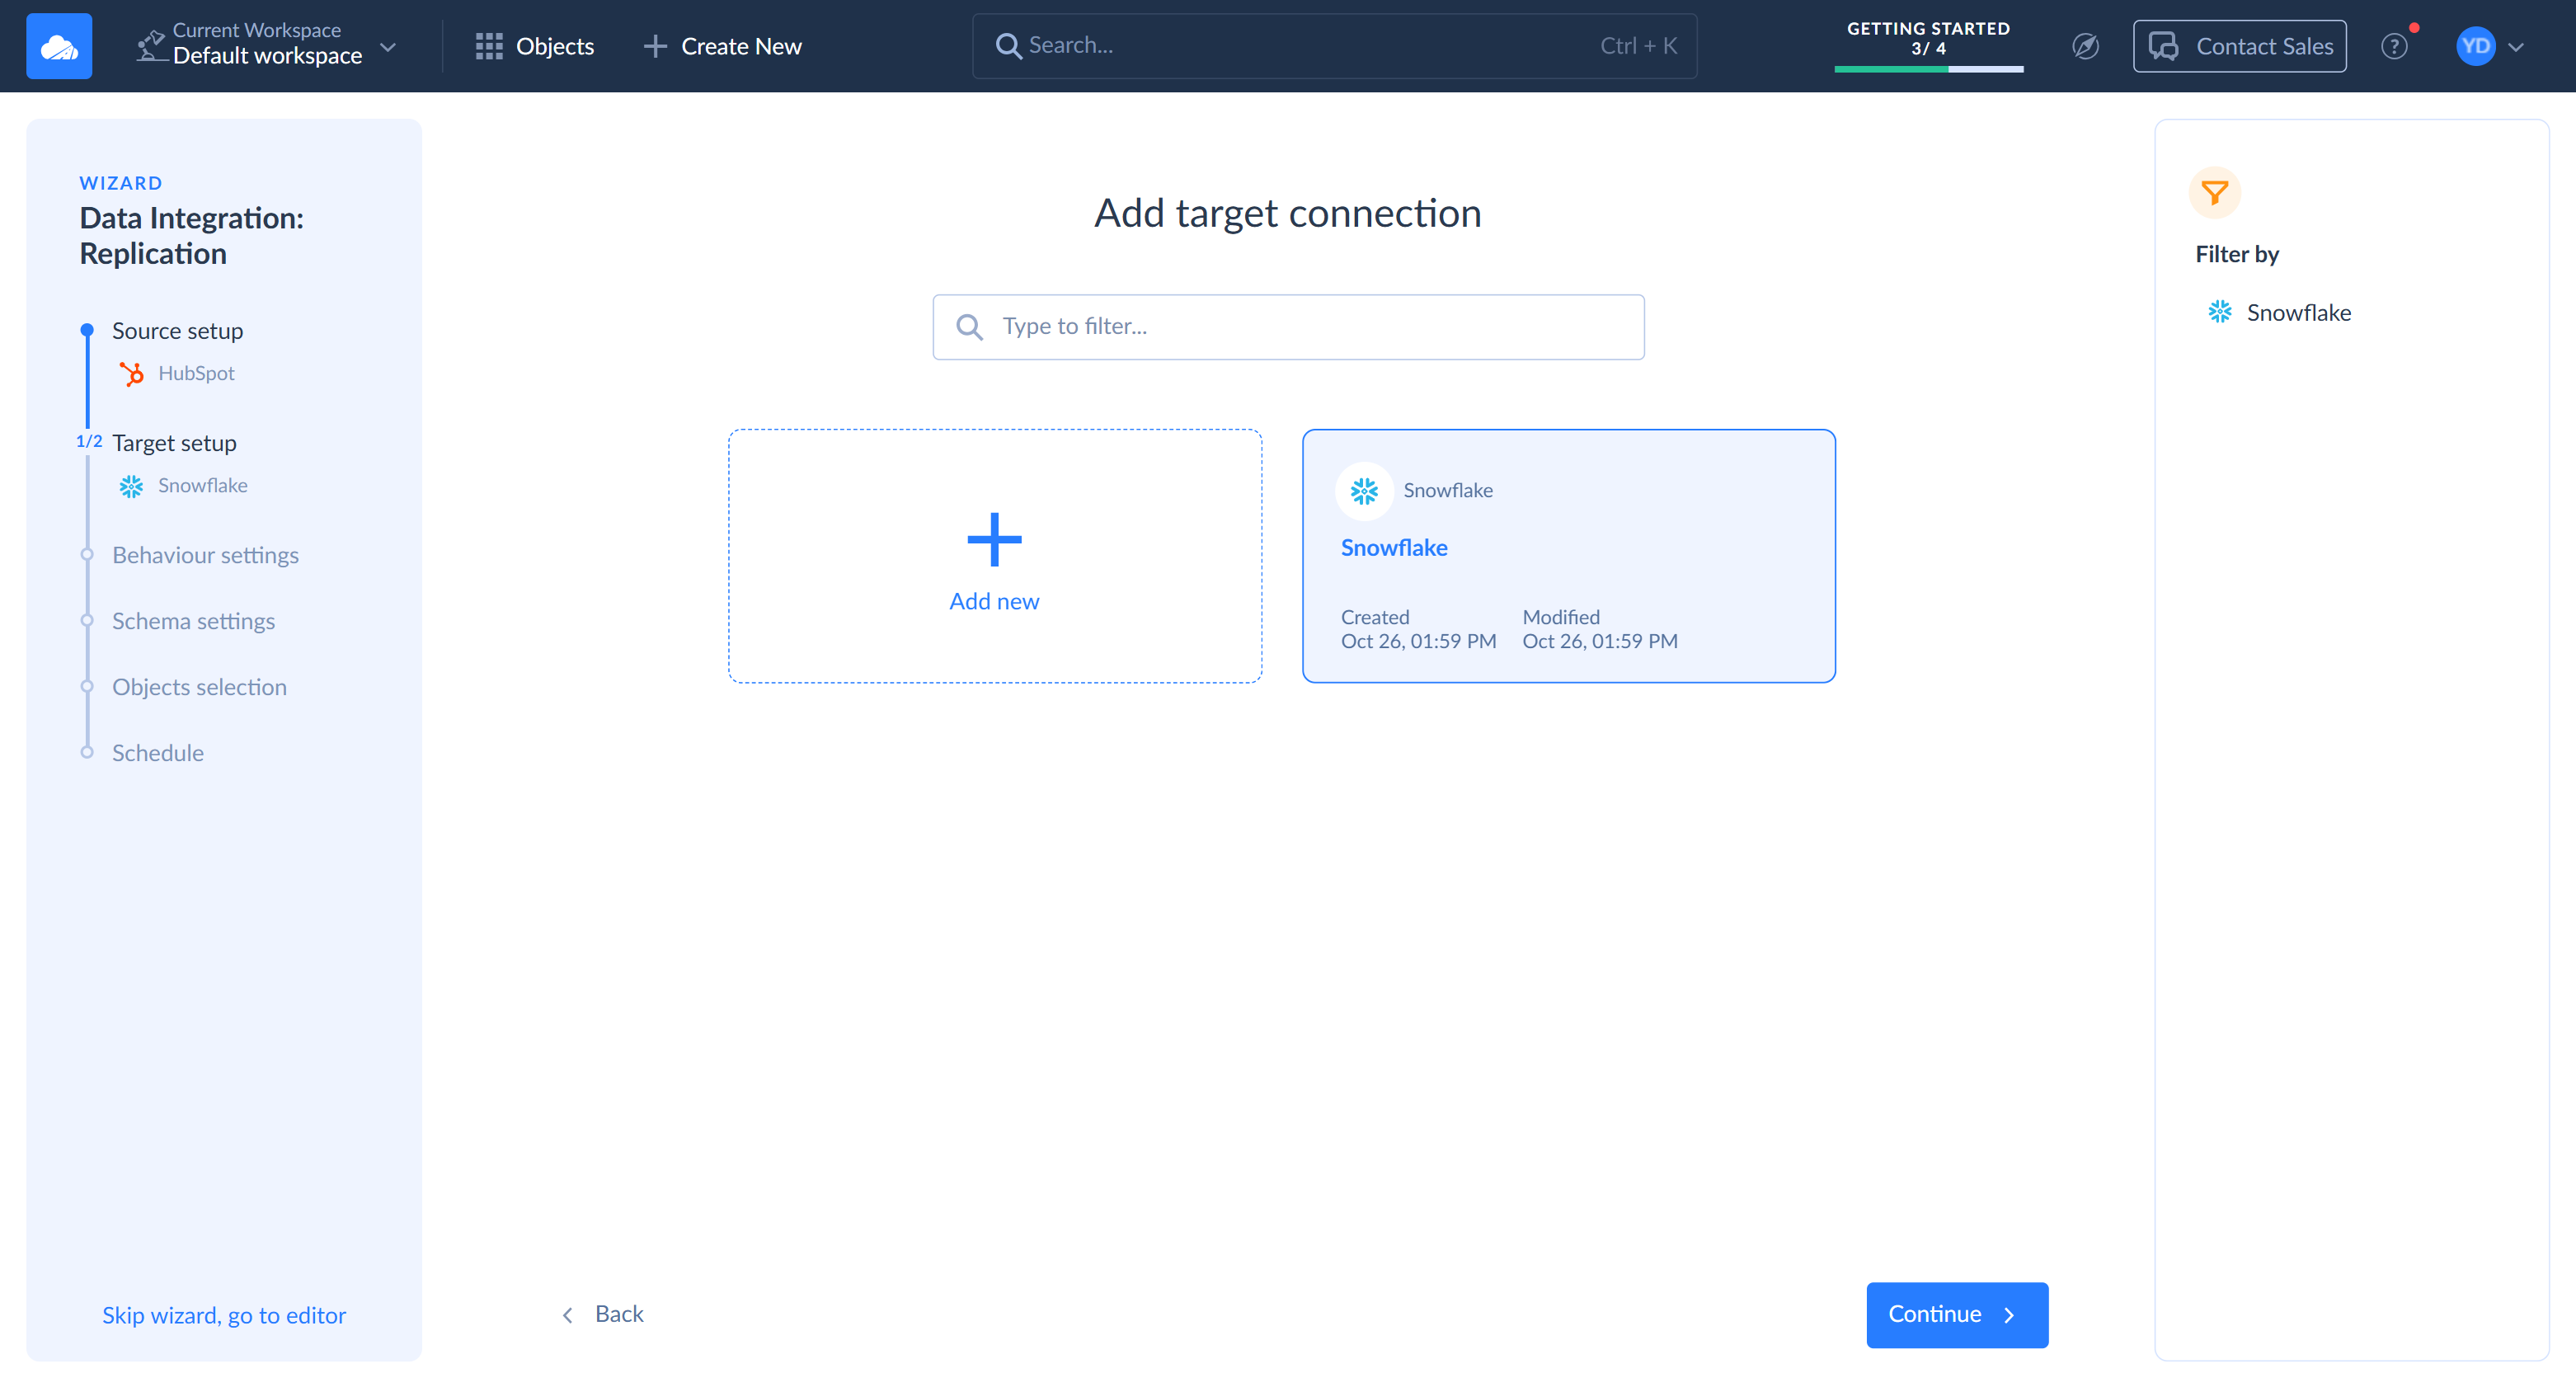
On the Target setup step, select the Snowflake connection and click Continue.
-
On the Behaviour settings step, keep the default settings. With Incremental Updates, later runs load only the changes. With Create new, Skyvia creates the tables in the
RAWschema for you. When Apply changes is selected, Skyvia adds new HubSpot fields to these tables when they appear. Click Continue.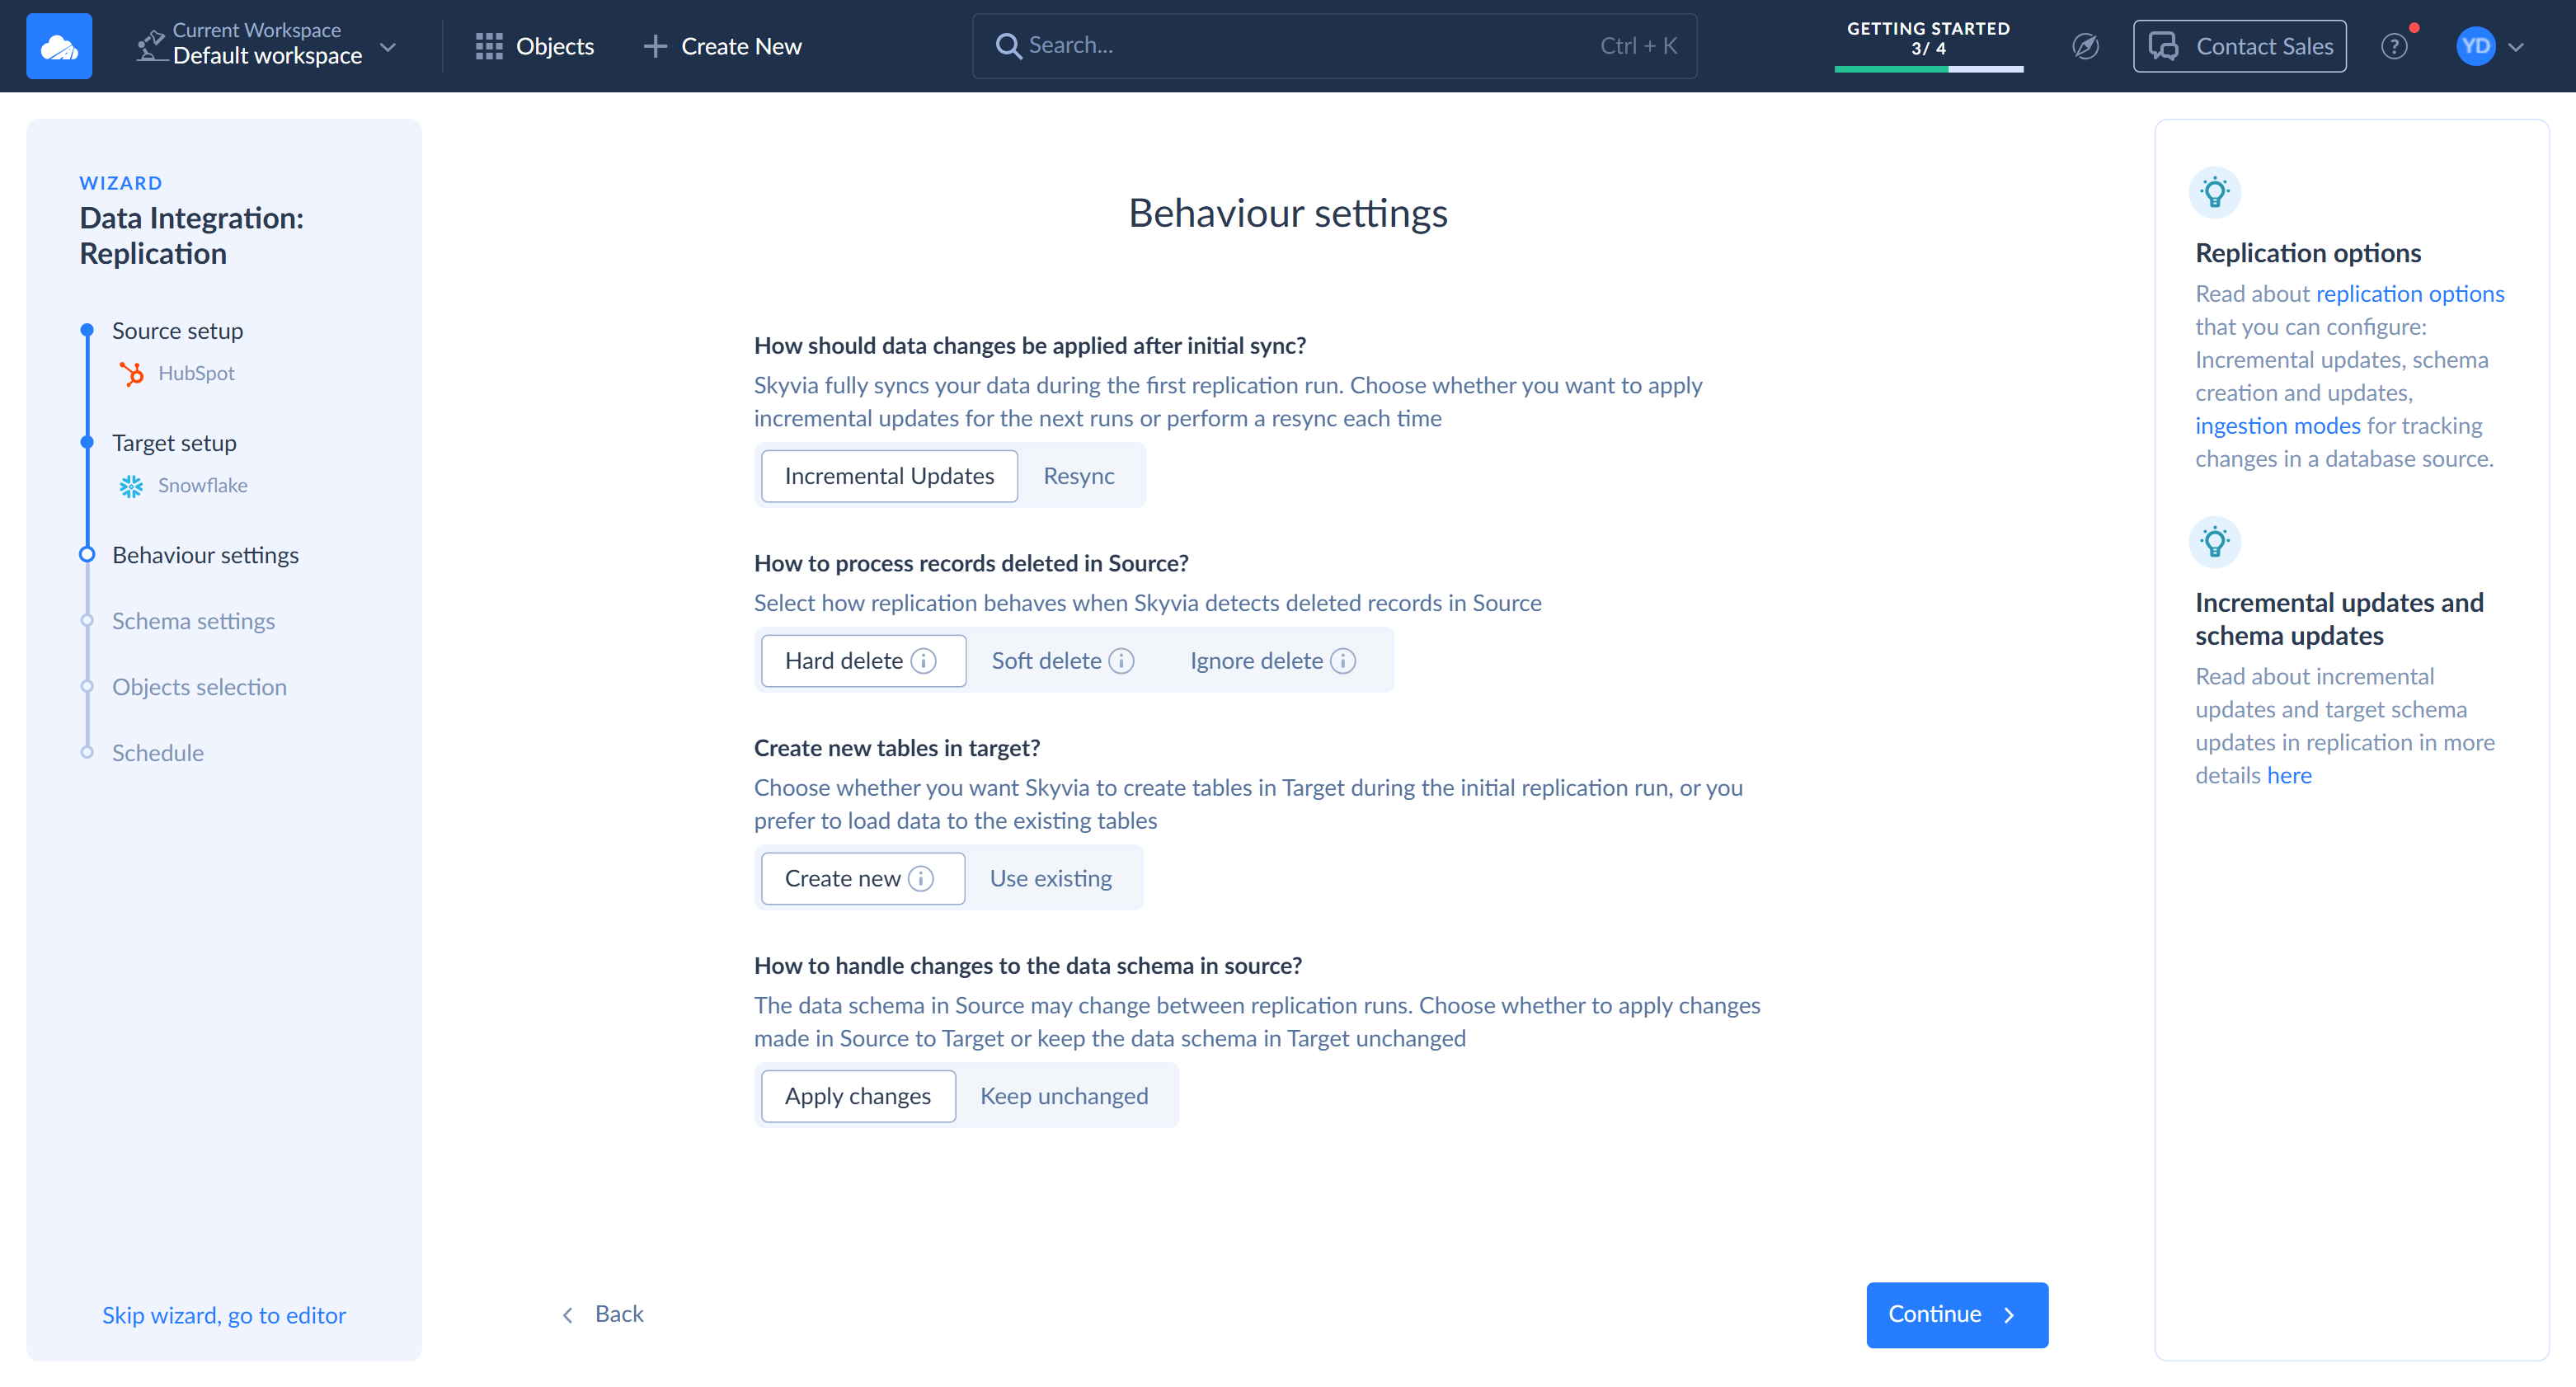
-
On the Schema settings step, set Case to Upper and select Sanitize Table/Column Names. With these settings, Skyvia creates upper-case table names, such as
DEALS, that you can query without quotes. In column names, it replaces spaces with underscores but keeps the case, so the Deal Name field becomes the"Deal_Name"column. In SQL, put column names in double quotes. Click Continue.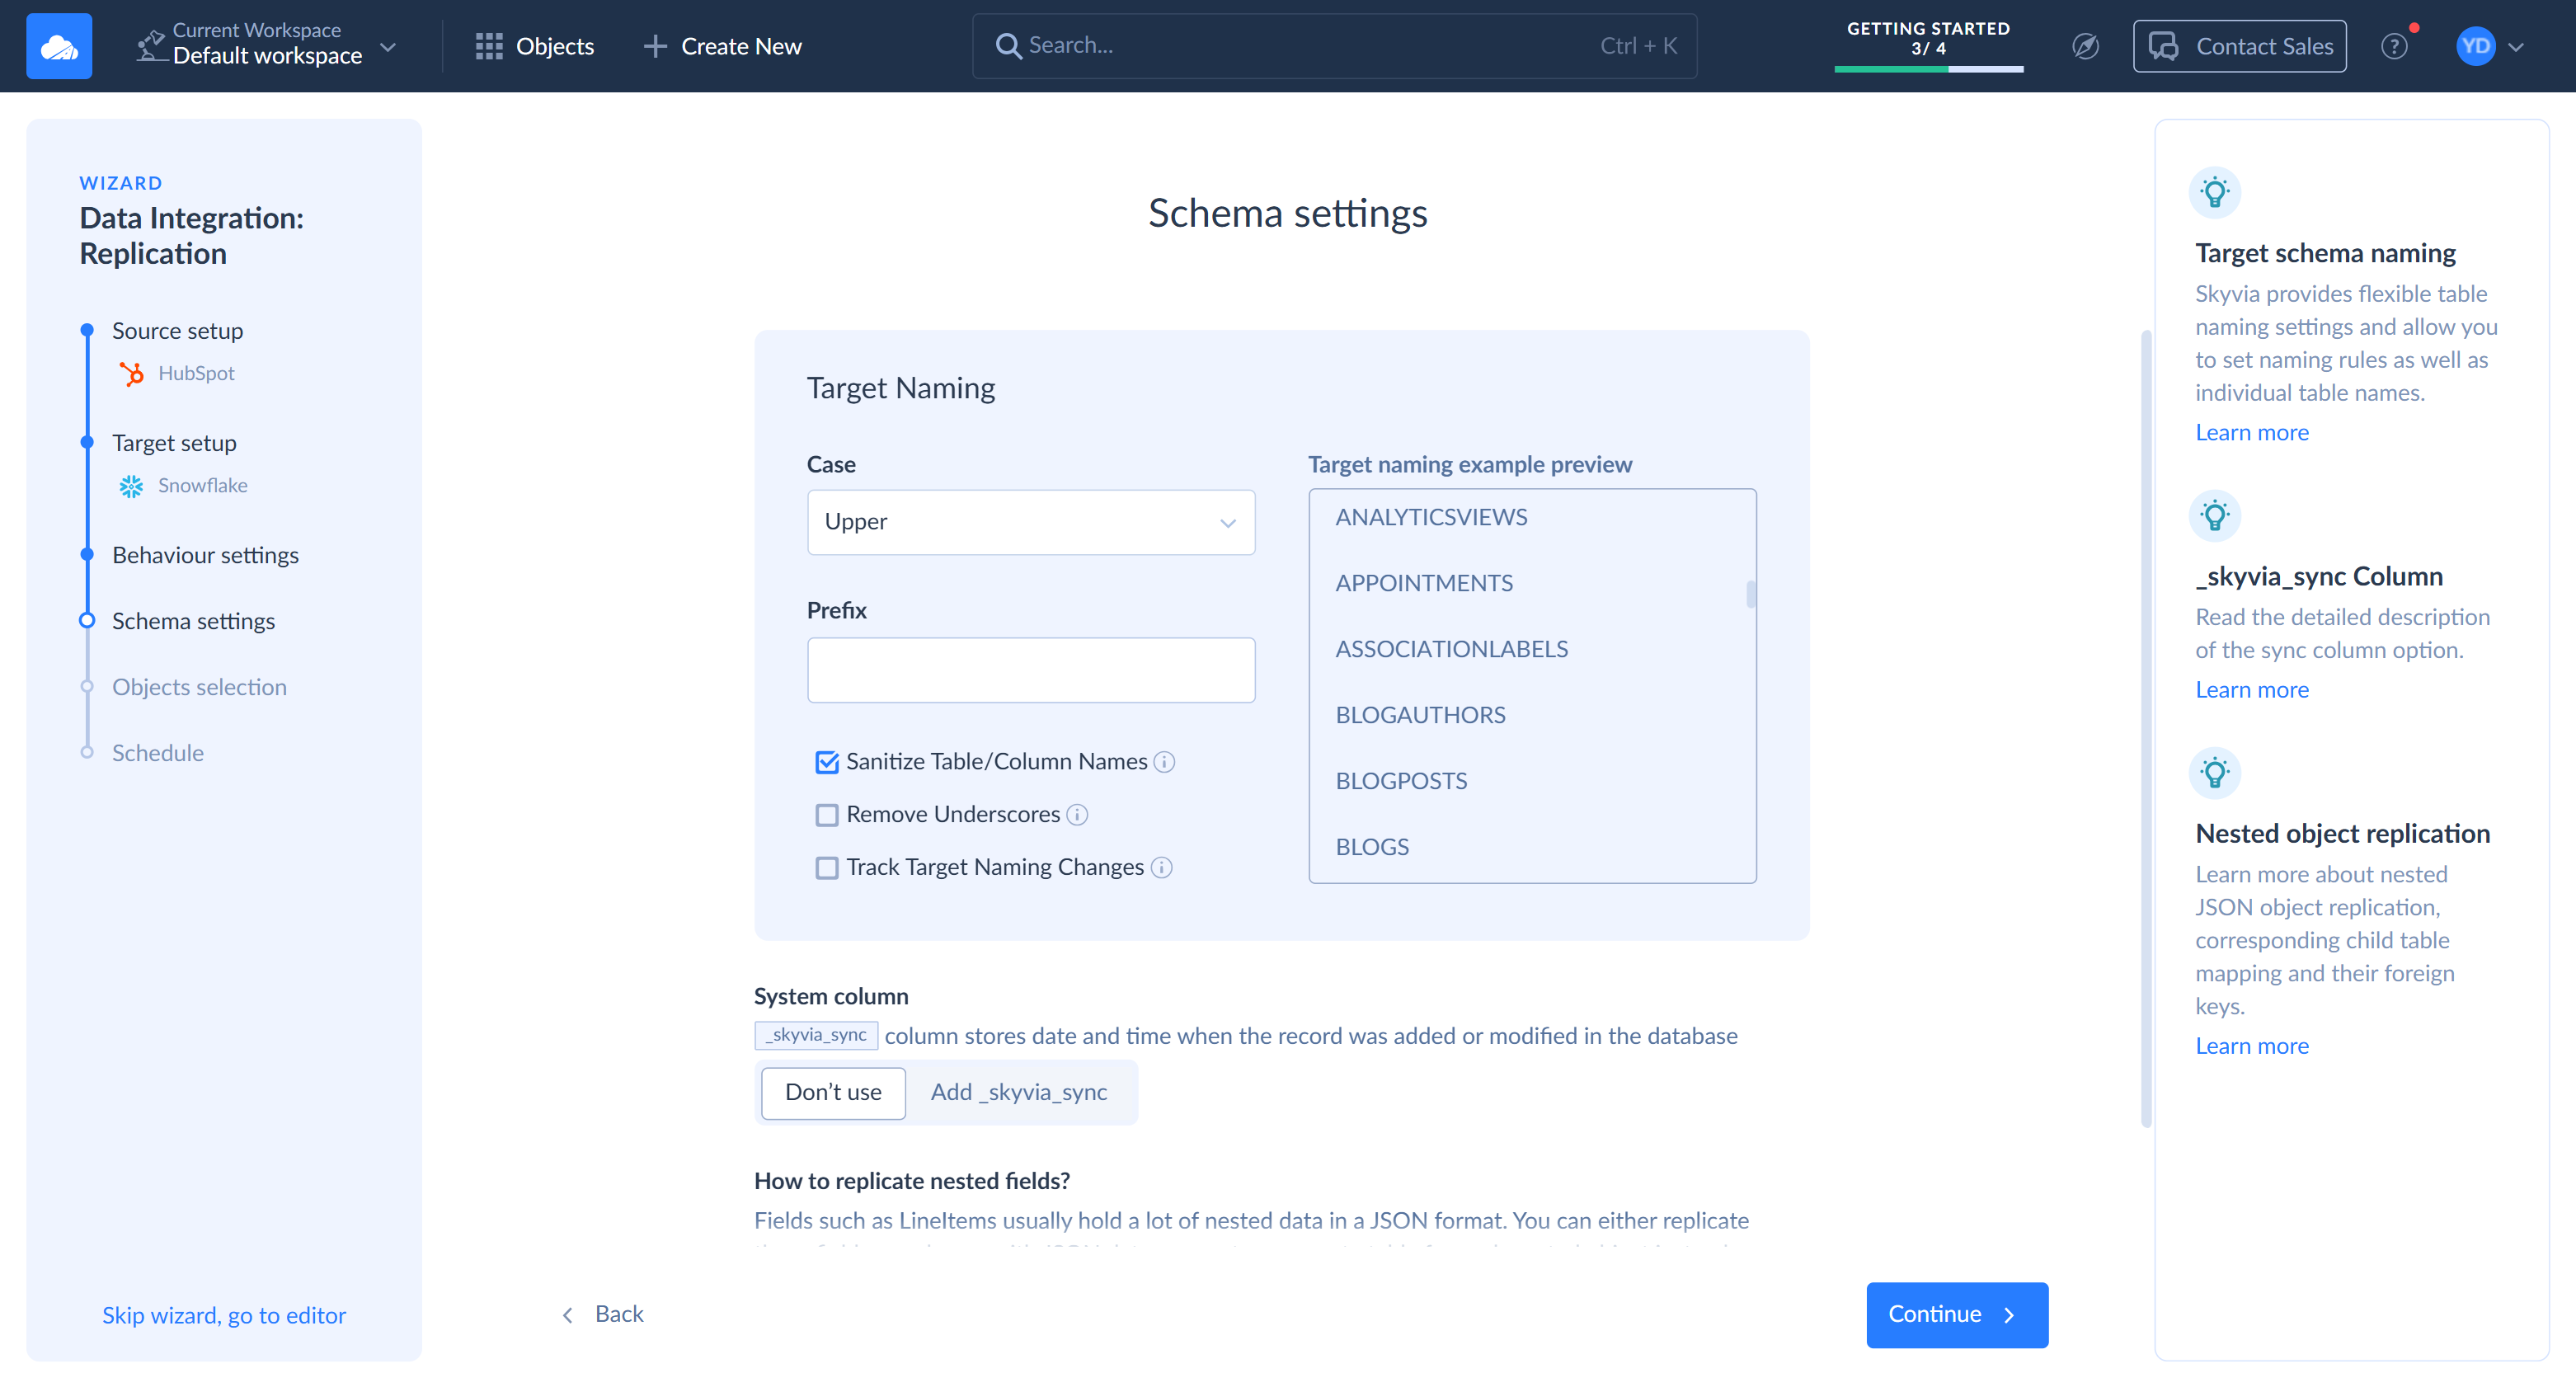
-
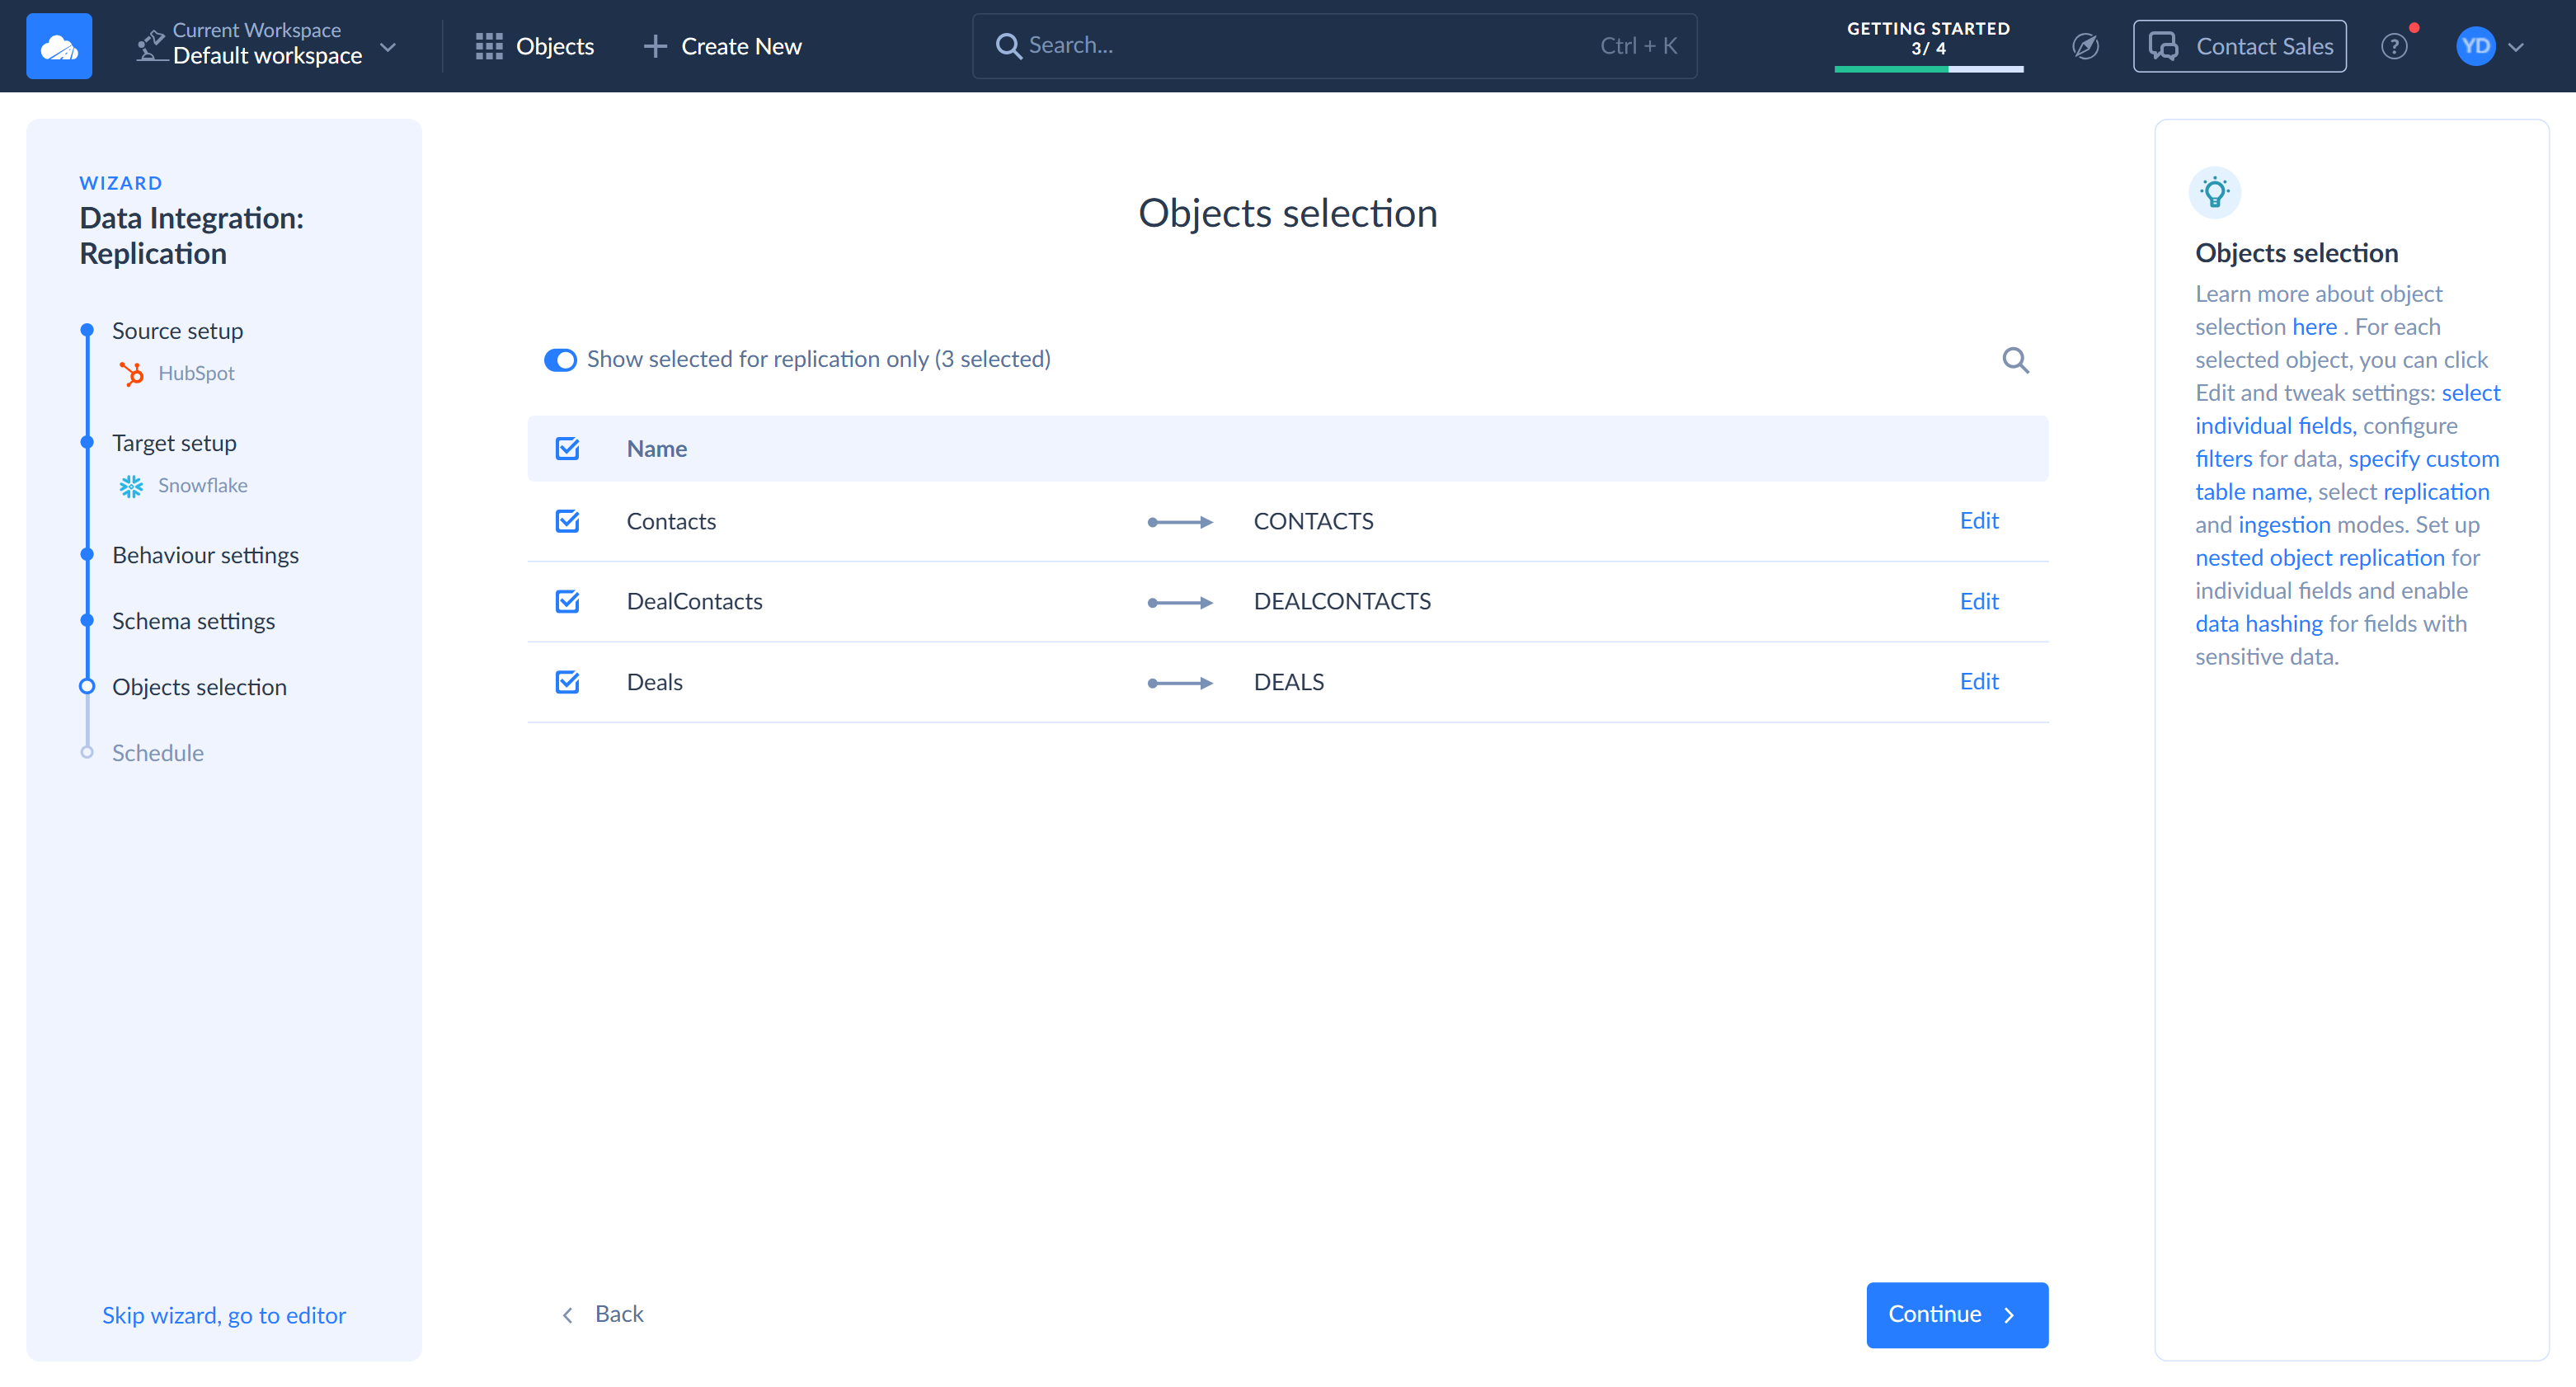
On the Objects selection step, select Contacts, Deals, and DealContacts. Use the search box to find them. Click Continue.
-
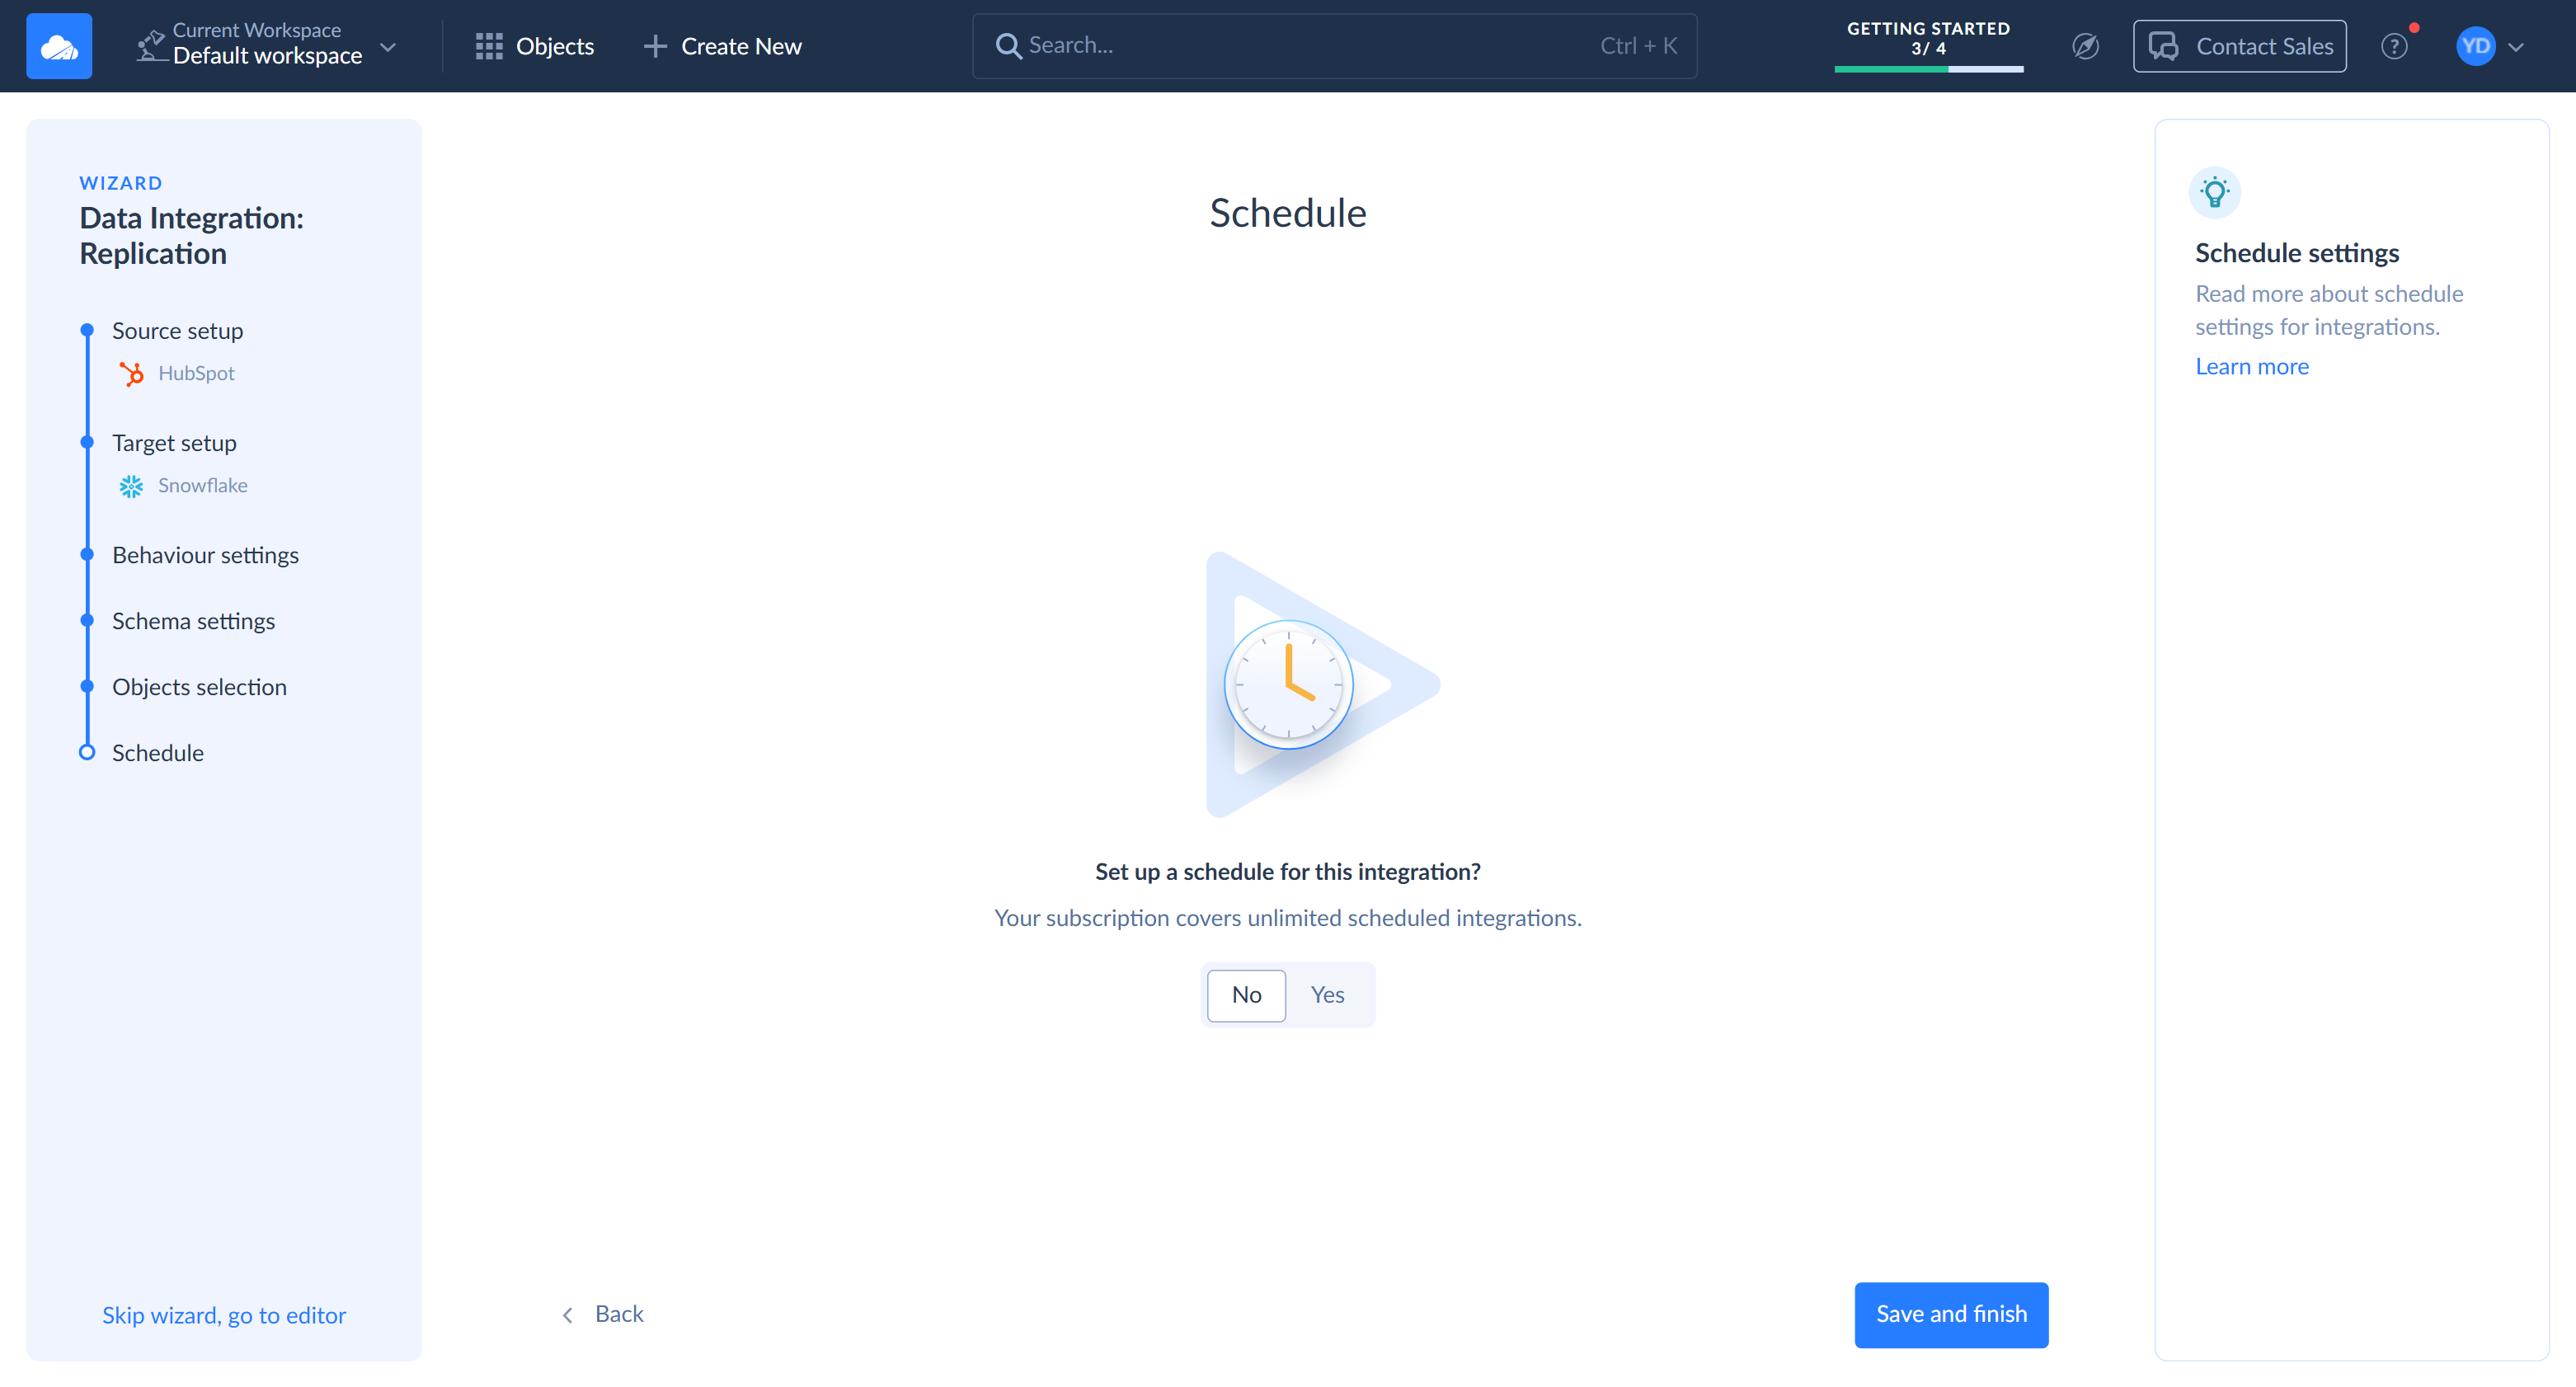
On the Schedule step, keep No for now. You schedule it together with the import at the end of this guide.
-
Click Save and finish. Skyvia saves the replication and opens it.
-
Click the default Untitled name and rename the replication, for example, to Replicate HubSpot to Snowflake.
Run the Replication
-
Click Run.
-
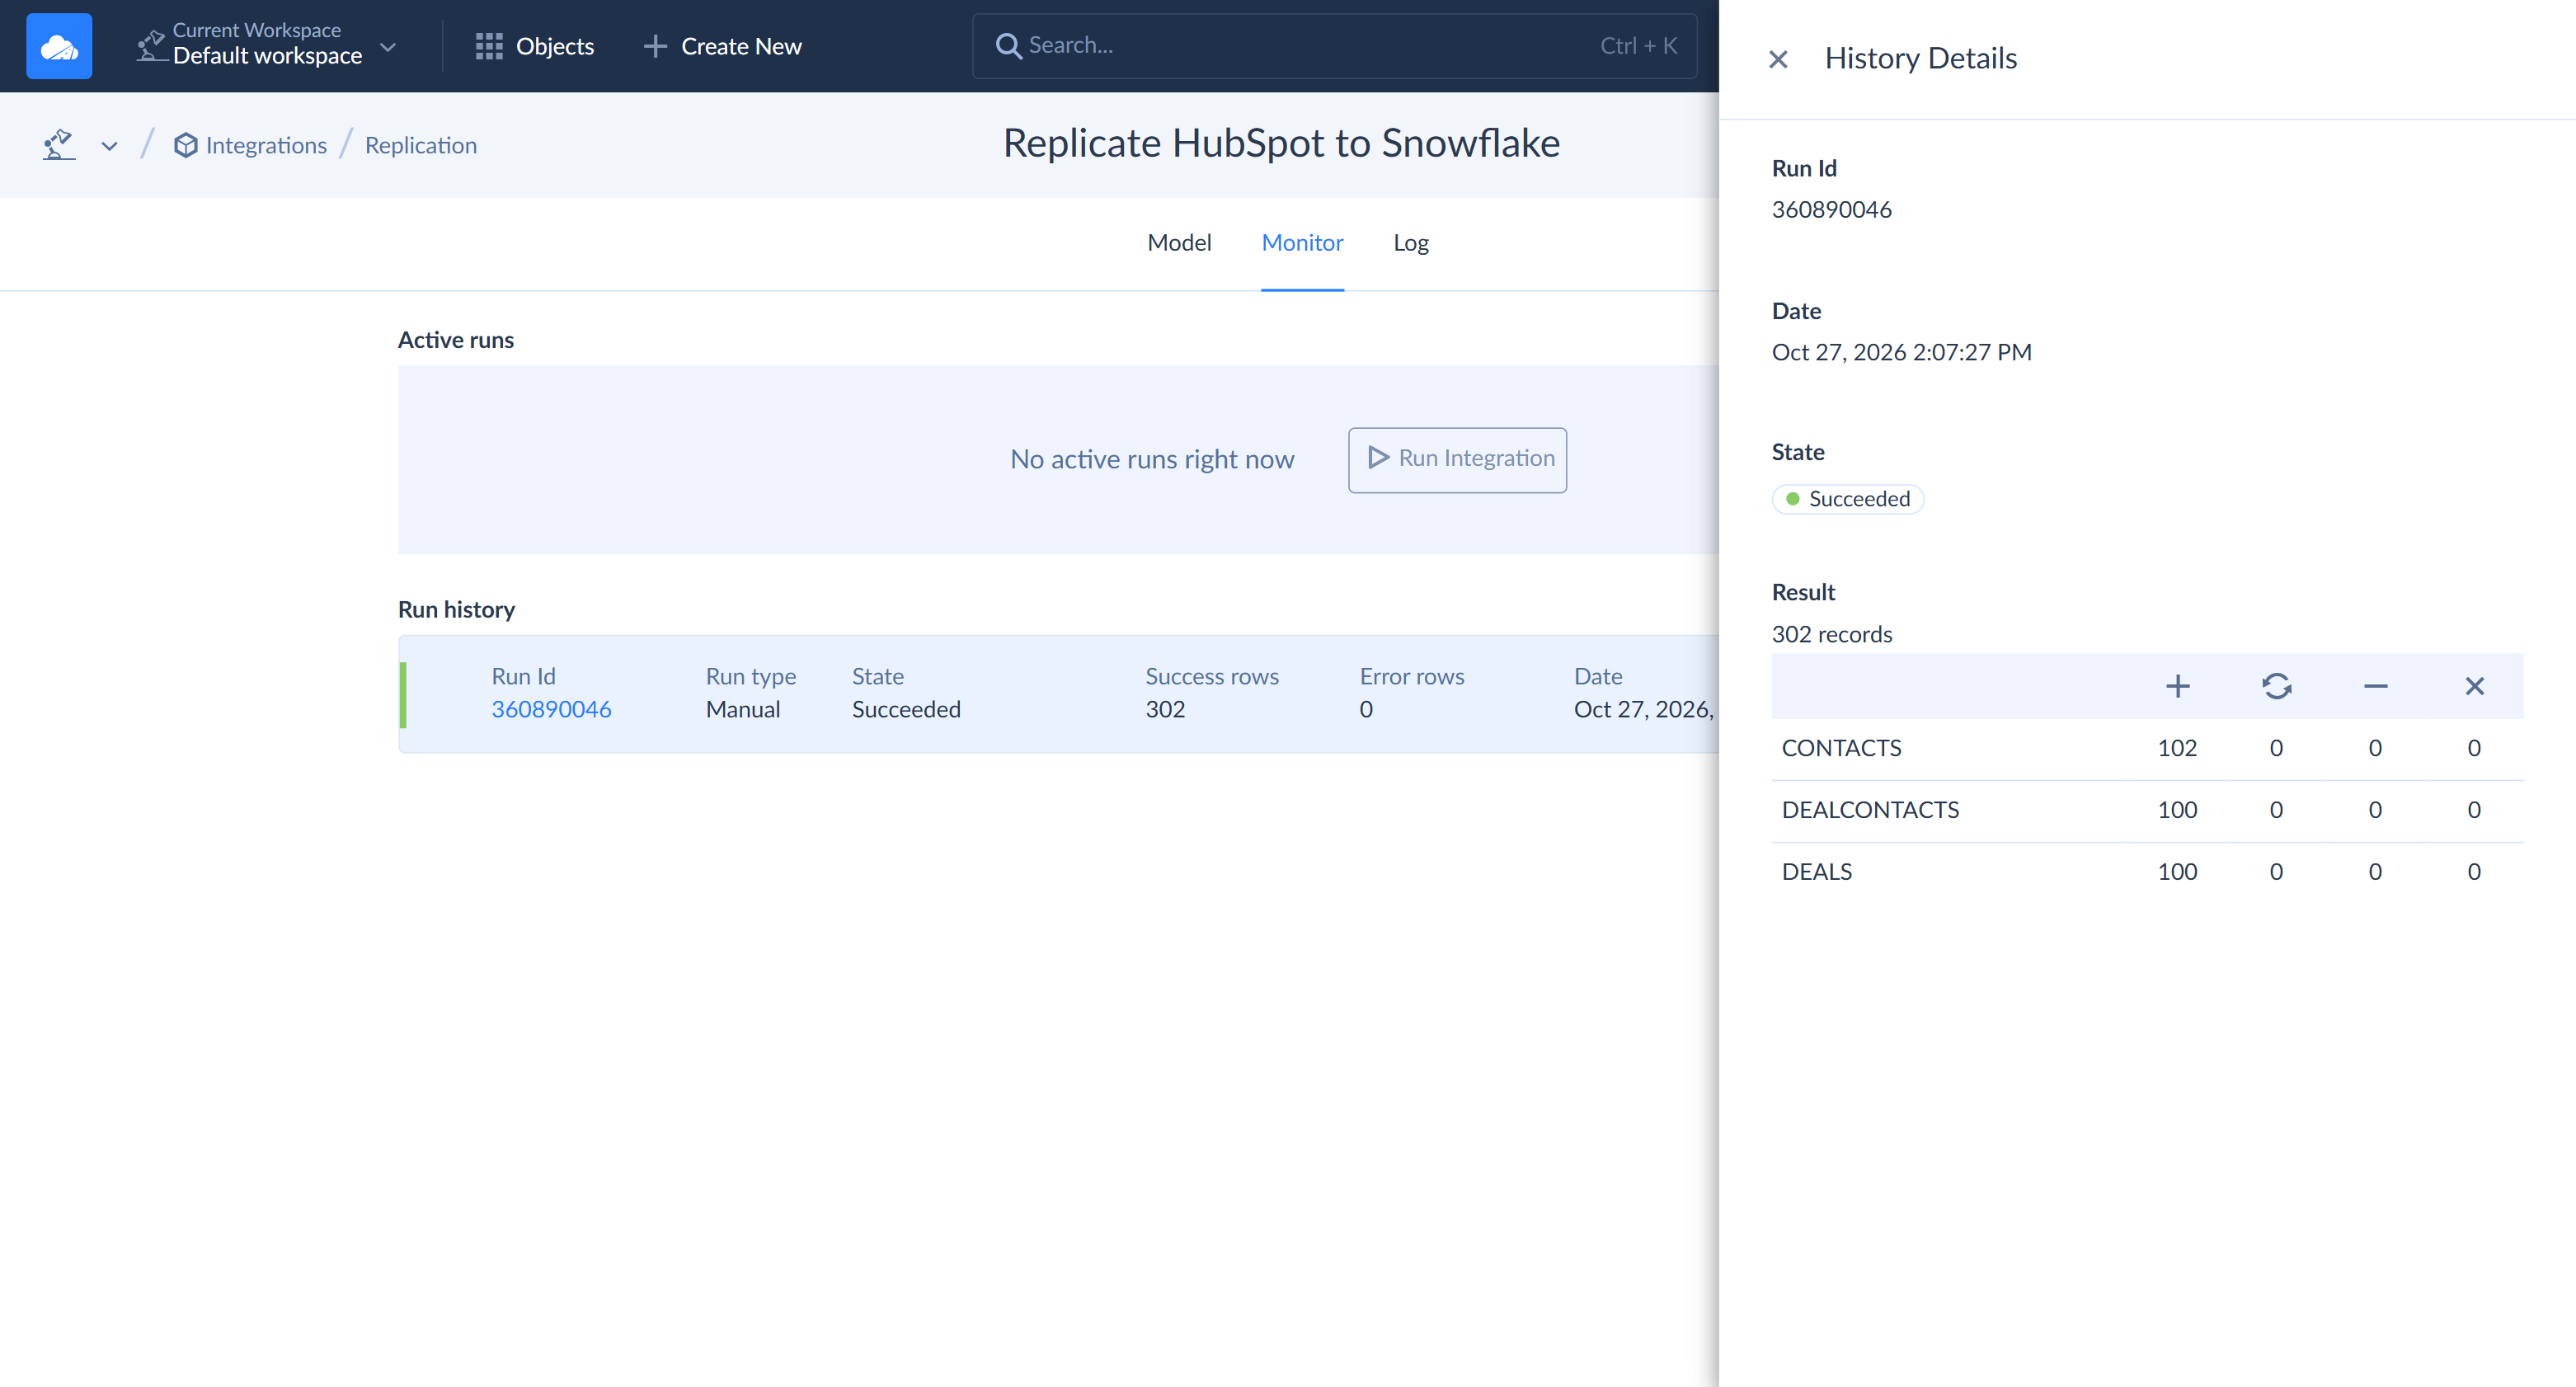
When the run completes, open the Monitor tab and click the run in Run history. DEALS and DEALCONTACTS show 100 records each. CONTACTS shows 102, because HubSpot adds two sample contacts to every new account.
-
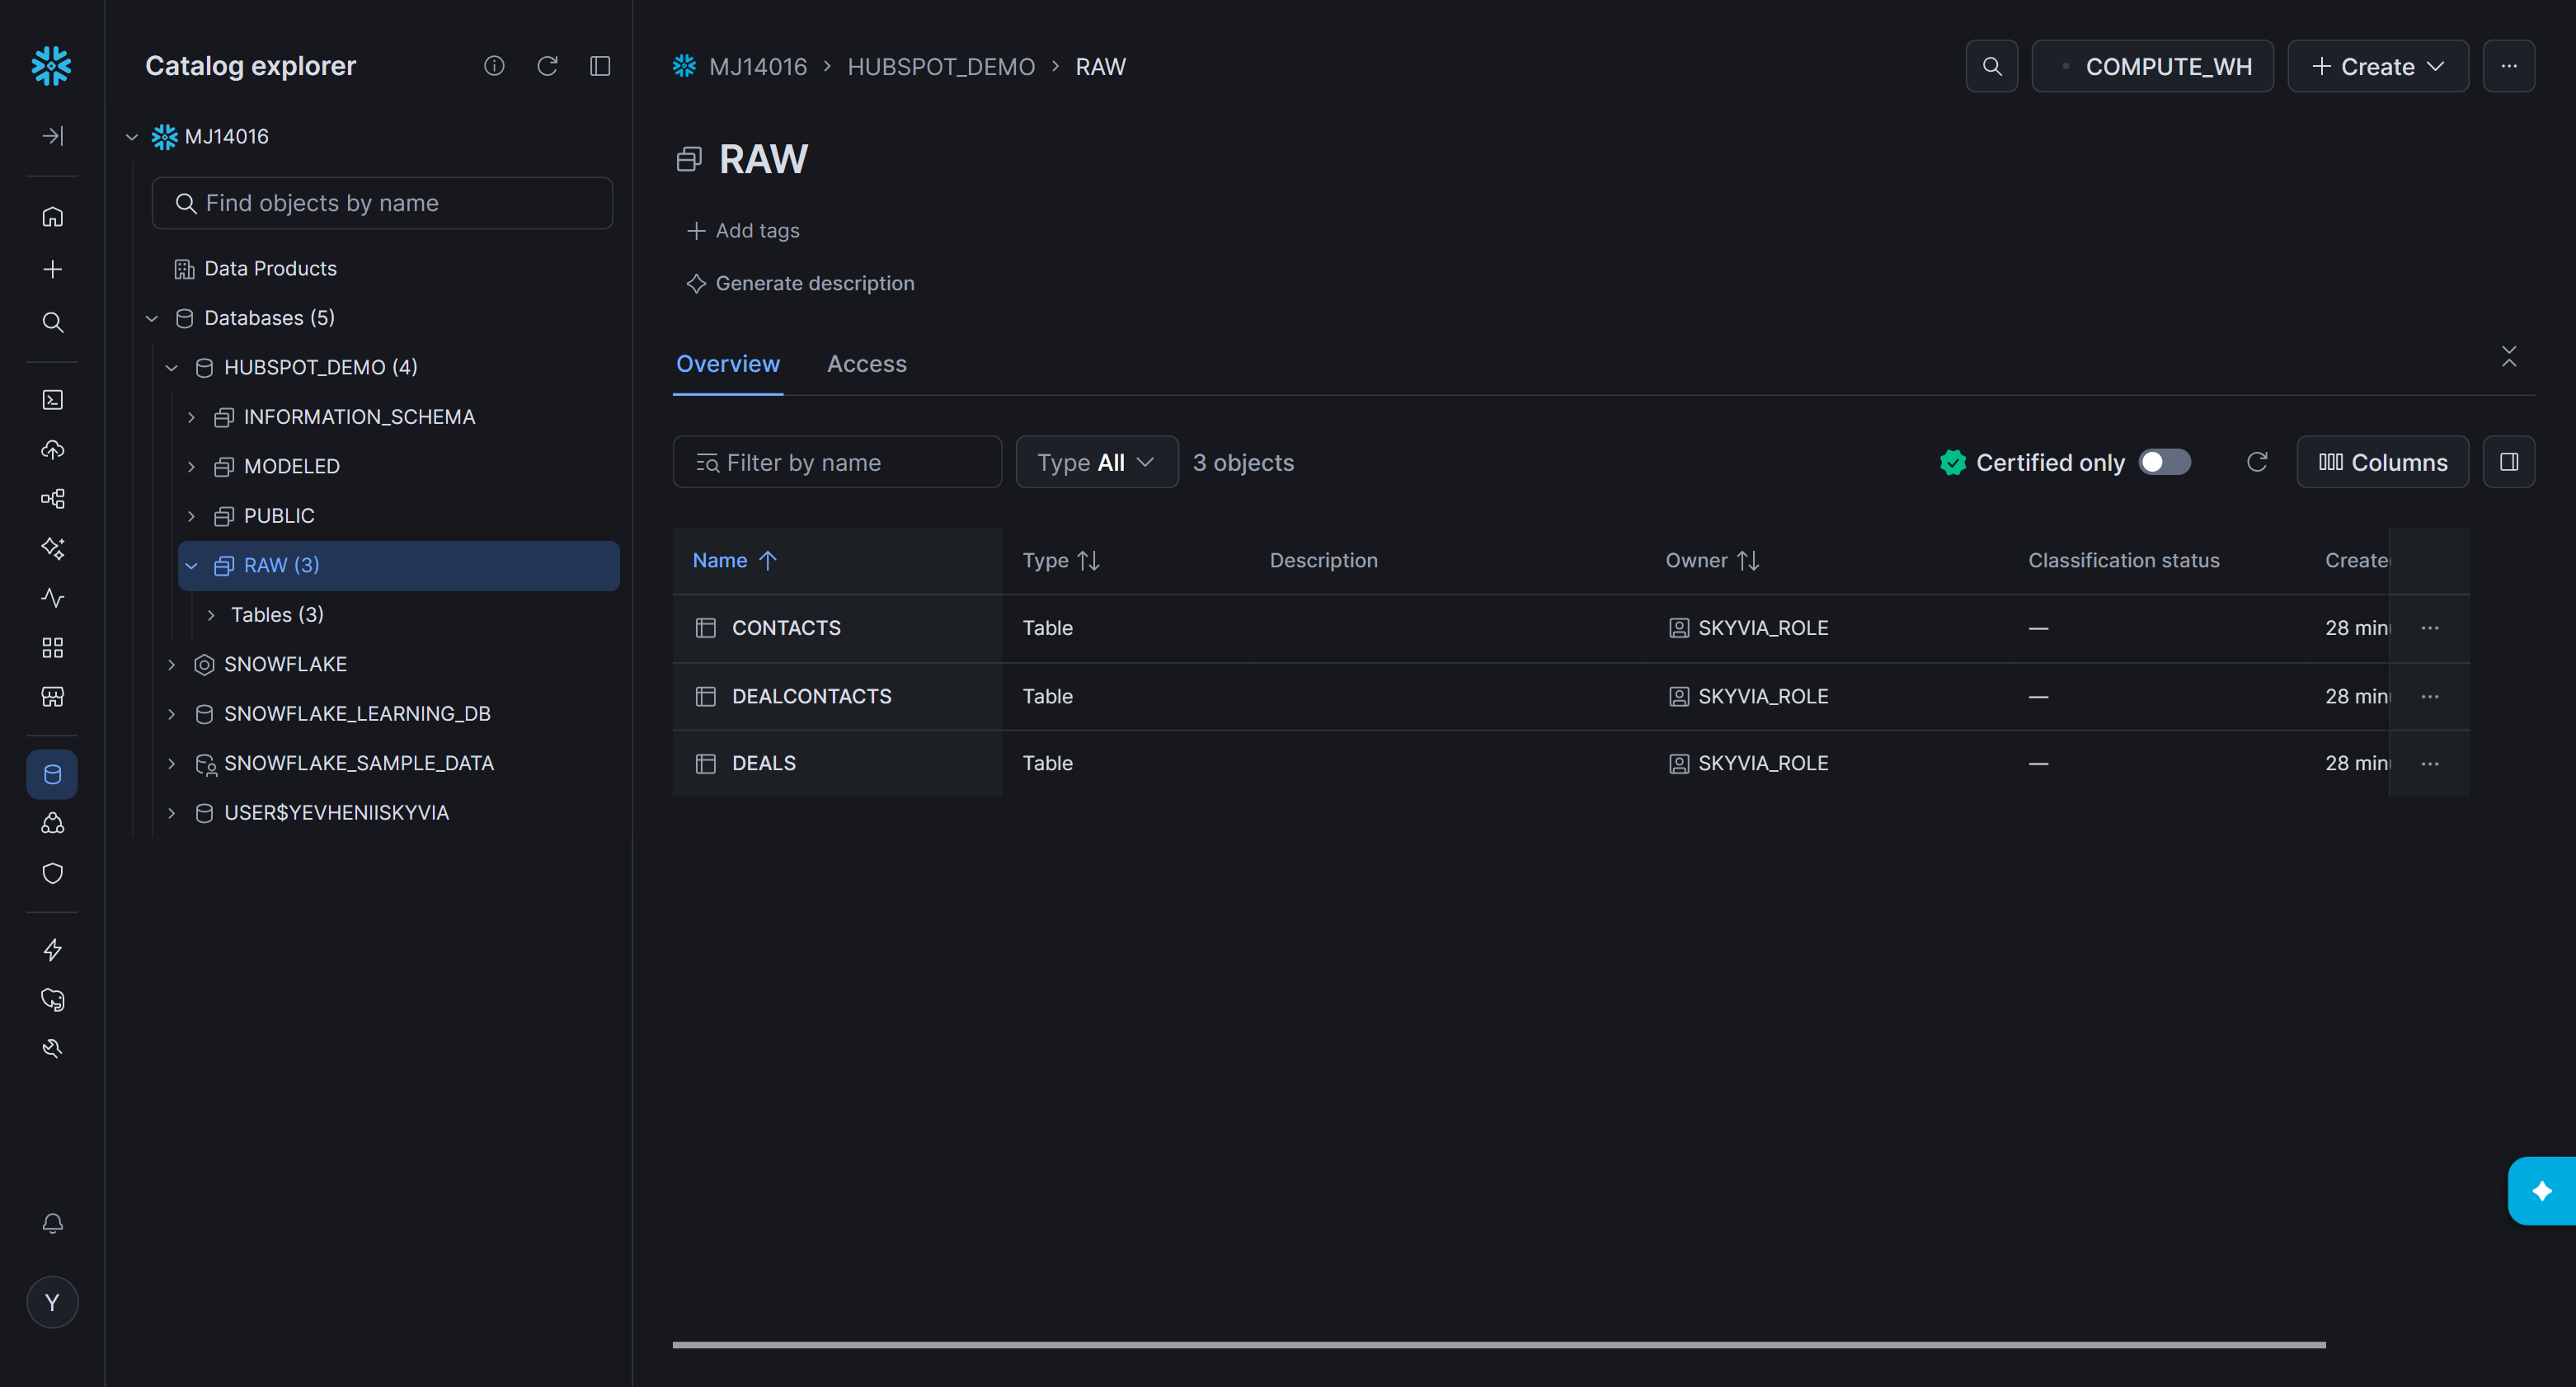
In Snowsight, go to Catalog > Explorer and expand HUBSPOT_DEMO > RAW. Check that the CONTACTS, DEALCONTACTS, and DEALS tables are there.
Build the Segment
A segment is a group of customers that share a trait. In this guide, each contact gets one of two labels:
- High value: the contact's closed-won deals add up to 50,000 or more
- Standard: all other contacts, including contacts without deals
You build the segment as a view in the MODELED schema. The view joins contacts to their deals through DEALCONTACTS, adds up the amounts of closed-won deals for each contact, and assigns the label. Because it's a view, it always shows the current data: each replication run updates the segment automatically.
-
In Snowsight, go to Projects > Workspaces and click SQL file.
-
Paste the following script:
USE ROLE ACCOUNTADMIN;
USE WAREHOUSE SKYVIA_WH;

CREATE OR REPLACE VIEW HUBSPOT_DEMO.MODELED.CONTACT_SEGMENTS AS
WITH won AS (
    SELECT
        c."Id" AS contact_id,
        c."Email" AS email,
        COALESCE(SUM(IFF(d."Is_Closed_Won", d."Amount", 0)), 0) AS closed_won_amount
    FROM HUBSPOT_DEMO.RAW.CONTACTS c
    LEFT JOIN HUBSPOT_DEMO.RAW.DEALCONTACTS dc ON dc."Contact_ID" = c."Id"
    LEFT JOIN HUBSPOT_DEMO.RAW.DEALS d ON d."Id" = dc."Deal_ID"
    GROUP BY c."Id", c."Email"
)
SELECT
    contact_id,
    email,
    closed_won_amount,
    IFF(closed_won_amount >= 50000, 'High value', 'Standard') AS segment
FROM won;

SELECT segment, COUNT(*) AS contacts
FROM HUBSPOT_DEMO.MODELED.CONTACT_SEGMENTS
GROUP BY segment;
Column names from the replicated tables are in double quotes because Skyvia keeps their case. The view's own columns have no quotes, so Snowflake stores them in upper case:
CONTACT_ID,EMAIL,CLOSED_WON_AMOUNT, andSEGMENT. -
Click the arrow next to the Run button and select Run all, or press Ctrl+Shift+Enter.
-
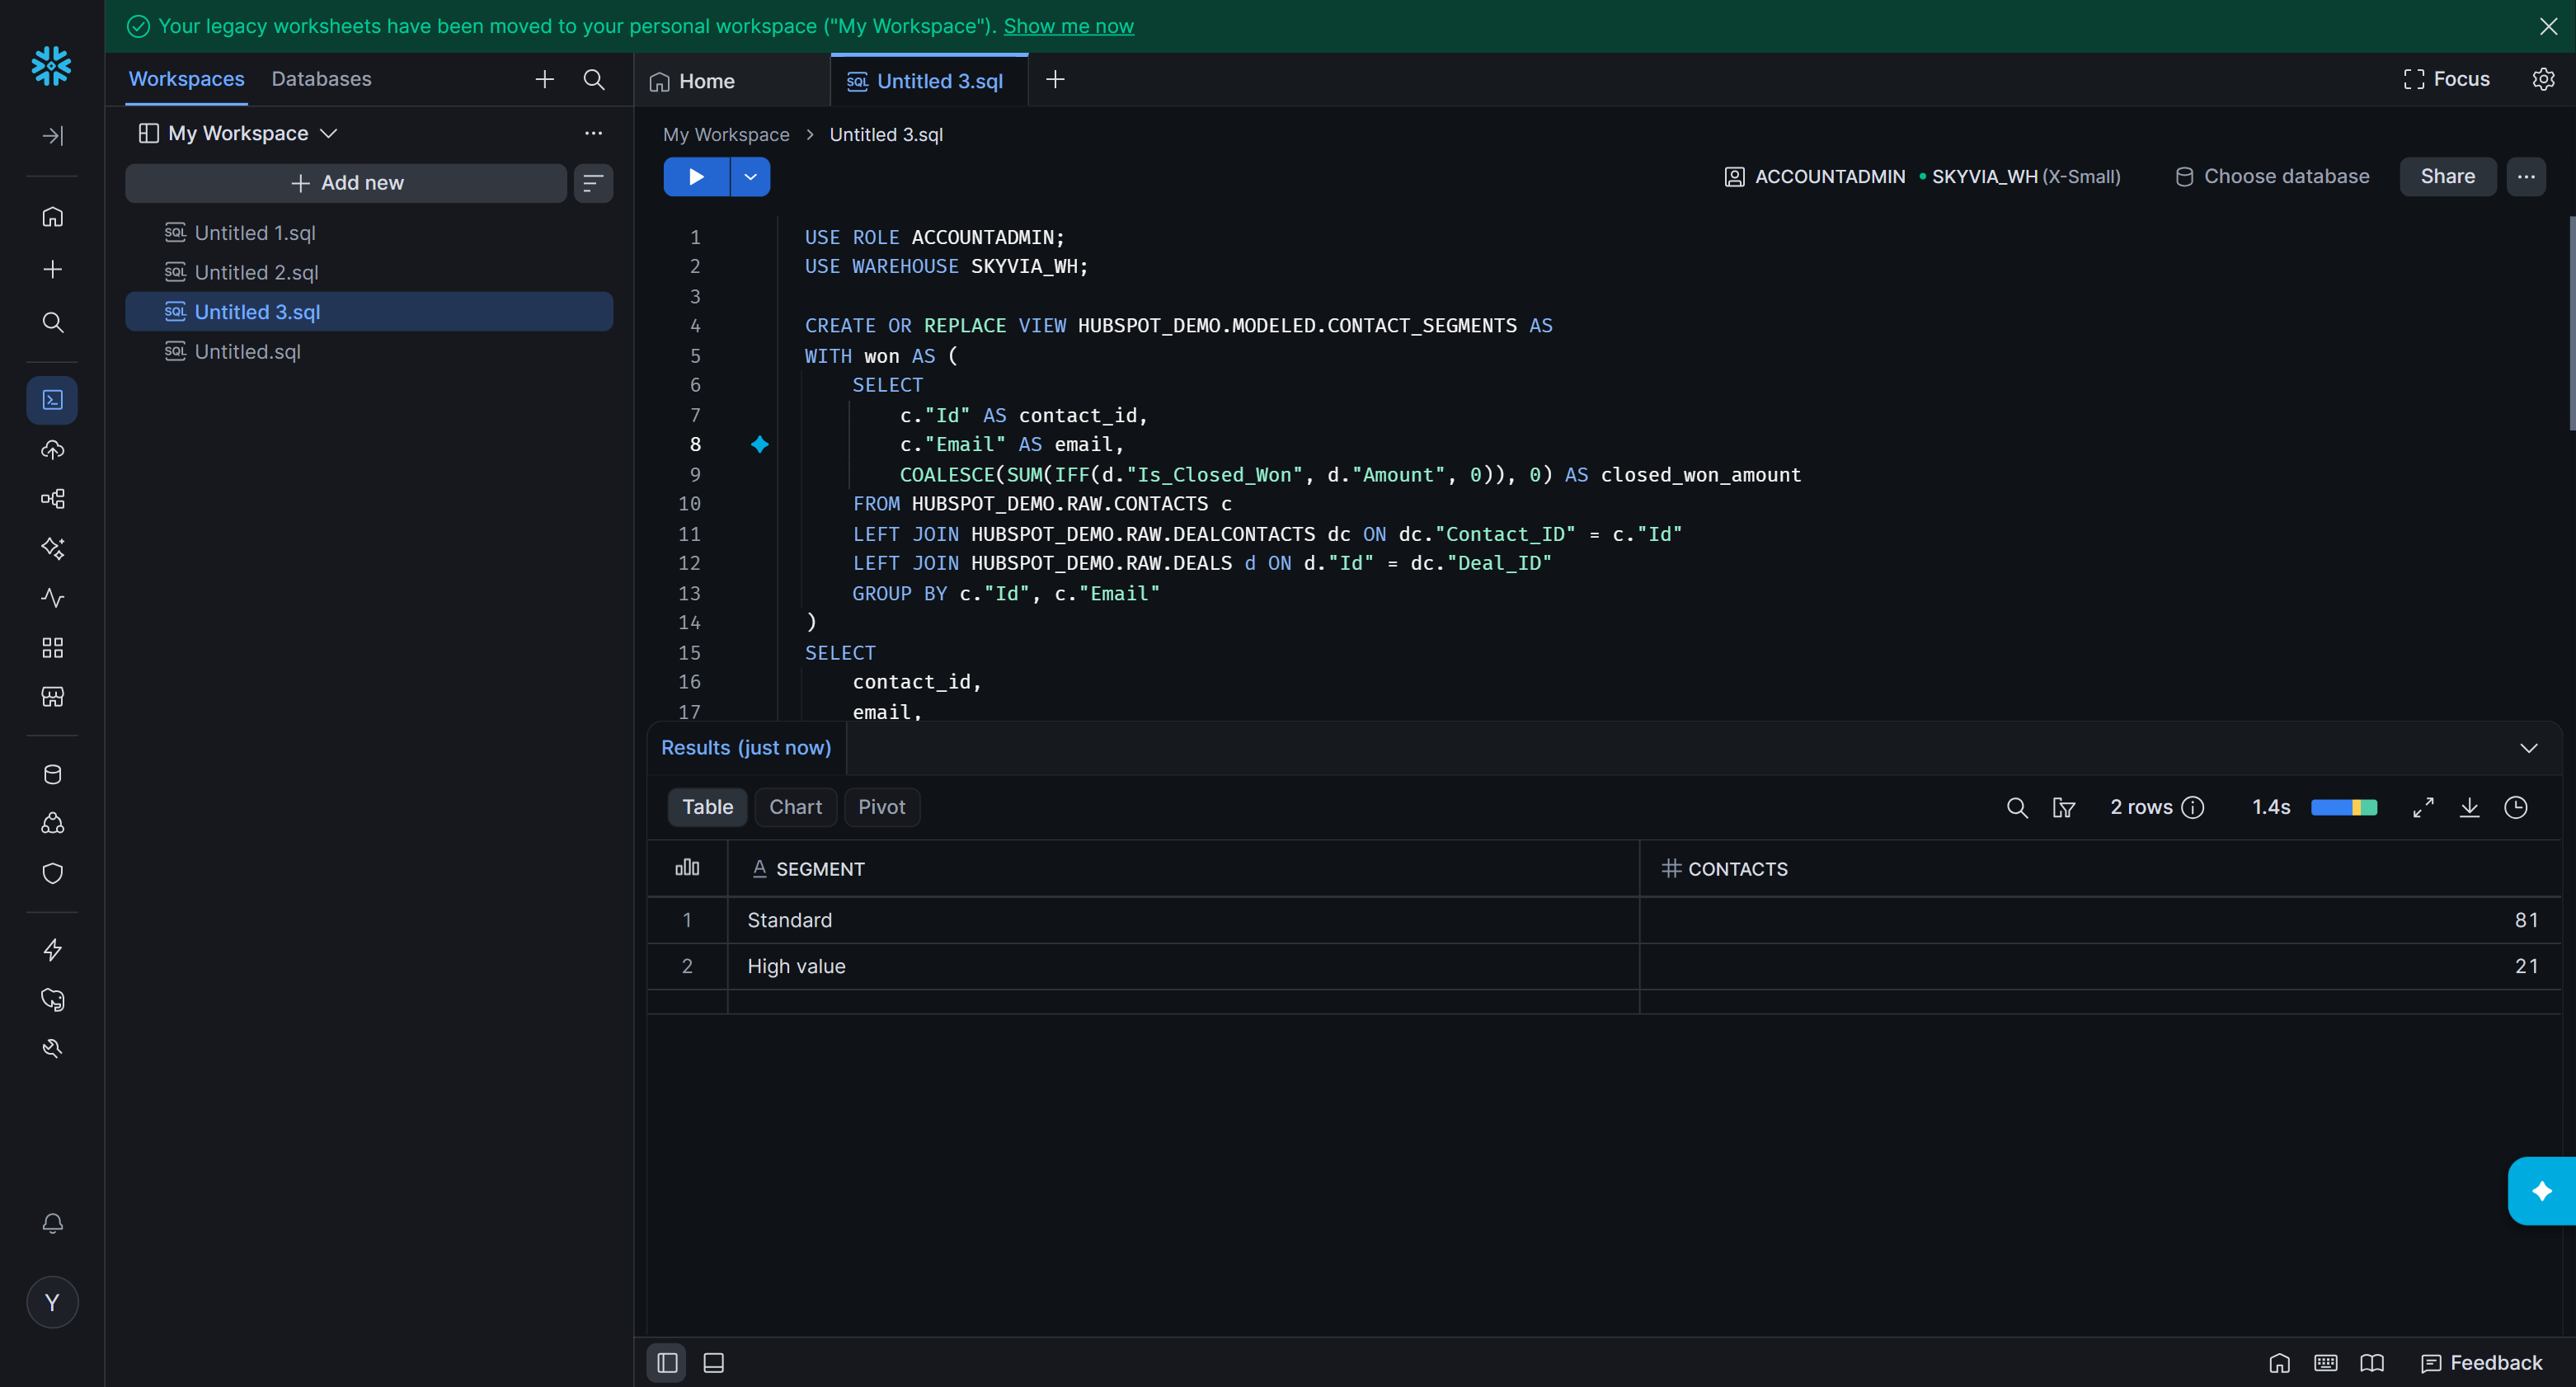
Check the result of the last statement. With the test data, 21 contacts are High value and 81 are Standard. The Standard count includes the two sample contacts that HubSpot adds to new accounts.
Sync Segment to HubSpot
Now write the segment back to HubSpot with reverse ETL, so that sales and marketing teams can filter contacts by it. First, create a contact property for the segment. Then create an import that reads the CONTACT_SEGMENTS view and updates HubSpot contacts.
Create the Segment Property
-
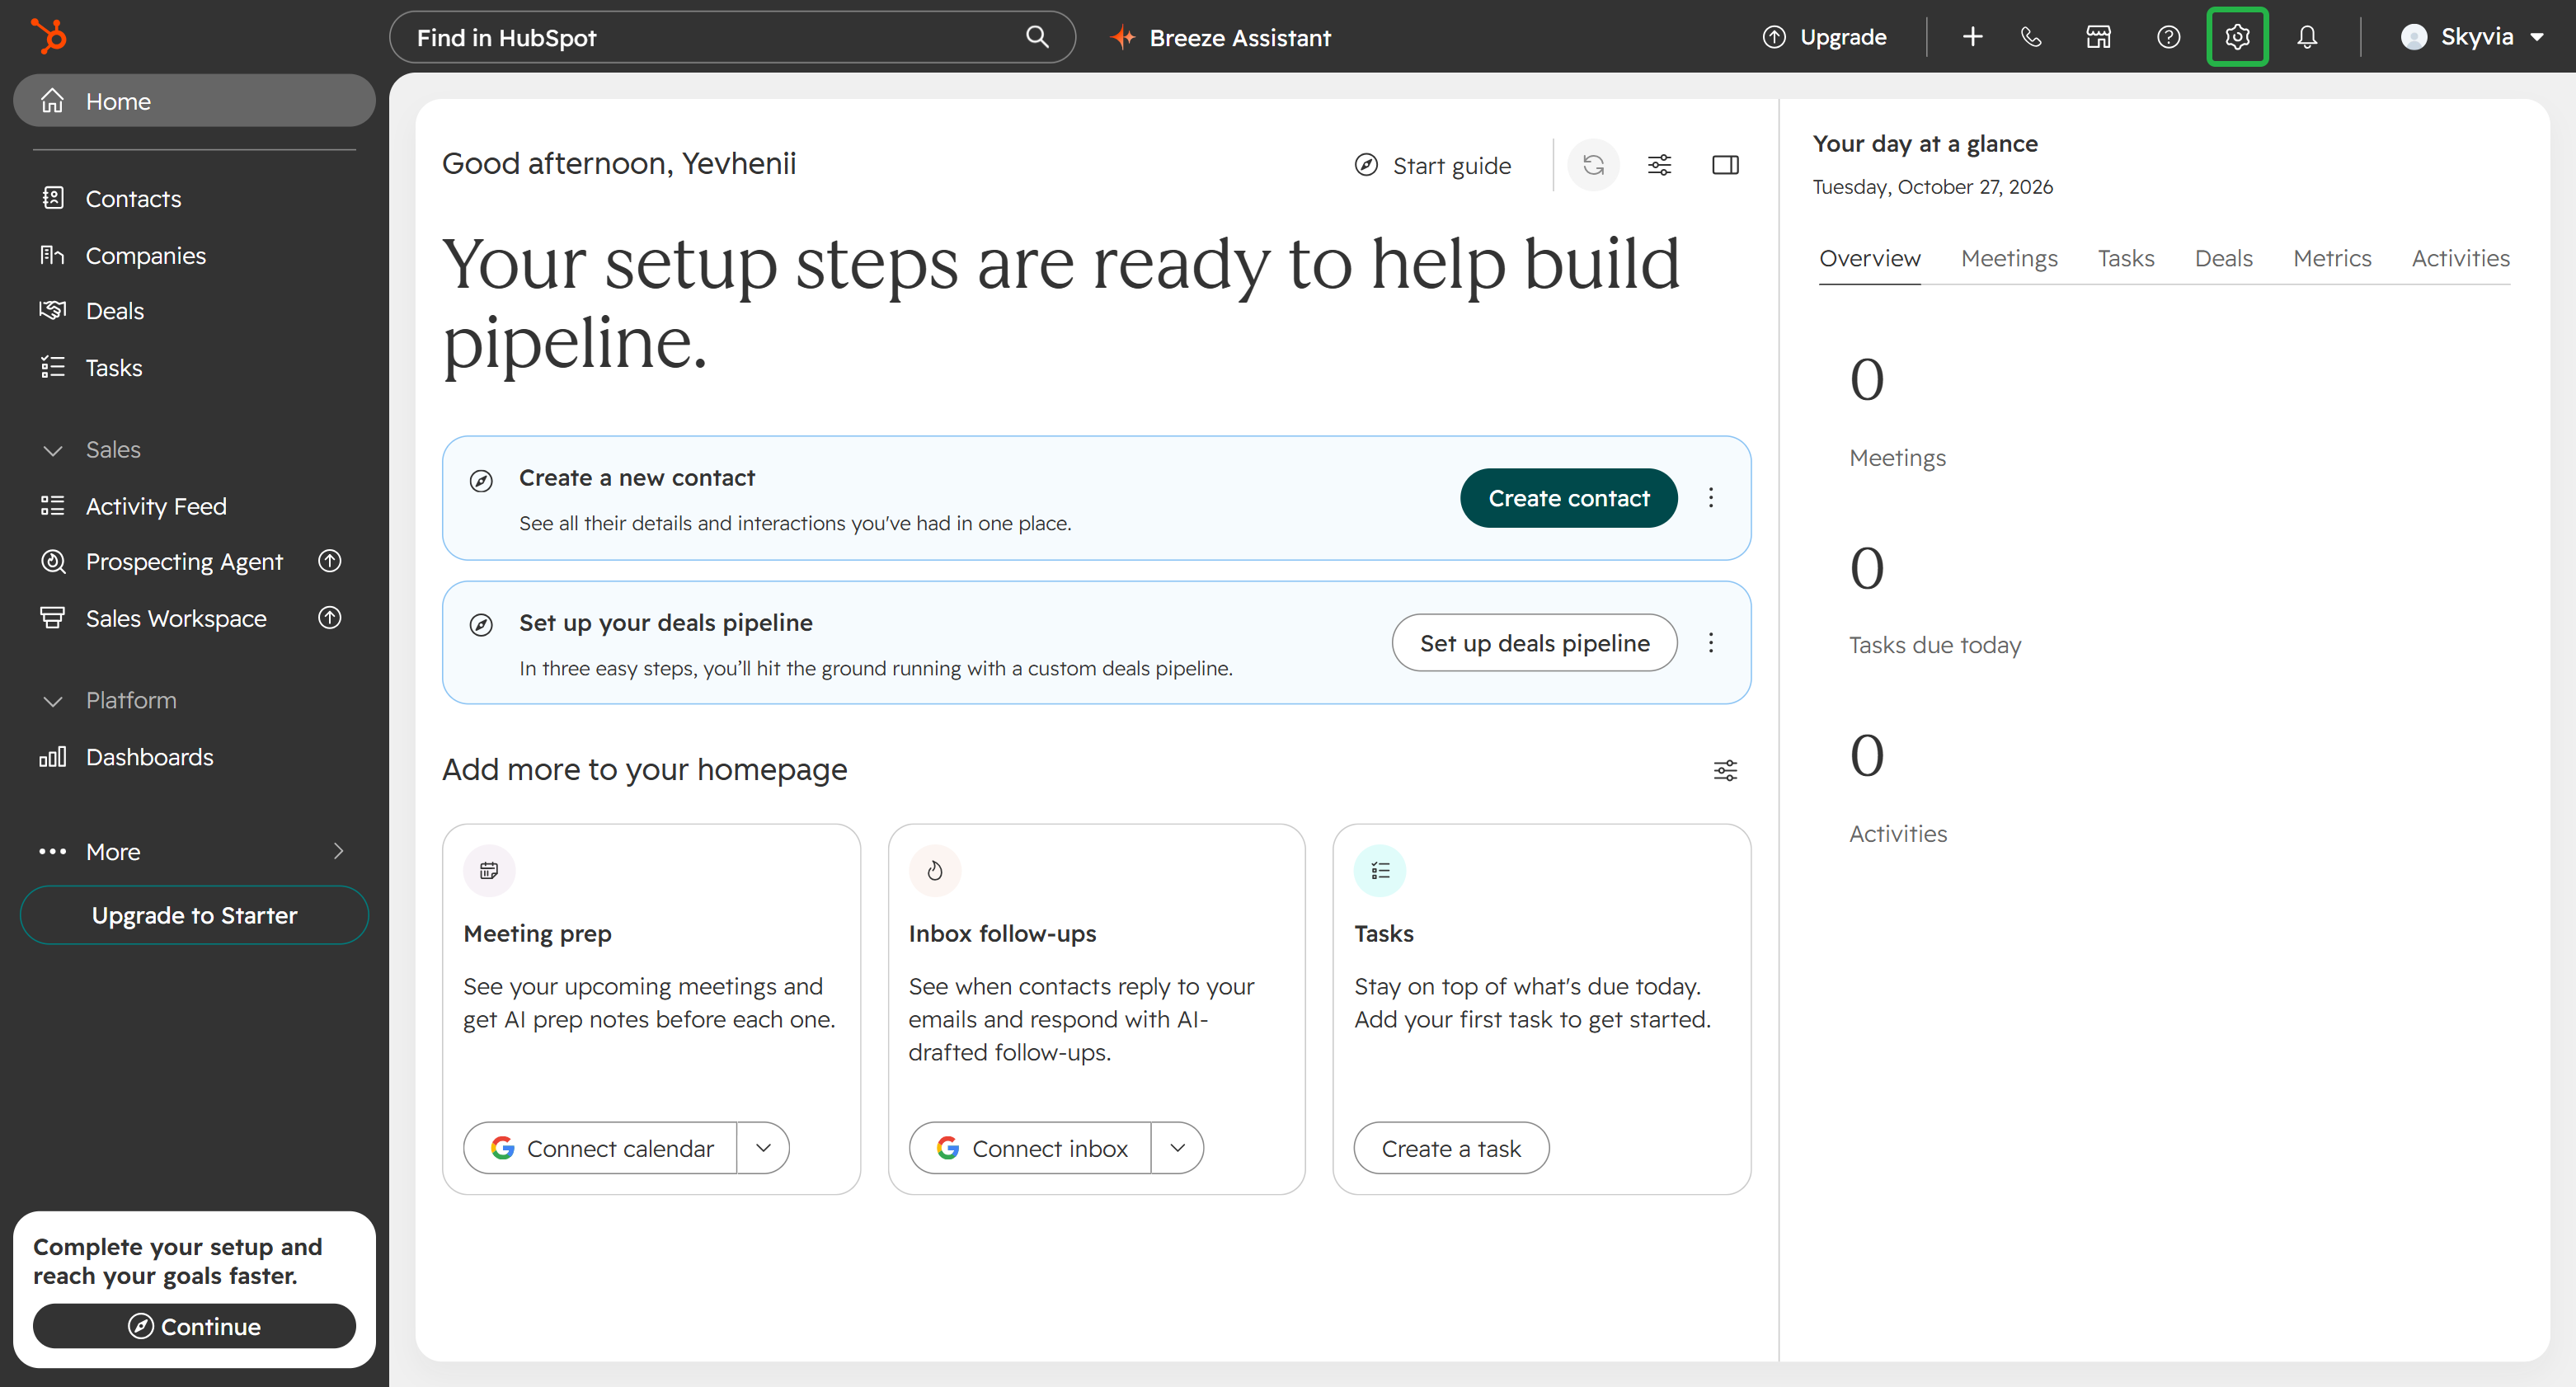
In HubSpot, click the Settings icon in the top navigation bar.
-
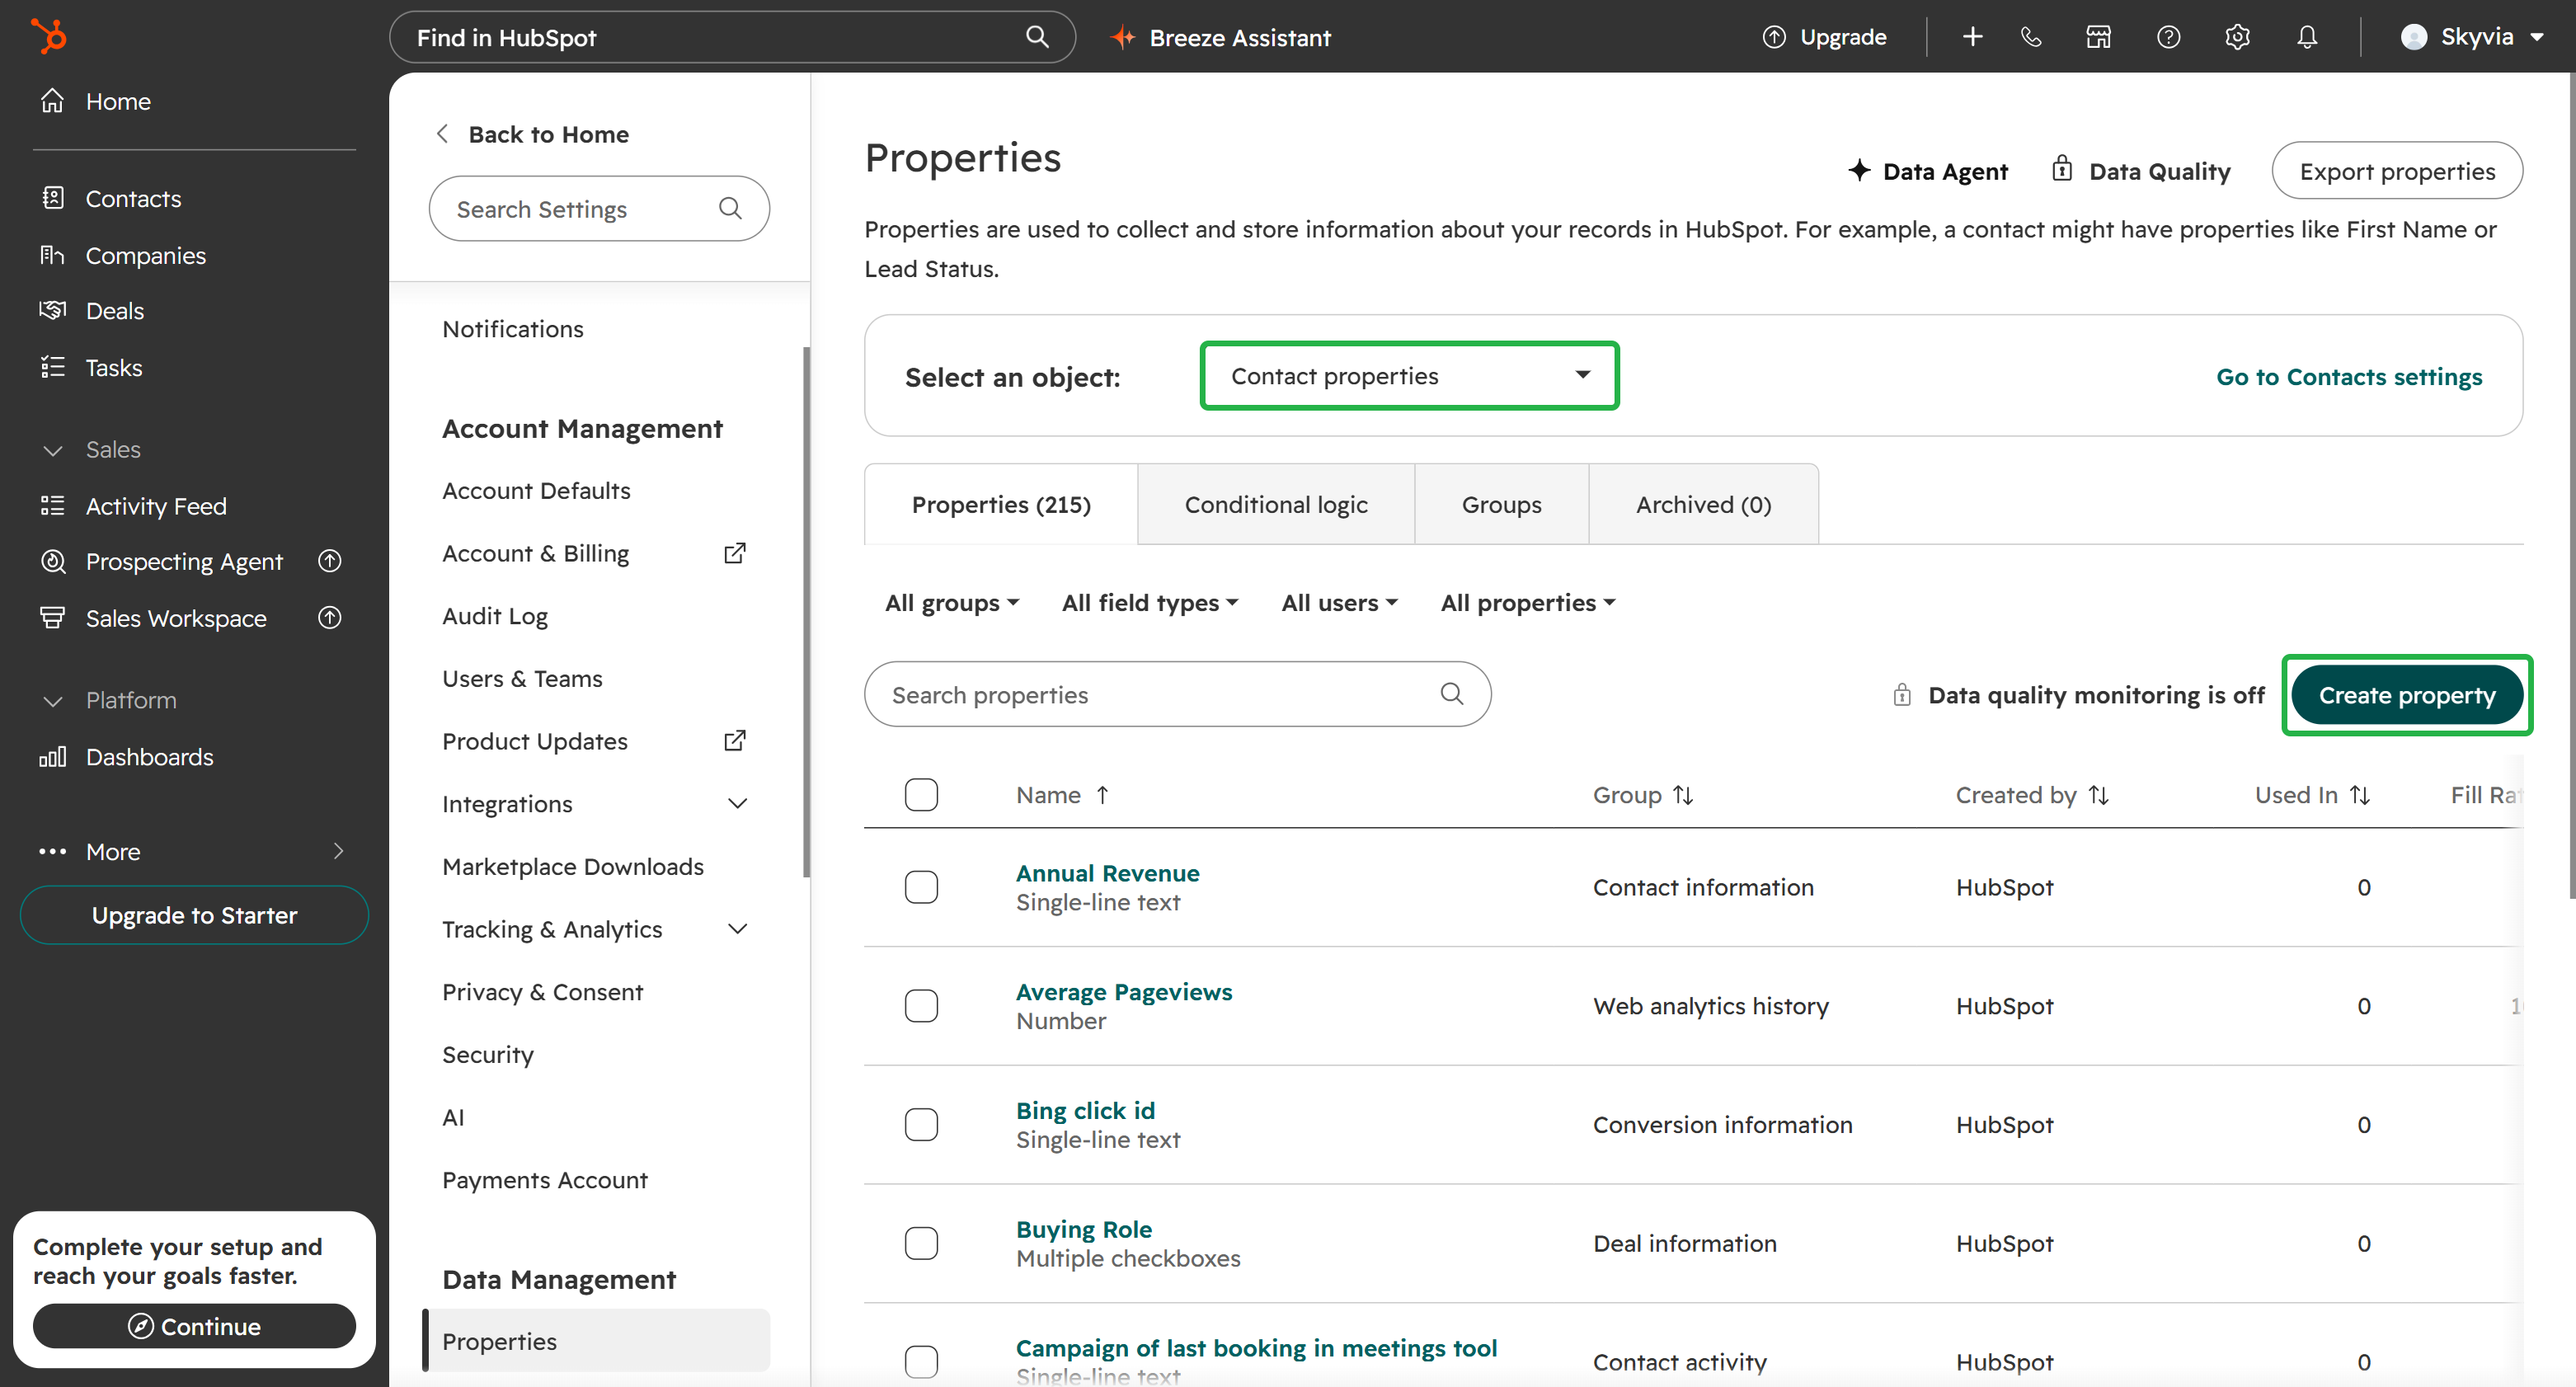
In the left menu, go to Data Management > Properties.
-
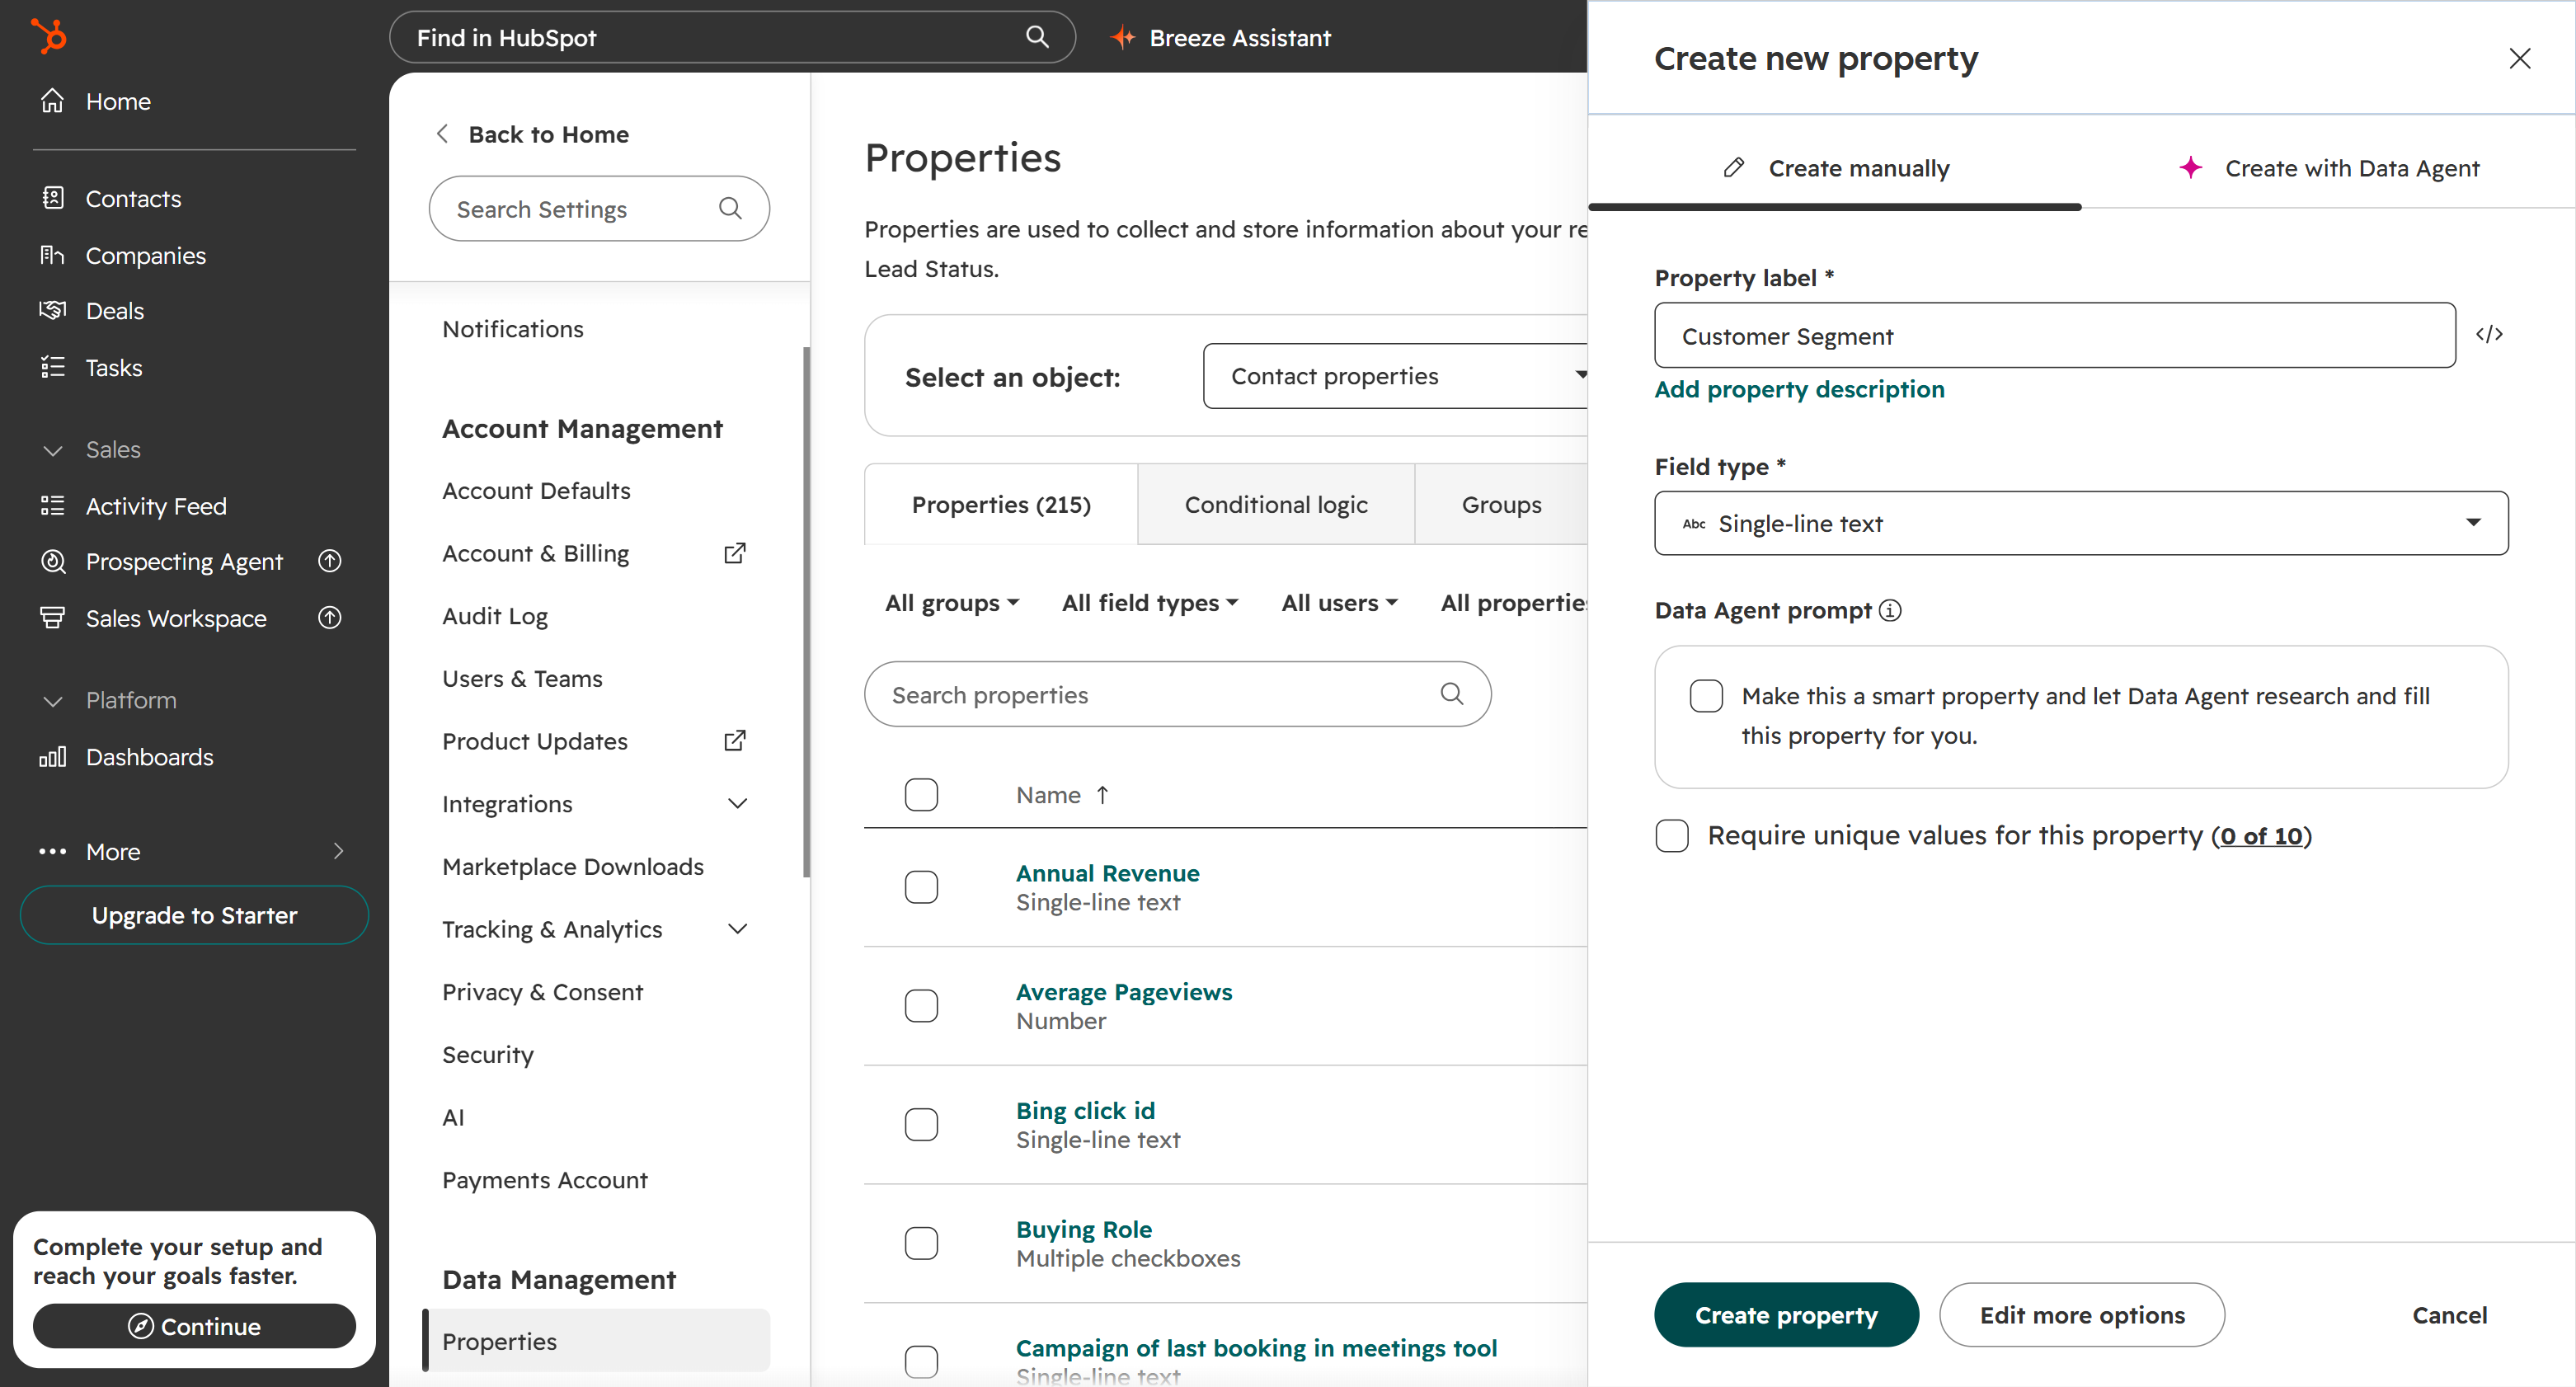
Make sure that Contact properties is selected in the Select an object list and click Create property.
-
In the Property label box, enter Customer Segment. In the Field type list, select Single-line text.
-
Click Create property.
Create the Import
Switch back to Skyvia and create an import that reads the segment from Snowflake and writes it to HubSpot.
-
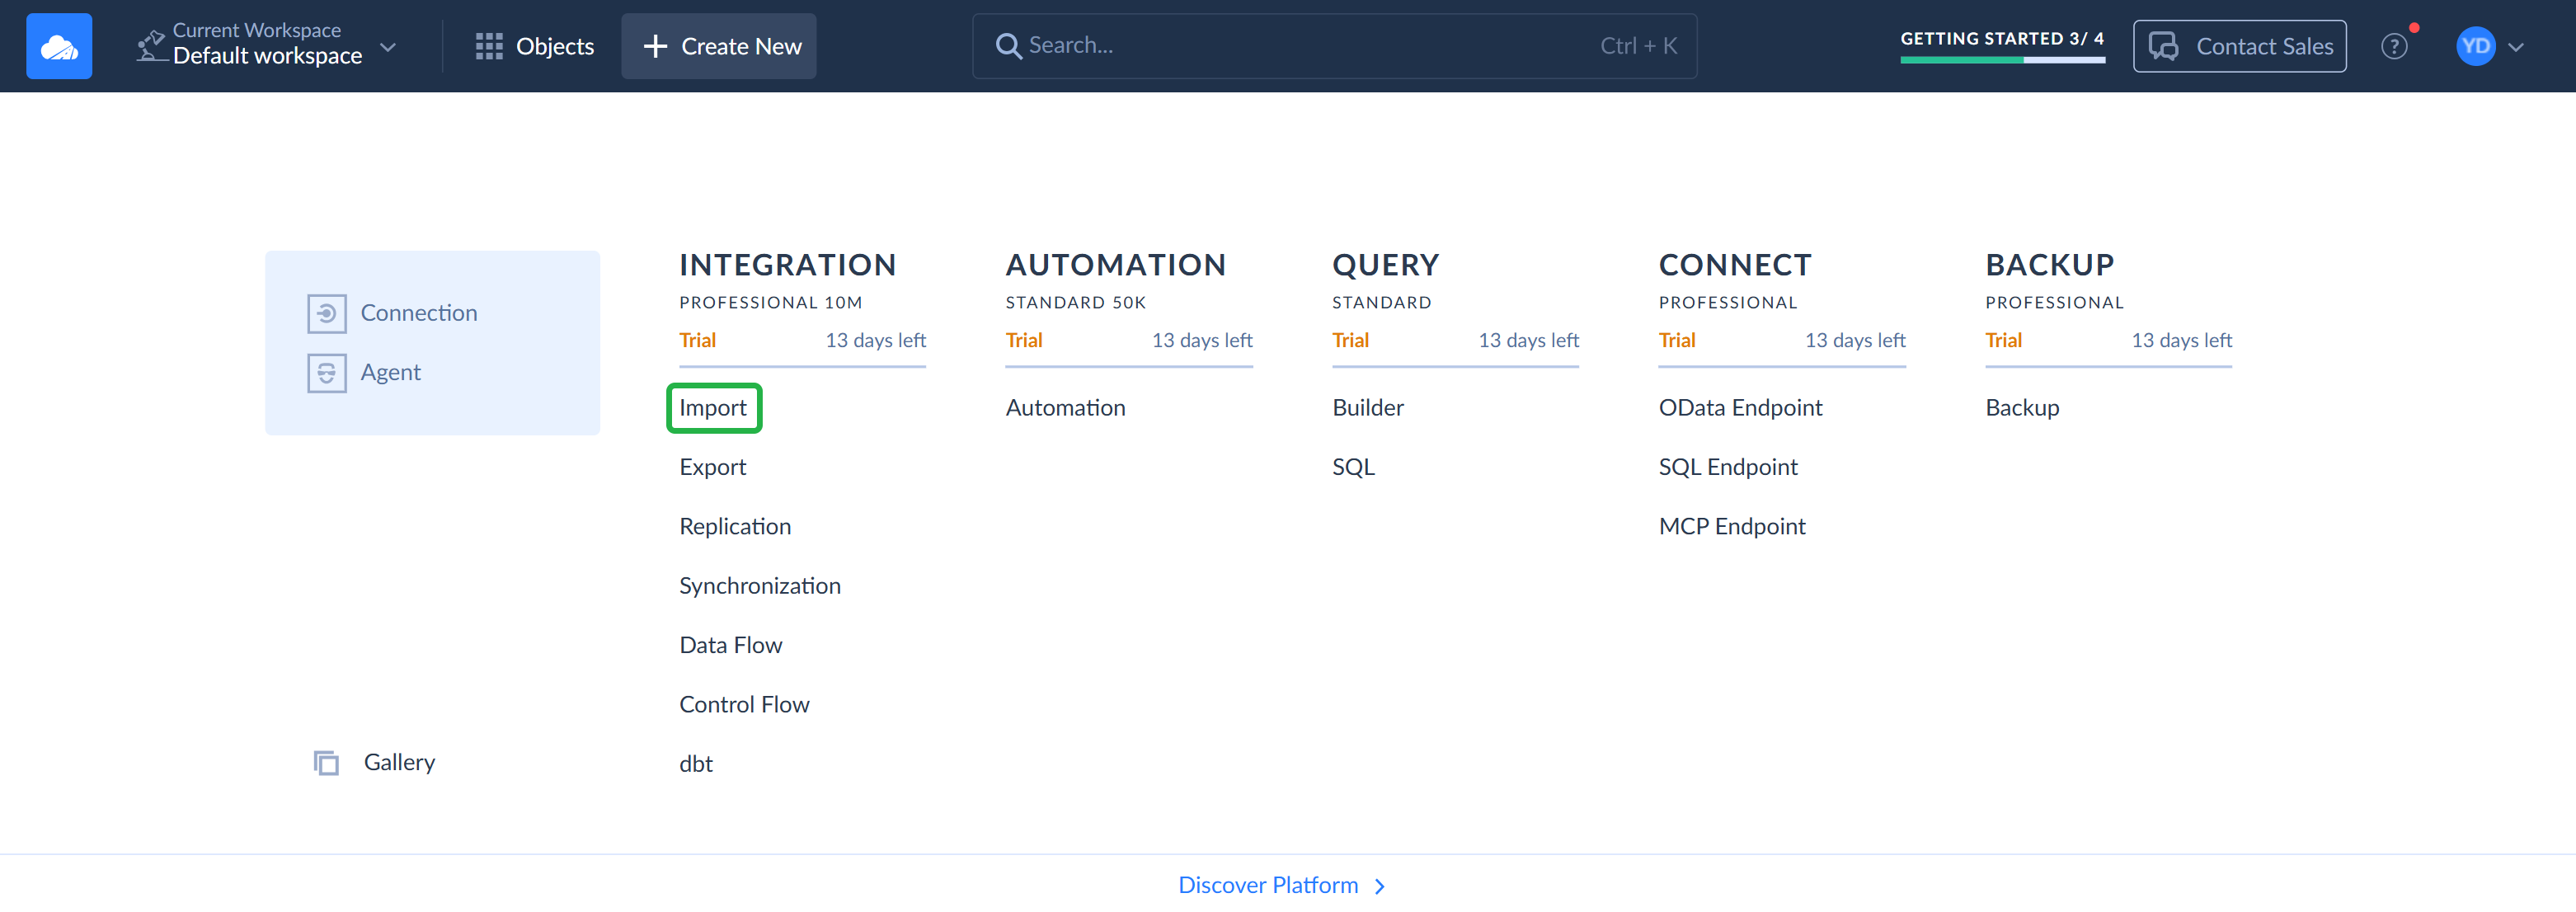
Click + Create New in the top menu and select Import.
-
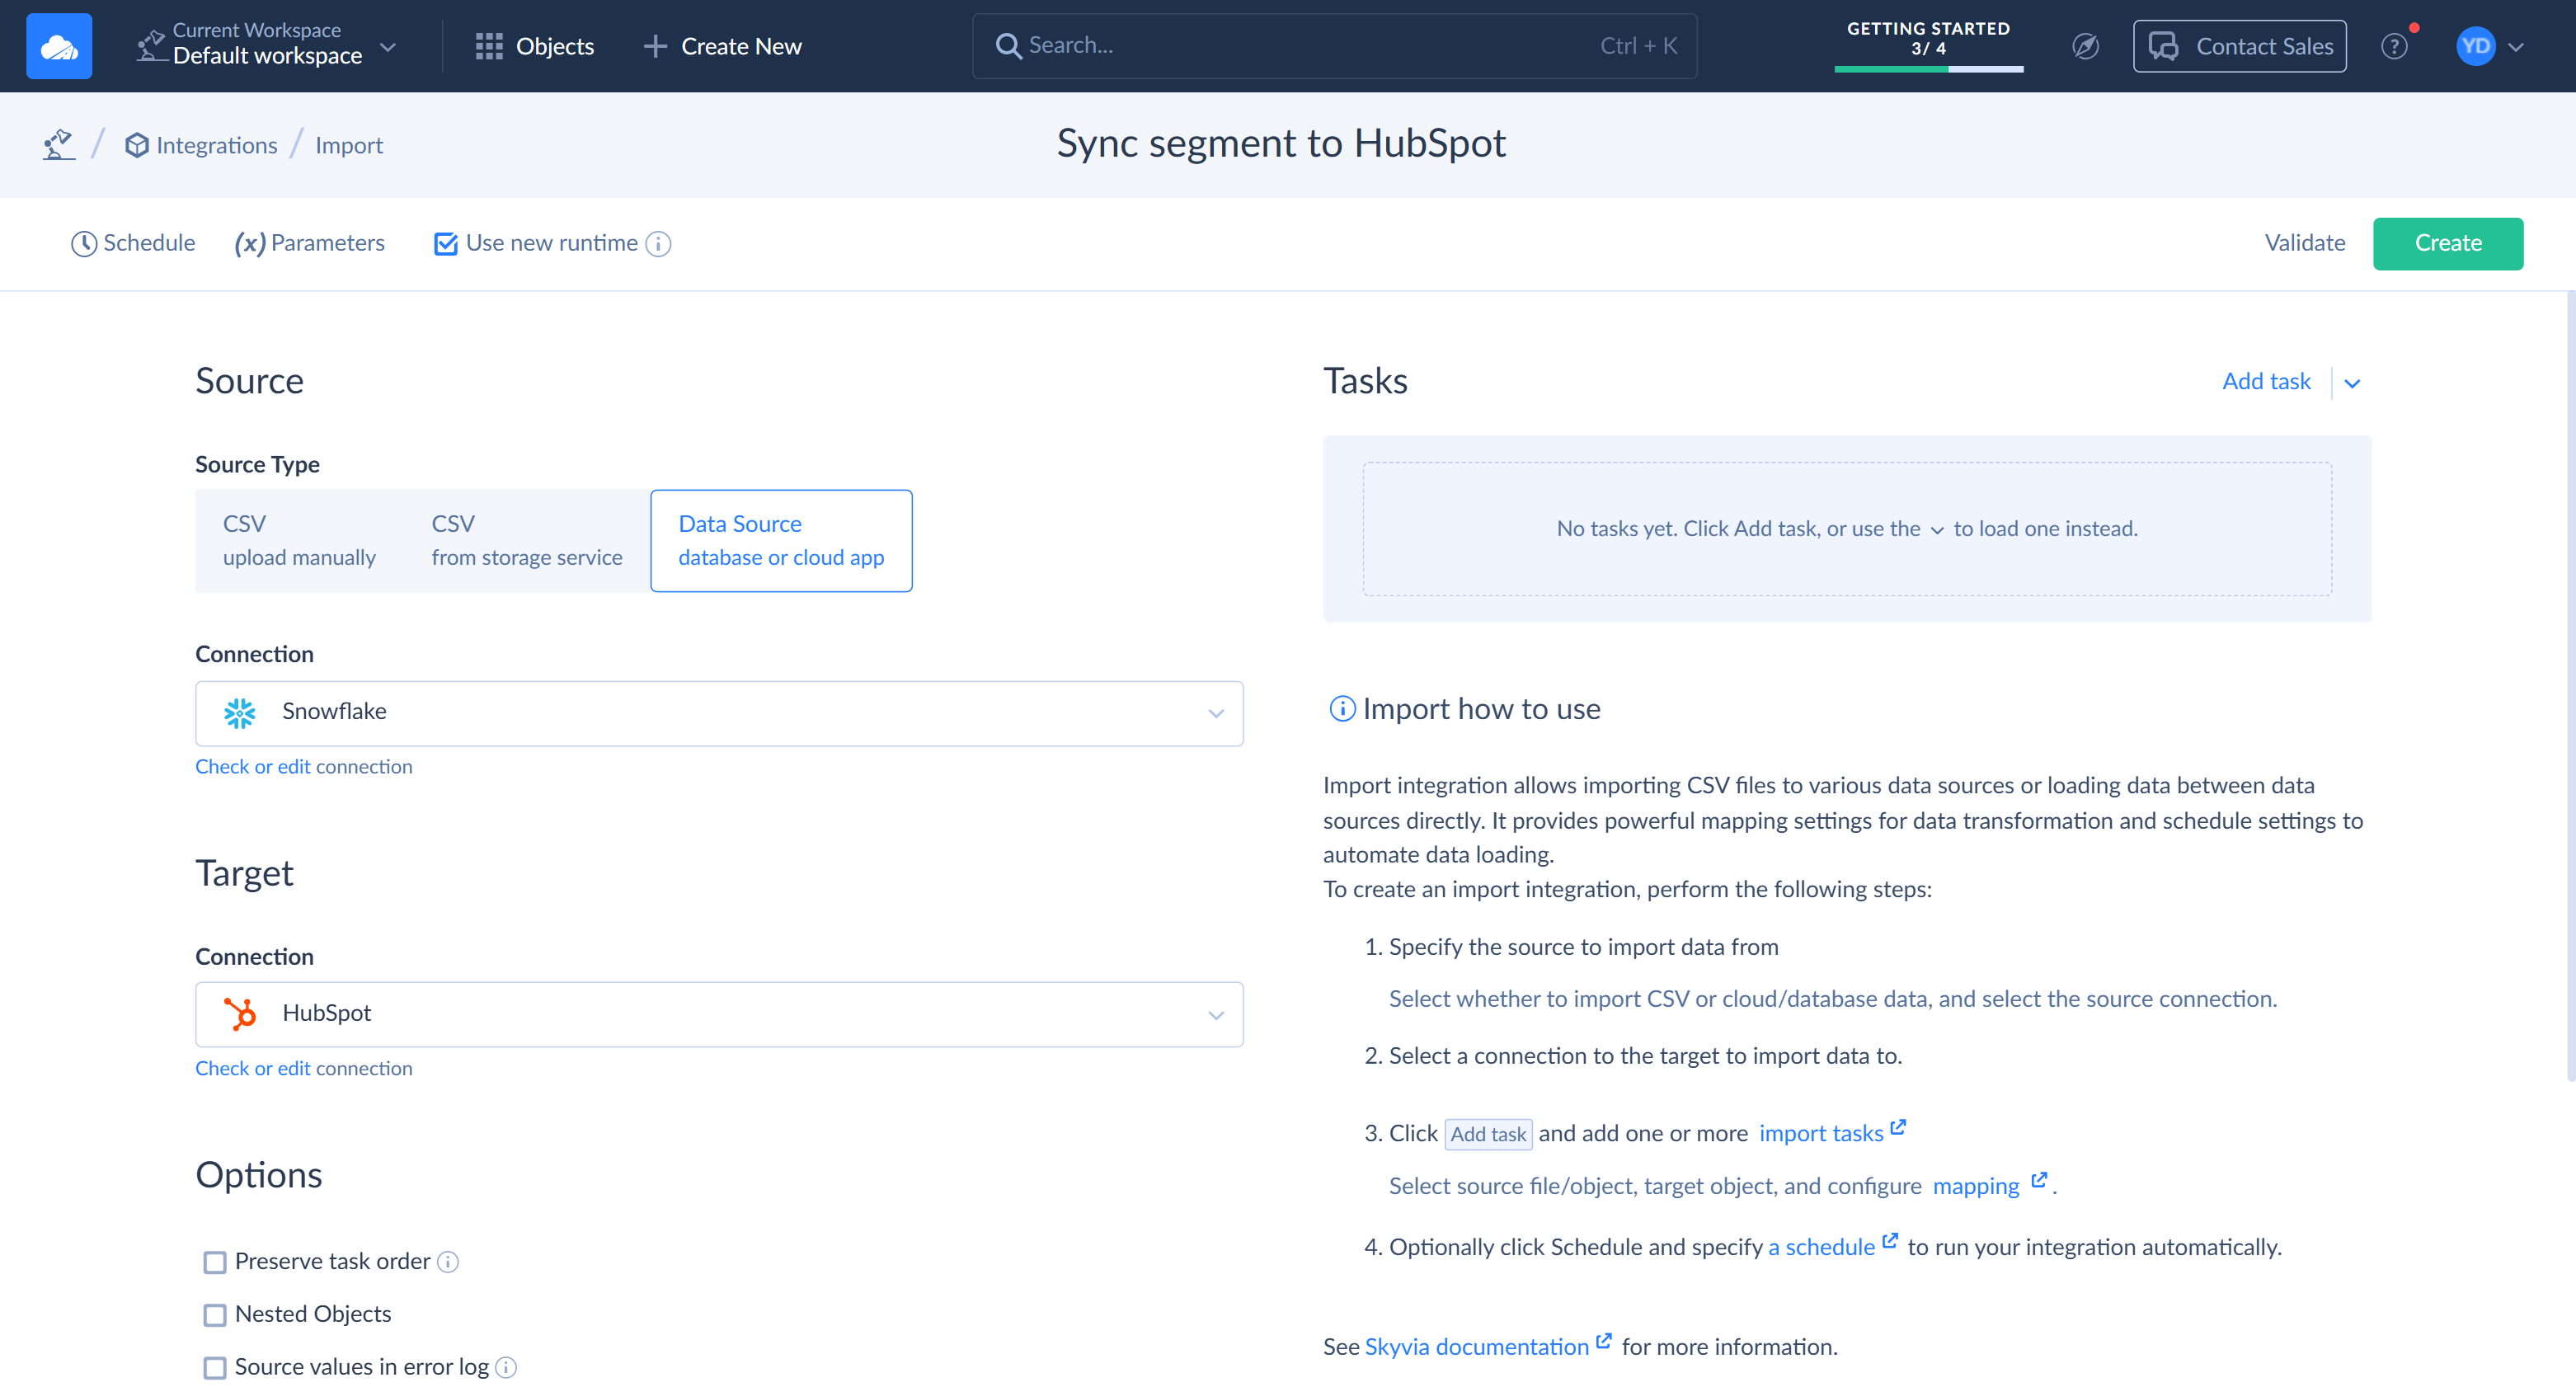
Click the default Untitled name and rename the import, for example, to Sync segment to HubSpot.
-
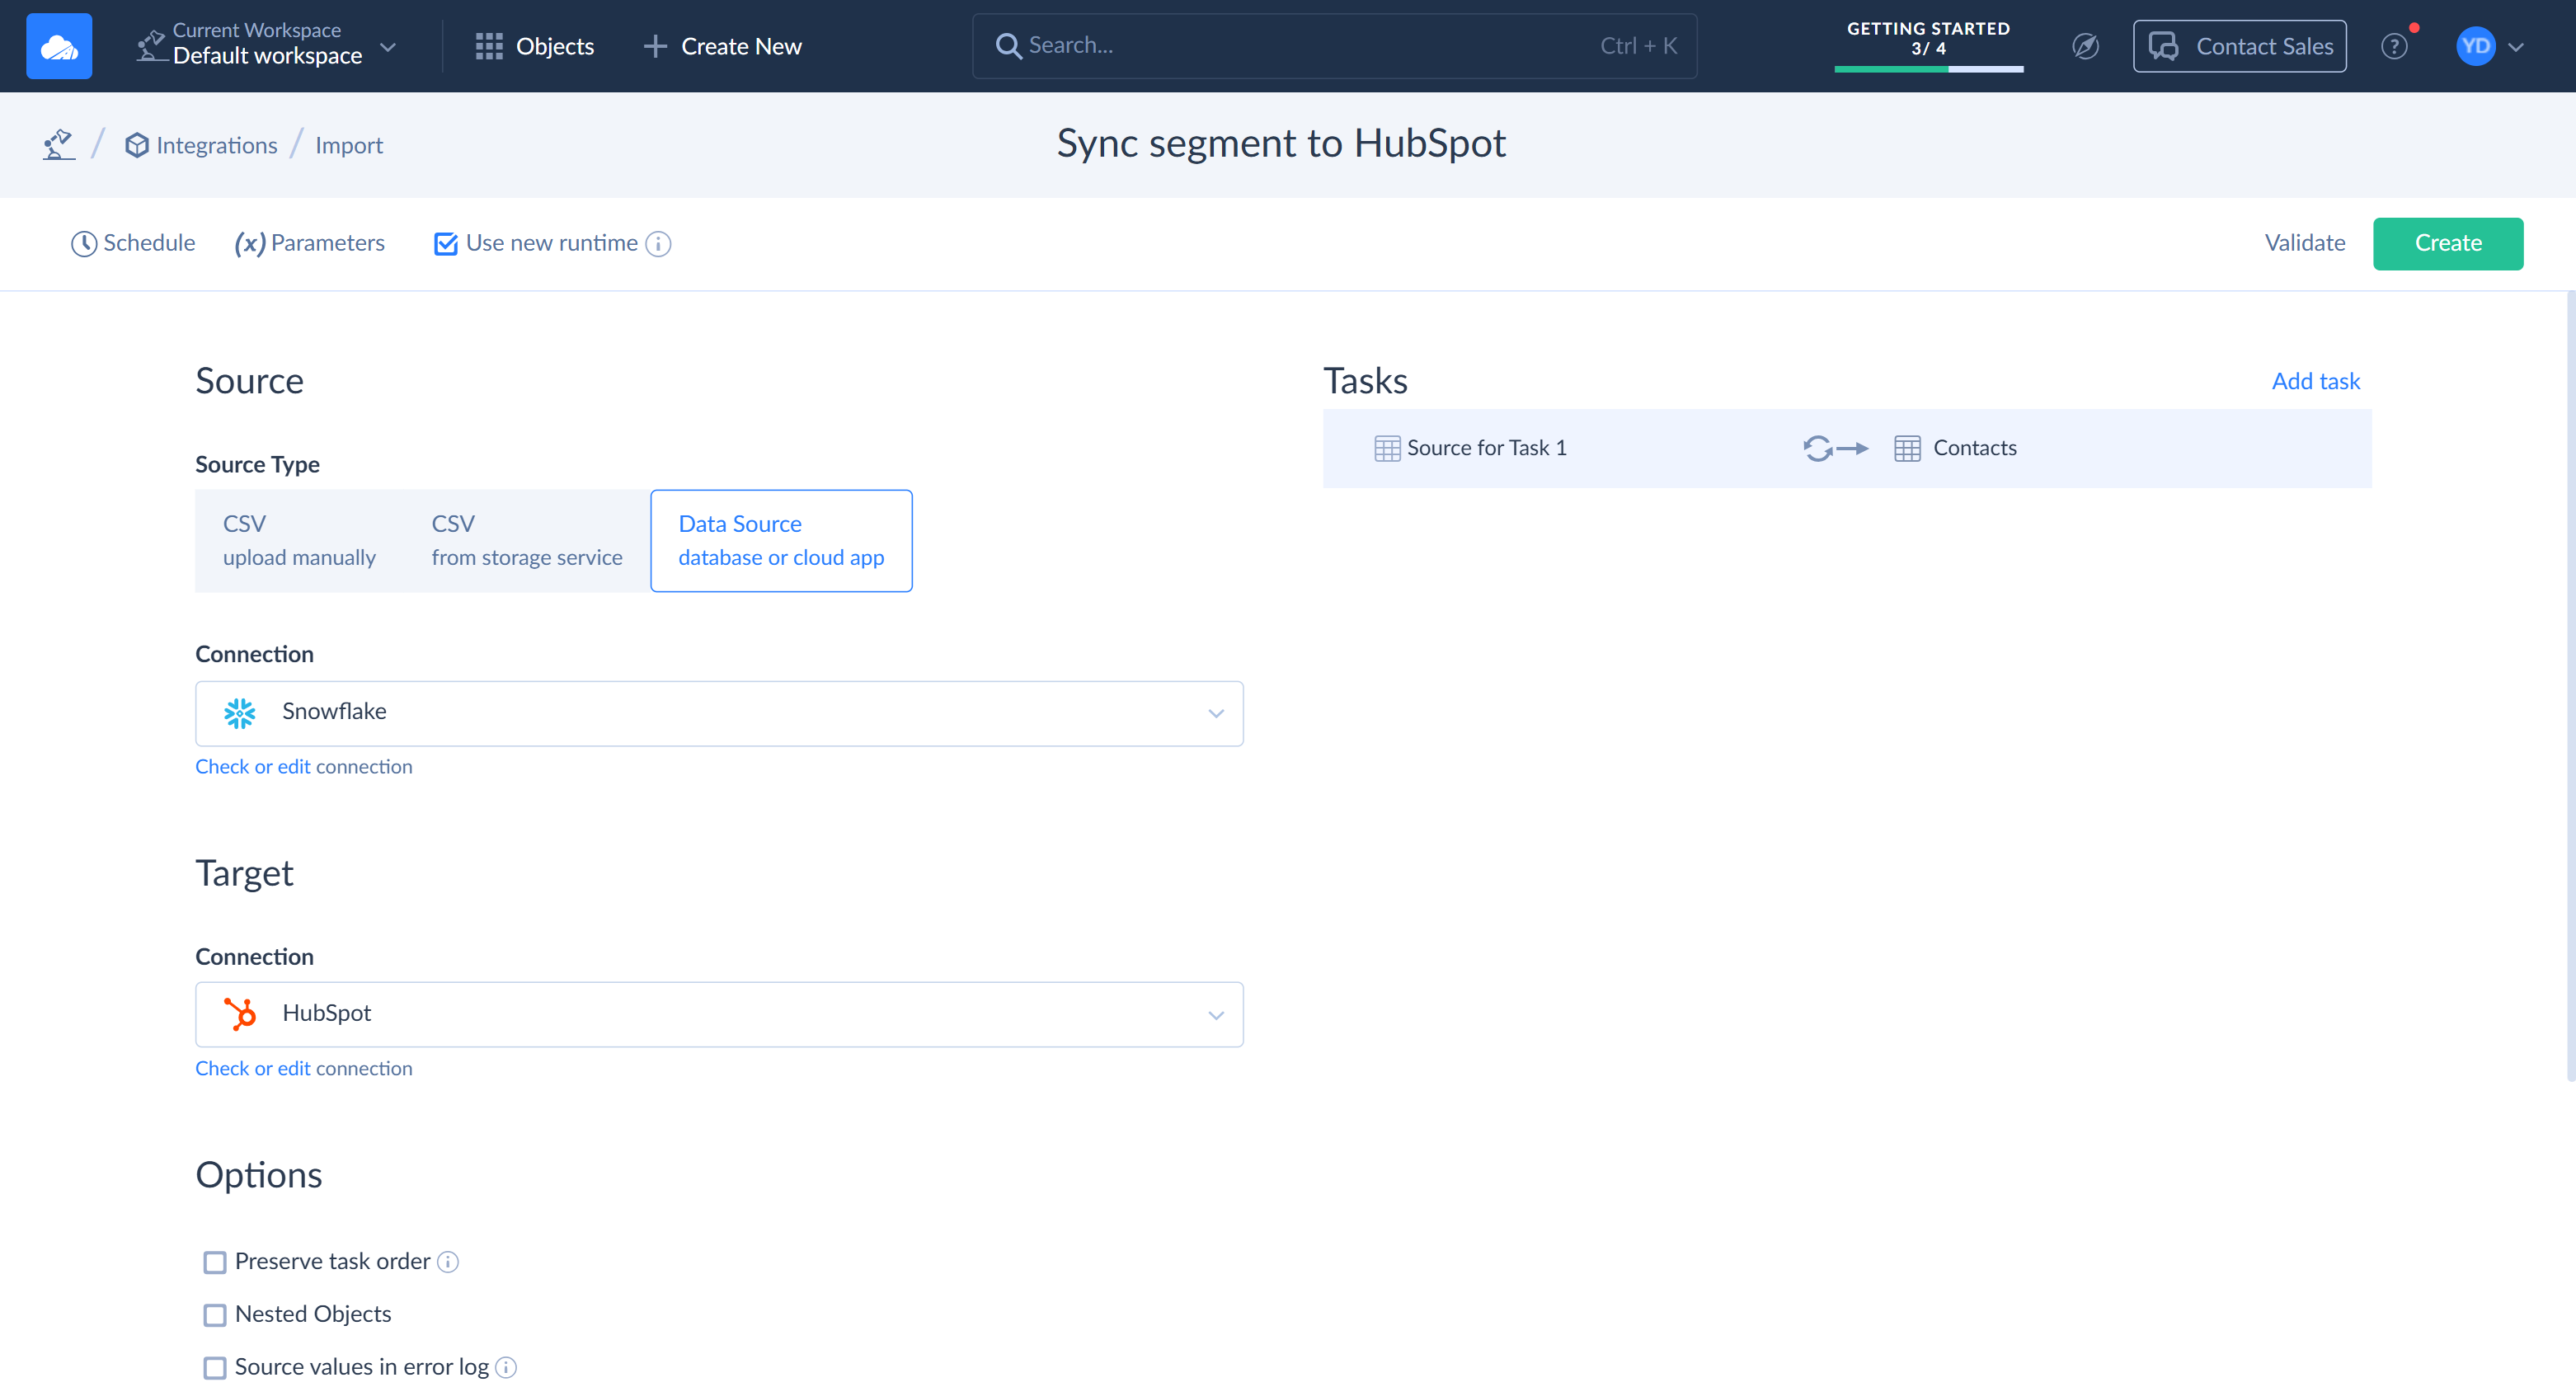
Under Source Type, click Data Source. In the Connection list, select the Snowflake connection.
-
Under Target, in the Connection list, select the HubSpot connection.
Add the Segment Task
The Snowflake connection points to the RAW schema, and the view is in MODELED. To read the view, query it with SQL in the Advanced editor mode.
-
Click Add task.
-
Under Editor Mode, click Advanced. In the Actions list, select Execute Command.
-
In the Command Text box, enter the following command:
SELECT CONTACT_ID, SEGMENT FROM HUBSPOT_DEMO.MODELED.CONTACT_SEGMENTS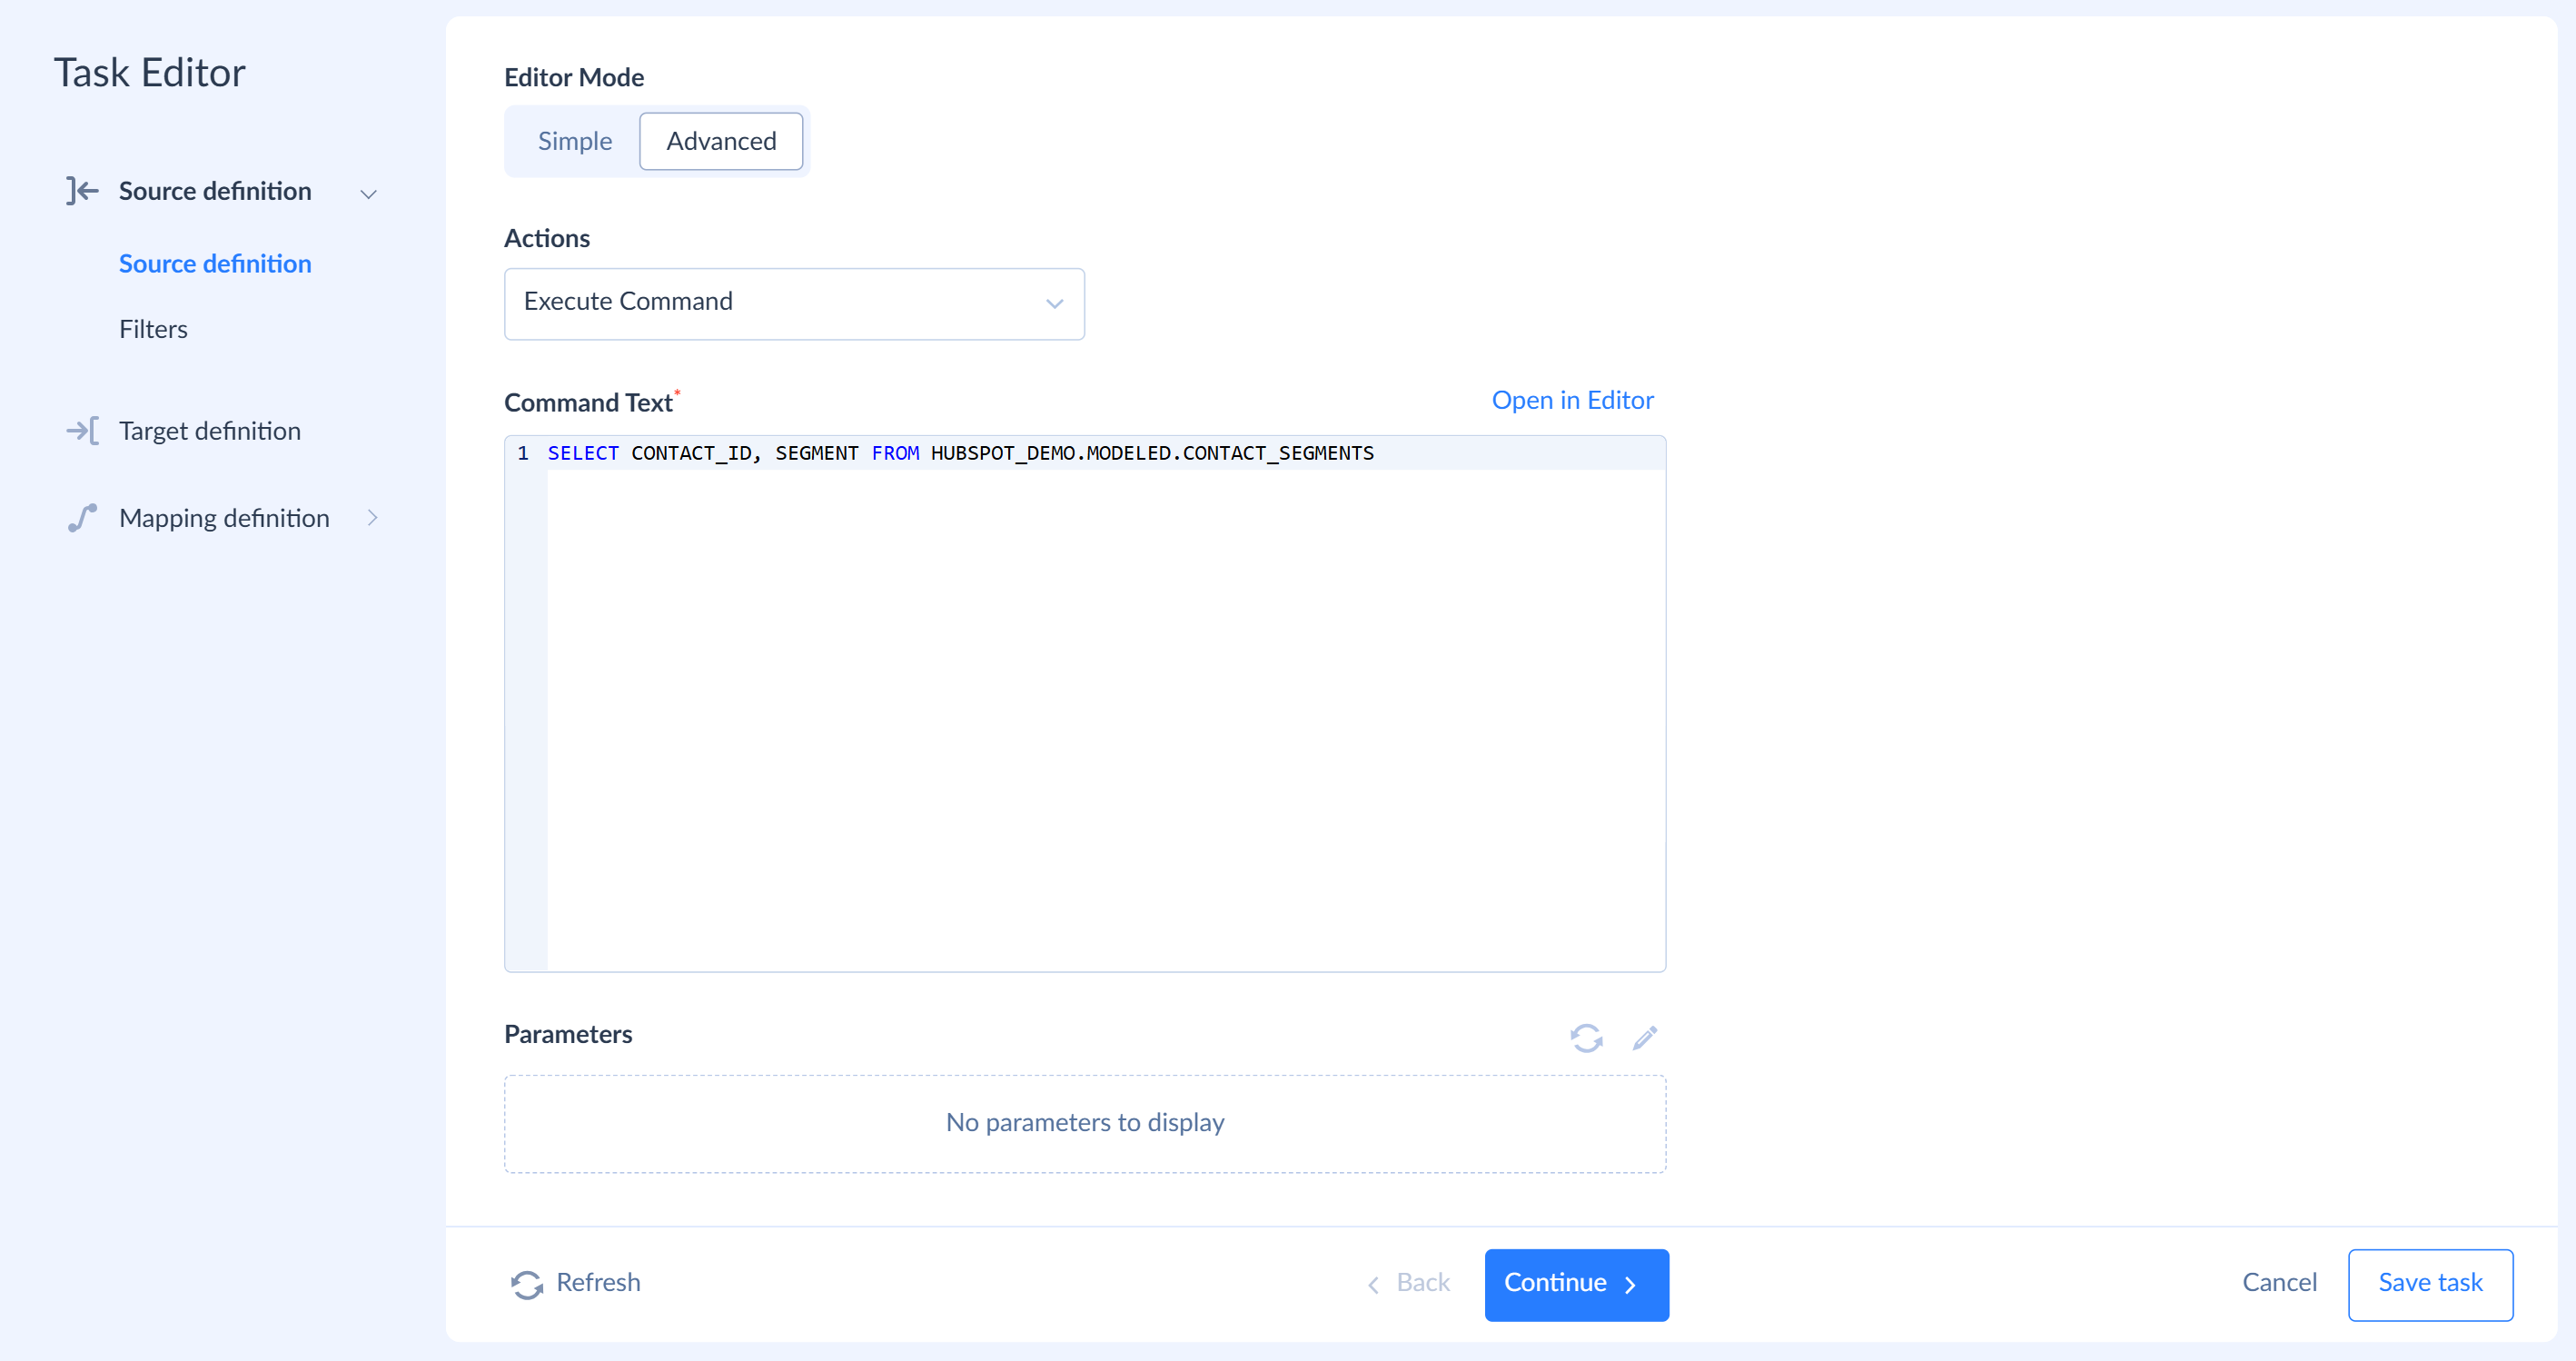
-
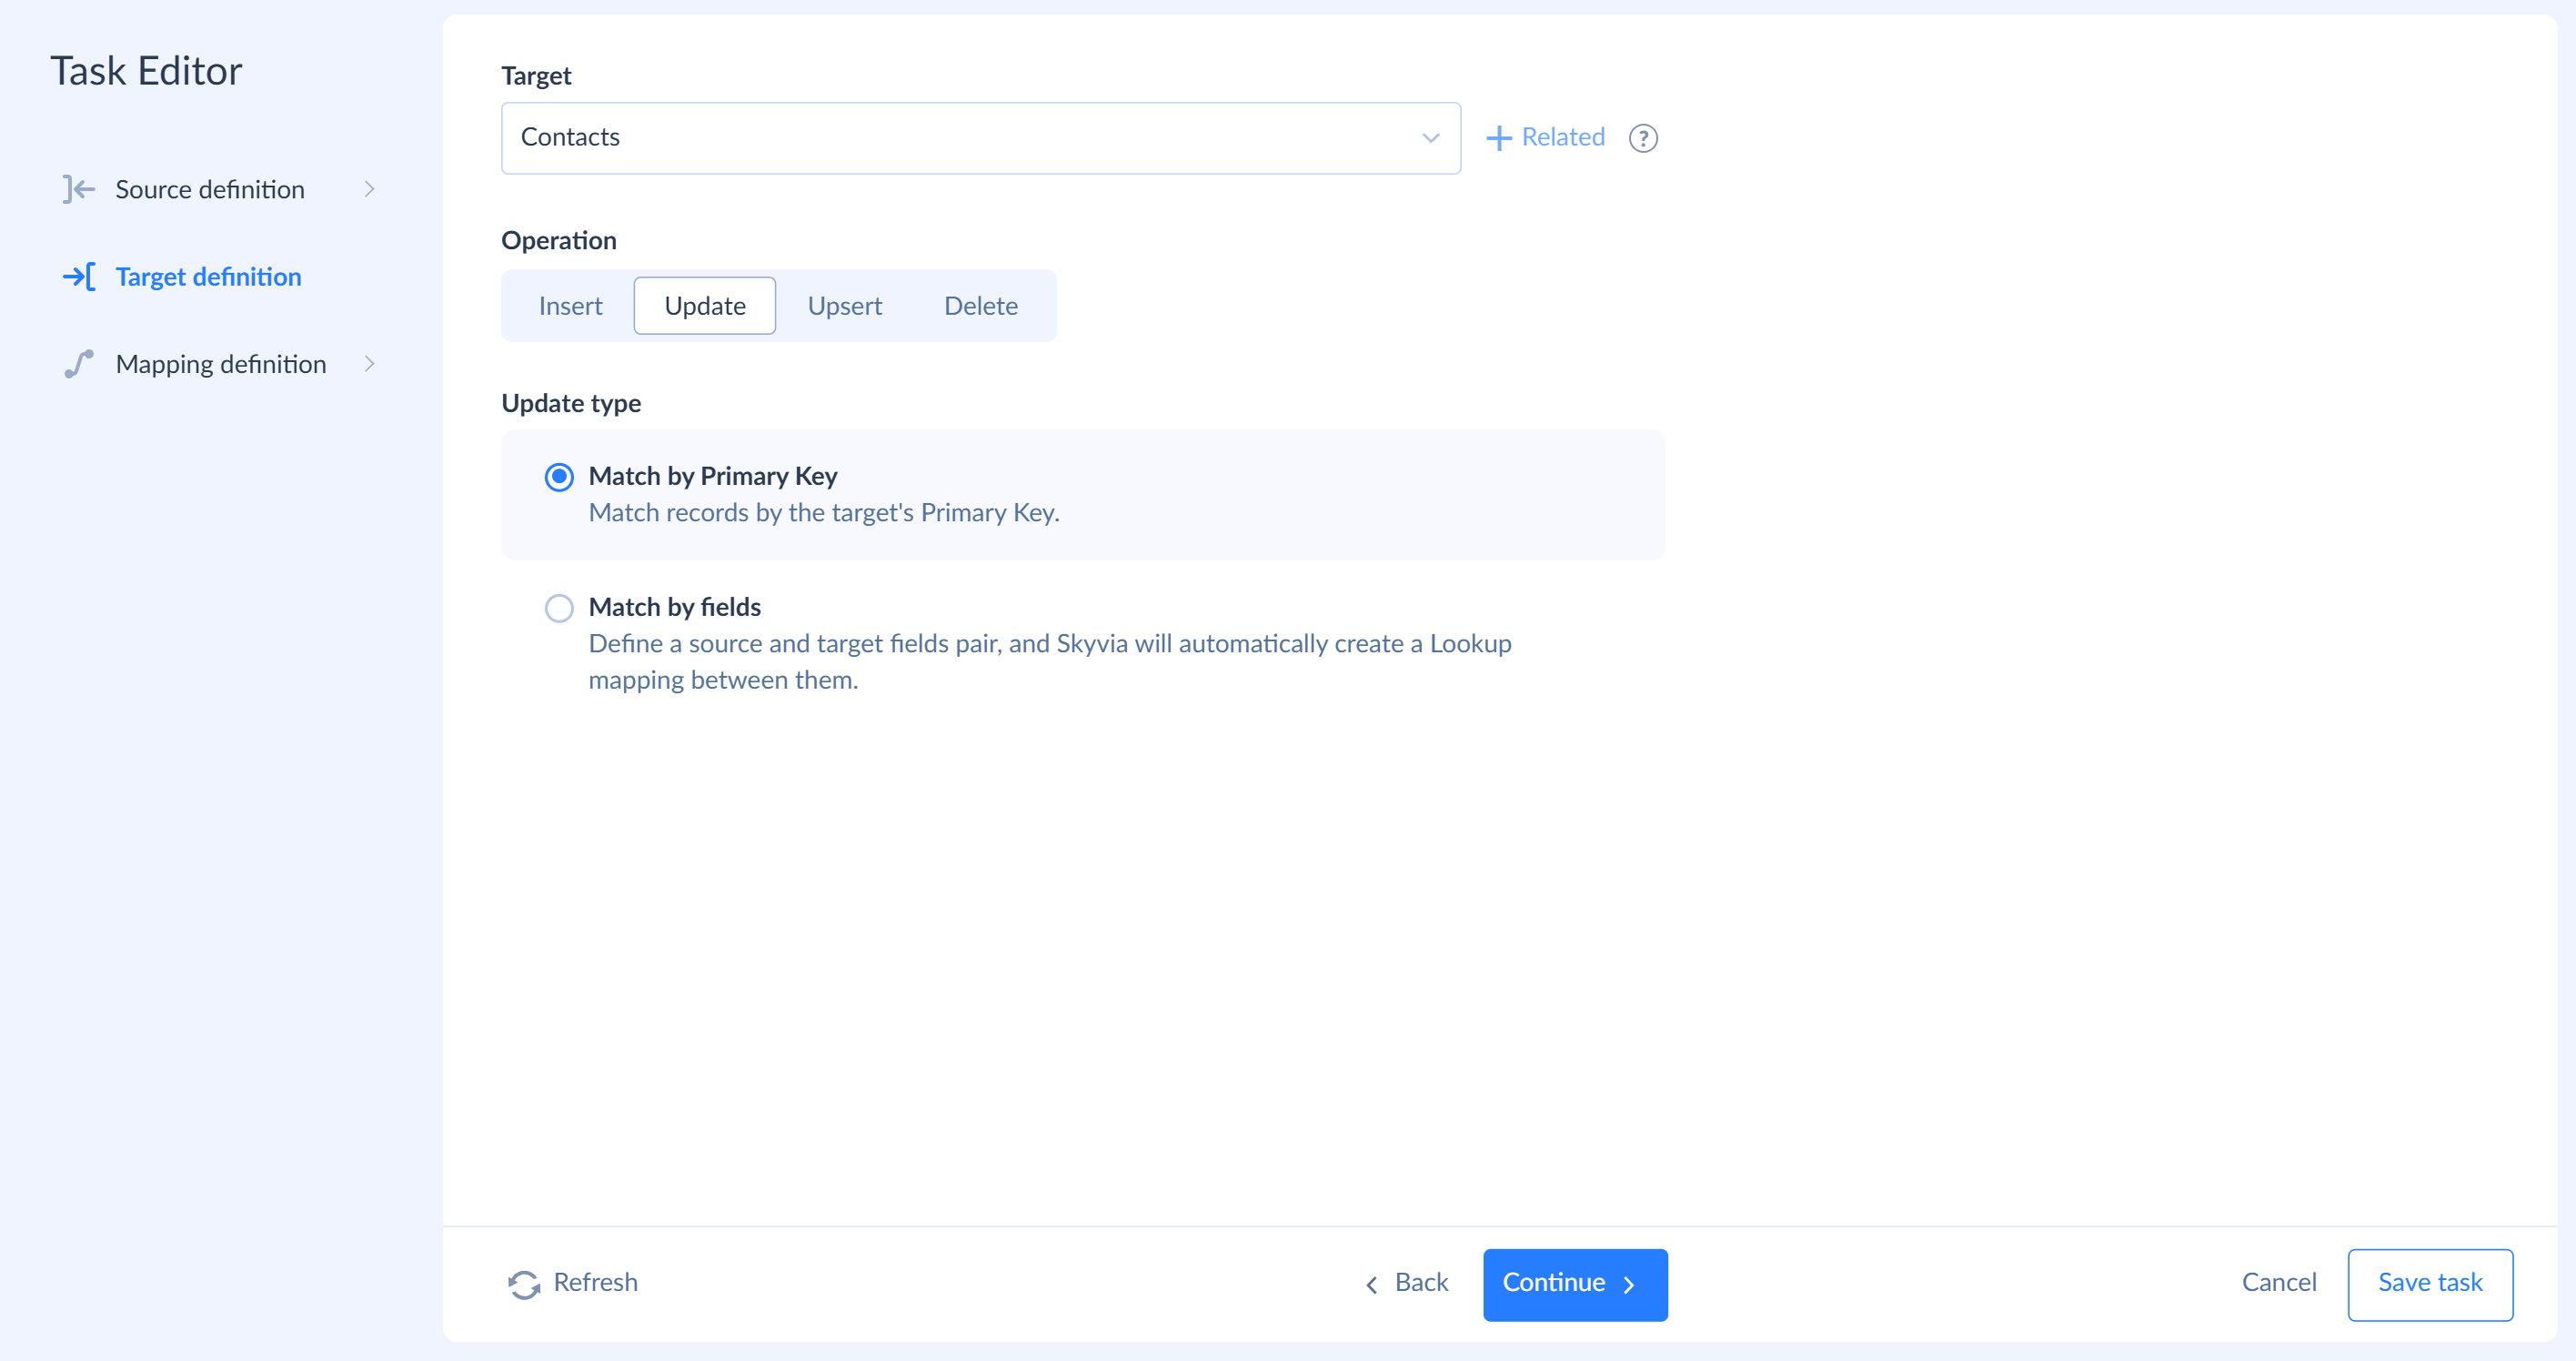
Click Target definition. In the Target list, select Contacts and click Update. For Update type, keep Match by Primary Key: the view returns the HubSpot contact IDs, so Skyvia finds each contact without additional setup.
-
Click Mapping definition. Click the Id column, select Column, and select
CONTACT_ID. Then map the Customer Segment column toSEGMENTthe same way. If Customer Segment isn't in the list, click Refresh to reload the HubSpot fields.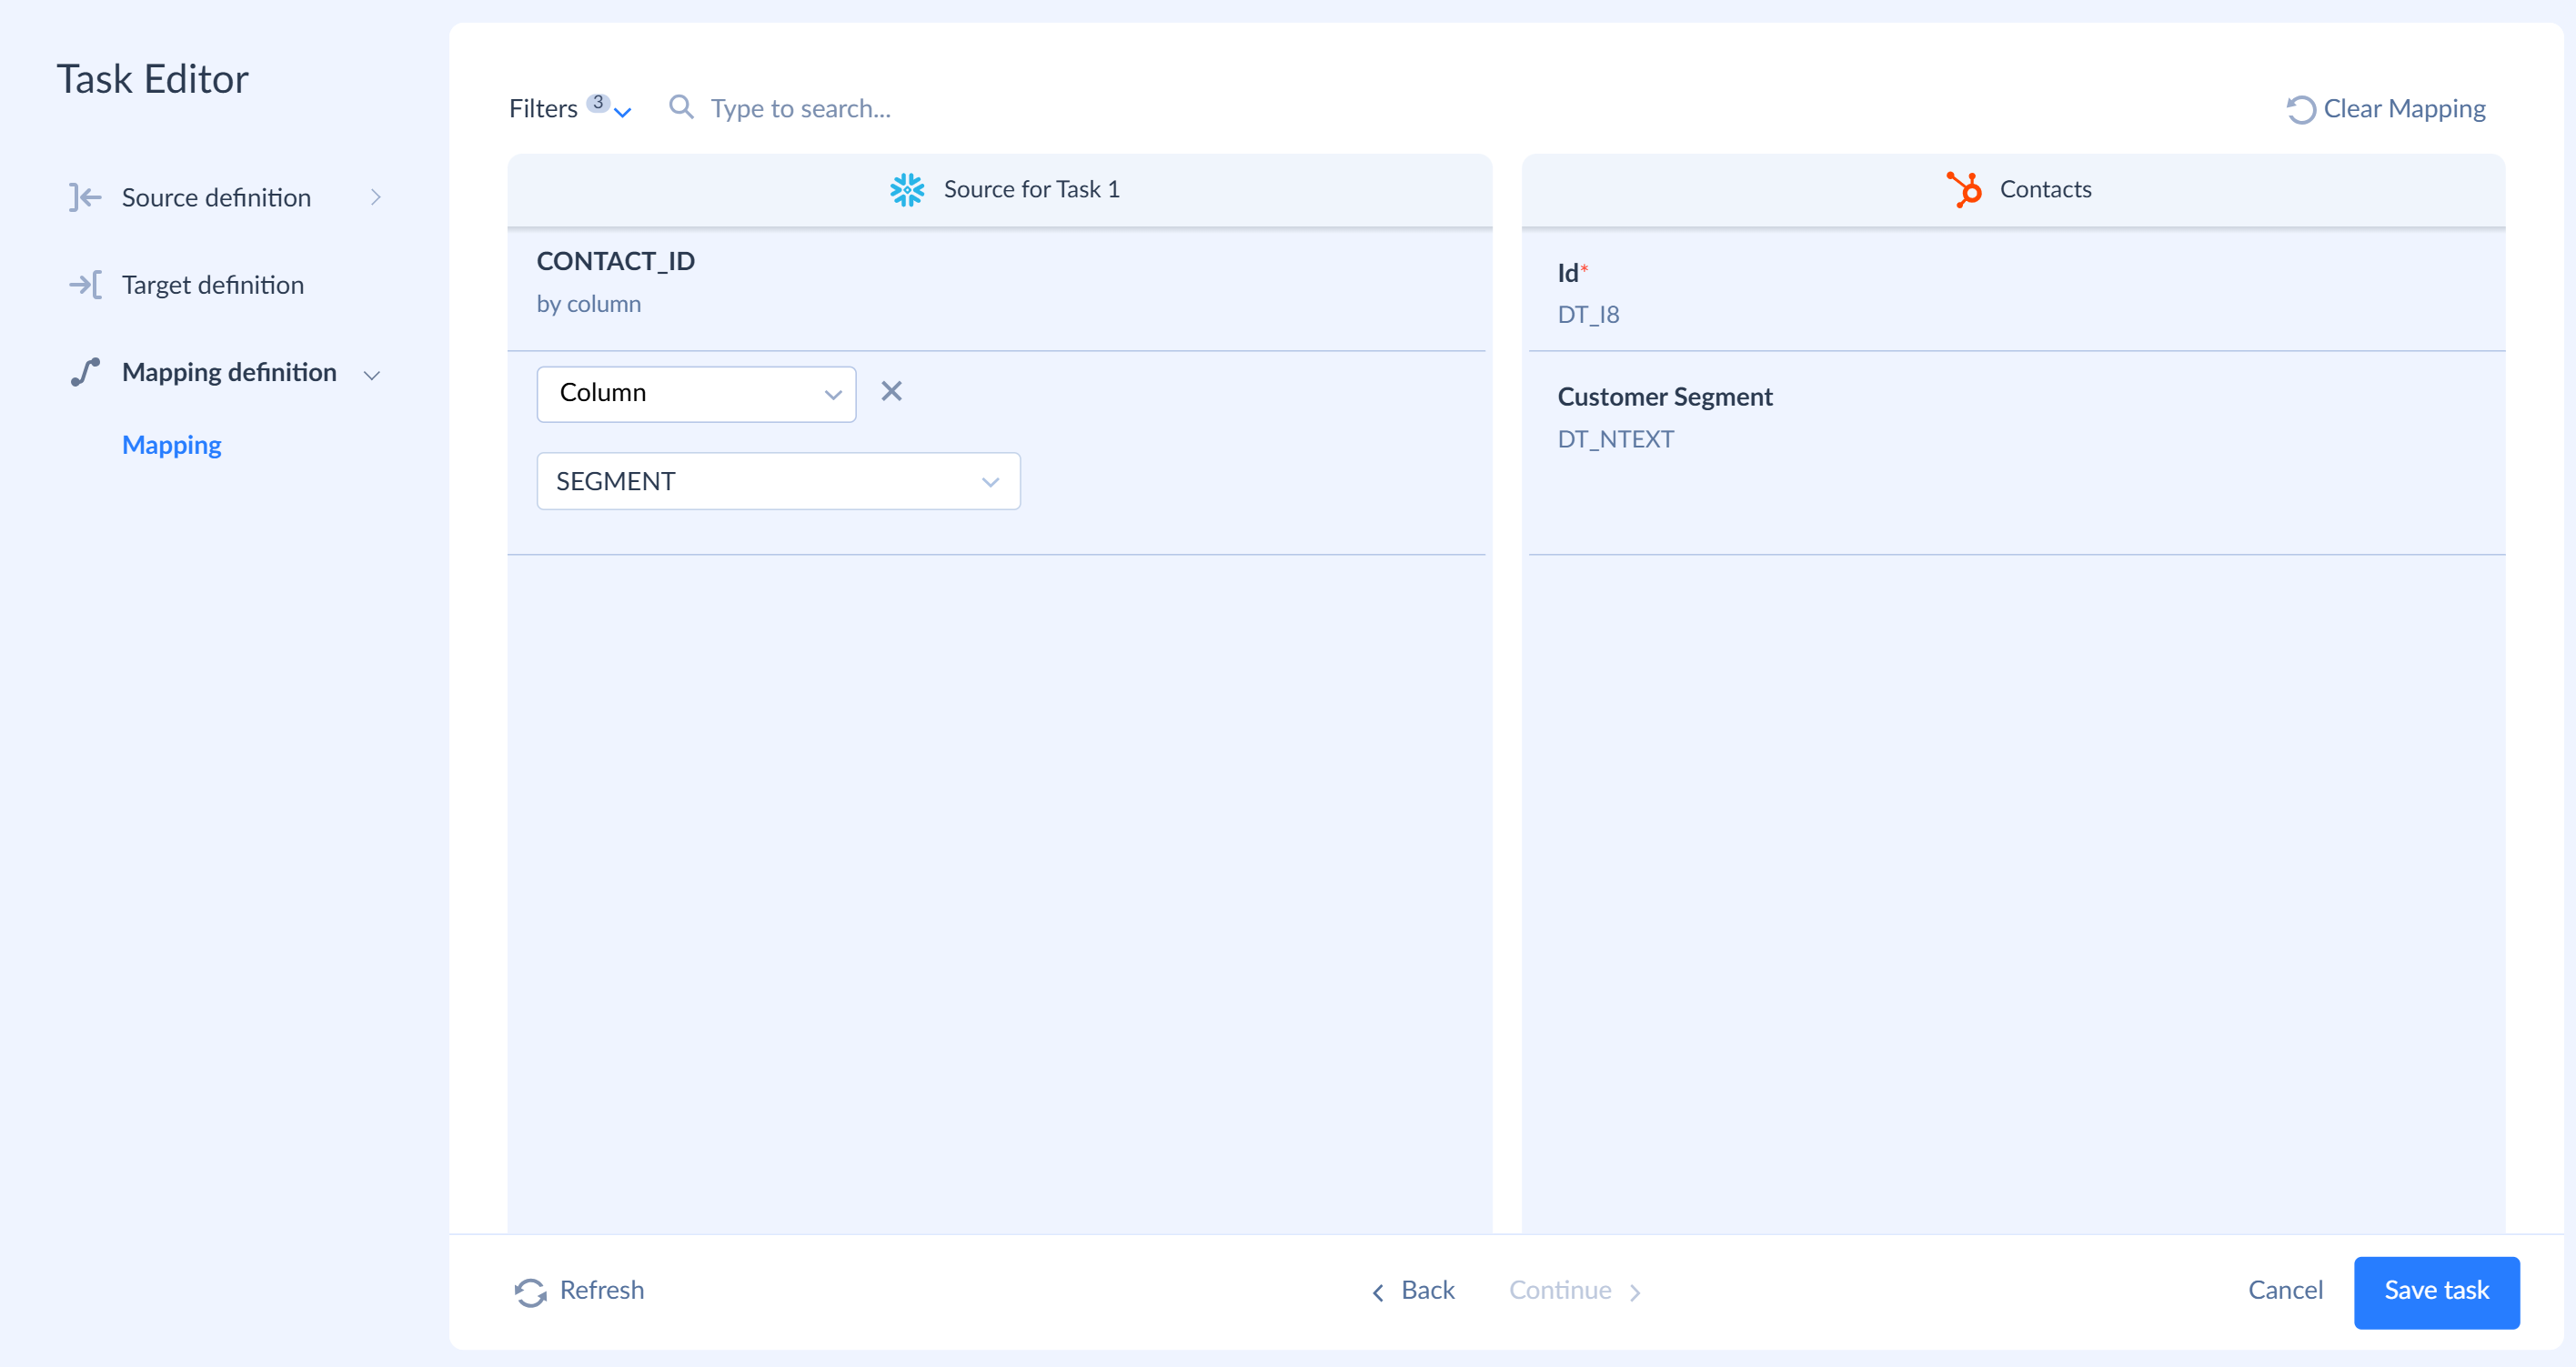
-
Click Save task.
Run the Import
-
Click Create to save the import.
-
Click Run.
-
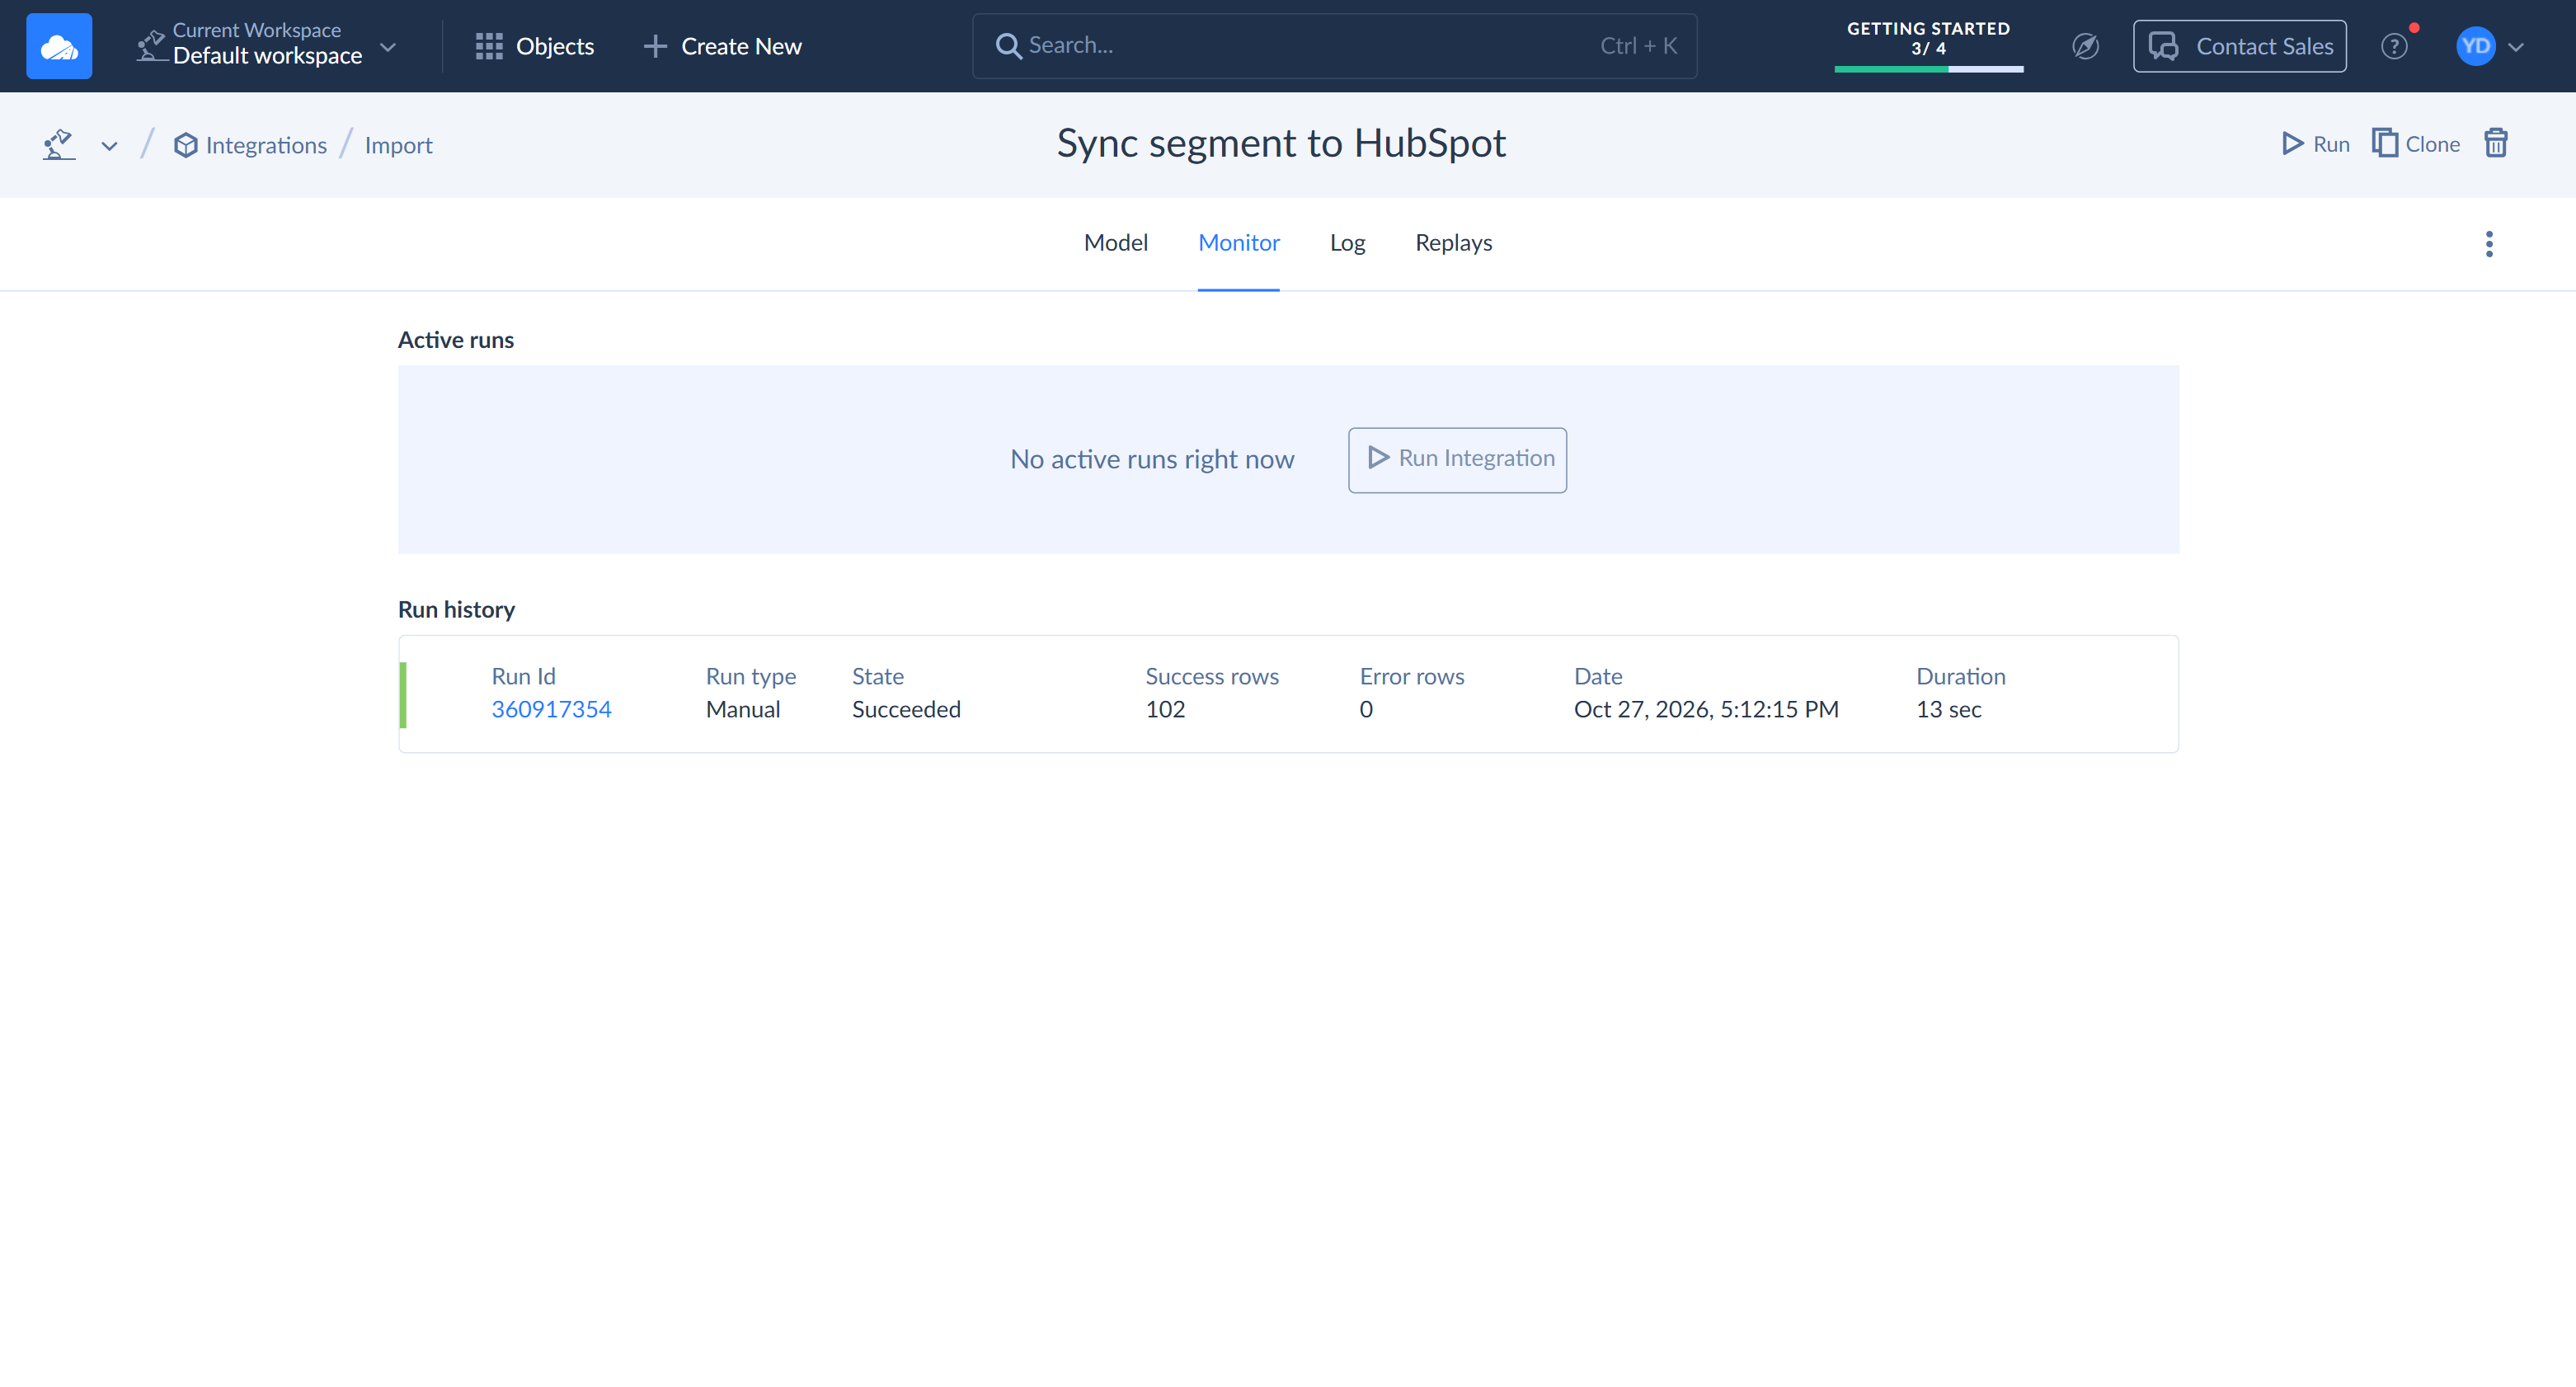
When the run completes, open the Monitor tab. The run in Run history shows 102 success rows and 0 error rows.
-
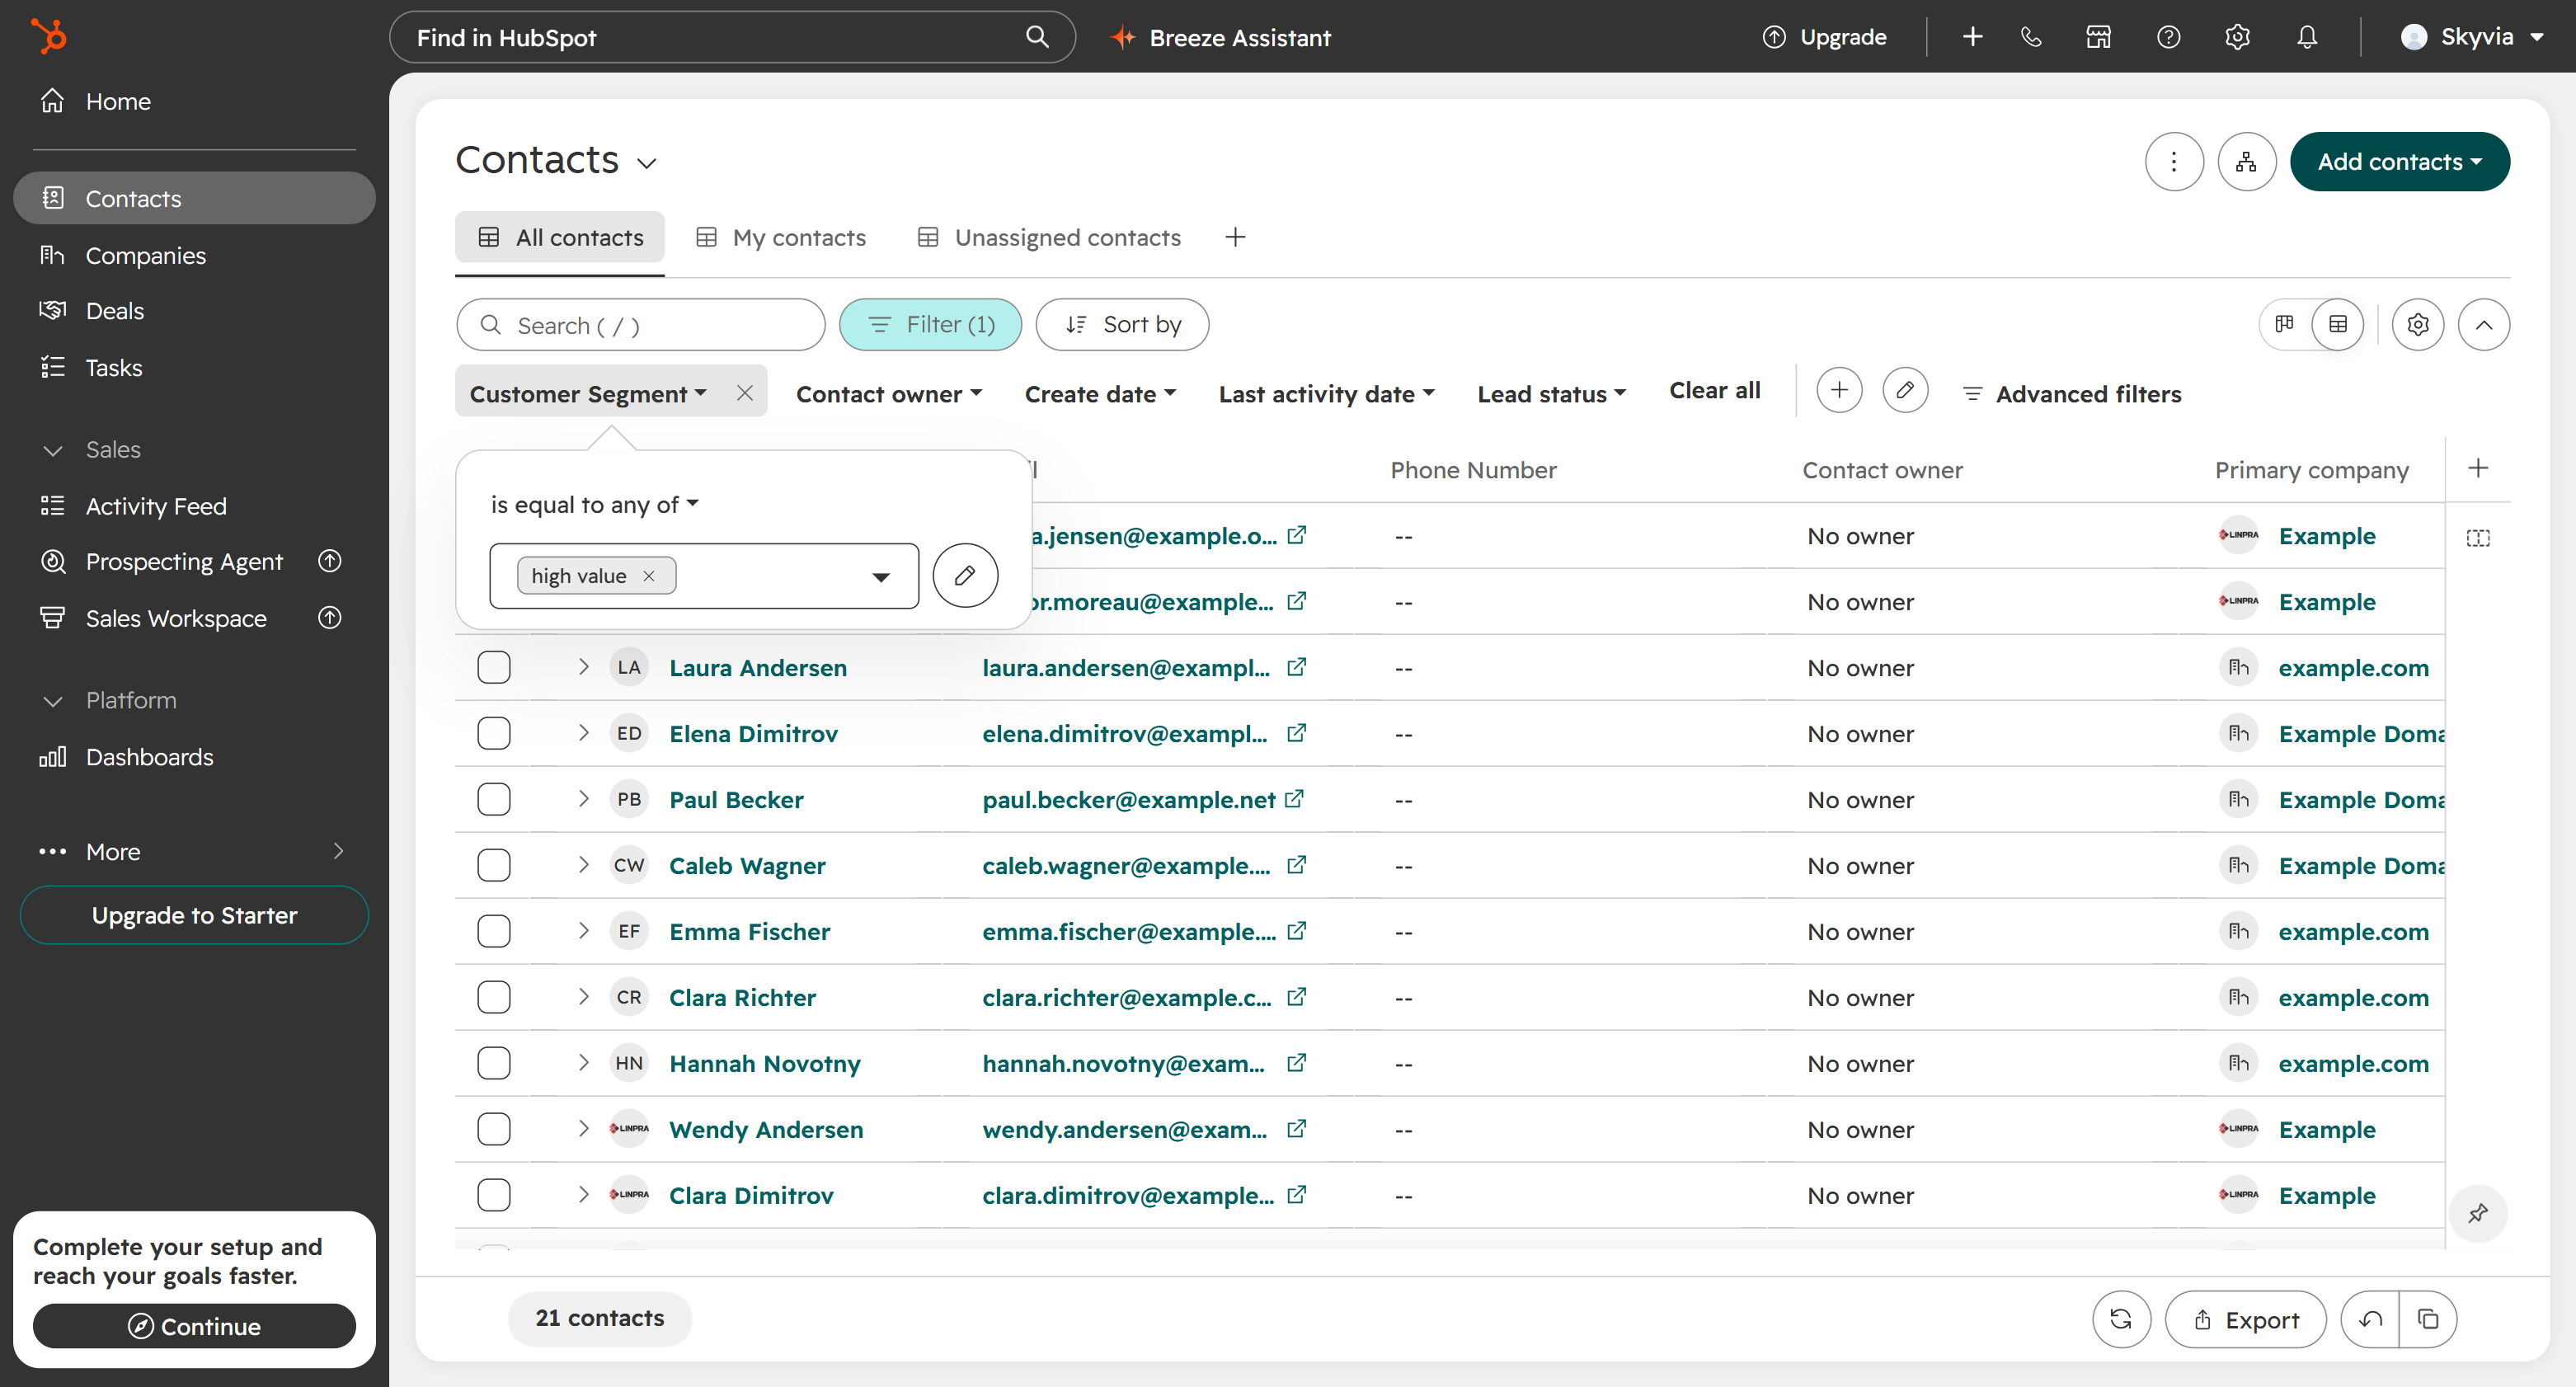
In HubSpot, click Contacts in the left menu. Next to the quick filters above the table, click + and add Customer Segment.
-
Click the Customer Segment filter. Keep is equal to any of, type High value in the Add values box, and press Enter. The table shows the 21 high-value contacts.
Schedule Both Integrations
So far, you've run both integrations manually. To keep the segment up to date as deals change in HubSpot, schedule integrations to run every day. The replication loads the changes to Snowflake, the view recalculates the segment, and the import writes the new labels back to HubSpot.
The import reads data that the replication loads, so schedule it to start after the replication. With the test data, the replication takes about a minute, so a 30-minute gap is enough.
Schedule the Replication
-
Open the Replicate HubSpot to Snowflake replication and click Schedule.
-
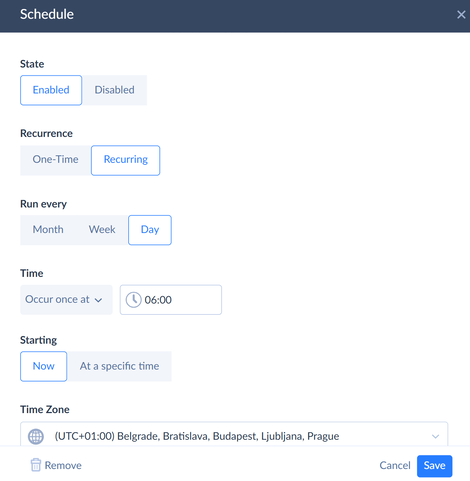
Under State, keep Enabled. Under Recurrence, click Recurring. Under Run every, keep Day.
-
Under Time, keep Occur once at and enter 06:00.
-
Under Starting, keep Now and select your Time Zone.
-
Click Save in the Schedule window, and then click Save in the replication editor.
Schedule the Import
- Open the Sync segment to HubSpot import and click Schedule.
- Set the same daily schedule, but enter 06:30 under Occur once at.
- Click Save in the Schedule window, and then click Save in the import editor.
Clean Up Resources
When you no longer need the setup, disable the schedules and remove the Snowflake objects that this guide created.
-
In Skyvia, open the replication and click Schedule. Under State, click Disabled, click Save in the Schedule window, and then click Save in the replication editor.
-
Do the same for the import.
-
In Snowflake, run the following script:
USE ROLE ACCOUNTADMIN;
DROP USER IF EXISTS SKYVIA_USER;
DROP NETWORK POLICY IF EXISTS SKYVIA_POLICY;
DROP DATABASE IF EXISTS HUBSPOT_DEMO;
DROP WAREHOUSE IF EXISTS SKYVIA_WH;
DROP ROLE IF EXISTS SKYVIA_ROLE;
Conclusion And Resources
You've built a round trip between HubSpot and Snowflake. Skyvia replicates HubSpot contacts, deals, and their associations to Snowflake, a SQL view assigns each contact a segment, and a Skyvia import writes the segment back to HubSpot every day. You built both directions in one platform, and the only code you wrote was the segment SQL.
You can extend this setup in several ways:
- Add more objects to the replication, such as Companies, and build segments for them.
- Run the replication and the import as one control flow so that the import starts right after the replication finishes.
- Move the segment SQL to a dbt project and run it with dbt in Skyvia when your models grow.
What You Learned
- How to connect Skyvia to Snowflake with a programmatic access token and to HubSpot with OAuth
- How to load test data to HubSpot with a Skyvia import
- How to replicate HubSpot objects to Snowflake with the replication wizard
- How to build a customer segment in Snowflake with a SQL view
- How to import the segment back to a HubSpot contact property
- How to schedule both integrations to keep the data in sync
Related Resources
This content is provided as is, and is not maintained on an ongoing basis. It may be out of date with current Snowflake instances
