Build Conversational Analytics with Amazon Quick and Snowflake MCP
Overview
Duration: 5
The enterprise data landscape is scattered. Teams are trapped in disconnected tools, business users wait days for insights, and engineers build fragile one-off integrations. This hands-on quickstart shows how to integrate Amazon Quick with Snowflake Cortex AI's Managed MCP server to build AI agents that transform how teams interact with enterprise data.
Business users can ask questions such as "What are our top-performing products this quarter?" — without writing SQL — while IT maintains security and governance through Snowflake's role-based access controls and OAuth.
By the end of this quickstart you will have a working, production-ready pattern that supports self-service analytics across your organization.
What You Will Build
- A Snowflake database with 6 Sales Operations tables loaded from a public S3 bucket
- A Semantic View over the sales data with dimensions, metrics, relationships, and verified queries
- A Cortex Agent powered by Cortex Analyst for natural-language text-to-SQL
- A Snowflake Managed MCP Server that exposes the agent to external clients
- An OAuth Security Integration for secure authentication
- An Amazon Quick MCP Connector linked to the Snowflake MCP Server
- An Amazon Quick Space, Chat Agent, and Flow for conversational analytics
What You Will Learn
- How to use Snowflake CoCo and a pre-built skill to automate creation of a Semantic View, Cortex Agent, and MCP Server
- How Model Context Protocol (MCP) standardizes connecting AI agents across platforms
- How to configure OAuth for Snowflake-Quick integration
- How to build conversational analytics experiences in Amazon Quick using Spaces, Chat Agents, and Flows
What You Will Need
- A Snowflake account with
ACCOUNTADMINrole access - A web browser with access to both Snowsight and the AWS Management Console
- An AWS account with permission to create Amazon Quick resources
- An Amazon Quick Author subscription or higher
- Familiarity with basic SQL and Snowsight
- Basic knowledge of MCP (Model Context Protocol) is helpful but not required
Prerequisites
Duration: 2
Before starting, make sure your environments are ready.
Snowflake
- Access to Snowsight (
app.snowflake.com) using a user withACCOUNTADMINrole - Snowflake CoCo enabled in your Snowflake account
- The ability to create databases, warehouses, roles, security integrations, agents, and MCP servers
AWS
- An AWS account with Administrator Access (or equivalent permissions to use Amazon Quick)
- Amazon Quick Author subscription or higher
- Permissions to create Amazon Quick connectors, spaces, chat agents, and flows
aside positive
If you are using a temporary AWS or Snowflake account (e.g., a trial or workshop account), all resources you create here can be cleaned up at the end of the quickstart by following the Cleanup section.
Architecture
Duration: 3
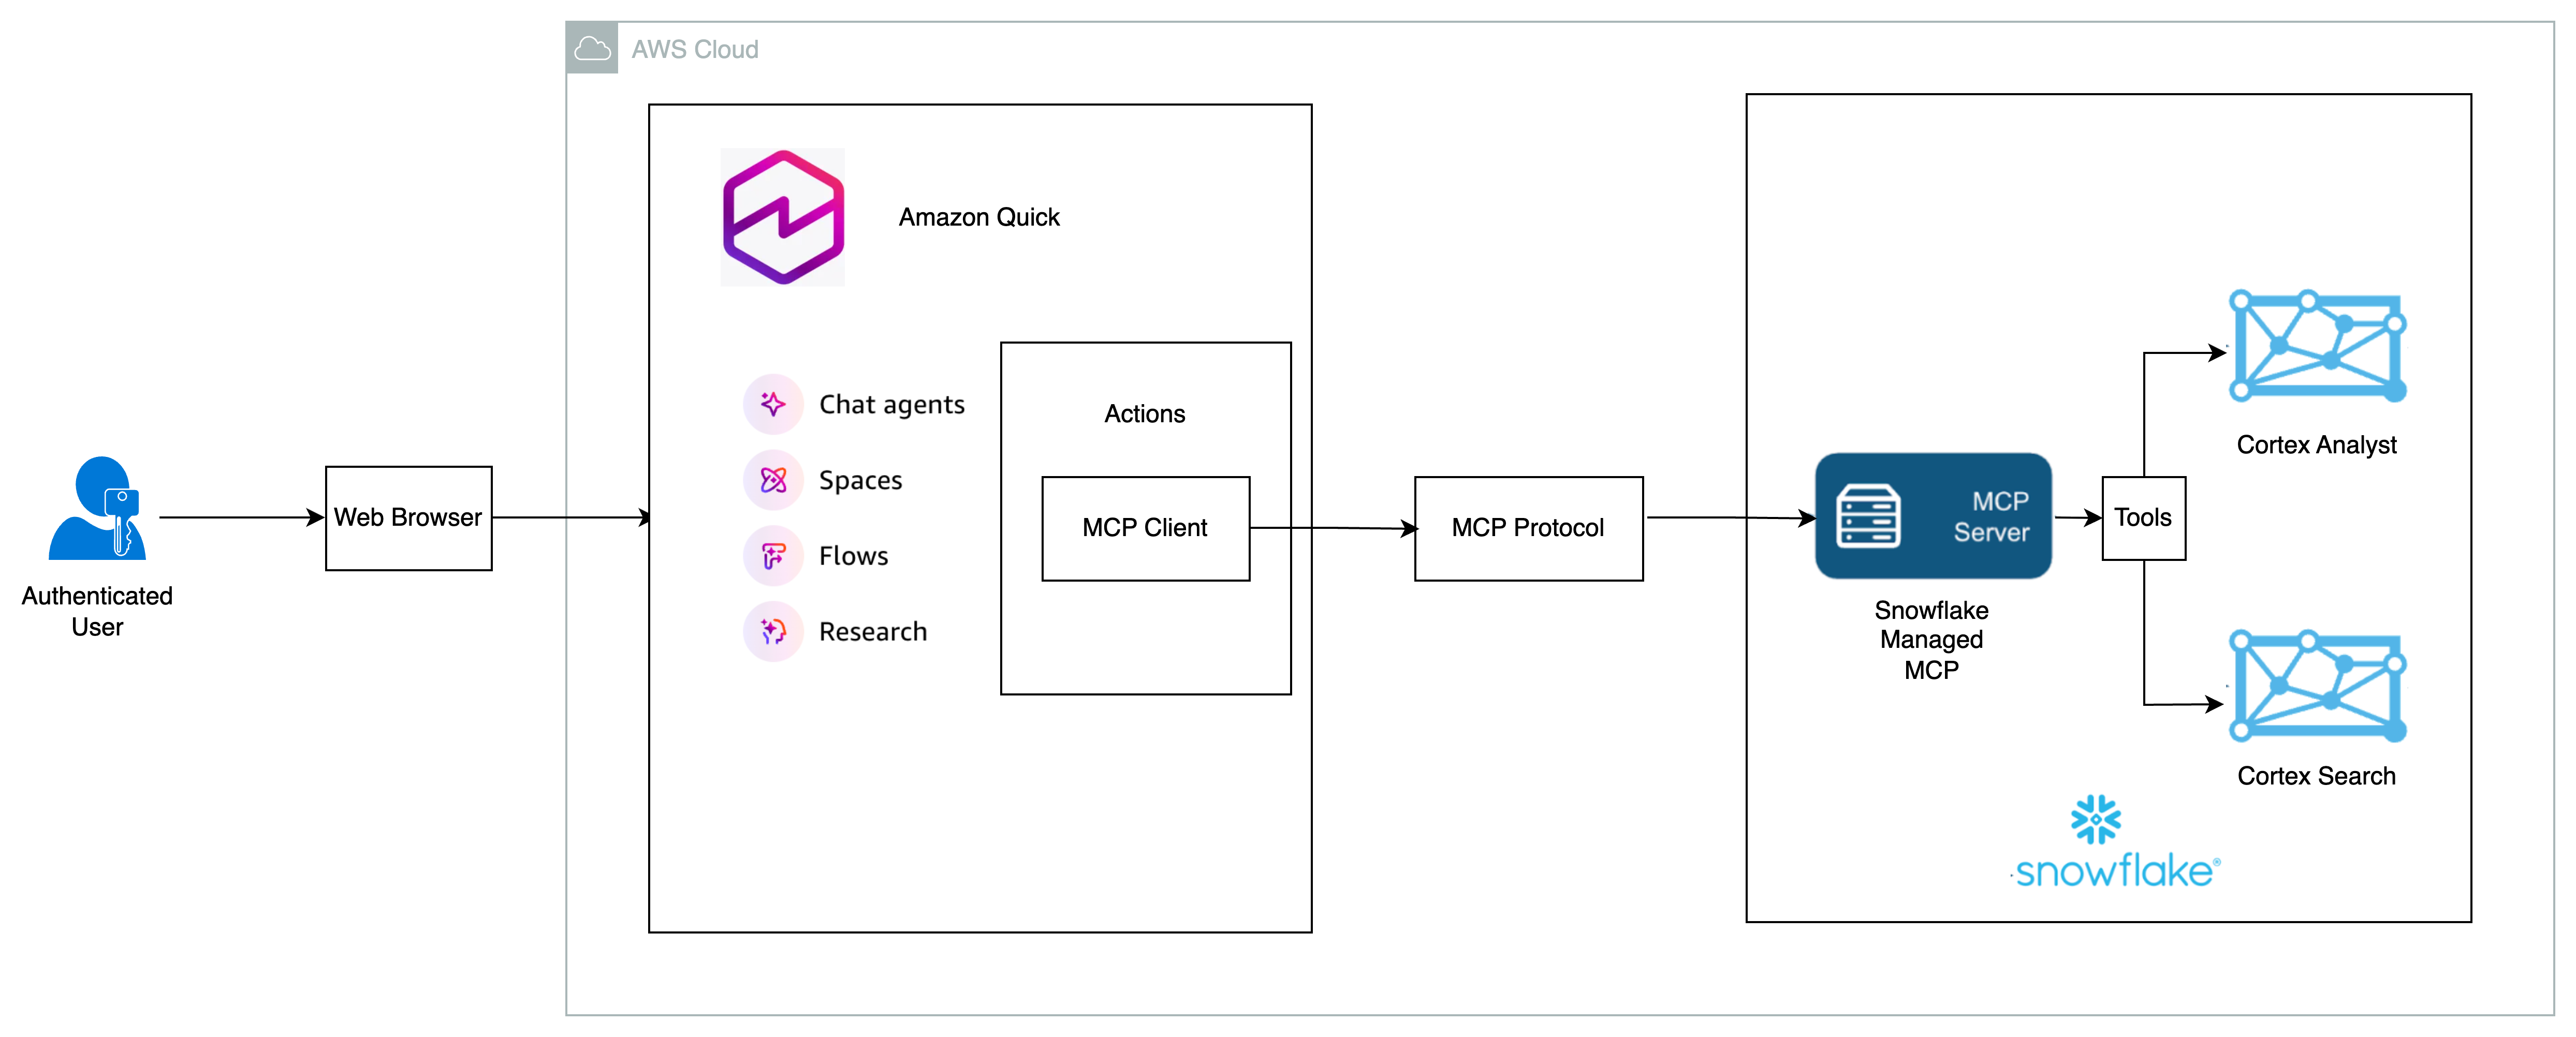
The end-to-end architecture follows the flow:
Amazon Quick → (OAuth 2.0 + MCP Protocol) → Snowflake Managed MCP Server → Cortex Agent → Cortex Analyst (text-to-SQL) → Semantic View → 6 Sales Ops tables
| Layer | Component | Purpose |
|---|---|---|
| Data | 6 Sales Ops Tables | Source data for analytics |
| Semantic | SALES_OPS_SEMANTIC_VIEW | Business-friendly layer with dimensions, metrics, and verified queries |
| AI | SALES_OPS_AGENT | Cortex Analyst-powered agent translating natural language to SQL |
| Protocol | SALES_OPS_MCP_SERVER | Snowflake Managed MCP server exposing the agent |
| Security | SALES_OPS_QUICK_SUITE_OAUTH | OAuth security integration for Quick |
| Client | Amazon Quick Connector / Chat Agent / Flow | Business-user experience |
Set Up Snowflake Database and Load Data
Duration: 15
In this section you will create the Snowflake database, schema, warehouse, and role; create six Sales Operations tables; and load sample data from a public S3 bucket.
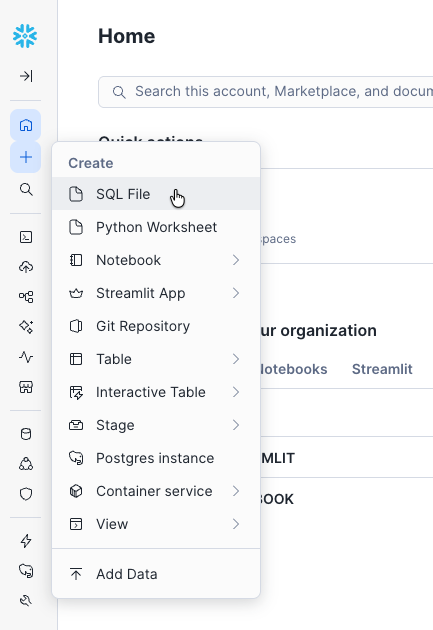
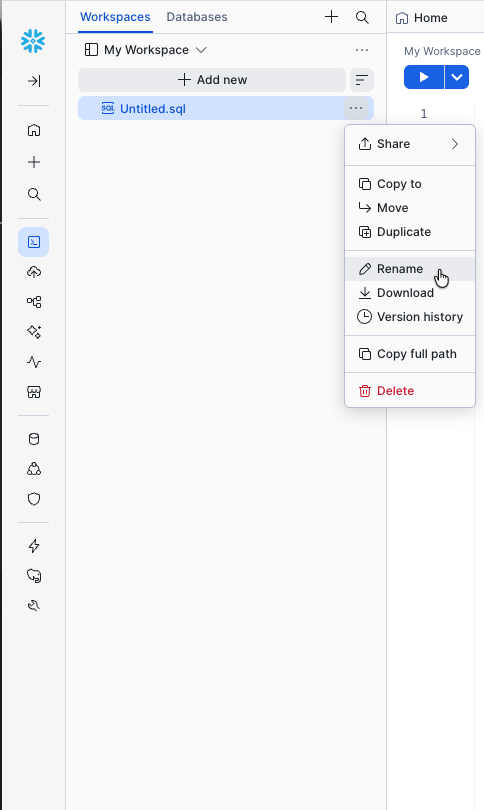
1. Create a New SQL Worksheet
In Snowsight, click + > SQL Worksheet to open a new worksheet. Click on the worksheet name (default is the timestamp) and rename it to HOL-LAB.
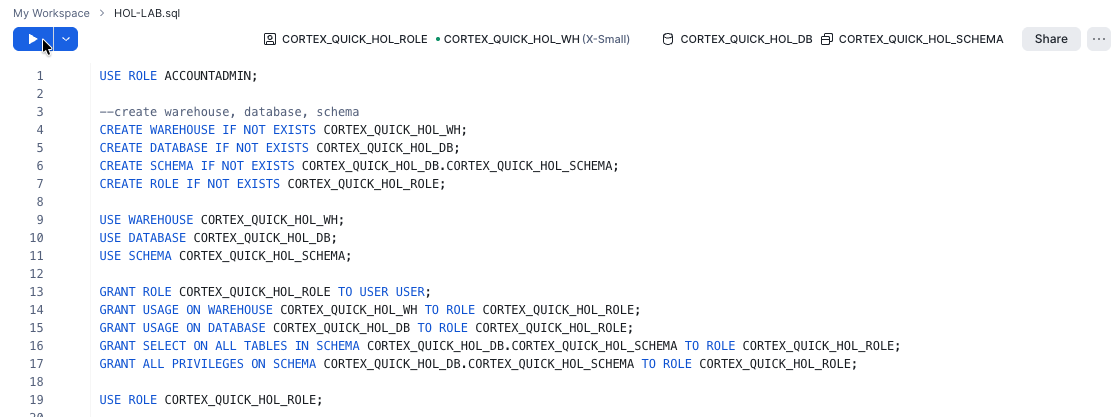
2. Set Up the Database, Warehouse, and Role
Copy and paste the following SQL into your worksheet and run it:
USE ROLE ACCOUNTADMIN;

-- Create warehouse, database, schema, role
CREATE WAREHOUSE IF NOT EXISTS CORTEX_QUICK_HOL_WH;
CREATE DATABASE  IF NOT EXISTS CORTEX_QUICK_HOL_DB;
CREATE SCHEMA    IF NOT EXISTS CORTEX_QUICK_HOL_DB.CORTEX_QUICK_HOL_SCHEMA;
CREATE ROLE      IF NOT EXISTS CORTEX_QUICK_HOL_ROLE;

-- Use the new context
USE WAREHOUSE CORTEX_QUICK_HOL_WH;
USE DATABASE  CORTEX_QUICK_HOL_DB;
USE SCHEMA    CORTEX_QUICK_HOL_SCHEMA;

-- Grant the new role to your user (replace <YOUR_USER> with your username)
GRANT ROLE CORTEX_QUICK_HOL_ROLE TO USER <YOUR_USER>;

GRANT USAGE  ON WAREHOUSE CORTEX_QUICK_HOL_WH                                TO ROLE CORTEX_QUICK_HOL_ROLE;
GRANT USAGE  ON DATABASE  CORTEX_QUICK_HOL_DB                                TO ROLE CORTEX_QUICK_HOL_ROLE;
GRANT SELECT ON ALL TABLES IN SCHEMA CORTEX_QUICK_HOL_DB.CORTEX_QUICK_HOL_SCHEMA TO ROLE CORTEX_QUICK_HOL_ROLE;
GRANT ALL PRIVILEGES ON SCHEMA CORTEX_QUICK_HOL_DB.CORTEX_QUICK_HOL_SCHEMA   TO ROLE CORTEX_QUICK_HOL_ROLE;

USE ROLE CORTEX_QUICK_HOL_ROLE;
3. Create the Sales Operations Tables
Run the following SQL to create a CSV file format and the six sales-ops tables.
-- File format
CREATE OR REPLACE FILE FORMAT CSV_FORMAT
    TYPE = 'CSV'
    FIELD_OPTIONALLY_ENCLOSED_BY = '"'
    SKIP_HEADER = 1
    NULL_IF = ('', 'NULL');
-- Table 1: Sales Transactions (Fact Table)
CREATE OR REPLACE TABLE SALES_TRANSACTIONS_FACT_TABLE (
    TRANSACTION_ID VARCHAR,
    TRANSACTION_DATE DATE,
    CUSTOMER_ID VARCHAR,
    PRODUCT_SKU VARCHAR,
    SALES_REP_ID VARCHAR,
    REGION VARCHAR,
    DEAL_SIZE_USD NUMBER(12,2),
    QUANTITY NUMBER,
    DISCOUNT_PERCENTAGE NUMBER(5,2),
    SALES_CYCLE_DAYS NUMBER,
    LEAD_SOURCE VARCHAR,
    CLOSE_PROBABILITY_AT_START NUMBER(5,2),
    FORECAST_CLOSE_DATE DATE,
    ACTUAL_CLOSE_DATE DATE
);

-- Table 2: Customer Dimension
CREATE OR REPLACE TABLE CUSTOMER_DIMENSION_TABLE (
    CUSTOMER_ID VARCHAR,
    COMPANY_NAME VARCHAR,
    INDUSTRY VARCHAR,
    COMPANY_SIZE VARCHAR,
    ANNUAL_REVENUE_BAND VARCHAR,
    FIRST_PURCHASE_DATE DATE,
    CUSTOMER_LIFETIME_VALUE NUMBER(12,2),
    CHURN_RISK_SCORE NUMBER(5,2),
    TOTAL_CONTRACTS_COUNT NUMBER,
    EXPANSION_POTENTIAL VARCHAR
);

-- Table 3: Product Catalog
CREATE OR REPLACE TABLE PRODUCT_CATALOG_TABLE (
    PRODUCT_SKU VARCHAR,
    PRODUCT_NAME VARCHAR,
    PRODUCT_CATEGORY VARCHAR,
    PRODUCT_FEATURE VARCHAR,
    PRODUCT_TIER VARCHAR,
    BILLING_FREQUENCY VARCHAR,
    LIST_PRICE_USD NUMBER(12,2),
    AVERAGE_CONTRACT_LENGTH_MONTHS NUMBER,
    RENEWAL_RATE_PCT NUMBER(5,2),
    UPSELL_RATE_PCT NUMBER(5,2),
    TYPICAL_DISCOUNT_RANGE VARCHAR
);

-- Table 4: Sales Rep Performance
CREATE OR REPLACE TABLE SALES_REP_PERFORMANCE_TABLE (
    SALES_REP_ID VARCHAR,
    REP_NAME VARCHAR,
    TERRITORY VARCHAR,
    HIRE_DATE DATE,
    QUOTA_USD NUMBER(12,2),
    QUOTA_ATTAINMENT_PCT NUMBER(5,2),
    AVG_DEAL_SIZE NUMBER(12,2),
    WIN_RATE_PCT NUMBER(5,2),
    AVG_SALES_CYCLE_DAYS NUMBER(5,2),
    PIPELINE_COVERAGE_RATIO NUMBER(5,2),
    ACTIVE_OPPORTUNITIES_COUNT NUMBER
);

-- Table 5: Sales Pipeline Opportunities
CREATE OR REPLACE TABLE SALES_PIPELINE_OPPORTUNITIES (
    OPPORTUNITY_ID VARCHAR,
    OPPORTUNITY_NAME VARCHAR,
    CURRENT_STAGE VARCHAR,
    ESTIMATED_VALUE NUMBER(12,2),
    WEIGHTED_FORECAST_VALUE NUMBER(12,2),
    CLOSE_PROBABILITY NUMBER(5,2),
    CREATED_DATE DATE,
    EXPECTED_CLOSE_DATE DATE,
    STAGE_ENTRY_DATE DATE,
    LAST_ACTIVITY_DATE DATE,
    DAYS_IN_CURRENT_STAGE NUMBER,
    COMPETITOR_PRESENT BOOLEAN,
    DECISION_MAKER_ENGAGED BOOLEAN,
    ACTIVITY_COUNT_LAST_30_DAYS NUMBER
);

-- Table 6: Marketing Attribution
CREATE OR REPLACE TABLE MARKETING_ATTRIBUTION_TABLE (
    LEAD_ID VARCHAR,
    LEAD_SOURCE_DETAIL VARCHAR,
    CAMPAIGN_NAME VARCHAR,
    FIRST_TOUCH_CHANNEL VARCHAR,
    LAST_TOUCH_CHANNEL VARCHAR,
    LEAD_SCORE NUMBER(5,2),
    LEAD_TO_OPPORTUNITY_DAYS NUMBER,
    MARKETING_SPEND_ALLOCATED NUMBER(12,2)
);
4. Load Sample Data from a Public S3 Bucket
Load the sample CSVs from the public Snowflake workshop bucket into each table:
COPY INTO SALES_TRANSACTIONS_FACT_TABLE
    FROM 's3://snowflake-corp-se-workshop/summit26-coco-mcp-aws-quick-hol/csvs/sales_transactions_fact_table.csv'
    FILE_FORMAT = CSV_FORMAT;

COPY INTO CUSTOMER_DIMENSION_TABLE
    FROM 's3://snowflake-corp-se-workshop/summit26-coco-mcp-aws-quick-hol/csvs/customer_dimension_table.csv'
    FILE_FORMAT = CSV_FORMAT;

COPY INTO PRODUCT_CATALOG_TABLE
    FROM 's3://snowflake-corp-se-workshop/summit26-coco-mcp-aws-quick-hol/csvs/product_catalog_table.csv'
    FILE_FORMAT = CSV_FORMAT;

COPY INTO SALES_REP_PERFORMANCE_TABLE
    FROM 's3://snowflake-corp-se-workshop/summit26-coco-mcp-aws-quick-hol/csvs/sales_rep_performance_table.csv'
    FILE_FORMAT = CSV_FORMAT;

COPY INTO SALES_PIPELINE_OPPORTUNITIES
    FROM 's3://snowflake-corp-se-workshop/summit26-coco-mcp-aws-quick-hol/csvs/sales_pipeline_opportunities.csv'
    FILE_FORMAT = CSV_FORMAT;

COPY INTO MARKETING_ATTRIBUTION_TABLE
    FROM 's3://snowflake-corp-se-workshop/summit26-coco-mcp-aws-quick-hol/csvs/marketing_attribution_table.csv'
    FILE_FORMAT = CSV_FORMAT;
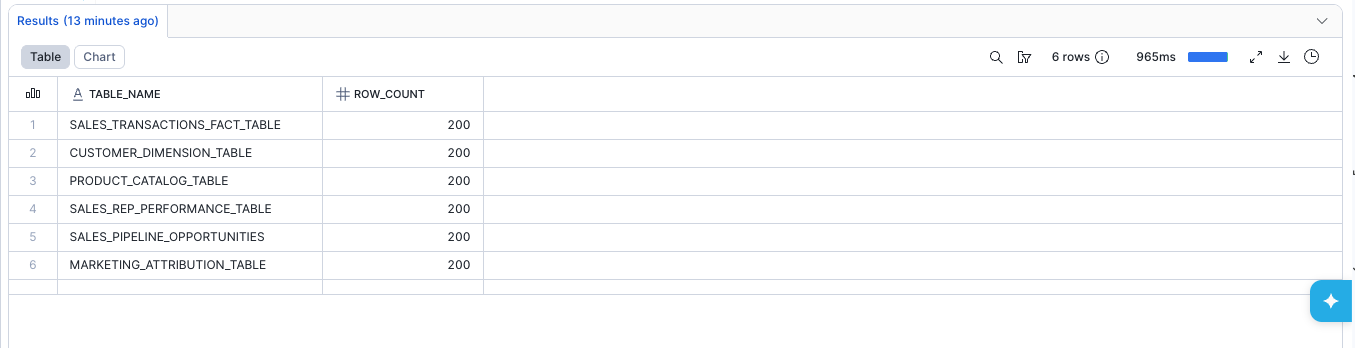
5. Verify the Data Load
Run the following query to confirm data was loaded into all six tables:
SELECT 'SALES_TRANSACTIONS_FACT_TABLE' AS TABLE_NAME, COUNT(*) AS ROW_COUNT FROM SALES_TRANSACTIONS_FACT_TABLE
UNION ALL
SELECT 'CUSTOMER_DIMENSION_TABLE',     COUNT(*) FROM CUSTOMER_DIMENSION_TABLE
UNION ALL
SELECT 'PRODUCT_CATALOG_TABLE',        COUNT(*) FROM PRODUCT_CATALOG_TABLE
UNION ALL
SELECT 'SALES_REP_PERFORMANCE_TABLE',  COUNT(*) FROM SALES_REP_PERFORMANCE_TABLE
UNION ALL
SELECT 'SALES_PIPELINE_OPPORTUNITIES', COUNT(*) FROM SALES_PIPELINE_OPPORTUNITIES
UNION ALL
SELECT 'MARKETING_ATTRIBUTION_TABLE',  COUNT(*) FROM MARKETING_ATTRIBUTION_TABLE;
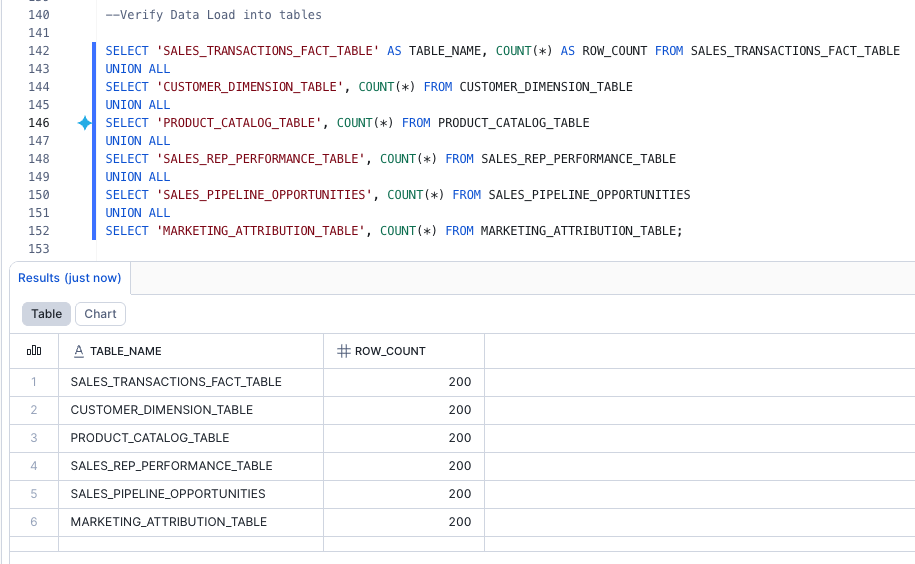
You should see non-zero row counts for each table. If any table shows 0 rows, re-run the corresponding COPY INTO statement.
aside positive
Checkpoint — At this point you should have a warehouse
CORTEX_QUICK_HOL_WH, a databaseCORTEX_QUICK_HOL_DBwith schemaCORTEX_QUICK_HOL_SCHEMA, and six tables loaded with sample Sales Operations data.
Set Up Snowflake CoCo Skill: Semantic View, Agent, and MCP Server
Duration: 20
In this section you will download a pre-built Snowflake CoCo (CoCo) skill and upload it to Snowflake CoCo in your Snowflake workspace. The skill automates the creation of the Semantic View, Cortex Agent, MCP Server, and OAuth integration.
1. Download and Upload the Skill
- Download the latest skill file: SKILL.md.
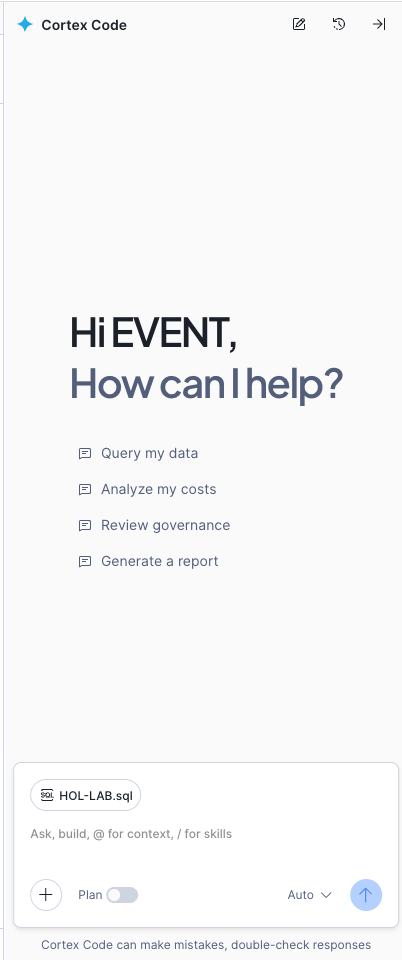
- In Snowsight, click the Snowflake CoCo icon (blue sparkle ✦) in the lower-right corner. The Snowflake CoCo panel opens on the right.
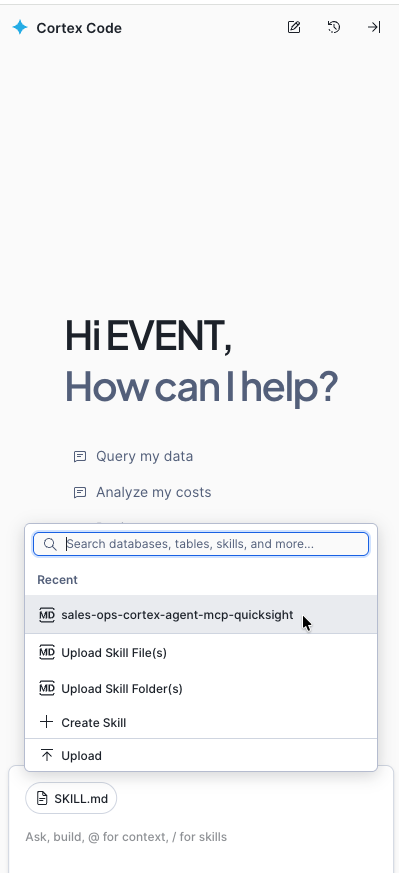
- In the Snowflake CoCo chat input bar at the bottom, click the + button and select Upload Skill File(s).
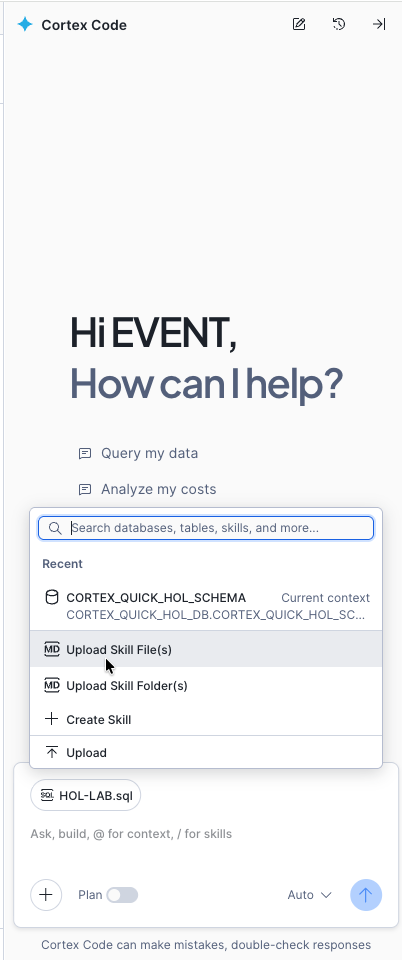
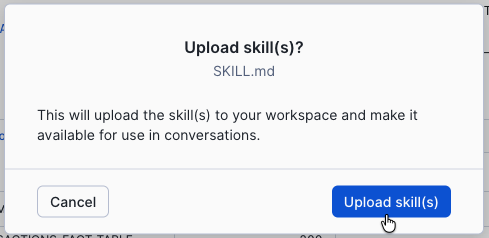
- Choose the SKILL.md file you just downloaded and confirm Upload skills.
- The skill
sales-ops-cortex-agent-mcp-quickshould now appear under Recent in the skill menu. Click the + button to confirm.
aside negative
Important
- The skill takes approximately 10–15 minutes to run end-to-end.
- The skill will pause at multiple points and ask you to confirm or approve SQL executions — click OK or Approve when prompted.
- The skill creates all Snowflake objects automatically — you only provide your database, schema, warehouse, account, and role when asked.
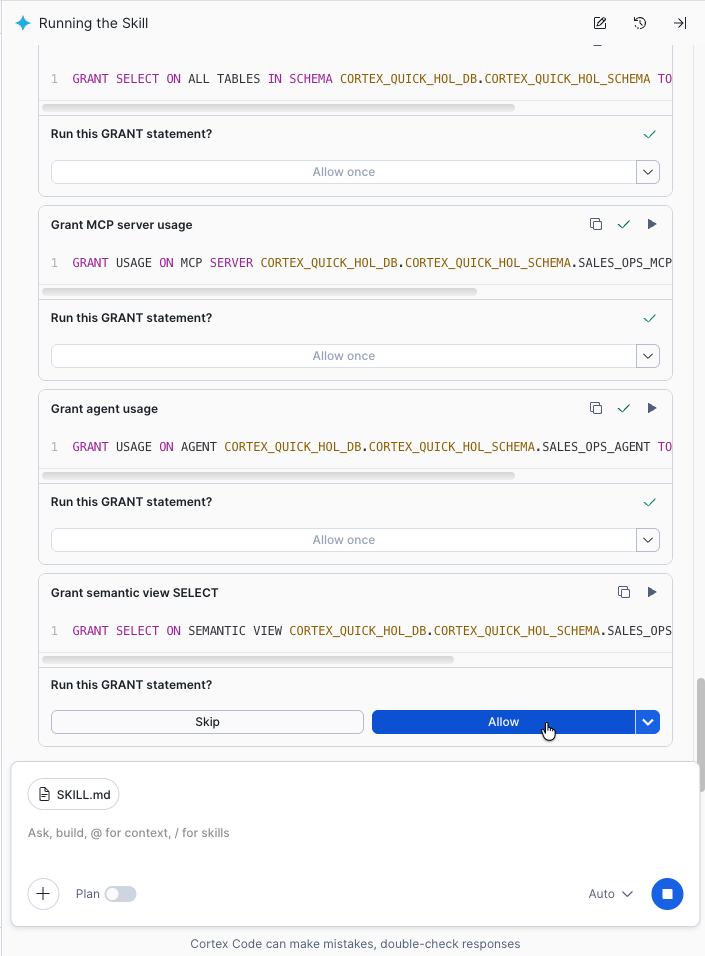
2. Run the Skill
In the Snowflake CoCo chat panel, type run the skill. The skill walks through an 8-step workflow and asks for the following parameters:
| Parameter | Description | Example |
|---|---|---|
DATABASE | Database containing your sales ops tables | CORTEX_QUICK_HOL_DB |
SCHEMA | Schema containing your sales ops tables | CORTEX_QUICK_HOL_SCHEMA |
WAREHOUSE | Warehouse for query execution | CORTEX_QUICK_HOL_WH |
ACCOUNT | Snowflake account identifier | abc12345 |
ROLE | Snowflake role | CORTEX_QUICK_HOL_ROLE |
aside positive
If you don't know your account identifier, run
SELECT CURRENT_ACCOUNT();in a SQL worksheet.
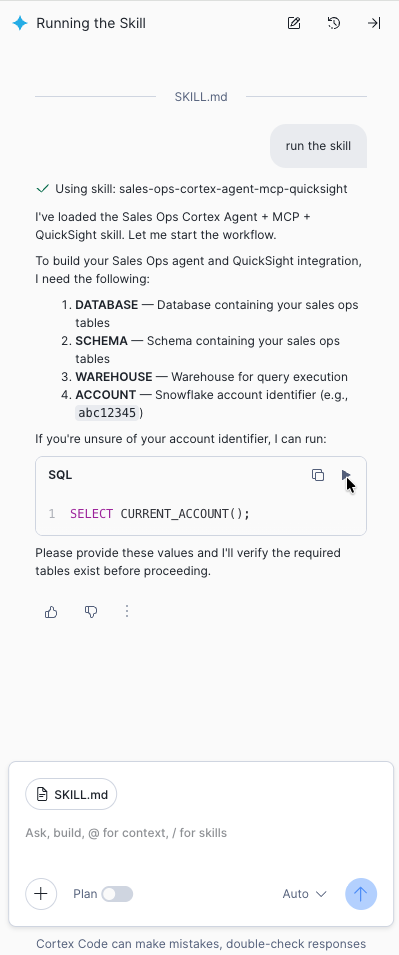
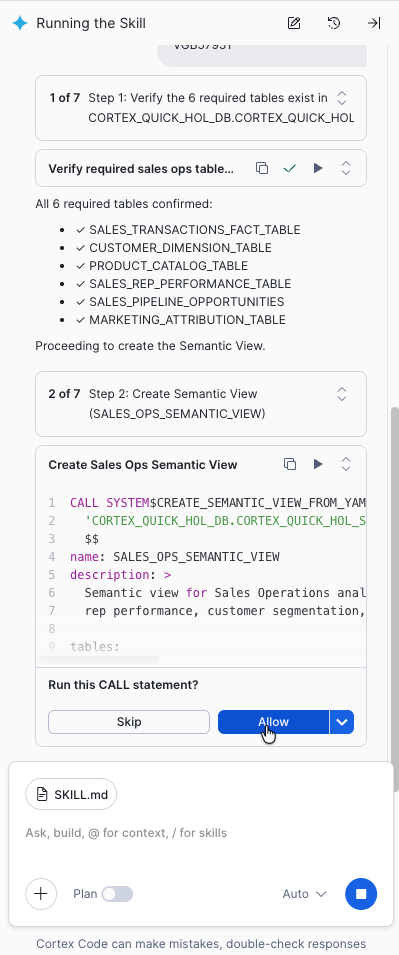
The skill verifies that all six required tables exist before proceeding.
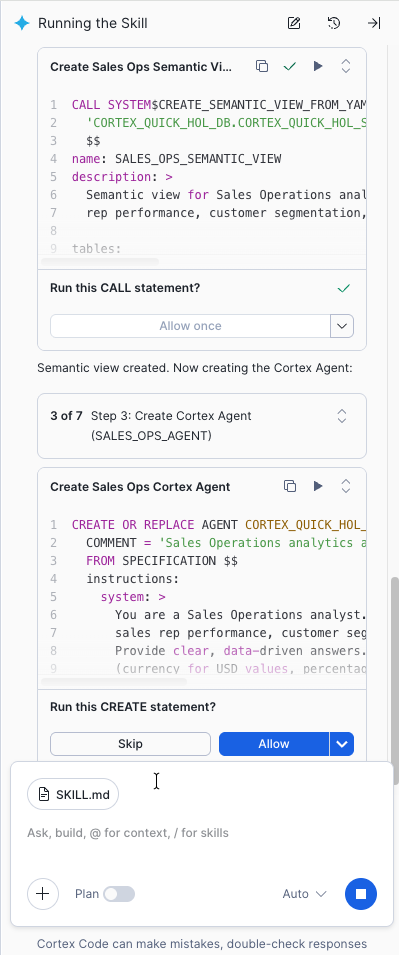
3. Skill Step — Create Semantic View
The skill creates SALES_OPS_SEMANTIC_VIEW — a comprehensive semantic layer that includes:
- 6 tables mapped with dimensions, facts, and metrics
- 25+ dimensions (e.g., region, industry, product tier, pipeline stage)
- 25+ facts (e.g., deal size, quota, estimated value, lead score)
- 20+ metrics (e.g., total revenue, average deal size, pipeline value)
- 3 relationships (transactions to customers, products, and reps)
- 6 verified queries for common sales operations questions
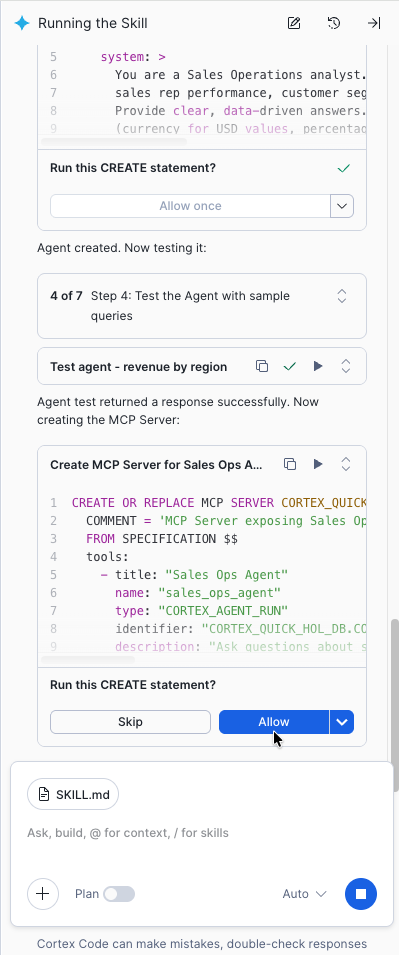
4. Skill Step — Create Cortex Agent
The skill creates SALES_OPS_AGENT — an AI agent that uses Cortex Analyst text-to-SQL to answer natural-language questions about your sales data.
The skill runs three test queries to validate the agent works:
- "What is total revenue by region?"
- "Which 5 reps have the highest quota attainment?"
- "What is pipeline value by stage and how many deals have competitors?"
aside negative
Checkpoint — Verify all 3 tests return valid data with SQL generated by Cortex Analyst. If any test fails, do not proceed — troubleshoot first.
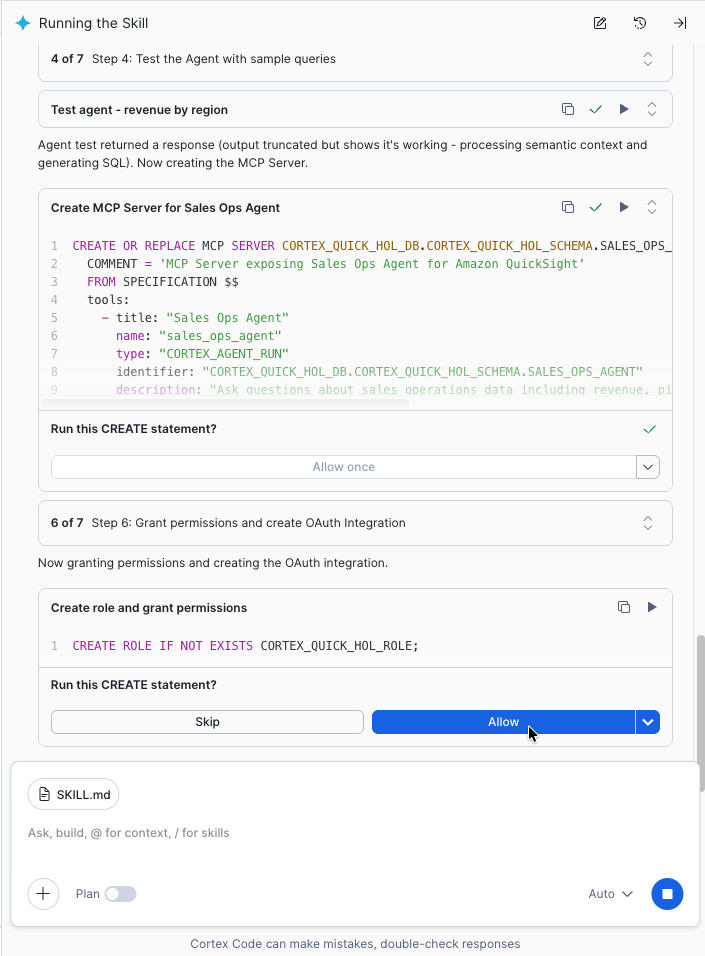
5. Skill Step — Create MCP Server
The skill creates SALES_OPS_MCP_SERVER — a Snowflake Managed MCP server that exposes the Cortex Agent to external clients like the Amazon Quick Connector.
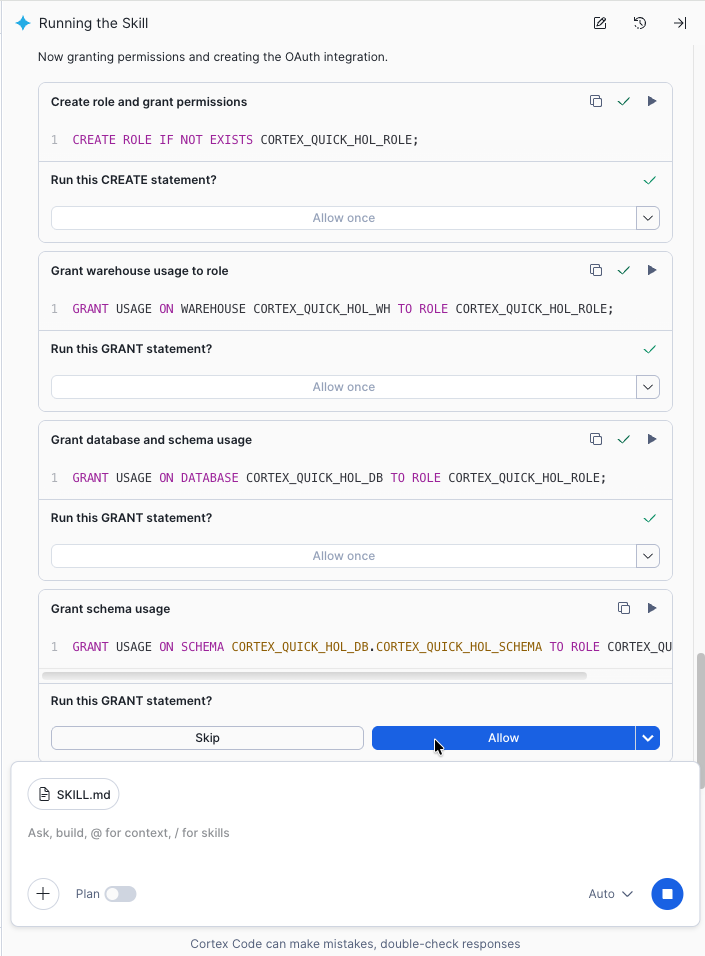
6. Skill Step — Create a Dedicated Role and Grants
The skill creates a dedicated role with the required grants:
CREATE ROLE IF NOT EXISTS CORTEX_QUICK_HOL_ROLE;

GRANT USAGE  ON DATABASE  CORTEX_QUICK_HOL_DB                                TO ROLE CORTEX_QUICK_HOL_ROLE;
GRANT USAGE  ON SCHEMA    CORTEX_QUICK_HOL_DB.CORTEX_QUICK_HOL_SCHEMA        TO ROLE CORTEX_QUICK_HOL_ROLE;
GRANT USAGE  ON WAREHOUSE CORTEX_QUICK_HOL_WH                                TO ROLE CORTEX_QUICK_HOL_ROLE;
GRANT SELECT ON ALL TABLES IN SCHEMA CORTEX_QUICK_HOL_DB.CORTEX_QUICK_HOL_SCHEMA TO ROLE CORTEX_QUICK_HOL_ROLE;
GRANT USAGE  ON MCP SERVER CORTEX_QUICK_HOL_DB.CORTEX_QUICK_HOL_SCHEMA.SALES_OPS_MCP_SERVER       TO ROLE CORTEX_QUICK_HOL_ROLE;
GRANT USAGE  ON CORTEX AGENT CORTEX_QUICK_HOL_DB.CORTEX_QUICK_HOL_SCHEMA.SALES_OPS_AGENT          TO ROLE CORTEX_QUICK_HOL_ROLE;
GRANT SELECT ON SEMANTIC VIEW CORTEX_QUICK_HOL_DB.CORTEX_QUICK_HOL_SCHEMA.SALES_OPS_SEMANTIC_VIEW TO ROLE CORTEX_QUICK_HOL_ROLE;

ALTER SECURITY INTEGRATION SALES_OPS_QUICK_SUITE_OAUTH SET OAUTH_USE_SECONDARY_ROLES = 'IMPLICIT';
ALTER USER <YOUR_USER> SET DEFAULT_ROLE = 'CORTEX_QUICK_HOL_ROLE';
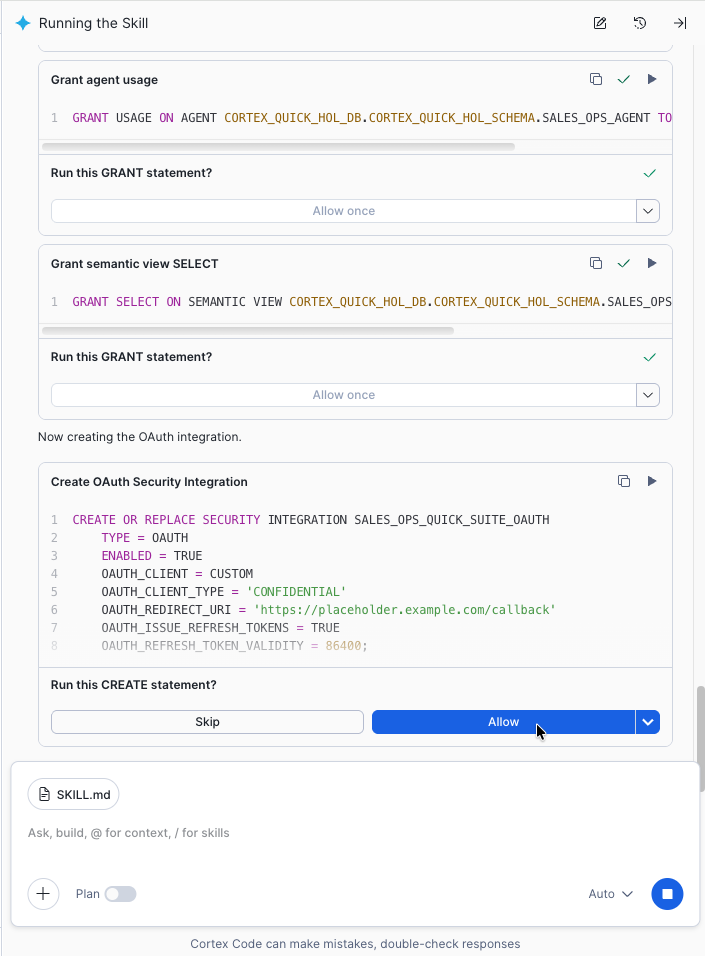
7. Skill Step — Create OAuth Security Integration
The skill creates SALES_OPS_QUICK_SUITE_OAUTH — a security integration for OAuth authentication.
When the skill finishes, it displays your OAuth and connection details:
MCP_ENDPOINT:        https://<ACCOUNT>.snowflakecomputing.com/api/v2/databases/<DATABASE>/schemas/<SCHEMA>/mcp-servers/SALES_OPS_MCP_SERVER
OAUTH_CLIENT_ID:     <value>
OAUTH_CLIENT_SECRET: <value>
TOKEN_URL:           https://<ACCOUNT>.snowflakecomputing.com/oauth/token-request
AUTH_URL:            https://<ACCOUNT>.snowflakecomputing.com/oauth/authorize
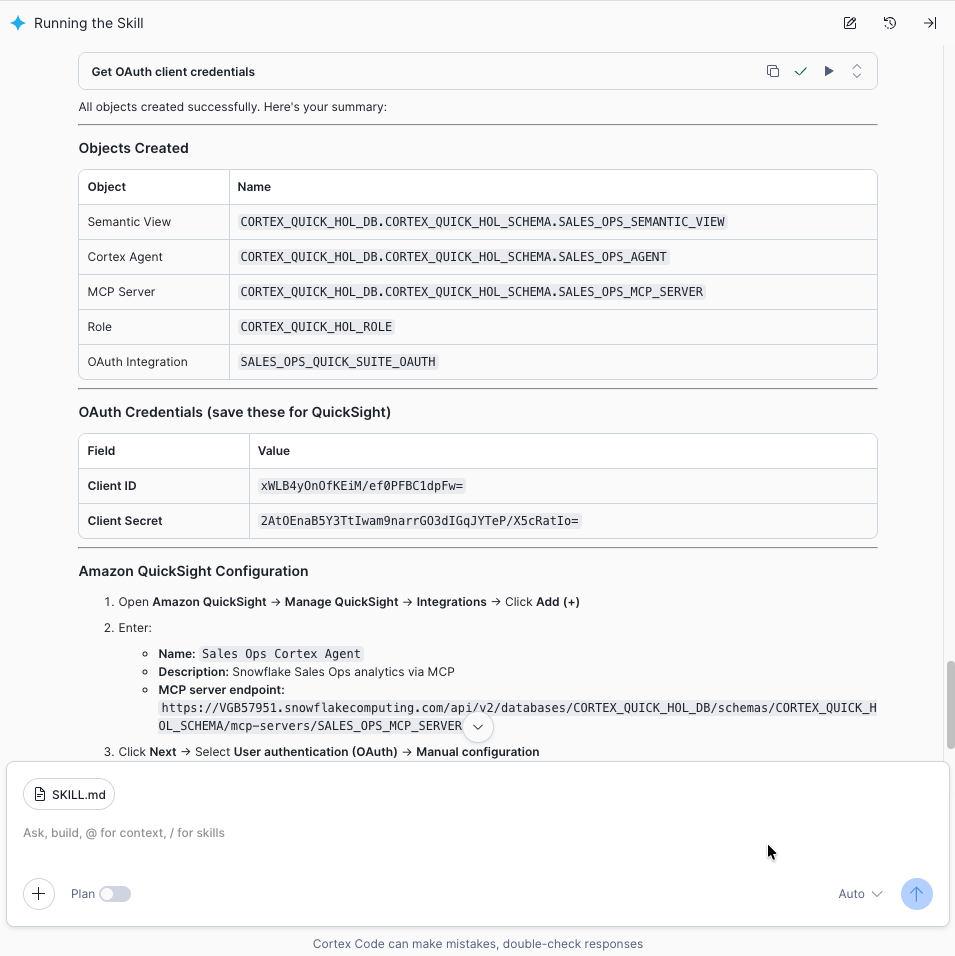
aside negative
Checkpoint — Copy and save all five values immediately. You will need them when creating the Amazon Quick MCP Connector.
Configure Amazon Quick MCP Connector
Duration: 15
In this section you will configure an MCP Connector in Amazon Quick that connects to the Snowflake Managed MCP Server you created in the previous section. This enables Amazon Quick to send natural-language queries to Snowflake's Cortex AI agent.
Prerequisites
Before proceeding, make sure you have the following from the previous section:
- MCP Server Endpoint URL
- OAuth Client ID
- OAuth Client Secret
- OAuth Token URL
- OAuth Authorization URL
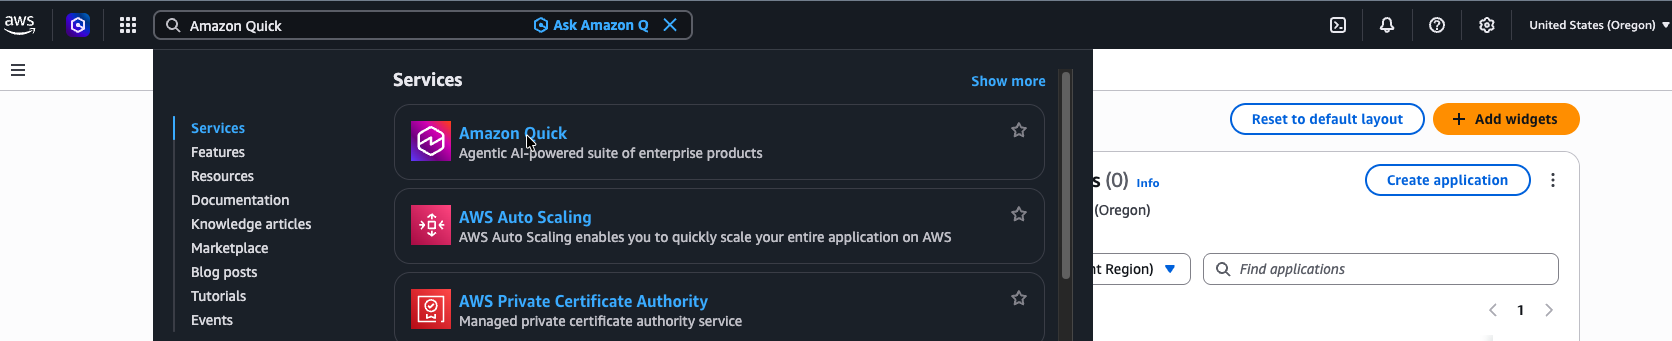
1. Open Amazon Quick
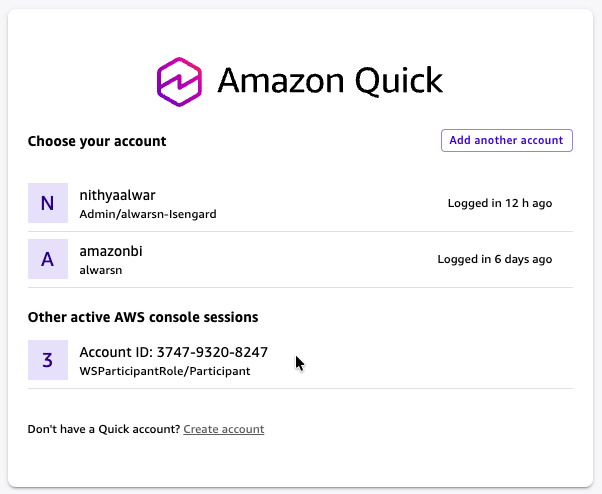
- Sign in to the AWS Management Console. In the search bar at the top, type Amazon Quick and click the Amazon Quick result (Agentic AI-powered suite of enterprise products).
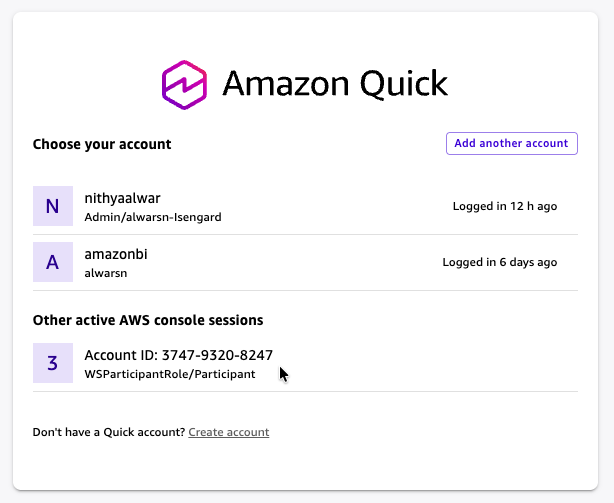
- You will be redirected to the Amazon Quick sign-in page. Under Active AWS console sessions, select the active console session for your AWS account.
2. Sign Up for Amazon Quick (if needed)
If this is your first time using Amazon Quick:
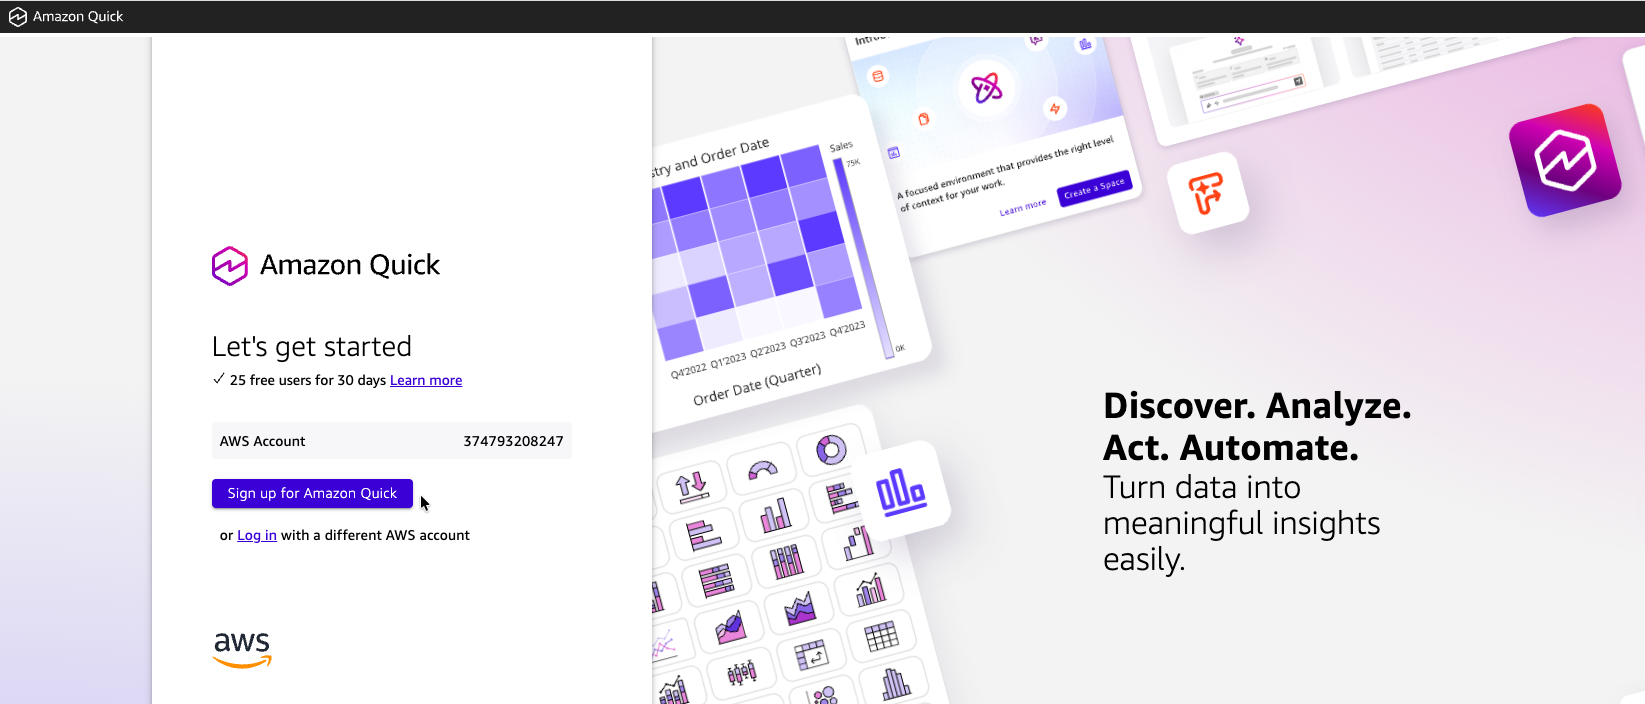
- On the Let's get started page, your AWS Account ID is pre-populated. Click Sign up for Amazon Quick.
- Fill in the account details:
| Field | Value |
|---|---|
| Account name | HOL-LAB |
| Email for account notifications | Your email address |
| Region | US West (Oregon) |
| Authentication method | Password-based or Single-Sign On |
| Encryption | Use AWS-managed key (default) |
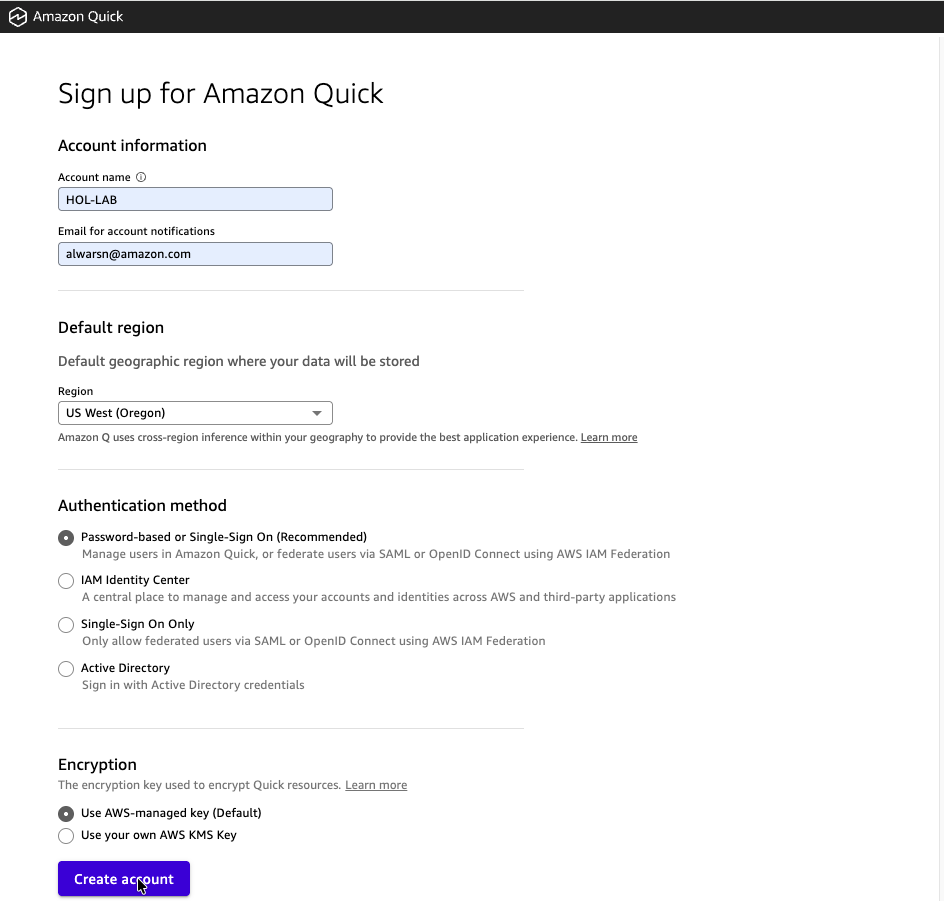
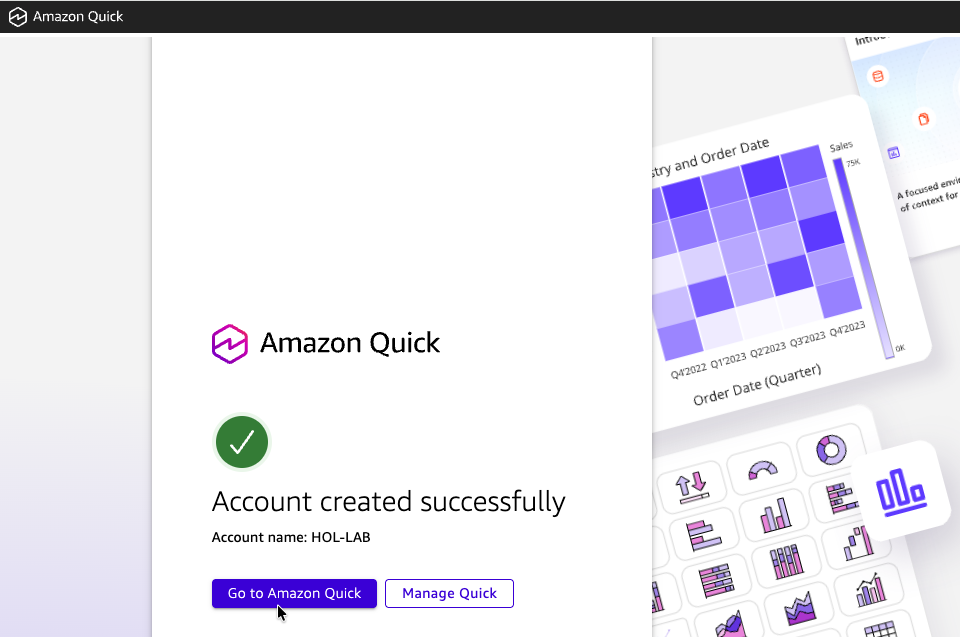
- Click Create account and wait while Amazon Quick provisions your account.
- After successful account creation, click Go to Amazon Quick.
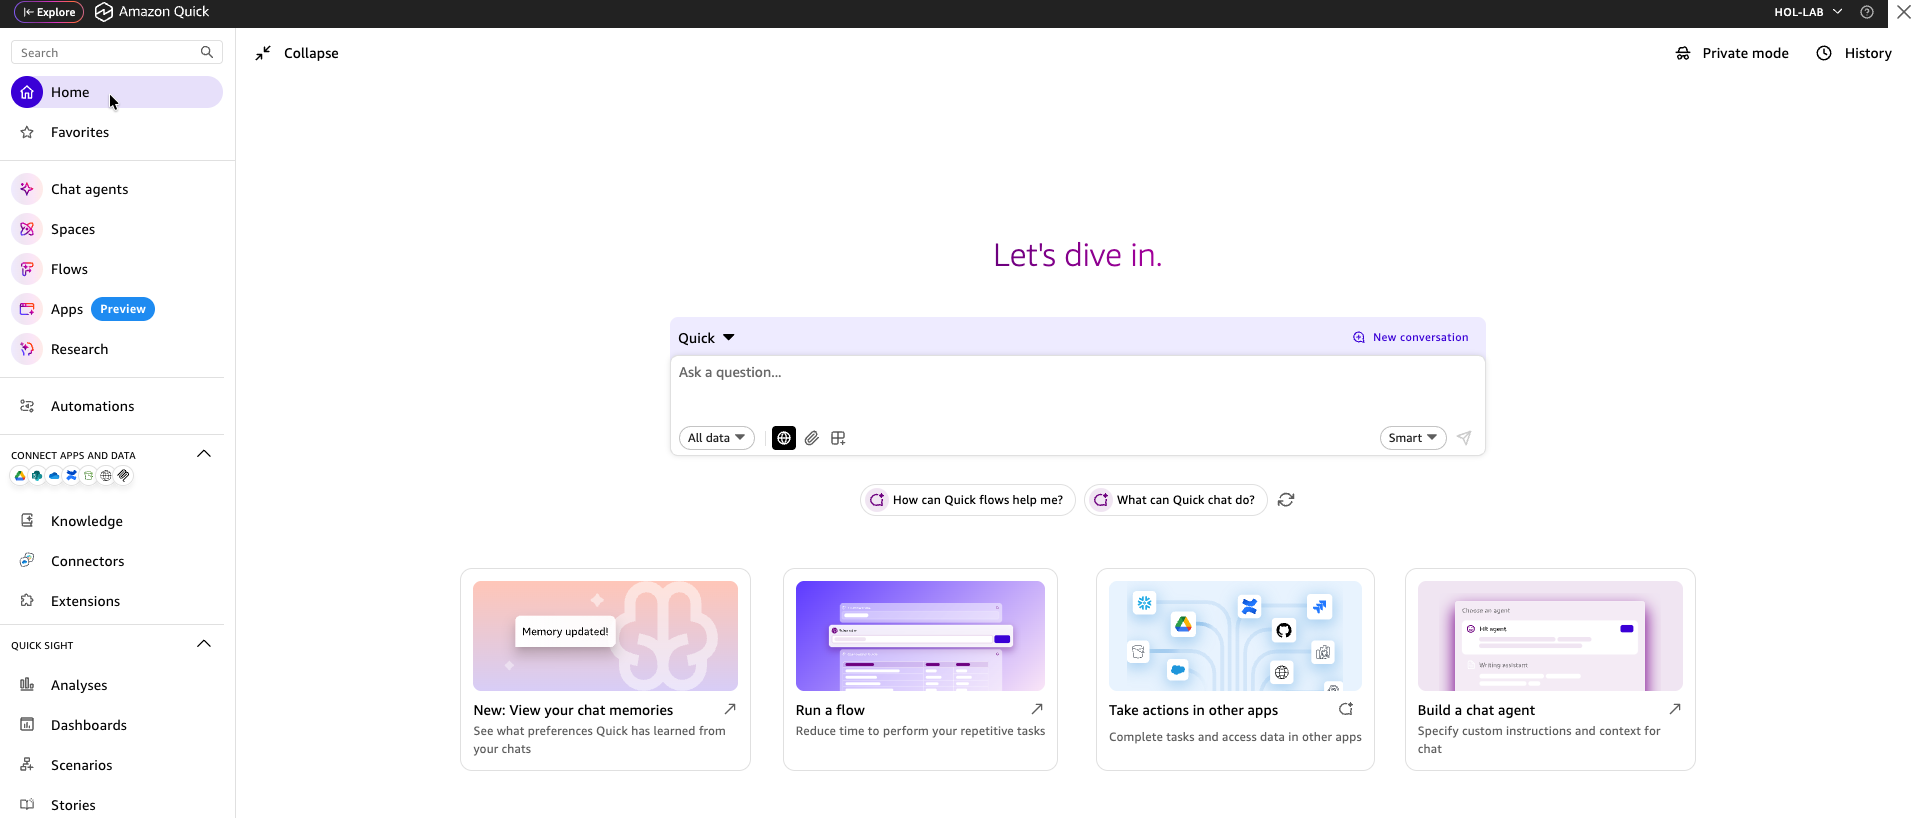
- Choose your AWS console session again to land on the Amazon Quick Home page.
3. Create an MCP Connector
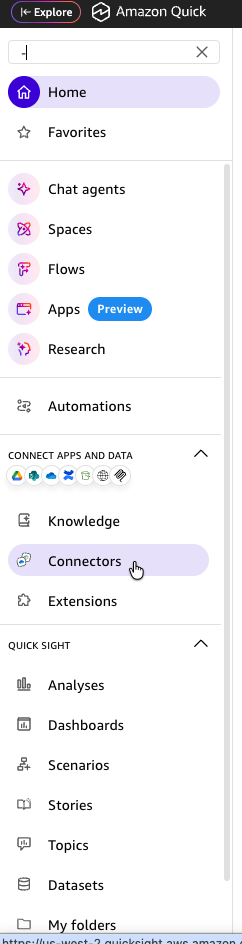
- In the left navigation panel, click Connectors.
- Select the Create for your team tab.
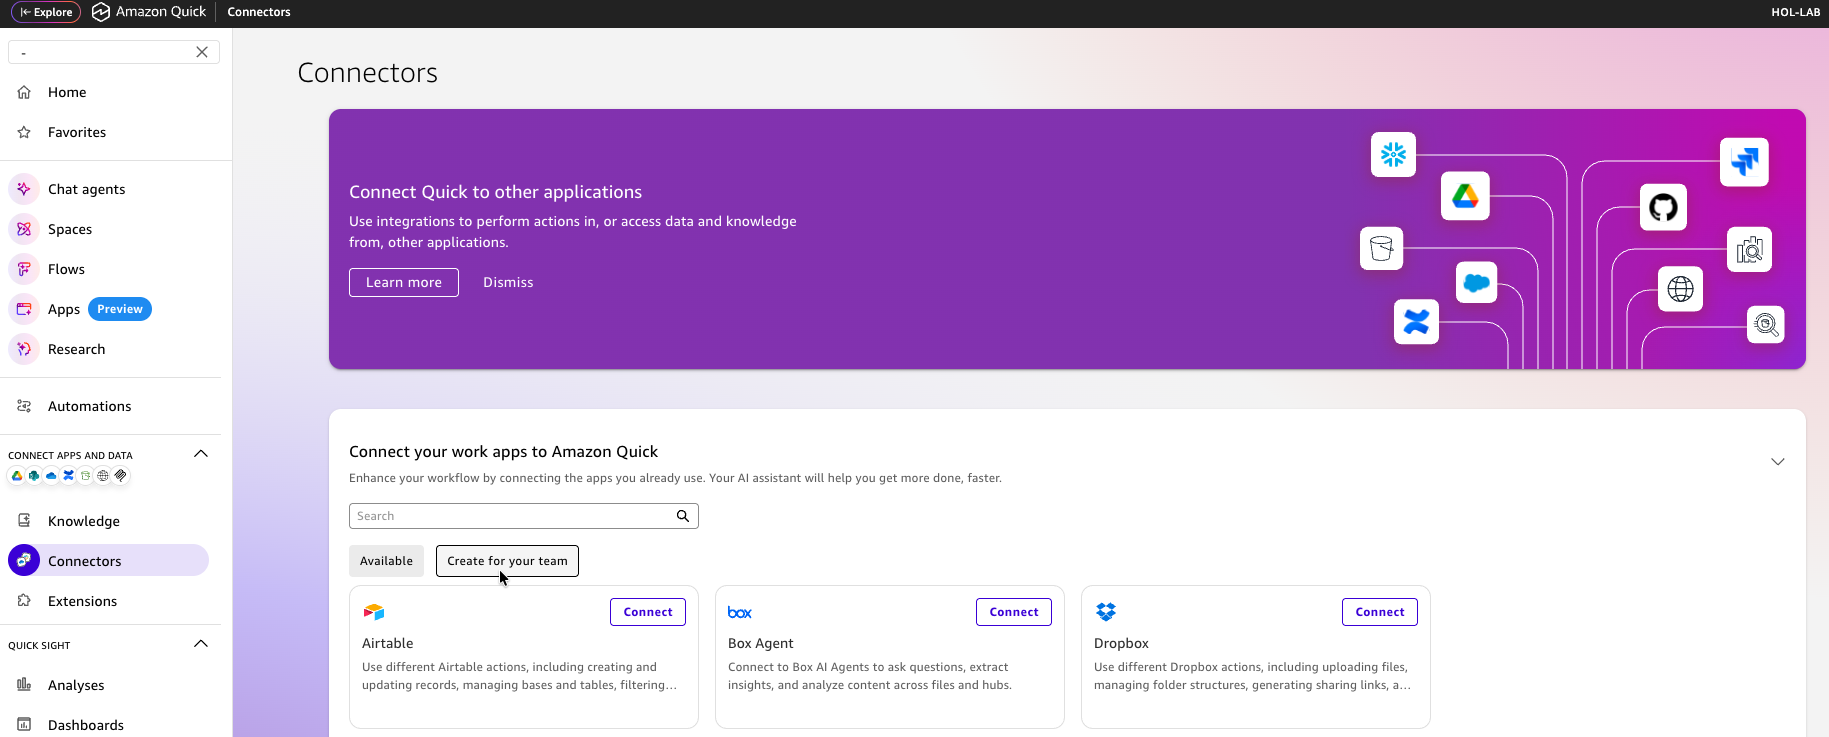
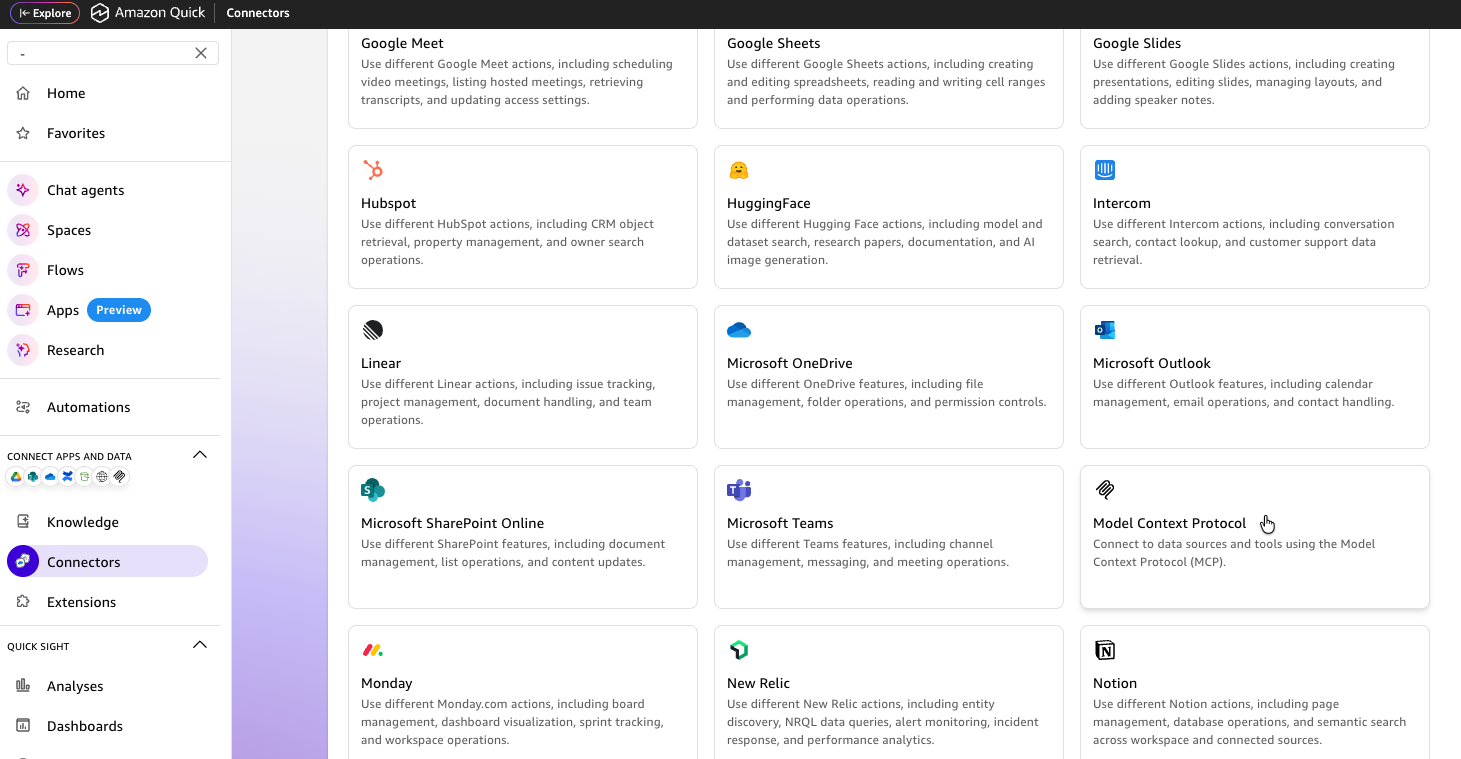
- Search for Model Context Protocol and click the tile.
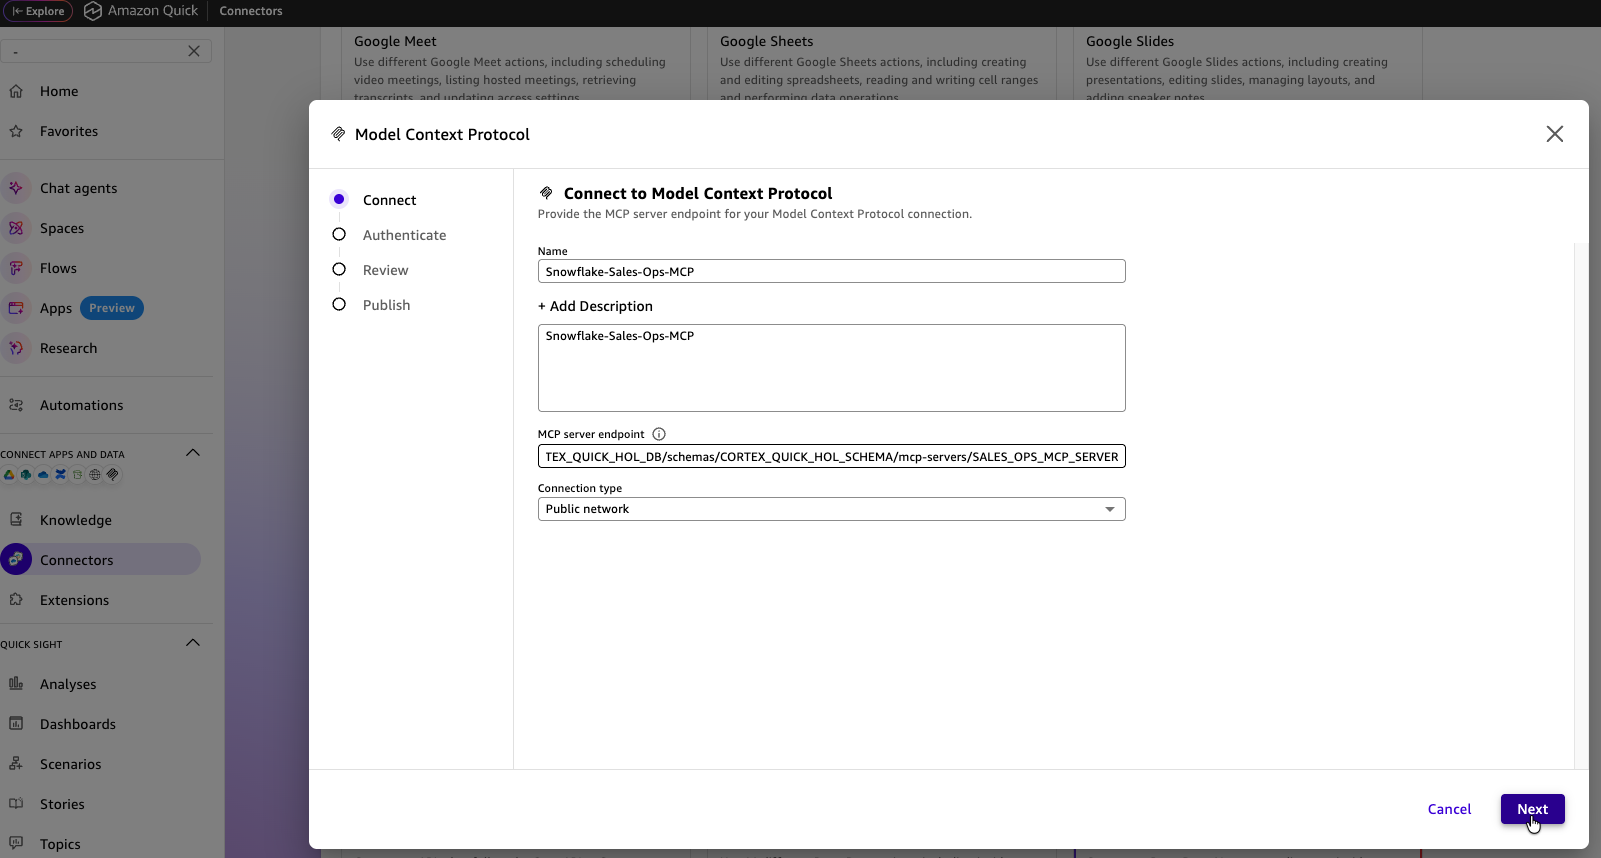
- In the Connect step, fill in the following and click Next:
| Setting | Value |
|---|---|
| Connector Name | Snowflake-Sales-Ops-MCP |
| Add Description | Snowflake Sales Ops MCP connector |
| MCP server endpoint | The MCP Server Endpoint URL from Snowflake |
| Connection type | Public network |
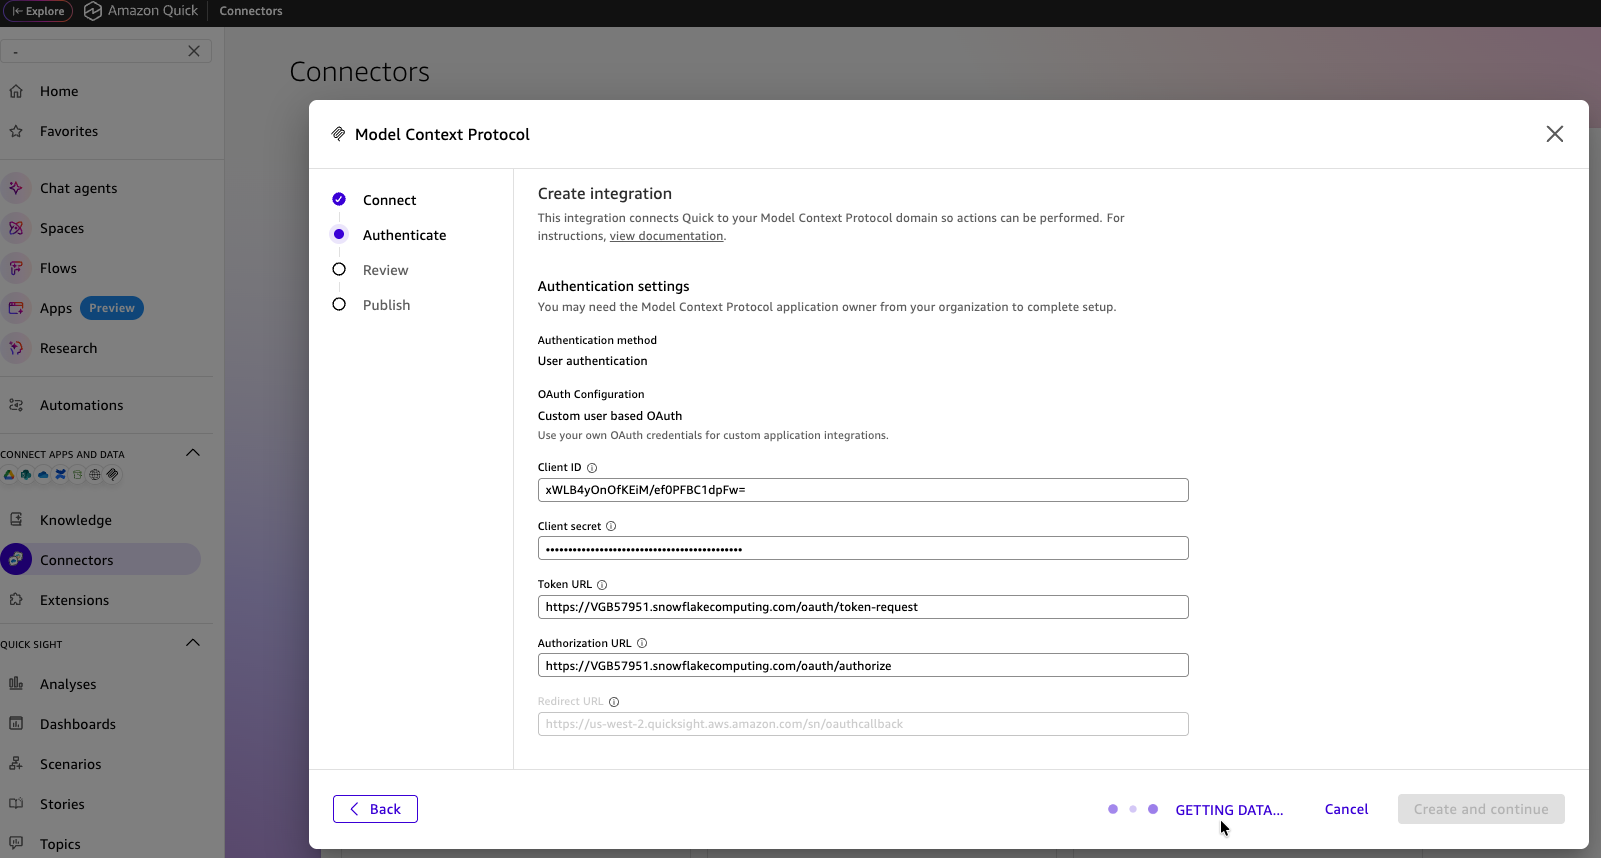
- In the Authenticate step, fill in:
| Setting | Value |
|---|---|
| Client ID | OAuth Client ID from Snowflake |
| Client secret | OAuth Client Secret from Snowflake |
| Token URL | OAuth Token URL from Snowflake |
| Authorization URL | OAuth Authorization URL from Snowflake |
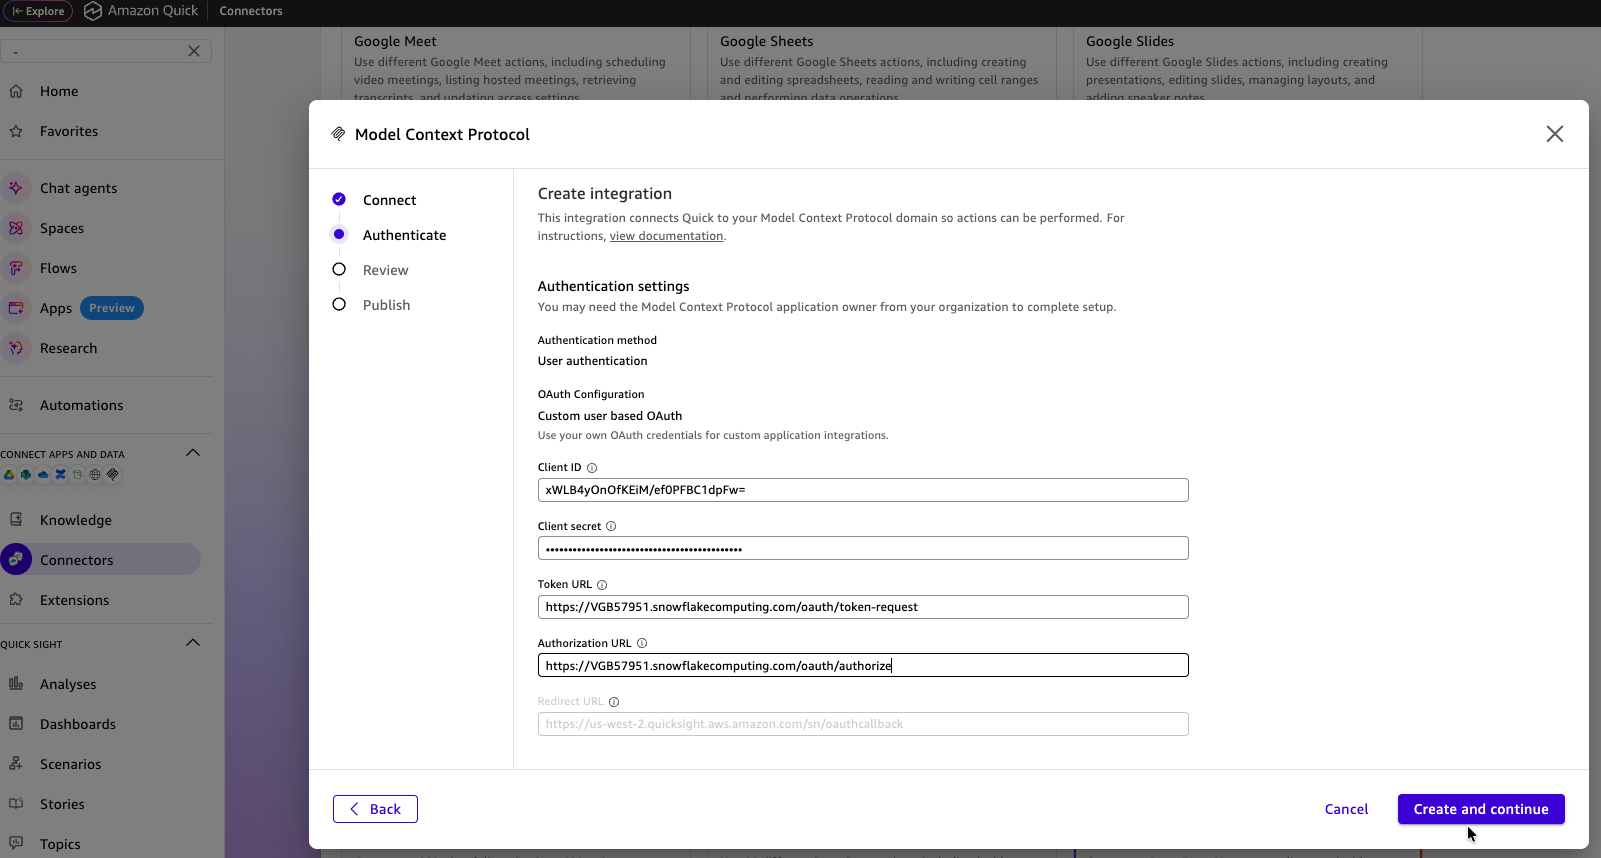
Click Create and continue. You will see a GETTING DATA load screen.
aside negative
Troubleshooting — If the connection test fails:
- Verify the MCP Server is running in Snowflake
- Verify your OAuth credentials are correct and not expired
- Confirm
OAUTH_USE_SECONDARY_ROLES = 'IMPLICIT'is set on the security integration
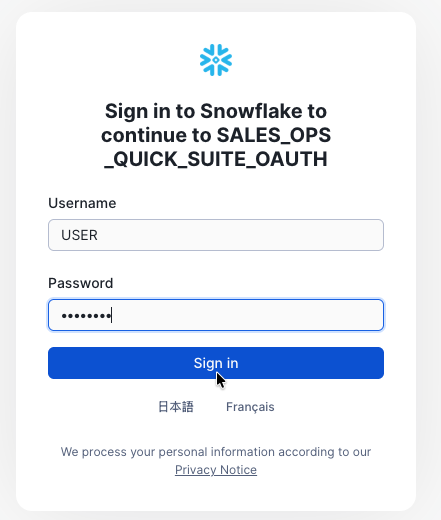
- You will be redirected to the Snowflake Sign-In page. Enter your username and password and click Sign in.
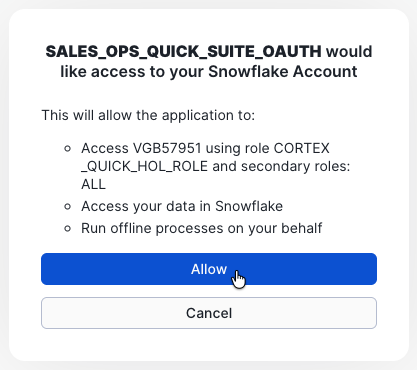
- Allow access for the role
CORTEX_QUICK_HOL_ROLE.
- Review the actions for the MCP connector and click Next.
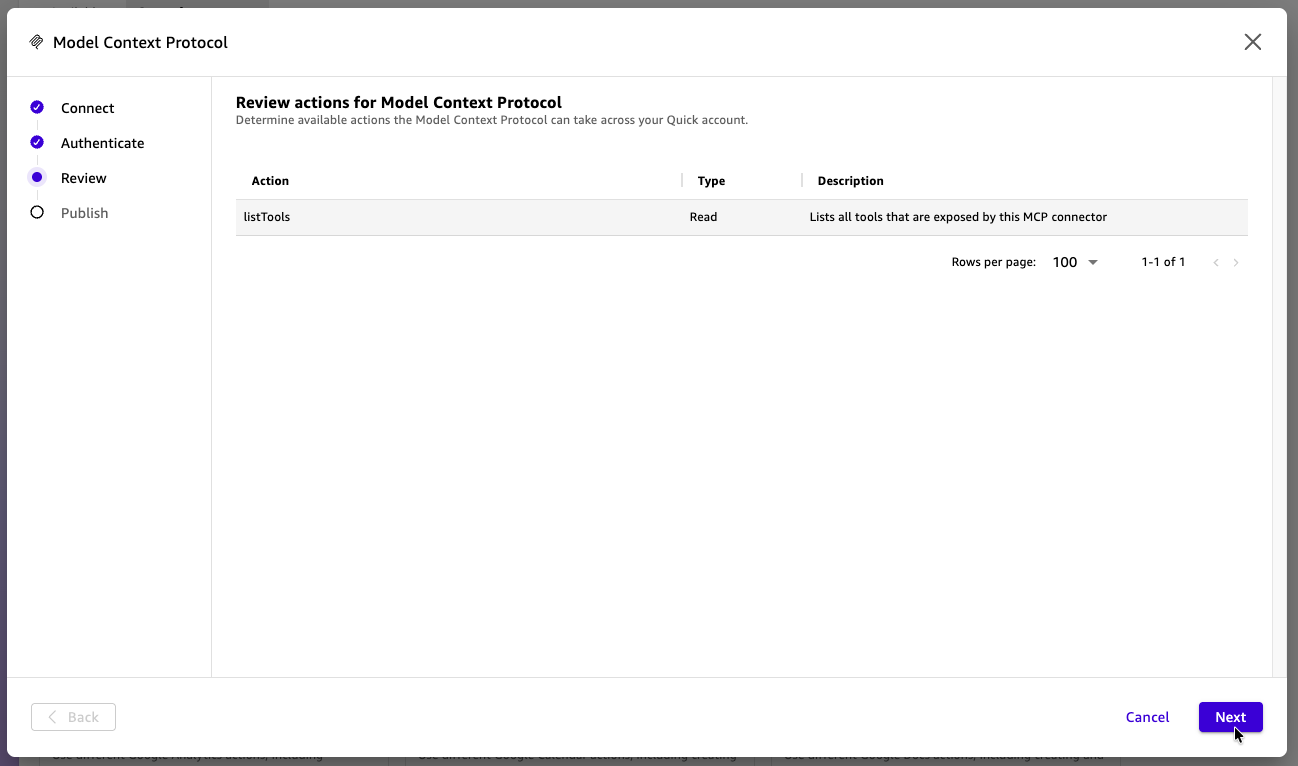
- Click Publish.
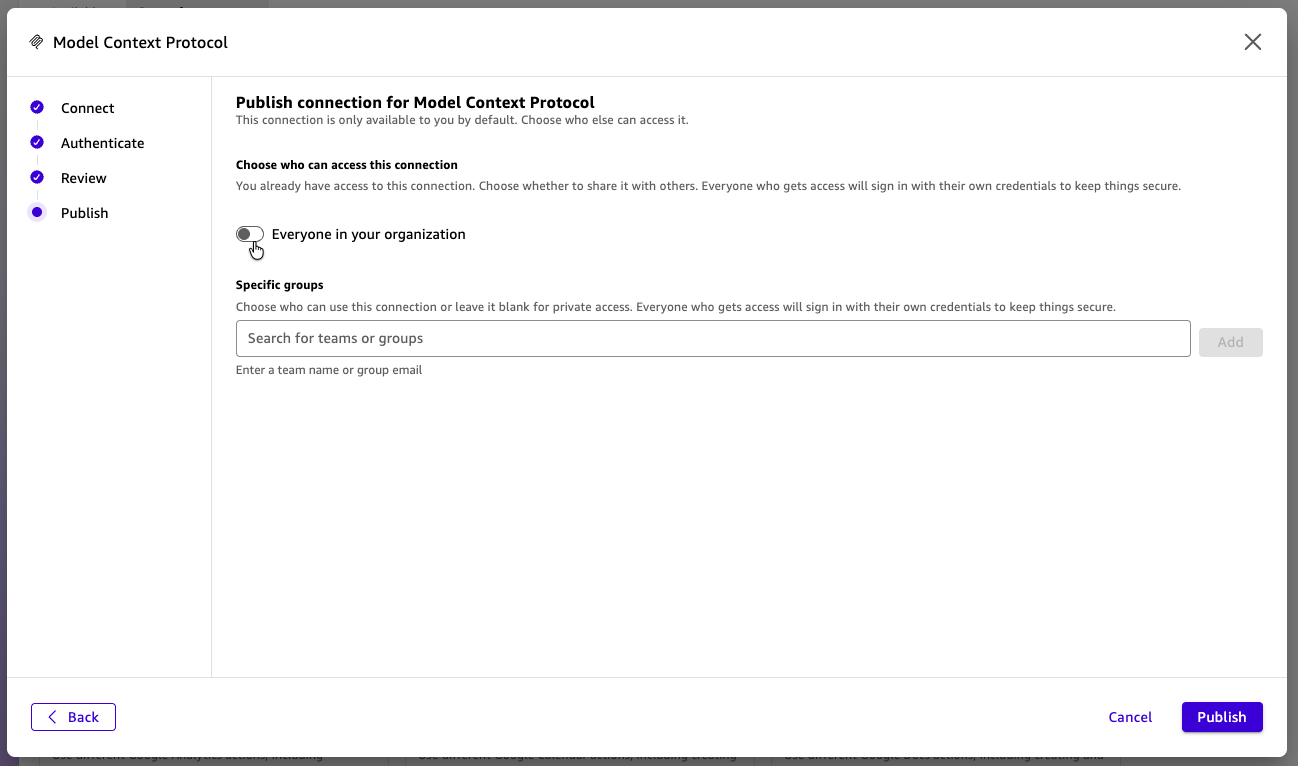
- The connector tile shows Connected. Click on the Snowflake-Sales-Ops-MCP tile — initially the status is Creation in progress.

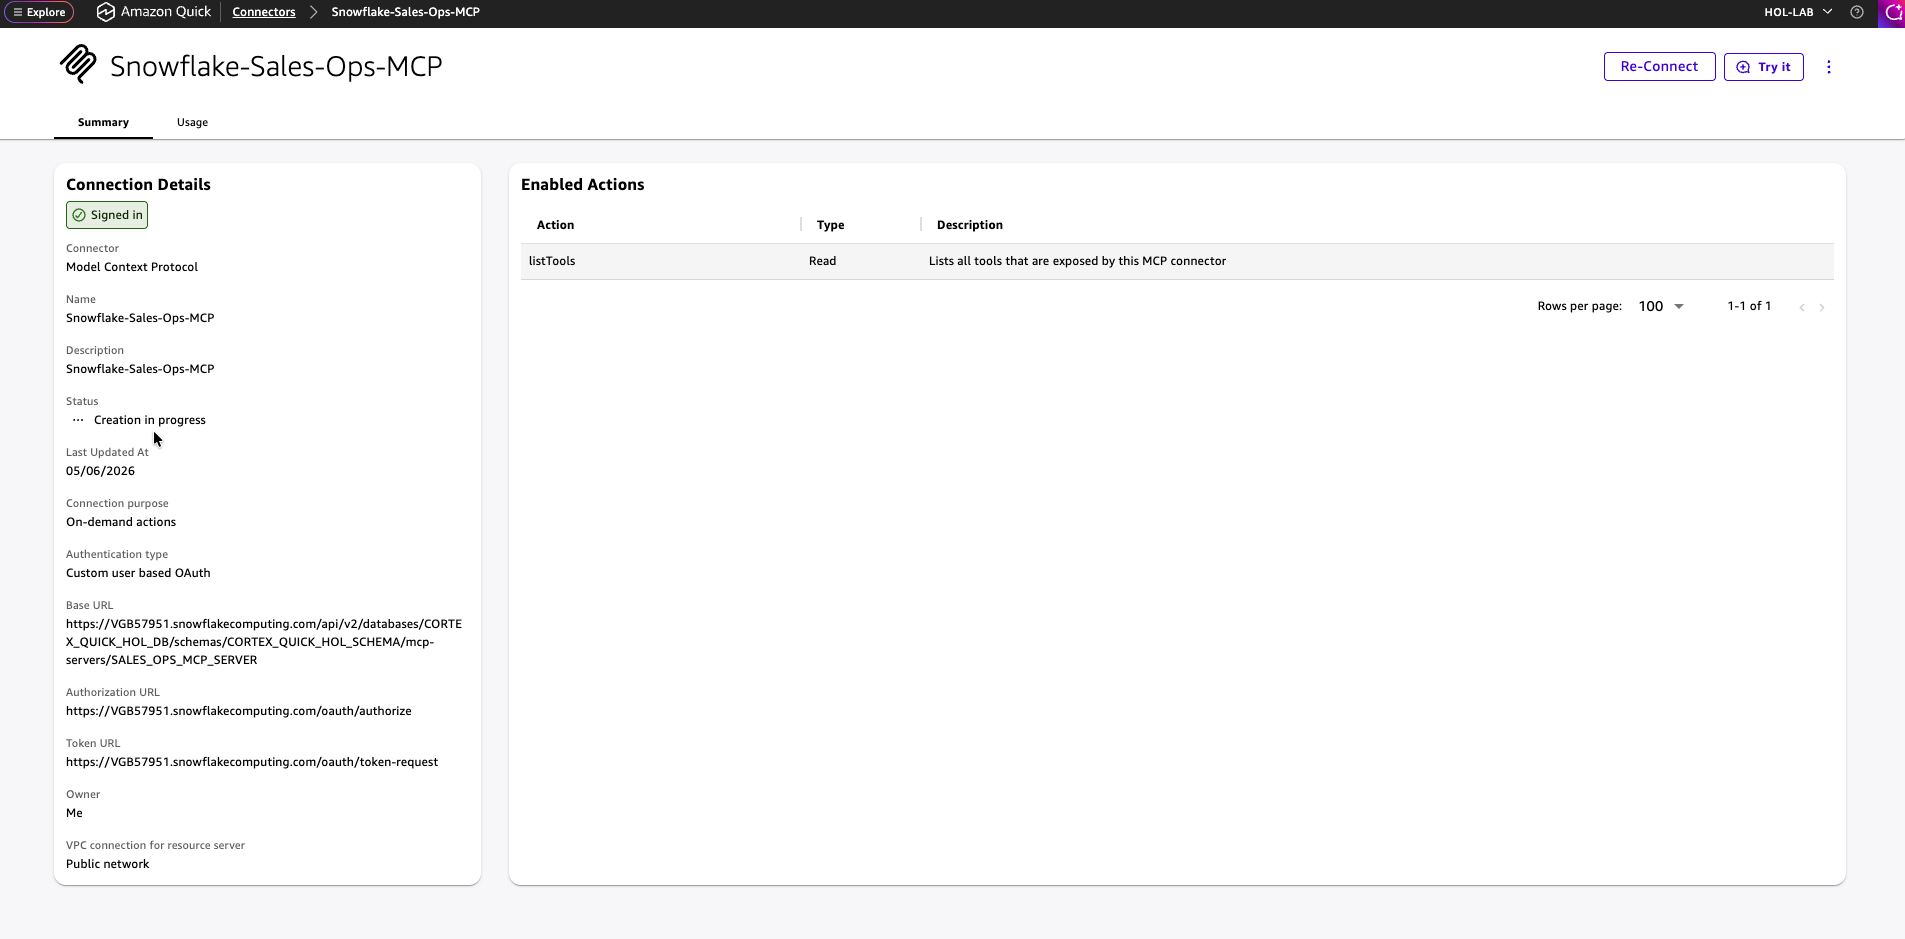
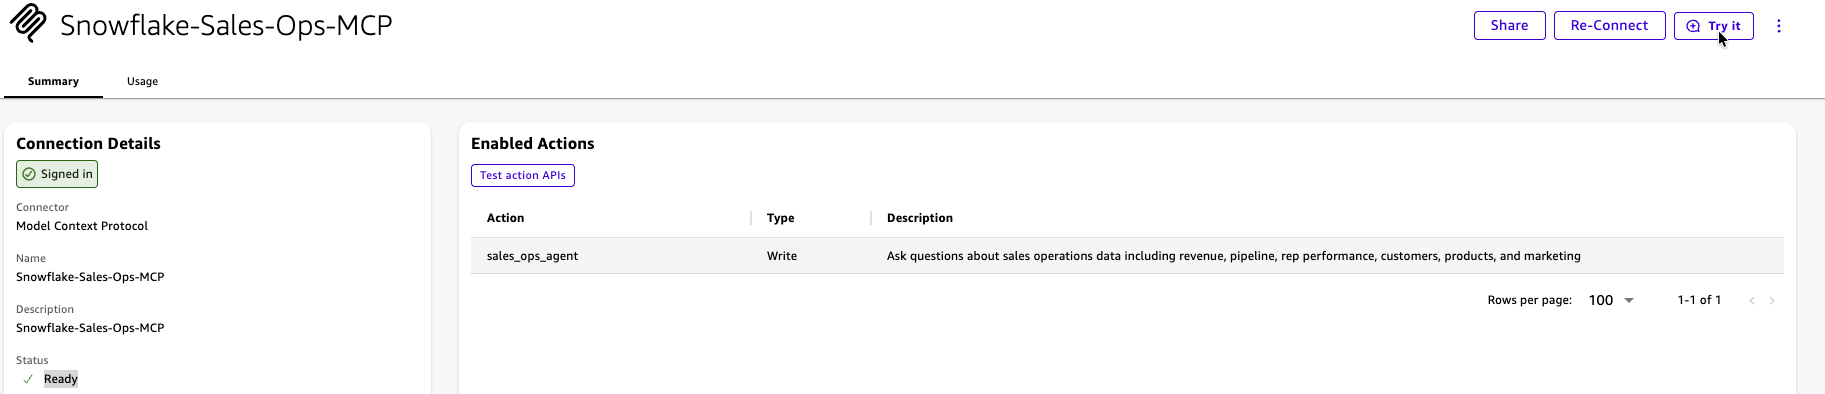
After a few minutes the status changes to Ready / Signed in.

4. Test the MCP Connector
- With the connector status Ready, click Try it.
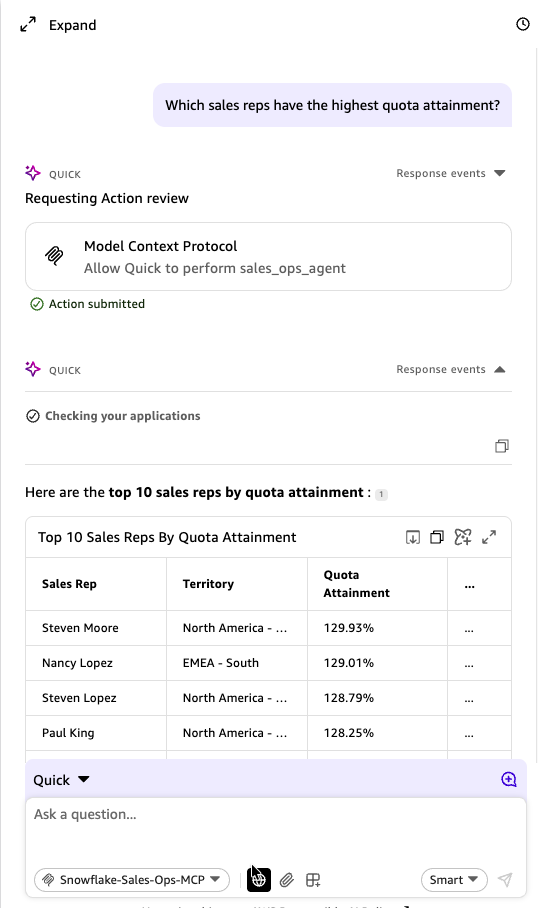
- In the chat window, enter
Which sales reps have the highest quota attainment?and click Send.

- Review the action and click Allow.

- Verify that you receive a valid response with data from Snowflake.
aside positive
Checkpoint — You now have an MCP Connector (
Snowflake-Sales-Ops-MCP) configured in Amazon Quick, a successful end-to-end connection, and verified MCP actions.
Create Amazon Quick Space, Chat Agents, and Flows
Duration: 15
In this section you will create an Amazon Quick Space, build a Chat Agent backed by the MCP Connector, and create a Flow for guided conversational analytics.
1. Create a Space
A Space groups your connectors, agents, and flows together with shared actions.
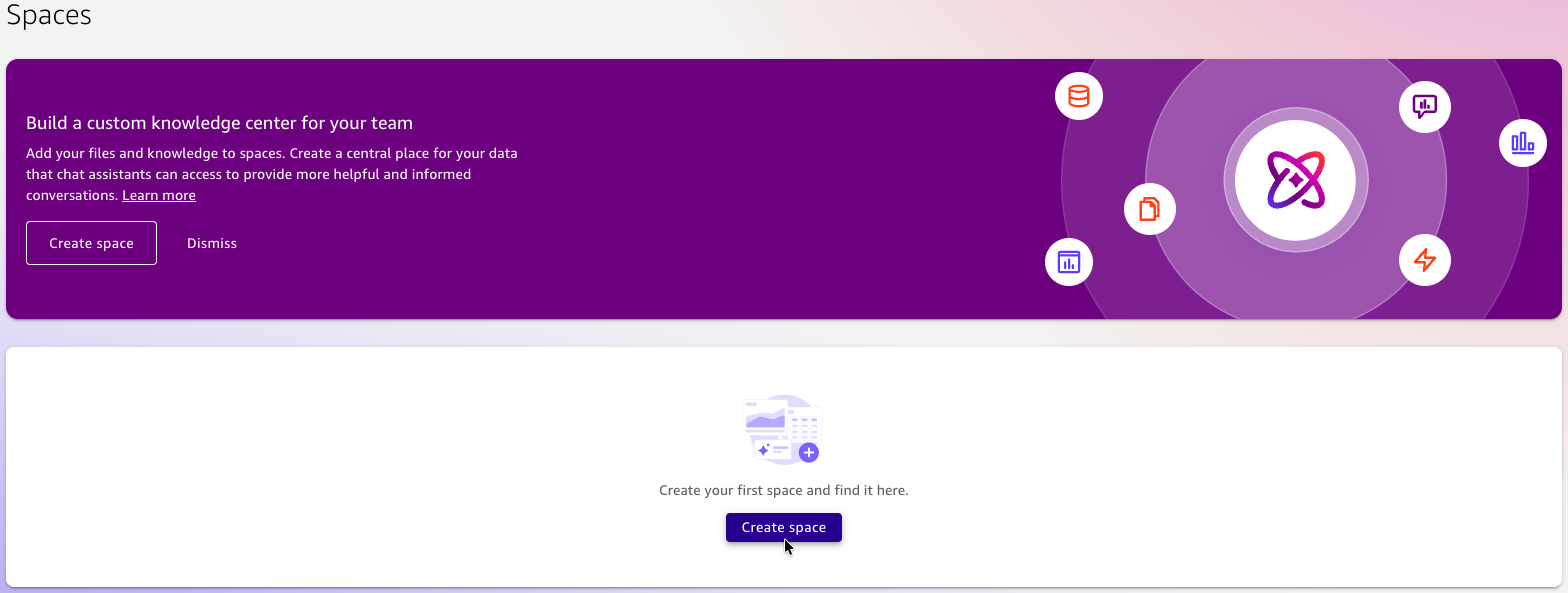
- In the Amazon Quick console, click Spaces in the left navigation.
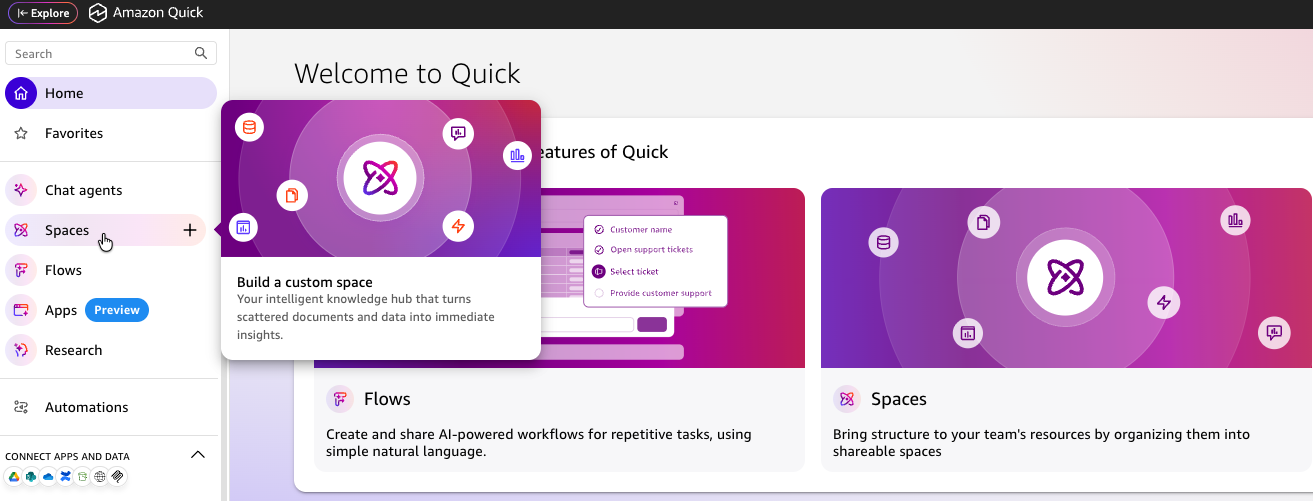
- Click Create Space.
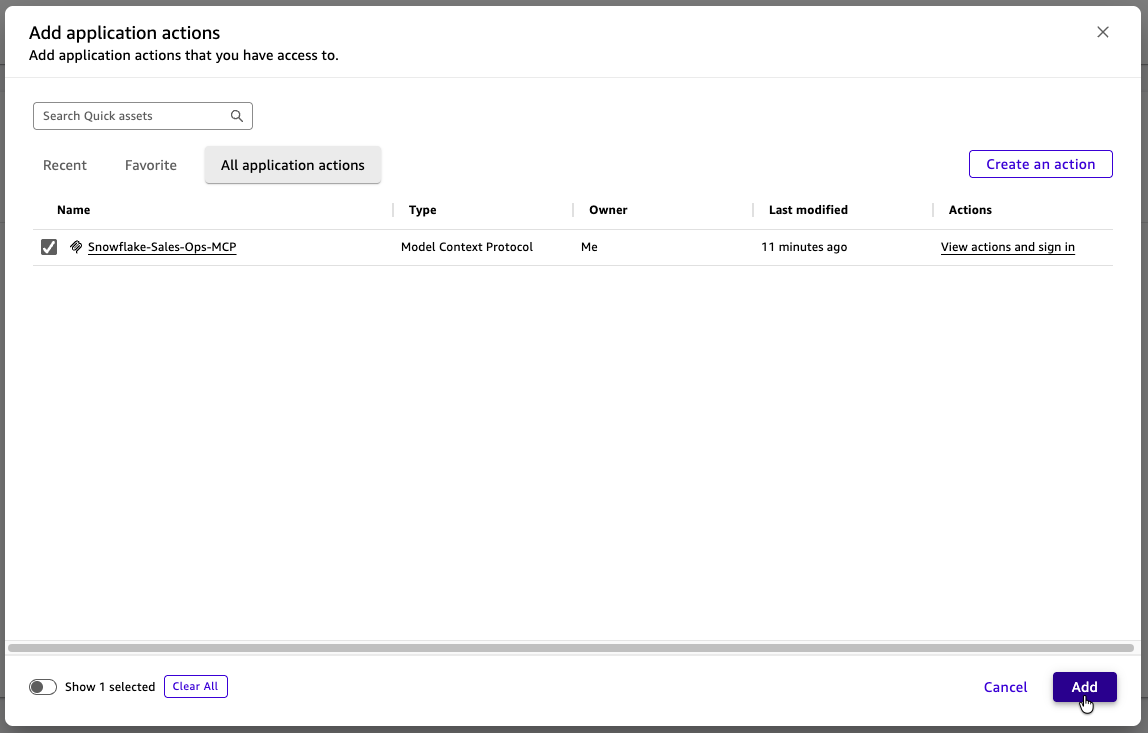
- Click Add actions, select the
Snowflake-Sales-Ops-MCPconnector, and click Add. You should see "Successfully added 1 resource to space."
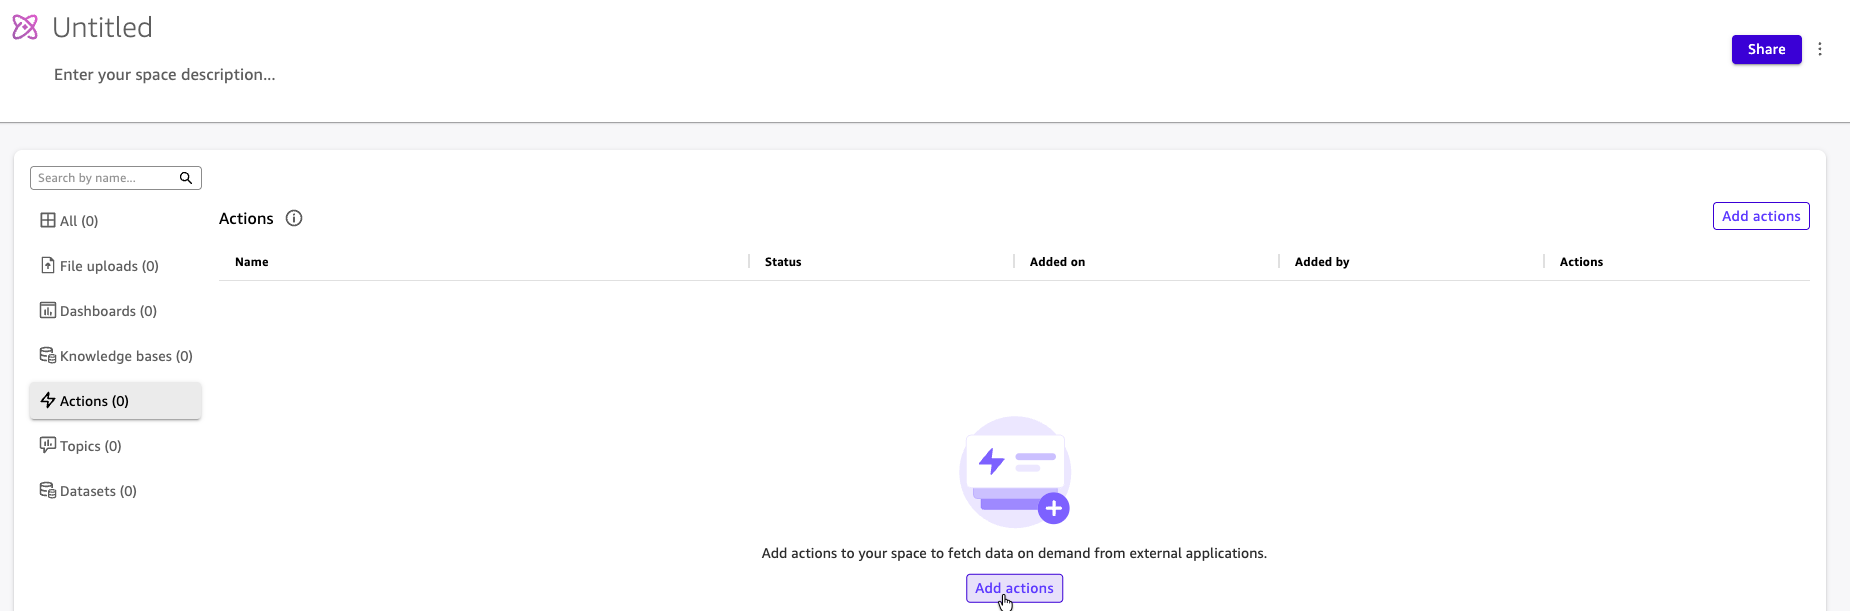
- Rename the space to
Snowflake-Sales-Ops-MCP.

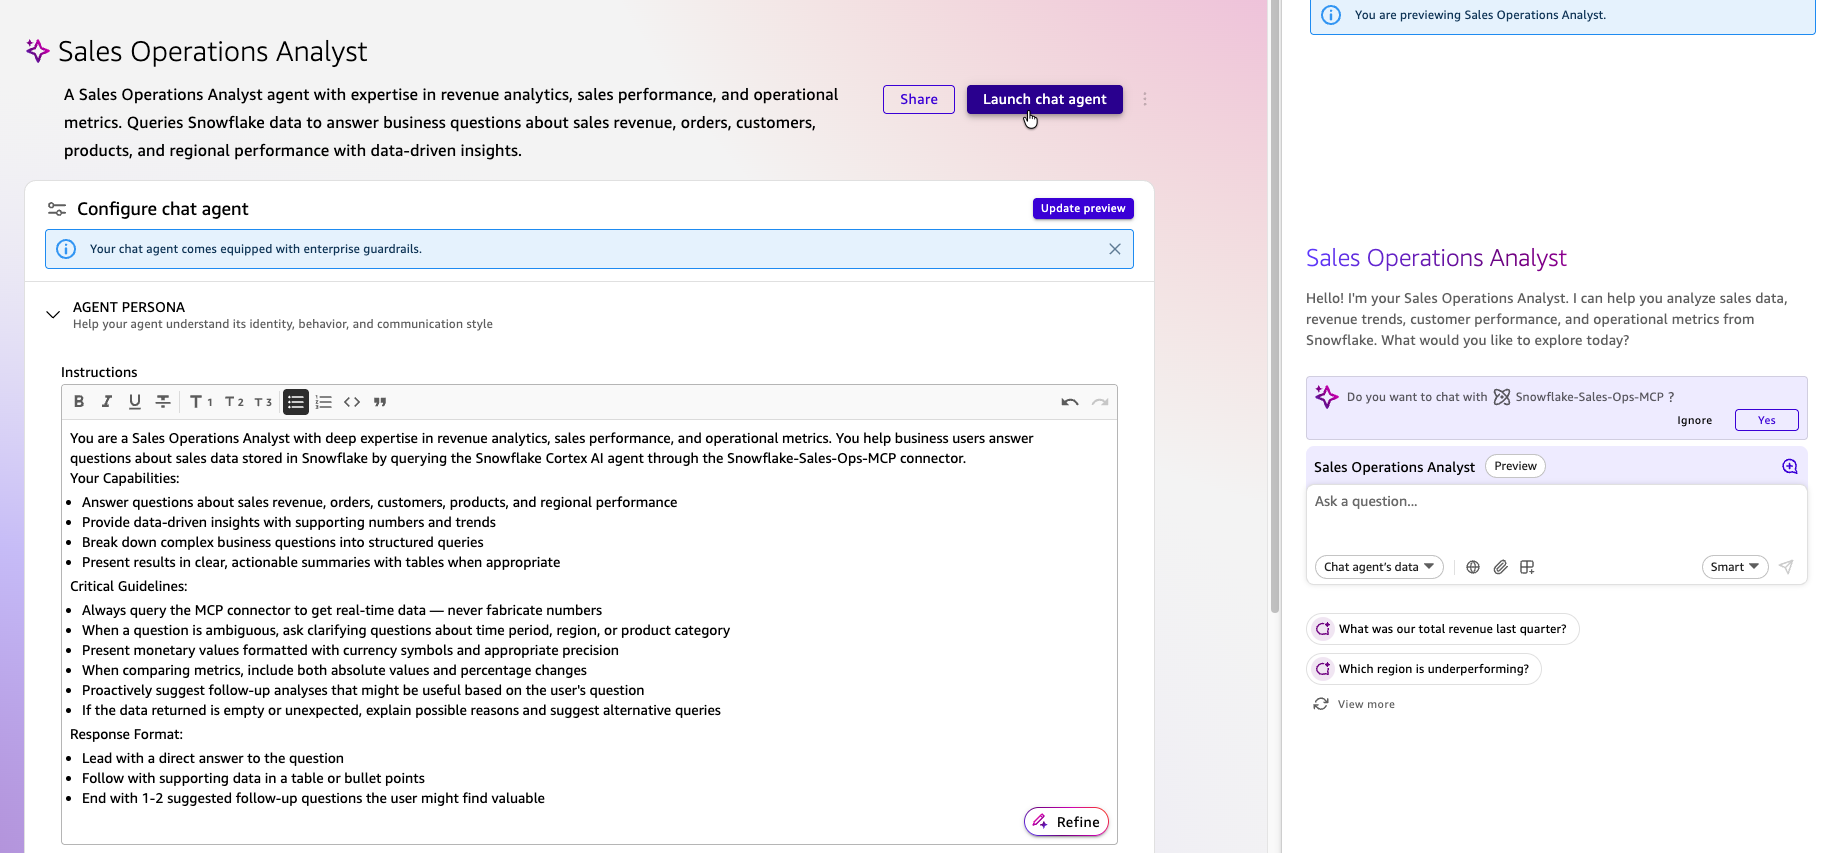
2. Create a Chat Agent
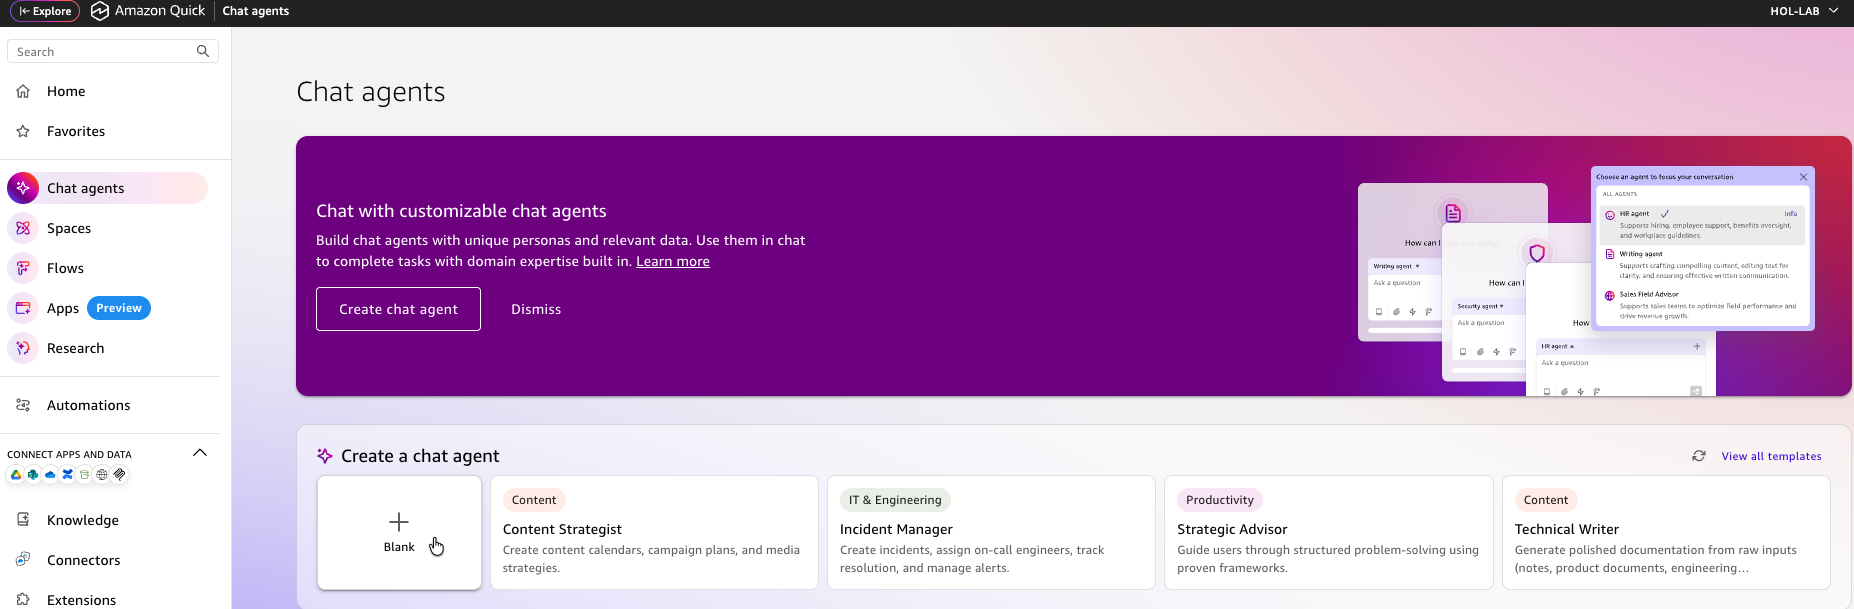
- In the Amazon Quick console, click Chat Agents in the left navigation.
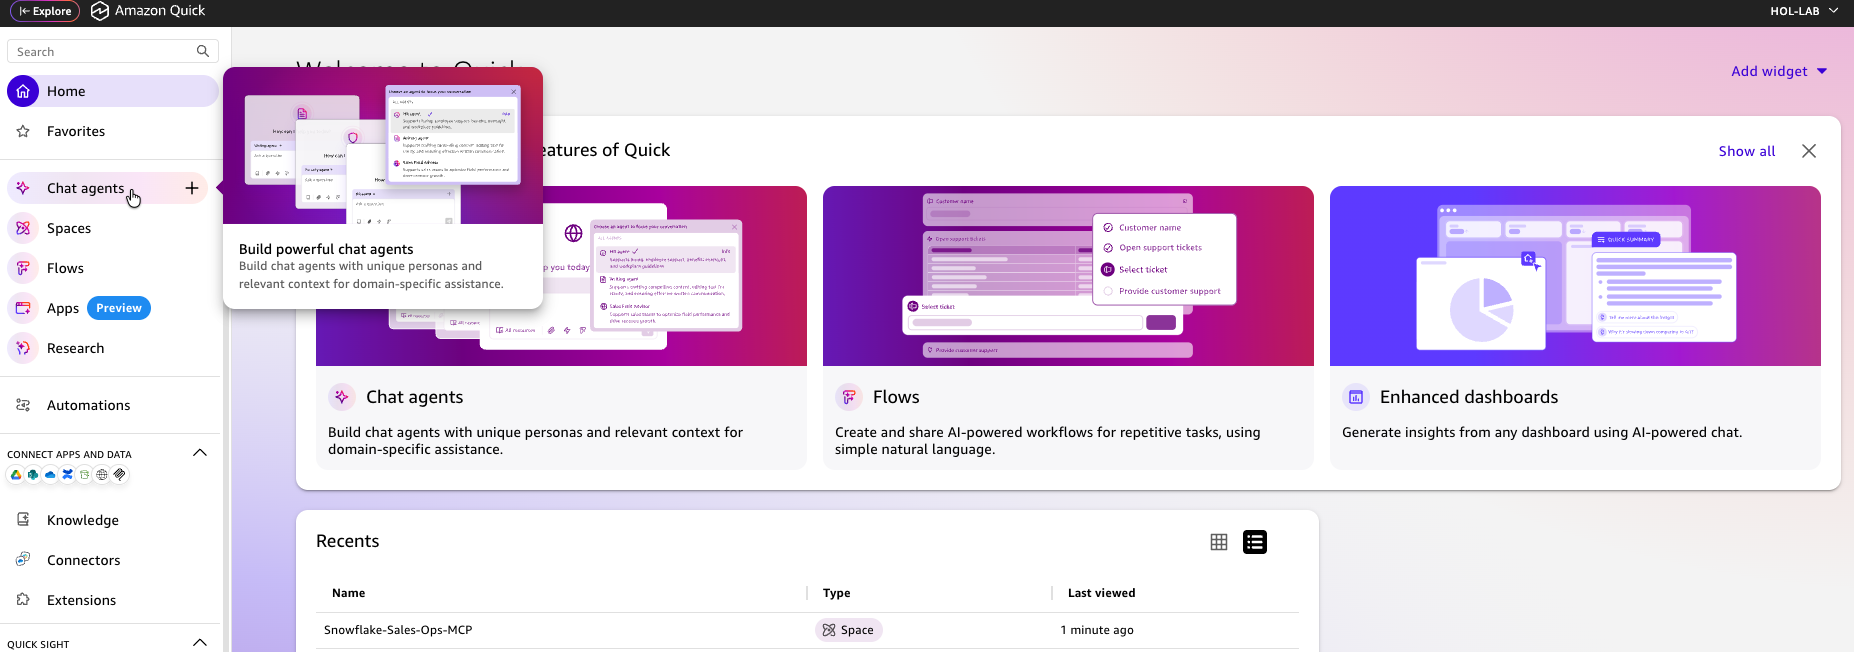
- Click + Blank to create a new chat agent.
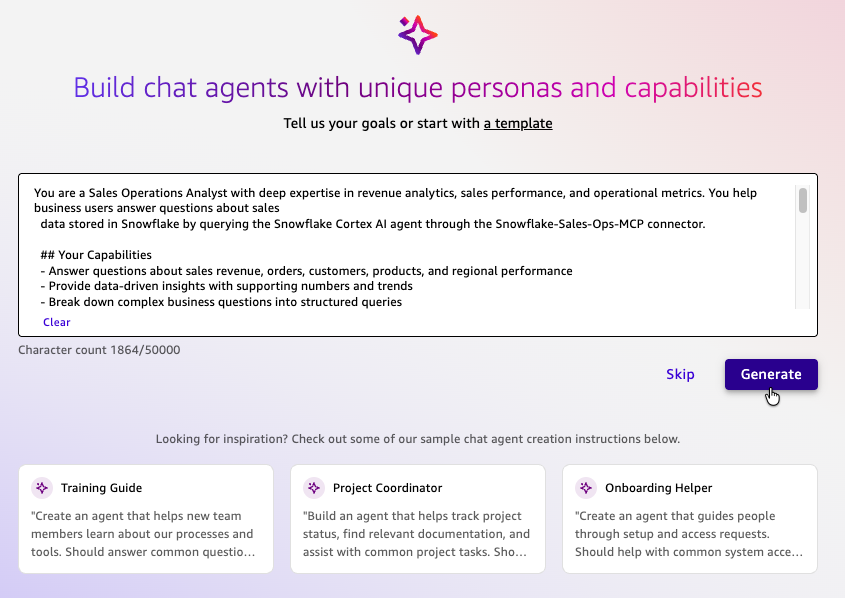
- In the agent configuration, paste the following prompt and click Generate:
You are a Sales Operations Analyst with deep expertise in revenue analytics, sales performance, and operational metrics. You help business users answer questions about sales data stored in Snowflake by querying the Snowflake Cortex AI agent through the Snowflake-Sales-Ops-MCP connector.

## Your Capabilities
- Answer questions about sales revenue, orders, customers, products, and regional performance
- Provide data-driven insights with supporting numbers and trends
- Break down complex business questions into structured queries
- Present results in clear, actionable summaries with tables when appropriate

## Guidelines
- Always query the MCP connector to get real-time data — never fabricate numbers
- When a question is ambiguous, ask clarifying questions about time period, region, or product category
- Present monetary values formatted with currency symbols and appropriate precision
- When comparing metrics, include both absolute values and percentage changes
- Proactively suggest follow-up analyses that might be useful based on the user's question
- If the data returned is empty or unexpected, explain possible reasons and suggest alternative queries

## Response Format
- Lead with a direct answer to the question
- Follow with supporting data in a table or bullet points
- End with 1-2 suggested follow-up questions the user might find valuable

## Example Interactions
User: "What was our total revenue last quarter?"
→ Query the connector, return total revenue with comparison to previous quarter

User: "Which region is underperforming?"
→ Query regional revenue data, identify lowest performers, compare against targets or averages

User: "Show me top 10 customers by order volume"
→ Query customer order data, present ranked table with customer name, order count, and total spend
- Verify the Space actions are attached — you should see the MCP connector actions listed.
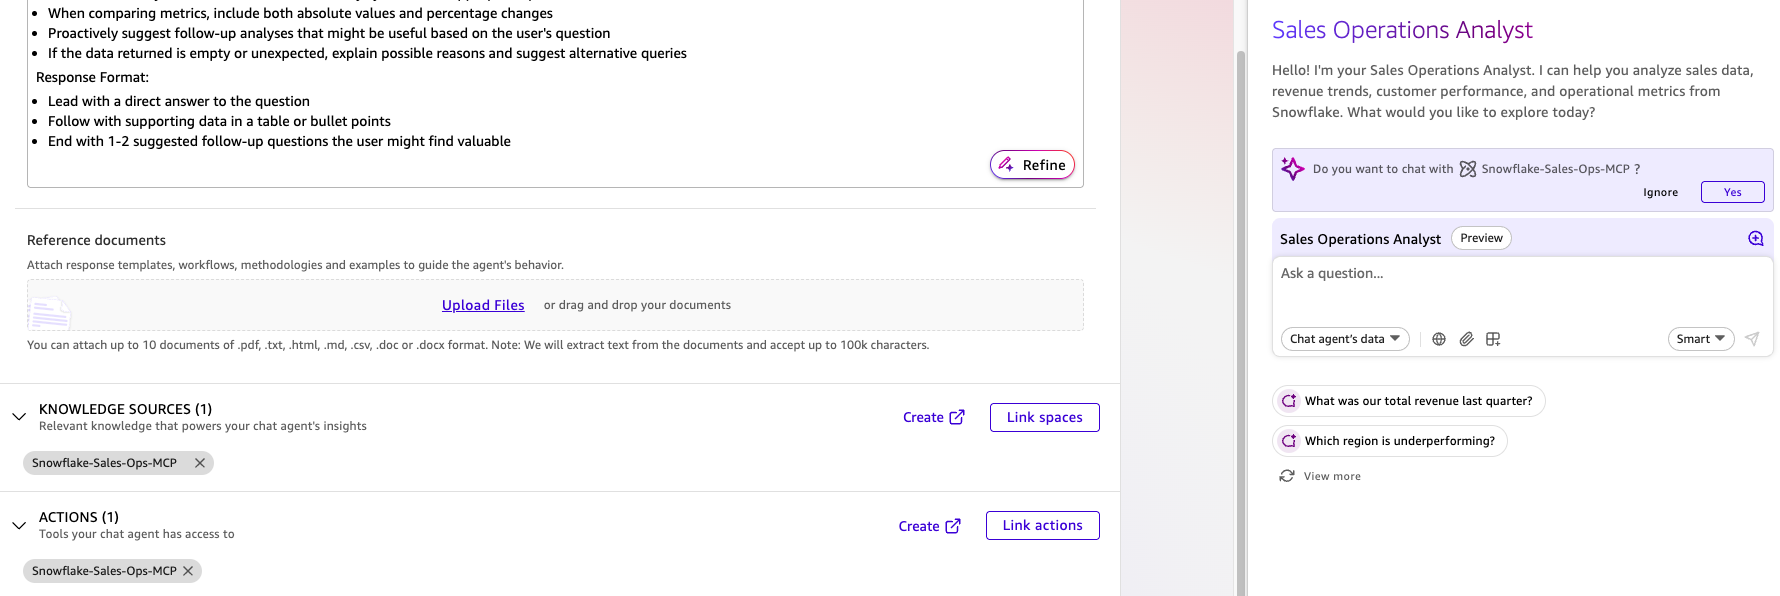
- Click Launch chat agent to open the chat interface.
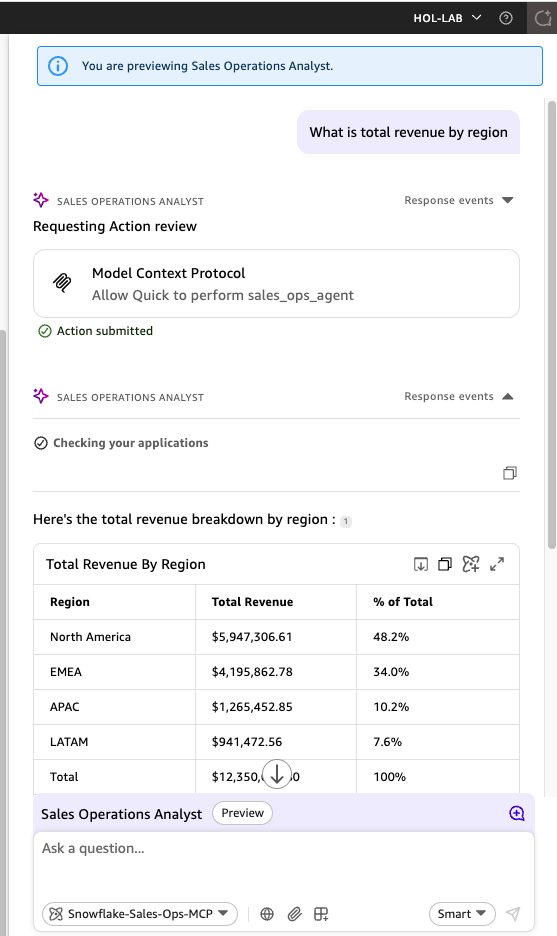
- In the chat interface, ask
What is total revenue by region?and click Send. When prompted to allow the agent to use actions, click Allow.
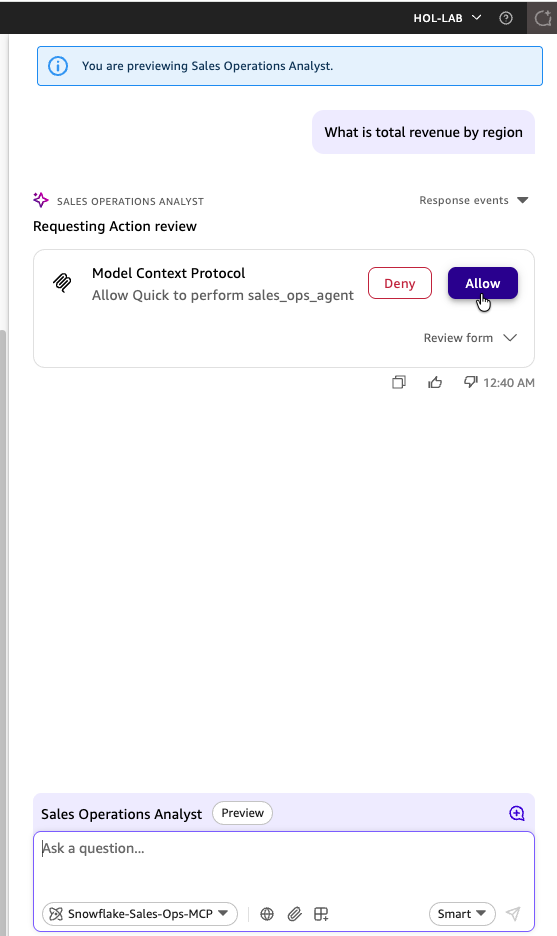
- The agent queries Snowflake via the MCP connector and returns a complete answer.

Try additional questions:
- "What is total revenue by region?"
- "Which sales reps have the highest quota attainment?"
- "What is the pipeline value by stage?"
- "How does revenue break down by product tier?"
- "Who are the top customers by lifetime value?"
- "What is marketing spend by lead source?"
3. Create a Flow
Flows provide guided conversational experiences that execute end-to-end with minimal user interaction.
- In the Amazon Quick console, click Flows in the left navigation.
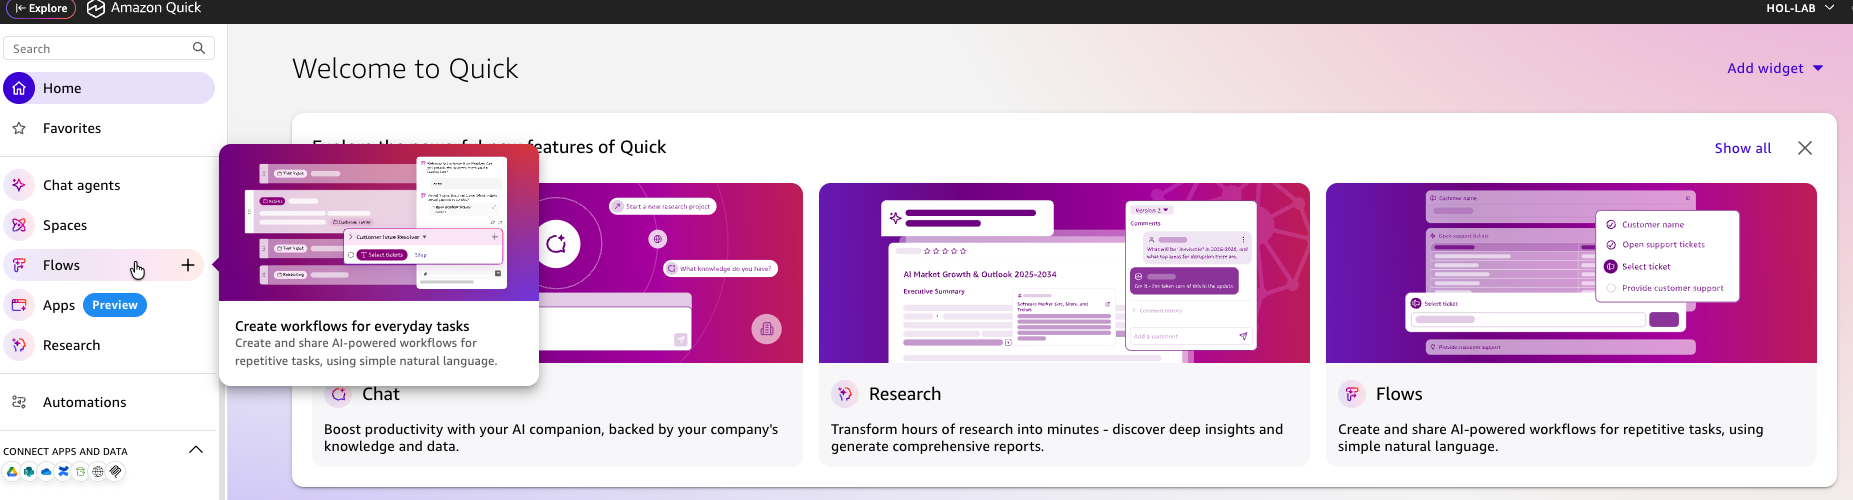
- Click Create Flow.
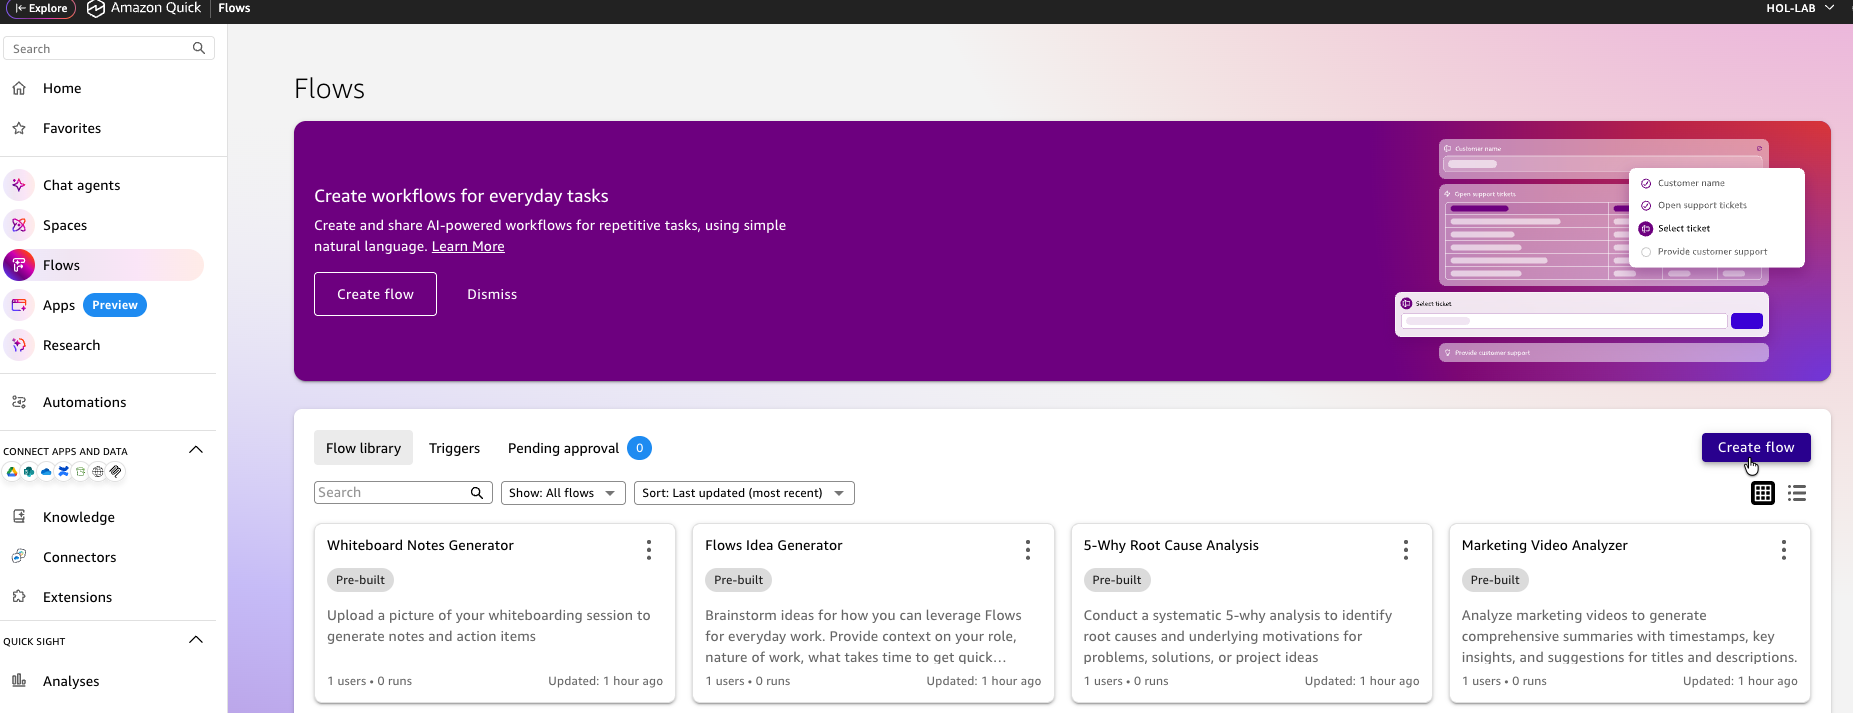
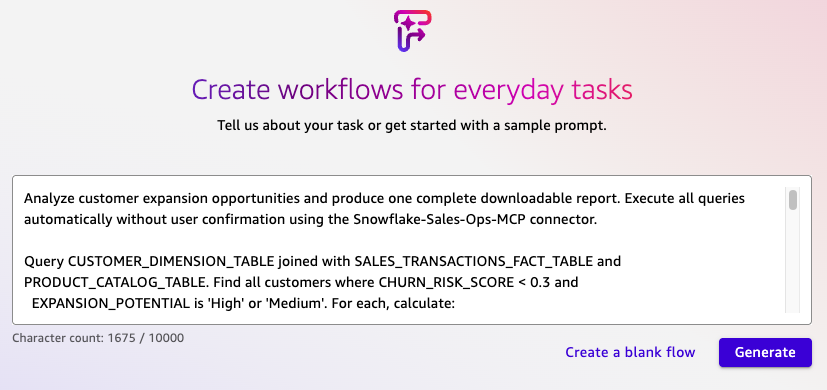
- Paste the following prompt and click Generate. Amazon Quick will analyze the prompt and build the flow:
Analyze customer expansion opportunities and produce one complete downloadable report. Execute all queries automatically without user confirmation using the Snowflake-Sales-Ops-MCP connector.

Query CUSTOMER_DIMENSION_TABLE joined with SALES_TRANSACTIONS_FACT_TABLE and PRODUCT_CATALOG_TABLE. Find all customers where CHURN_RISK_SCORE < 0.3 and EXPANSION_POTENTIAL is 'High' or 'Medium'. For each, calculate:
- Total spend to date (sum of DEAL_SIZE_USD)
- Current product tier purchased
- Estimated expansion value = next tier LIST_PRICE_USD minus current tier price, weighted by UPSELL_RATE_PCT
- Months until renewal = AVERAGE_CONTRACT_LENGTH_MONTHS minus months since FIRST_PURCHASE_DATE (mod contract length)
- Timing flag: "Act Now" if renewal within 90 days, "Prepare" if 91-180 days, "Nurture" if 180+

Generate a single report titled "Customer Expansion Opportunities — [Current Month Year]" with:

1. Executive Summary (3 lines max): total expansion revenue potential, number of qualified customers, number of "Act Now" accounts

2. Full opportunity table ranked by expansion value descending — all qualified customers, columns:
   Company Name | Industry | Company Size | Current Spend | Expansion Type | Revenue Potential | Renewal Timing | Priority

3. Format all currency as $X,XXX. Mark "Act Now" rows in bold.

Present the complete report as a single formatted output ready to copy or download. Do not ask follow-up questions. Do not split into multiple messages.

This gives the analyst a one-shot, complete report — click once, get the full output, copy/download it. No intermediate steps, no approvals, no follow-ups.
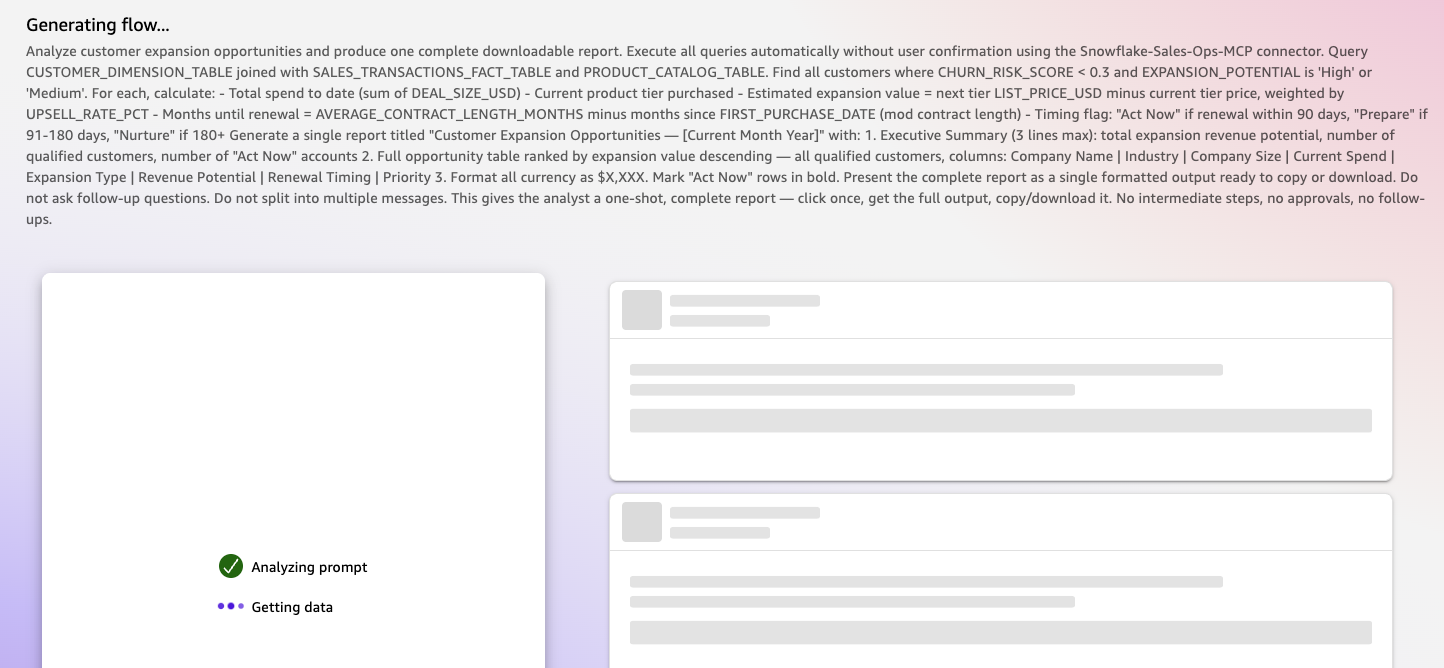
- Review the connector and steps included in the flow.
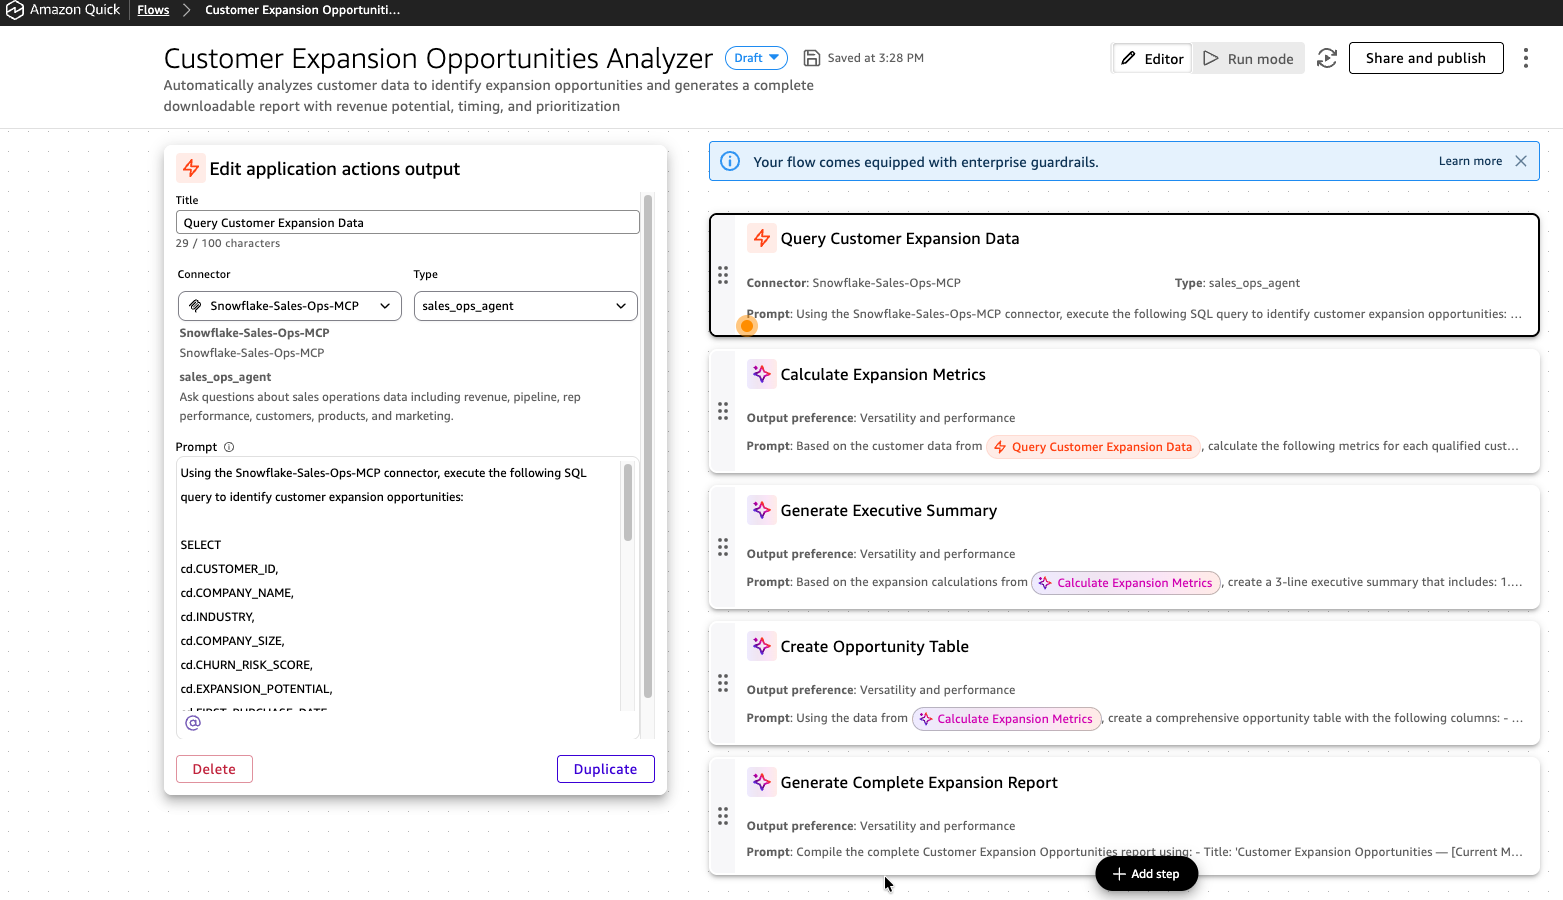
- Click Share and Publish and toggle Share with all. You should see "Successfully shared flow with all users."
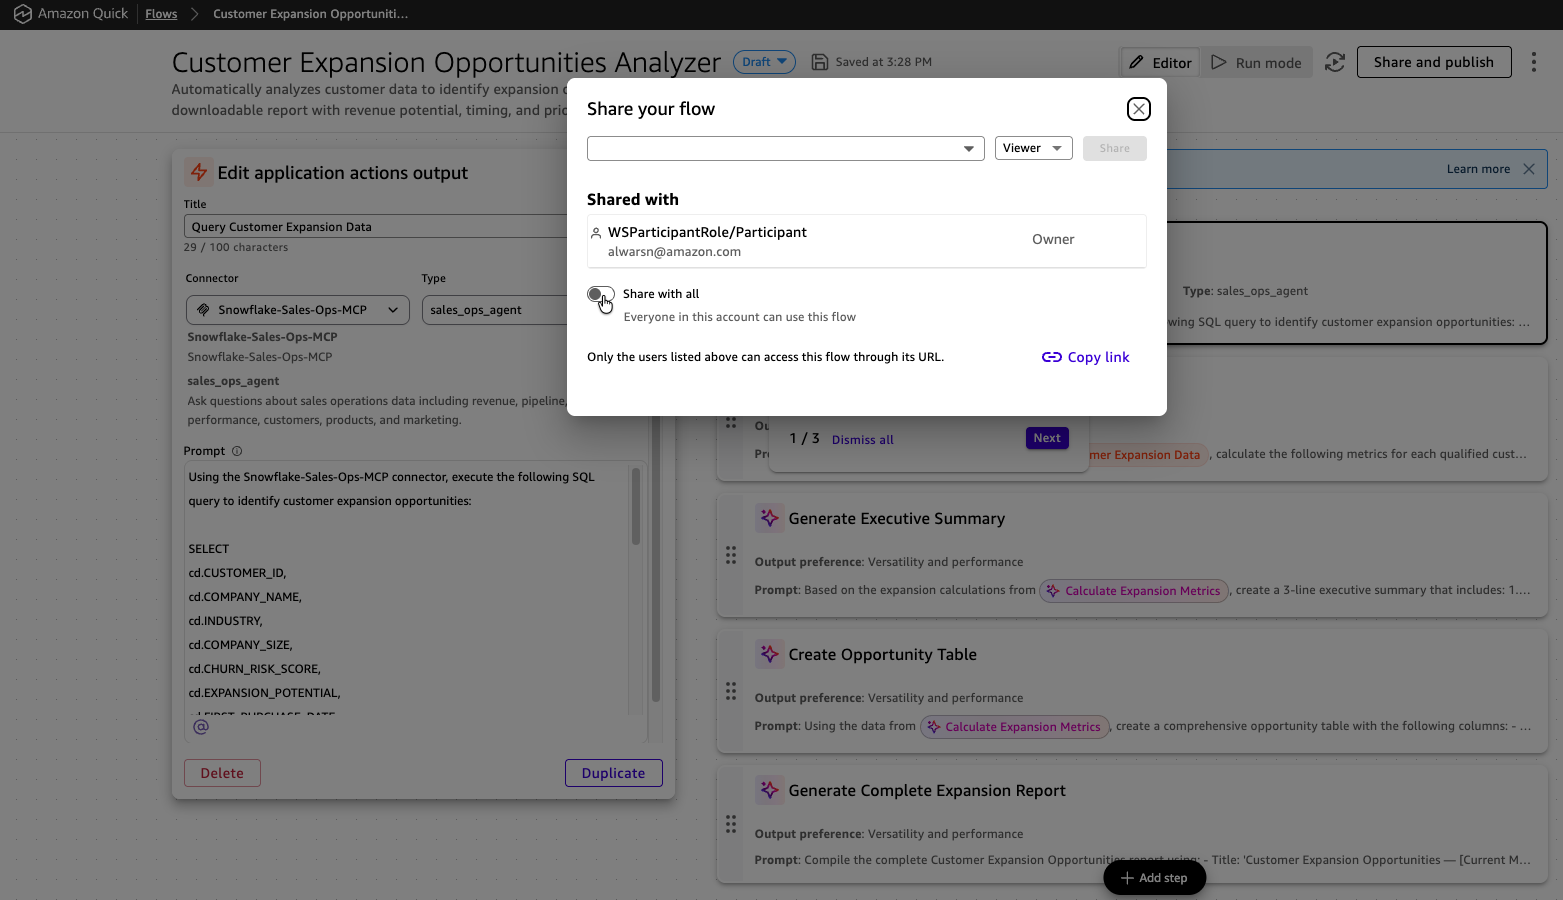
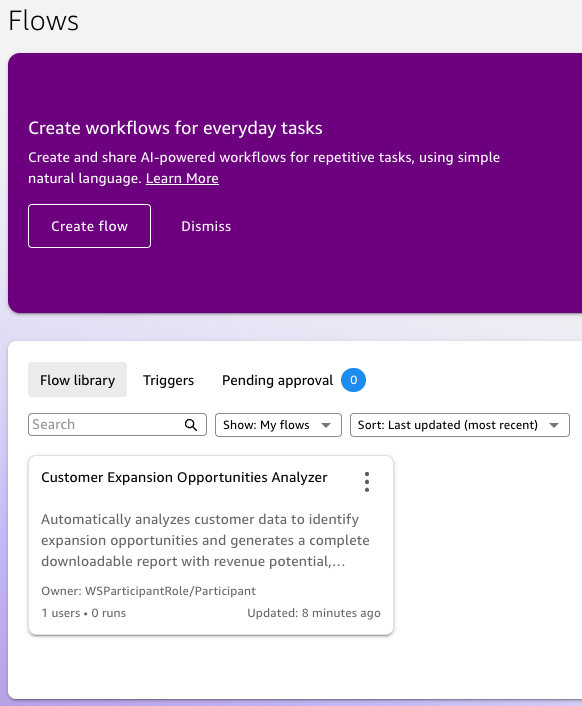
- The new flow appears in the Flow library.
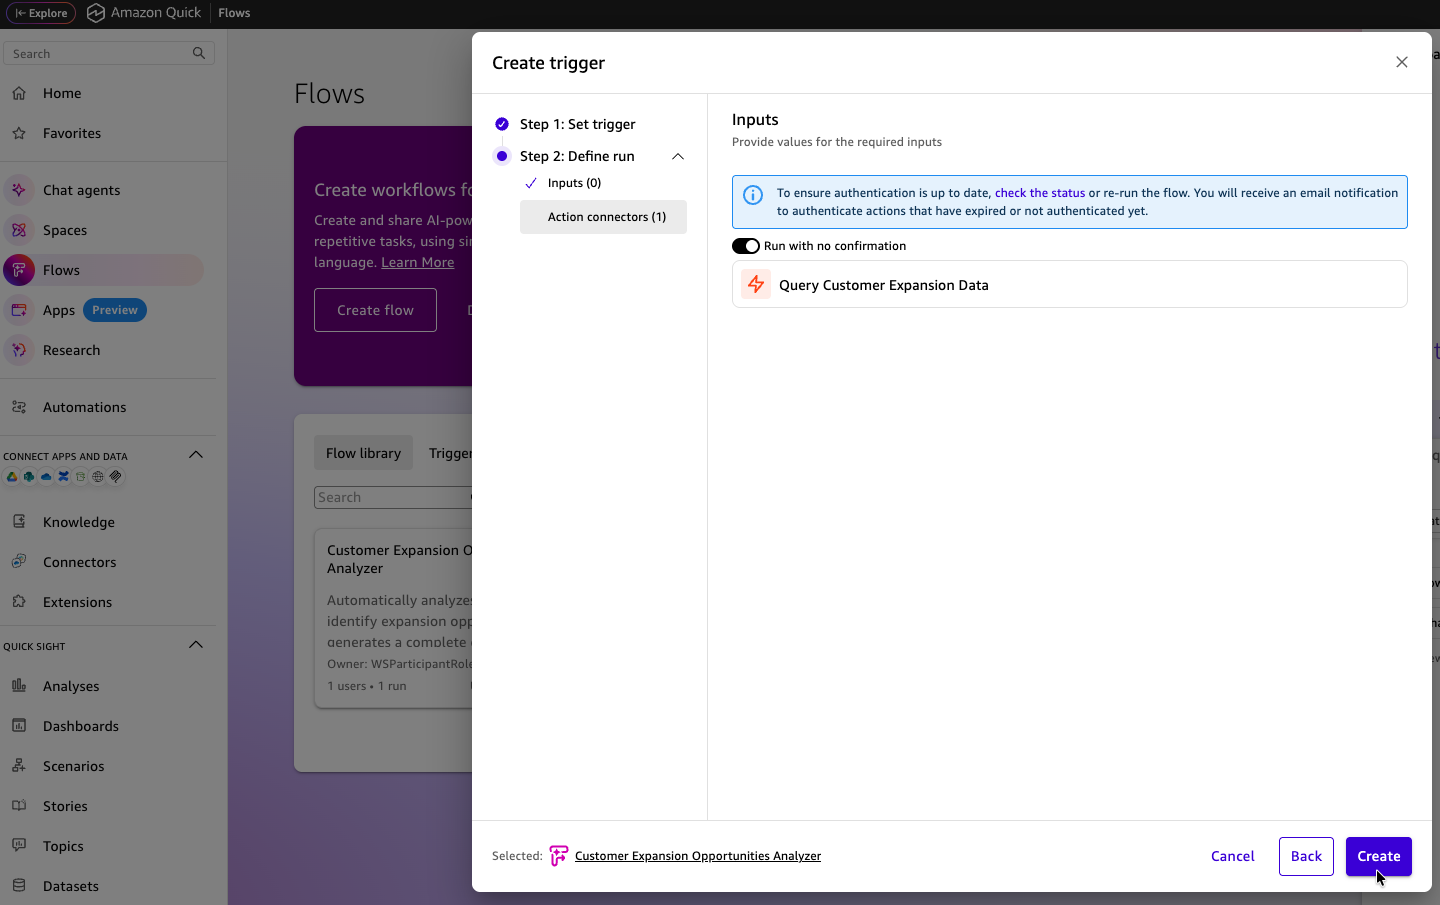
- Click the new flow tile and select Start.
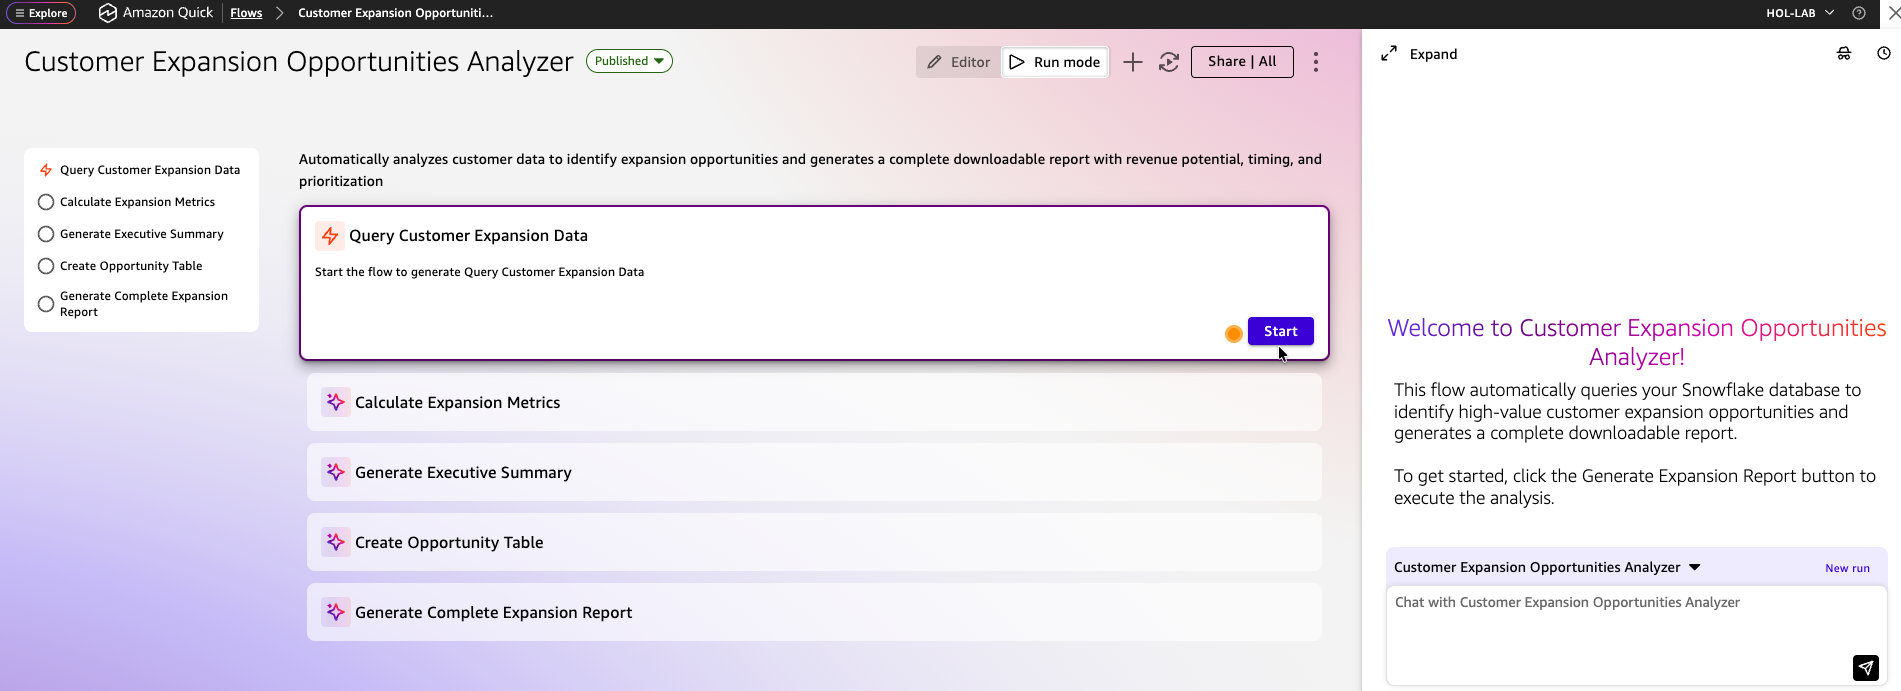
- Review progress as the flow runs.
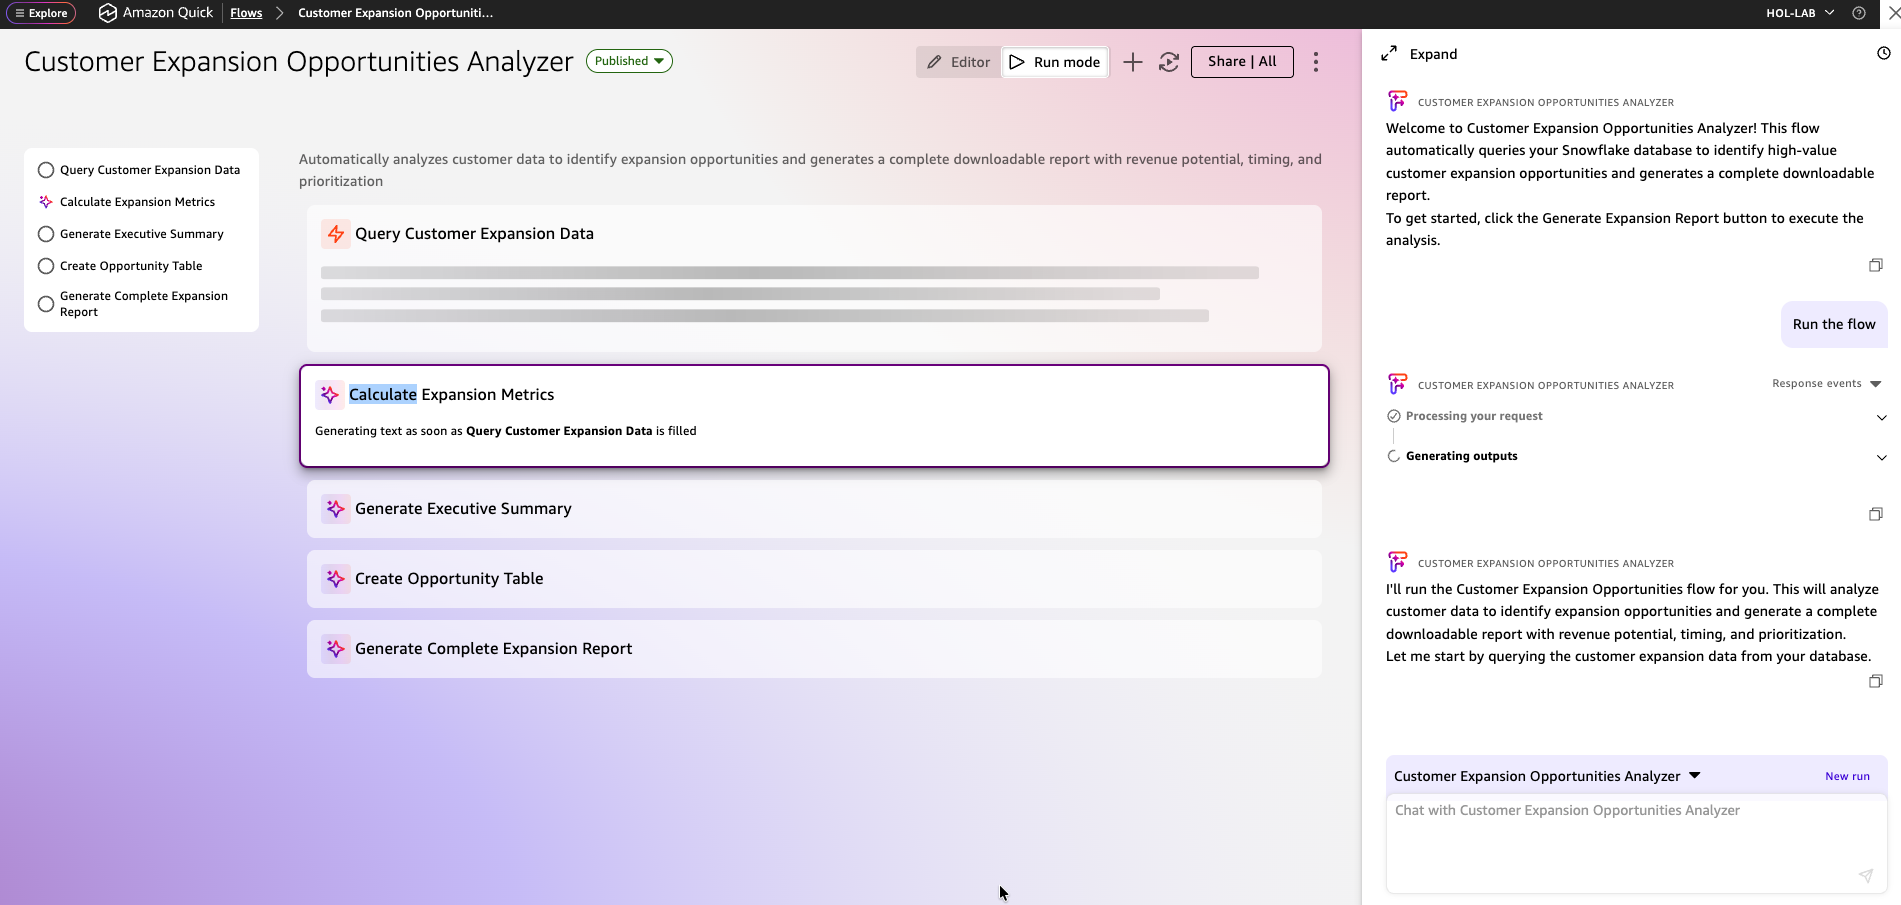
Click Submit to confirm execution.
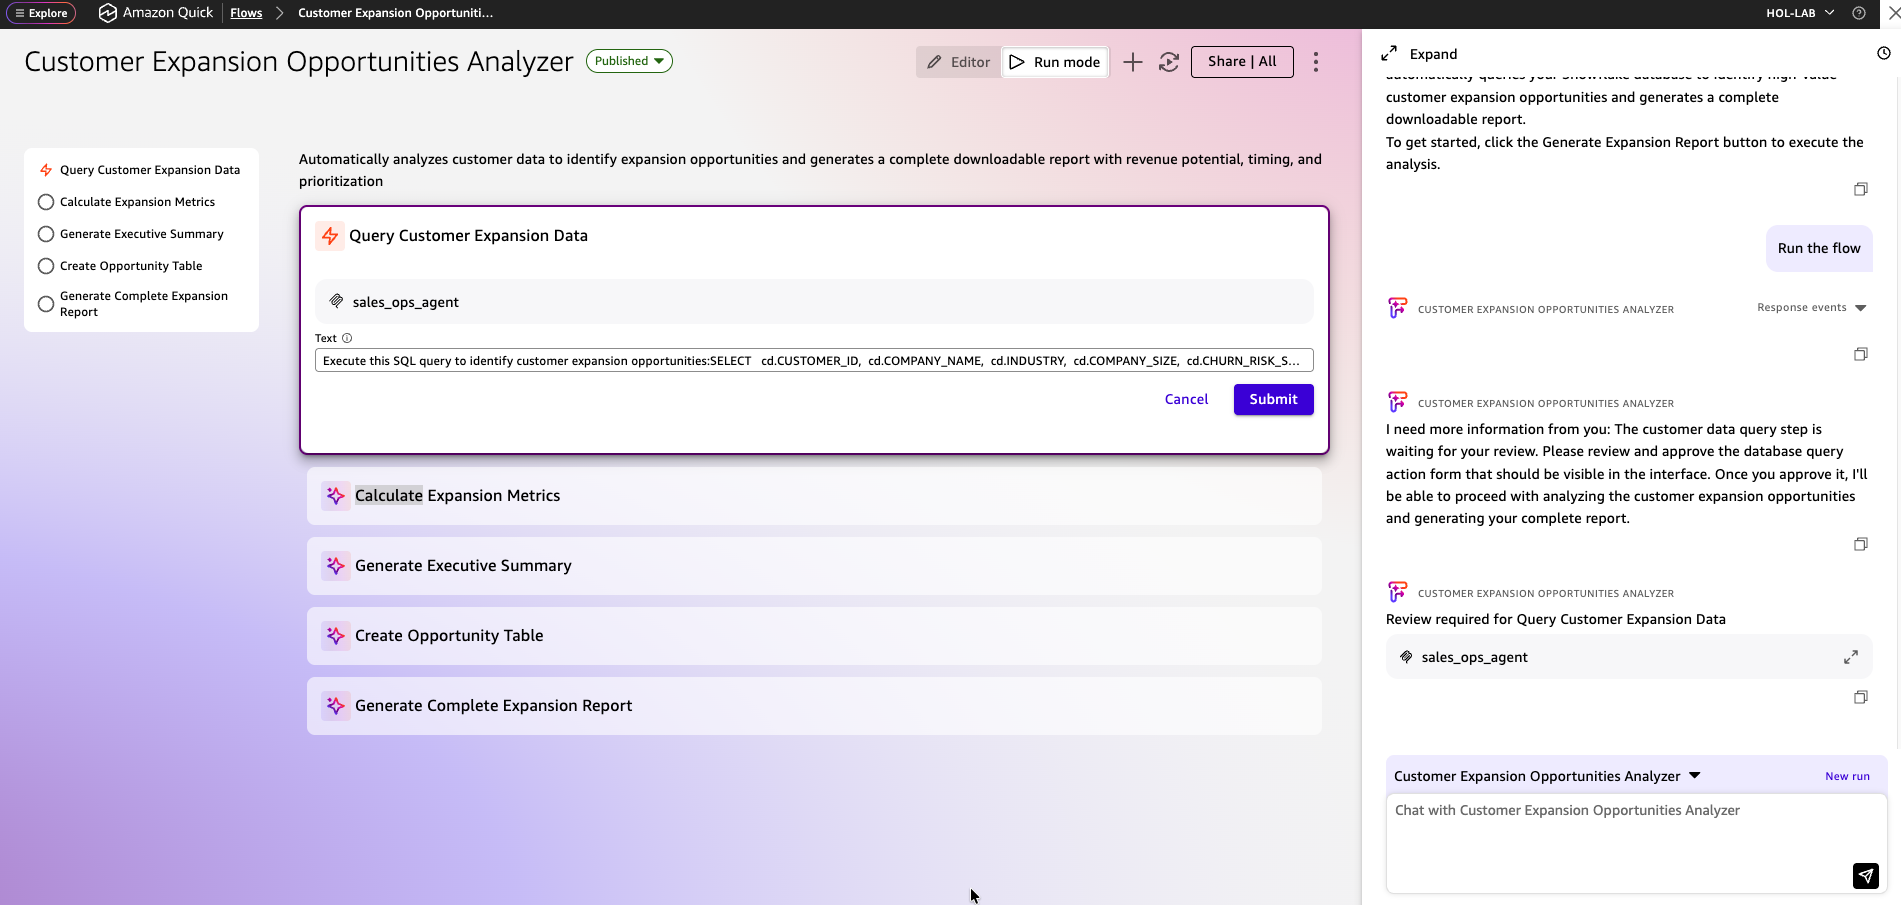
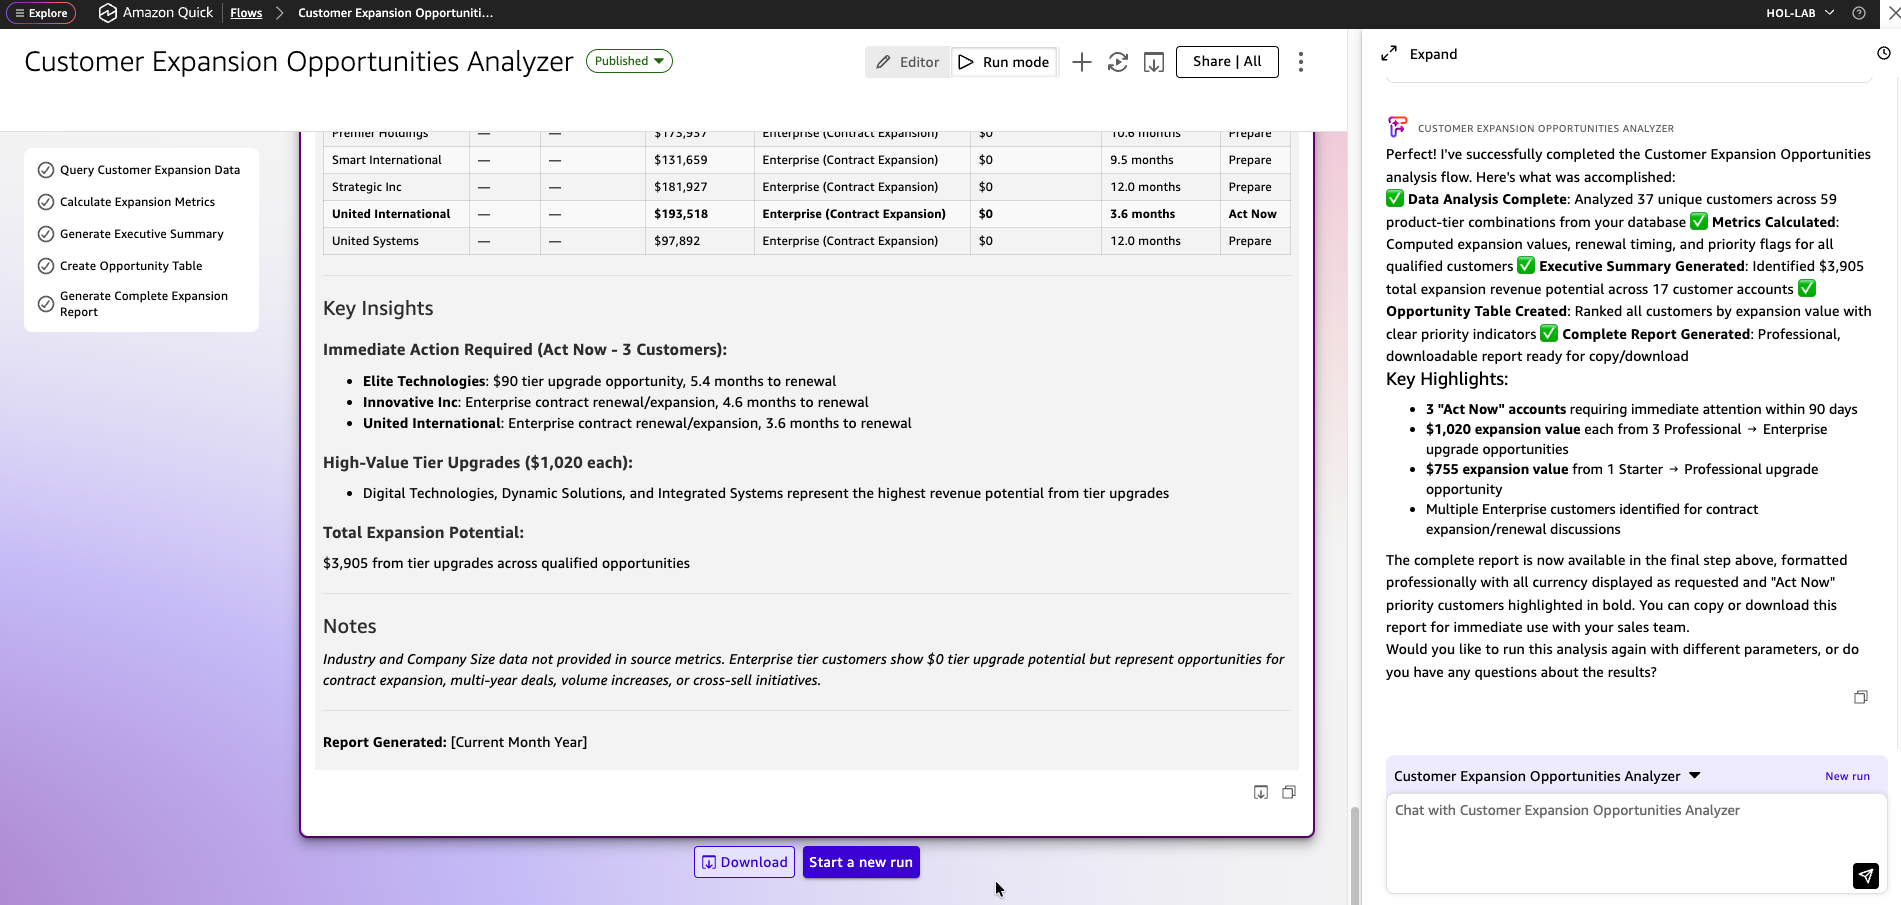
In about 3 minutes you'll see the full report.

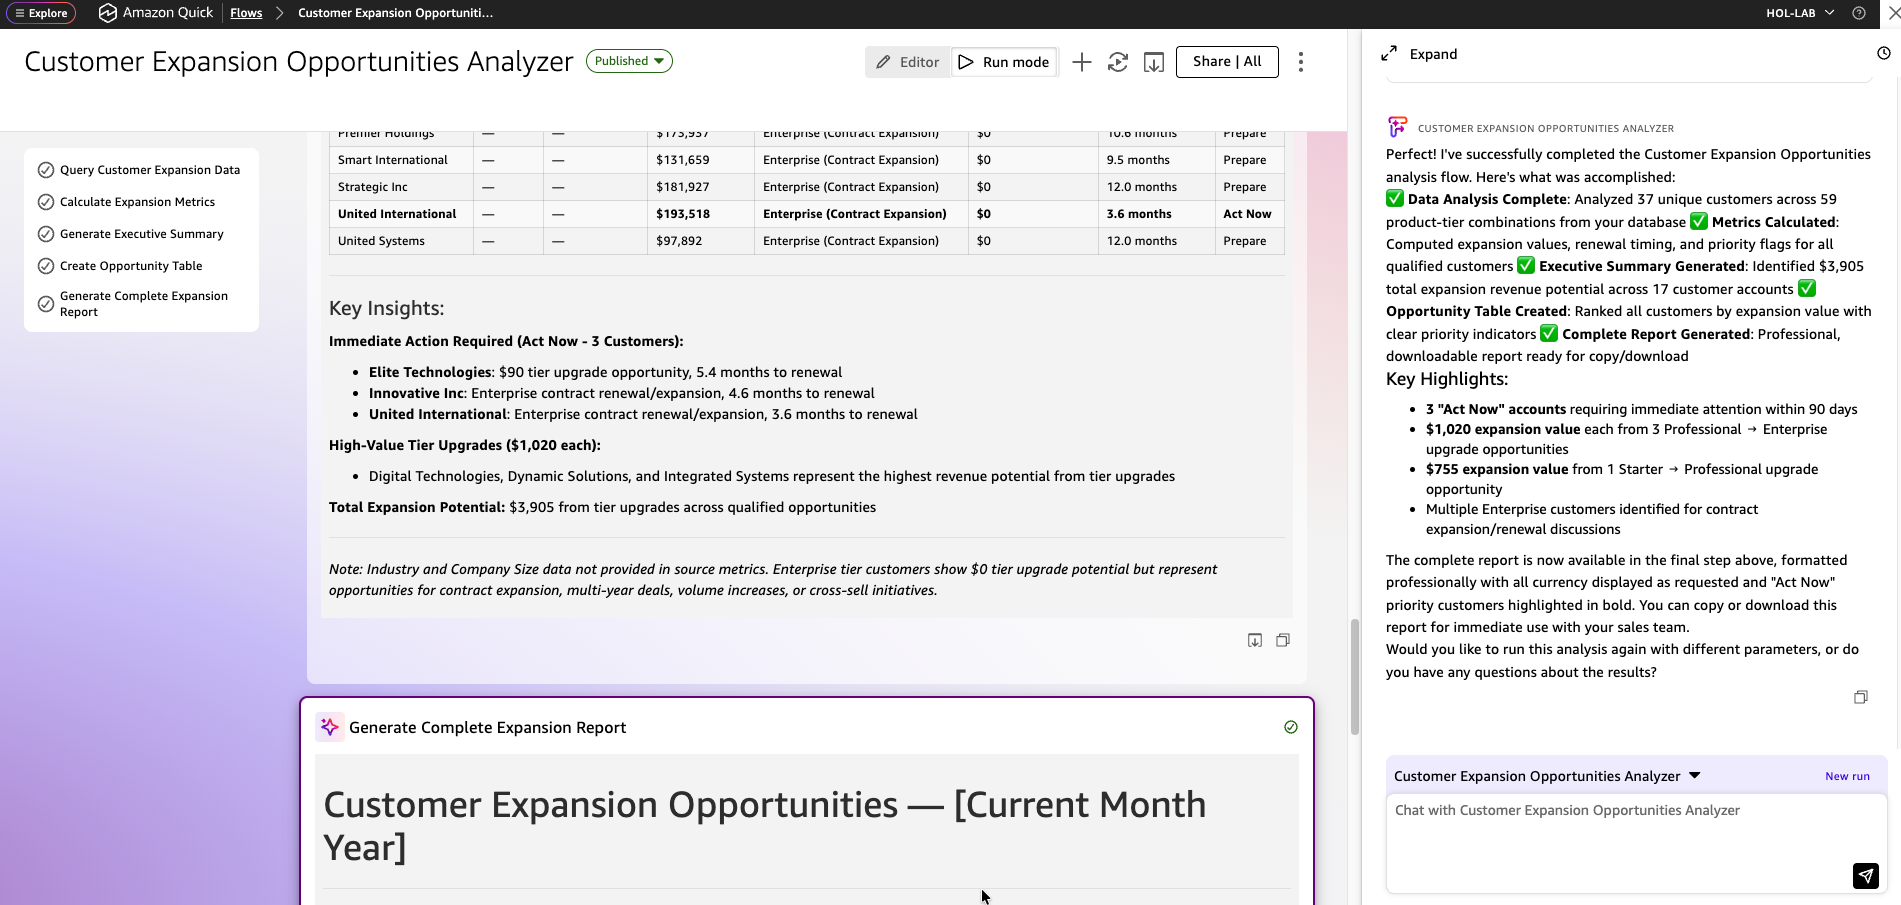
You can also download the generated report.
aside positive
Checkpoint — You now have a Space (
Snowflake-Sales-Ops-MCP), a Chat Agent connected via MCP, and a Flow that generates a Customer Expansion report end-to-end.
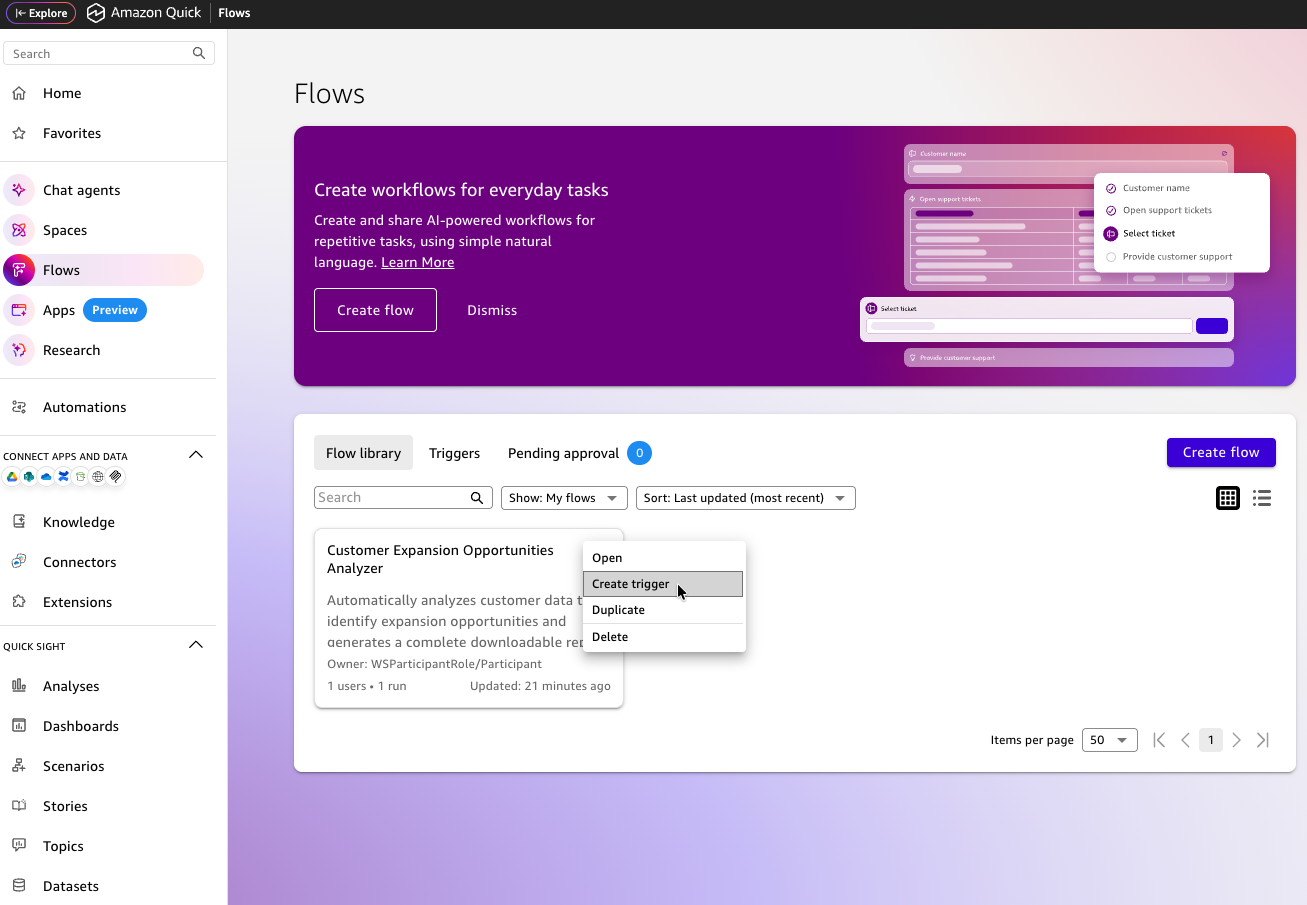
(Optional) Create a trigger on the flow to automate scheduling. Set a name and schedule and click Create.
Cleanup
Duration: 5
Follow these steps to remove all resources created during this quickstart.
1. Clean Up Amazon Quick Resources
In the Amazon Quick console:
- Chat Agents → select the Sales Ops chat agent → Delete
- Flows → select the Customer Expansion flow → Delete
- Spaces → select
Snowflake-Sales-Ops-MCP→ Delete - Connectors → select
Snowflake-Sales-Ops-MCP→ Delete
2. Clean Up Snowflake Resources
Run the following SQL in a Snowsight worksheet:
USE ROLE ACCOUNTADMIN;

-- Drop the MCP Server
DROP MCP SERVER IF EXISTS CORTEX_QUICK_HOL_DB.CORTEX_QUICK_HOL_SCHEMA.SALES_OPS_MCP_SERVER;

-- Drop the OAuth Security Integration
DROP SECURITY INTEGRATION IF EXISTS SALES_OPS_QUICK_SUITE_OAUTH;

-- (Optional) Drop the Cortex Agent through the Snowflake CoCo UI if it was not removed automatically

-- Drop the database (this removes all tables, schemas, stages, and the semantic view)
DROP DATABASE IF EXISTS CORTEX_QUICK_HOL_DB;

-- Drop the warehouse
DROP WAREHOUSE IF EXISTS CORTEX_QUICK_HOL_WH;

-- (Optional) Drop the role
DROP ROLE IF EXISTS CORTEX_QUICK_HOL_ROLE;
aside positive
Cleanup Complete — All quickstart resources are now removed. If you used a temporary Snowflake trial account, it will expire automatically.
Conclusion And Resources
Duration: 5
Congratulations! You have successfully built an AI-powered conversational analytics experience that connects Amazon Quick with Snowflake Cortex AI via the Model Context Protocol.
What You Built
- A Snowflake database with 6 Sales Operations tables loaded from S3
- A Semantic View with dimensions, metrics, and verified queries
- A Cortex Agent powered by Cortex Analyst for natural-language text-to-SQL
- A Snowflake Managed MCP Server exposing the agent
- An OAuth Security Integration for secure authentication
- An Amazon Quick MCP Connector linked to the Snowflake MCP Server
- An Amazon Quick Space, Chat Agent, and Flow for conversational analytics
Key Takeaways
- MCP as the universal integration layer — Snowflake's Managed MCP Server exposes Cortex AI to any MCP-compatible client. No custom integrations or brittle point-to-point connectors.
- Natural language as the new query interface — Cortex Analyst translates questions to SQL in real time, enabling true self-service analytics.
- Semantic Views drive accuracy and governance — They define business context (dimensions, metrics, verified queries) so the AI generates correct SQL consistently.
- Conversational analytics for business users — Amazon Quick Spaces, Chat Agents, and Flows bring AI-powered exploration directly into the tools business users work in.
- Repeatable, production-ready pattern — Swap the underlying tables and semantic view, and the same pipeline serves a completely different domain (finance, HR, supply chain, etc.).
What You Learned
- How to set up Snowflake objects and load data from a public S3 bucket
- How to use Snowflake CoCo skills to automate creation of a Semantic View, Cortex Agent, MCP Server, and OAuth integration
- How to configure an Amazon Quick MCP Connector with OAuth
- How to build a Space, Chat Agent, and Flow for conversational analytics
Related Resources
This content is provided as is, and is not maintained on an ongoing basis. It may be out of date with current Snowflake instances