
PLEASE NOTE: This post was originally published in October 2023. It has been updated to reflect currently available products, features, and functionality.
At Snowflake, we’re committed to helping customers effectively manage and optimize spend. To that end, today we’re excited to announce the launch of the public preview of Budgets on Amazon Web Services (AWS), Microsoft Azure and Google Cloud Platform (GCP). Budgets enables customers to set spending limits and receive notifications for Snowflake credit usage for either their entire Snowflake account or for a custom group of resources within an account.
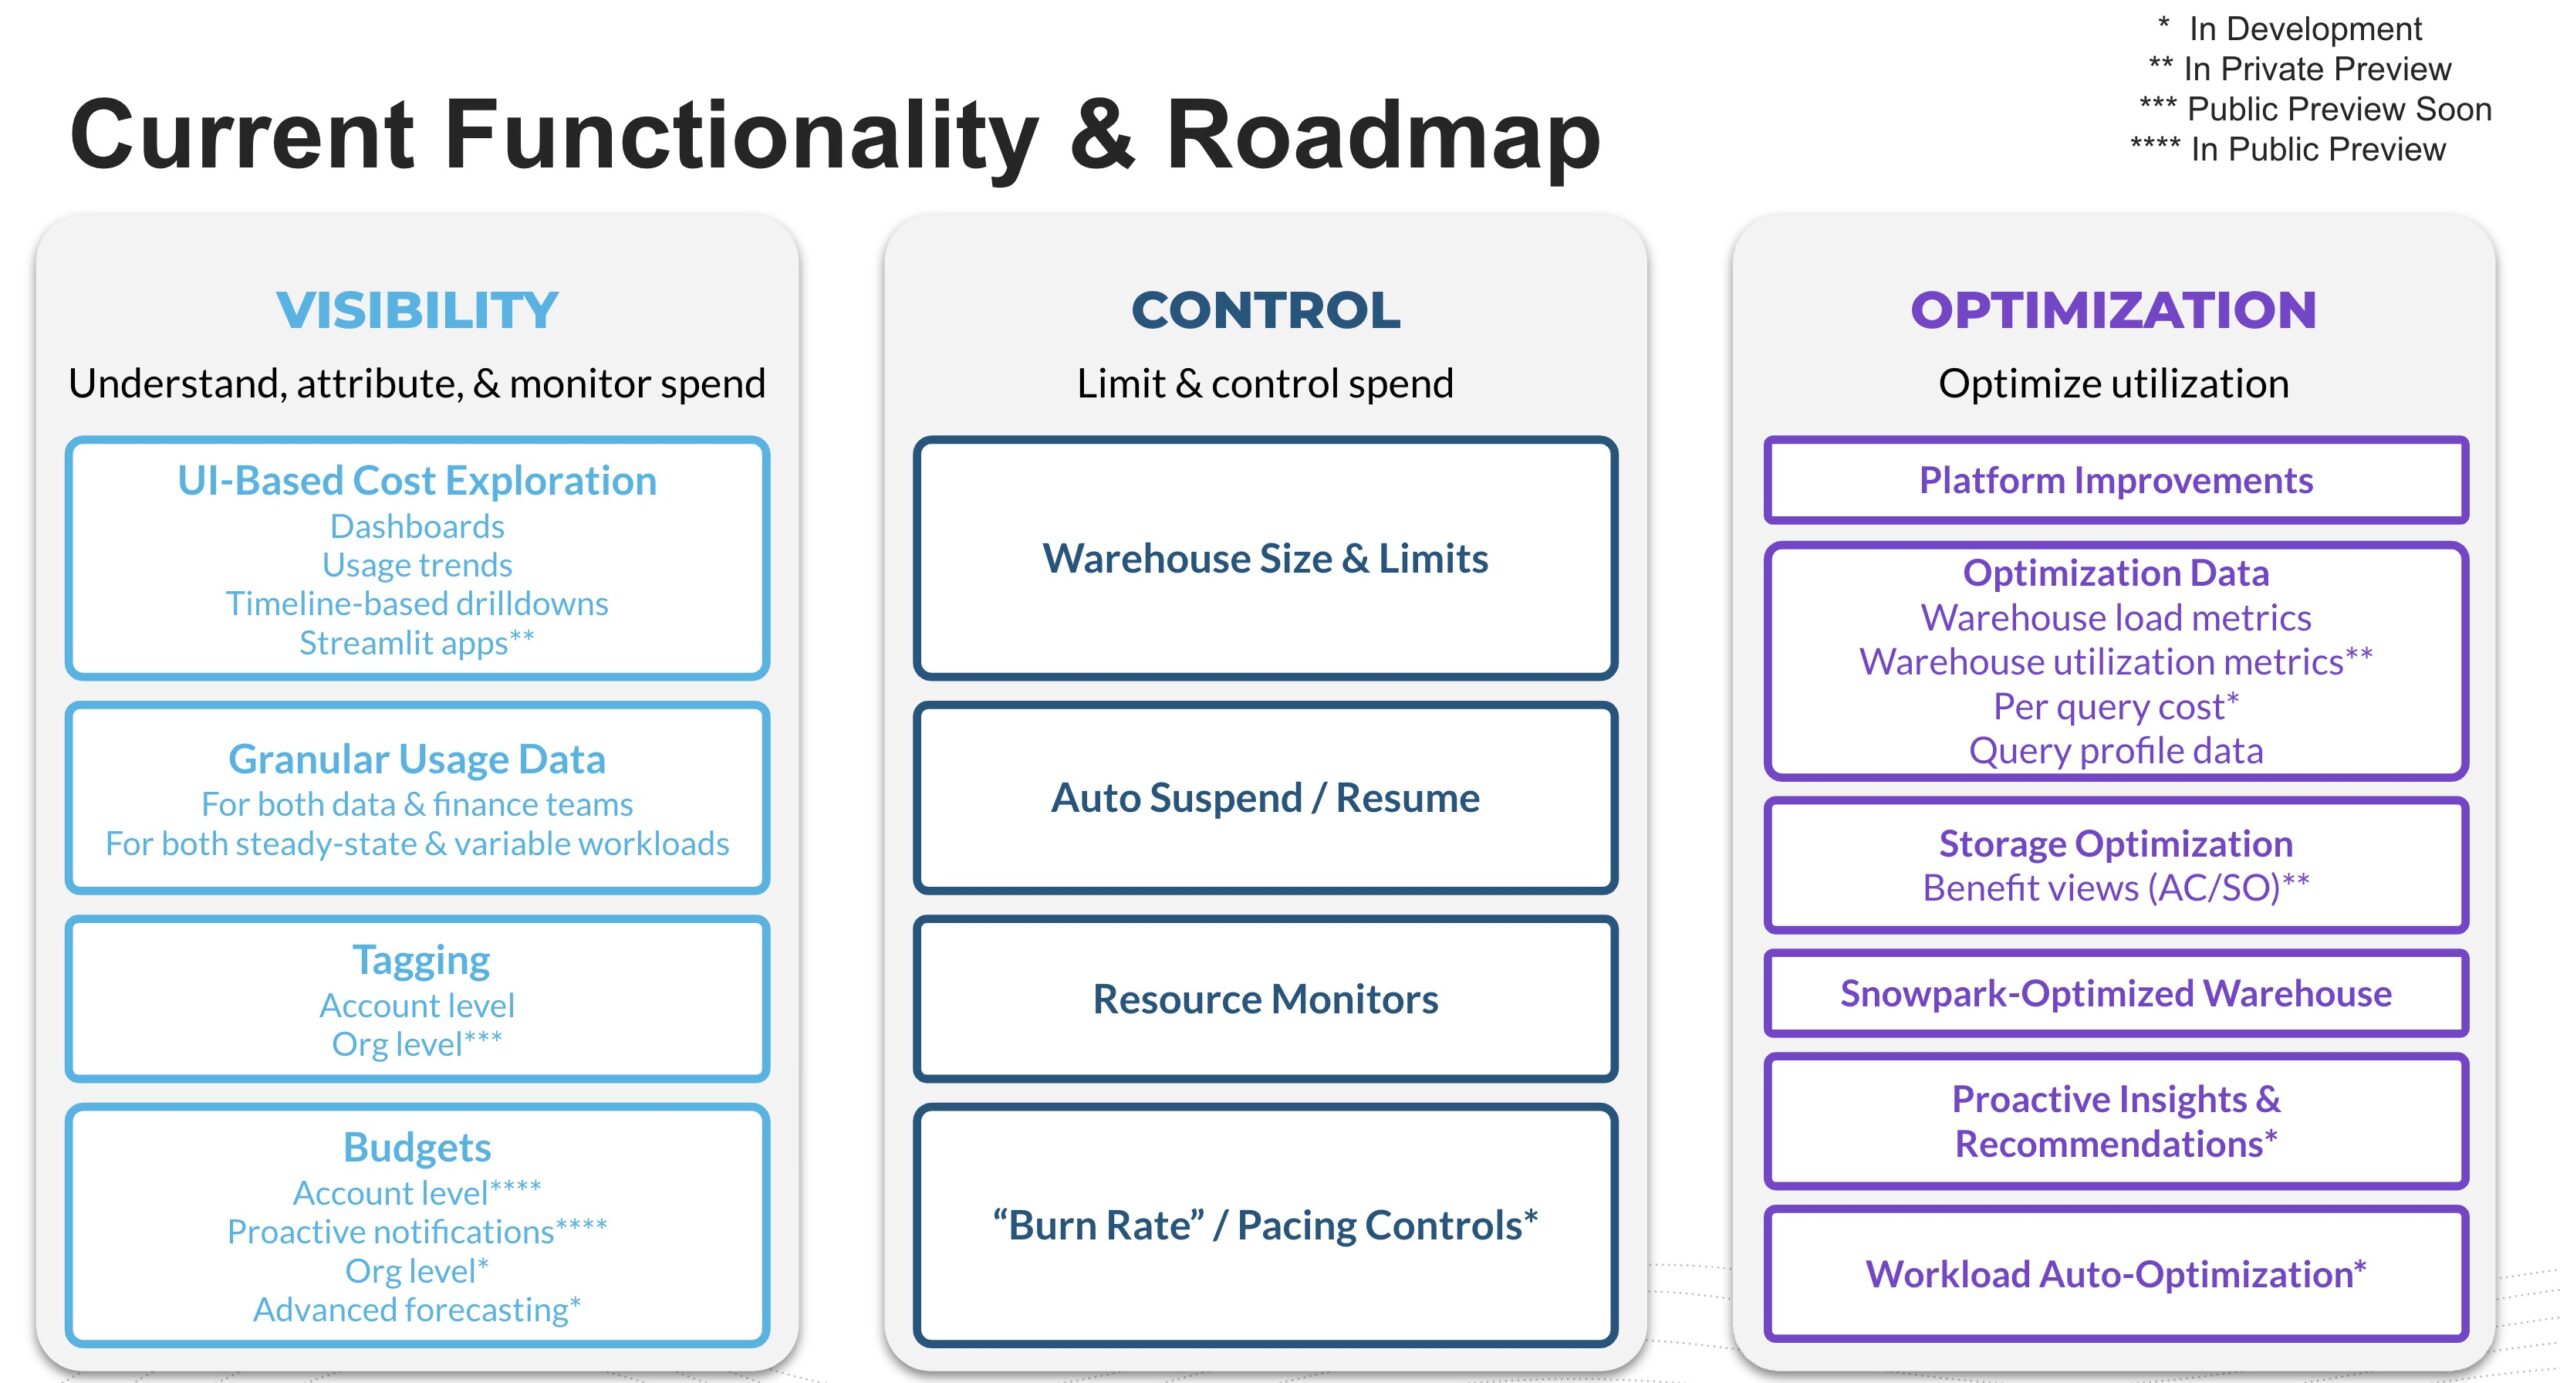
We have recently shared a series of blog posts to help you more easily and effectively manage spend on Snowflake, including: 1) Best practices to optimize Snowflake spend, 2) Using Snowflake’s scale-to-zero capabilities for fun & profit, 3) Deep dive into managing latency, throughput, and cost in Snowflake, 4) Improve Snowflake price-performance by optimizing Storage, 5) Compute primitives in Snowflake and best practices to right-size them and 6) FinOps for Snowflake. Based on customer feedback, we have broadly organized our investments into the following categories:
This post goes deeper into the Budgets feature and how you can start using it today to better control your Snowflake spend.
Account-level budgets
When you activate an account-level Budget, you set up a spending limit for all supported Snowflake objects in the account. This Budget will monitor the credit spend for your compute resources, including Warehouses, cloud services and serverless services such as Query Acceleration Service, Materialized Views, Automatic Clustering and Search Optimization for the calendar month. We will also proactively send you daily alert notifications, if you are projected to overspend during any day of the month. In public preview, the Budget is fixed for the duration of the calendar month and will reset on the first day of the following month.
Setting up account-level budgets
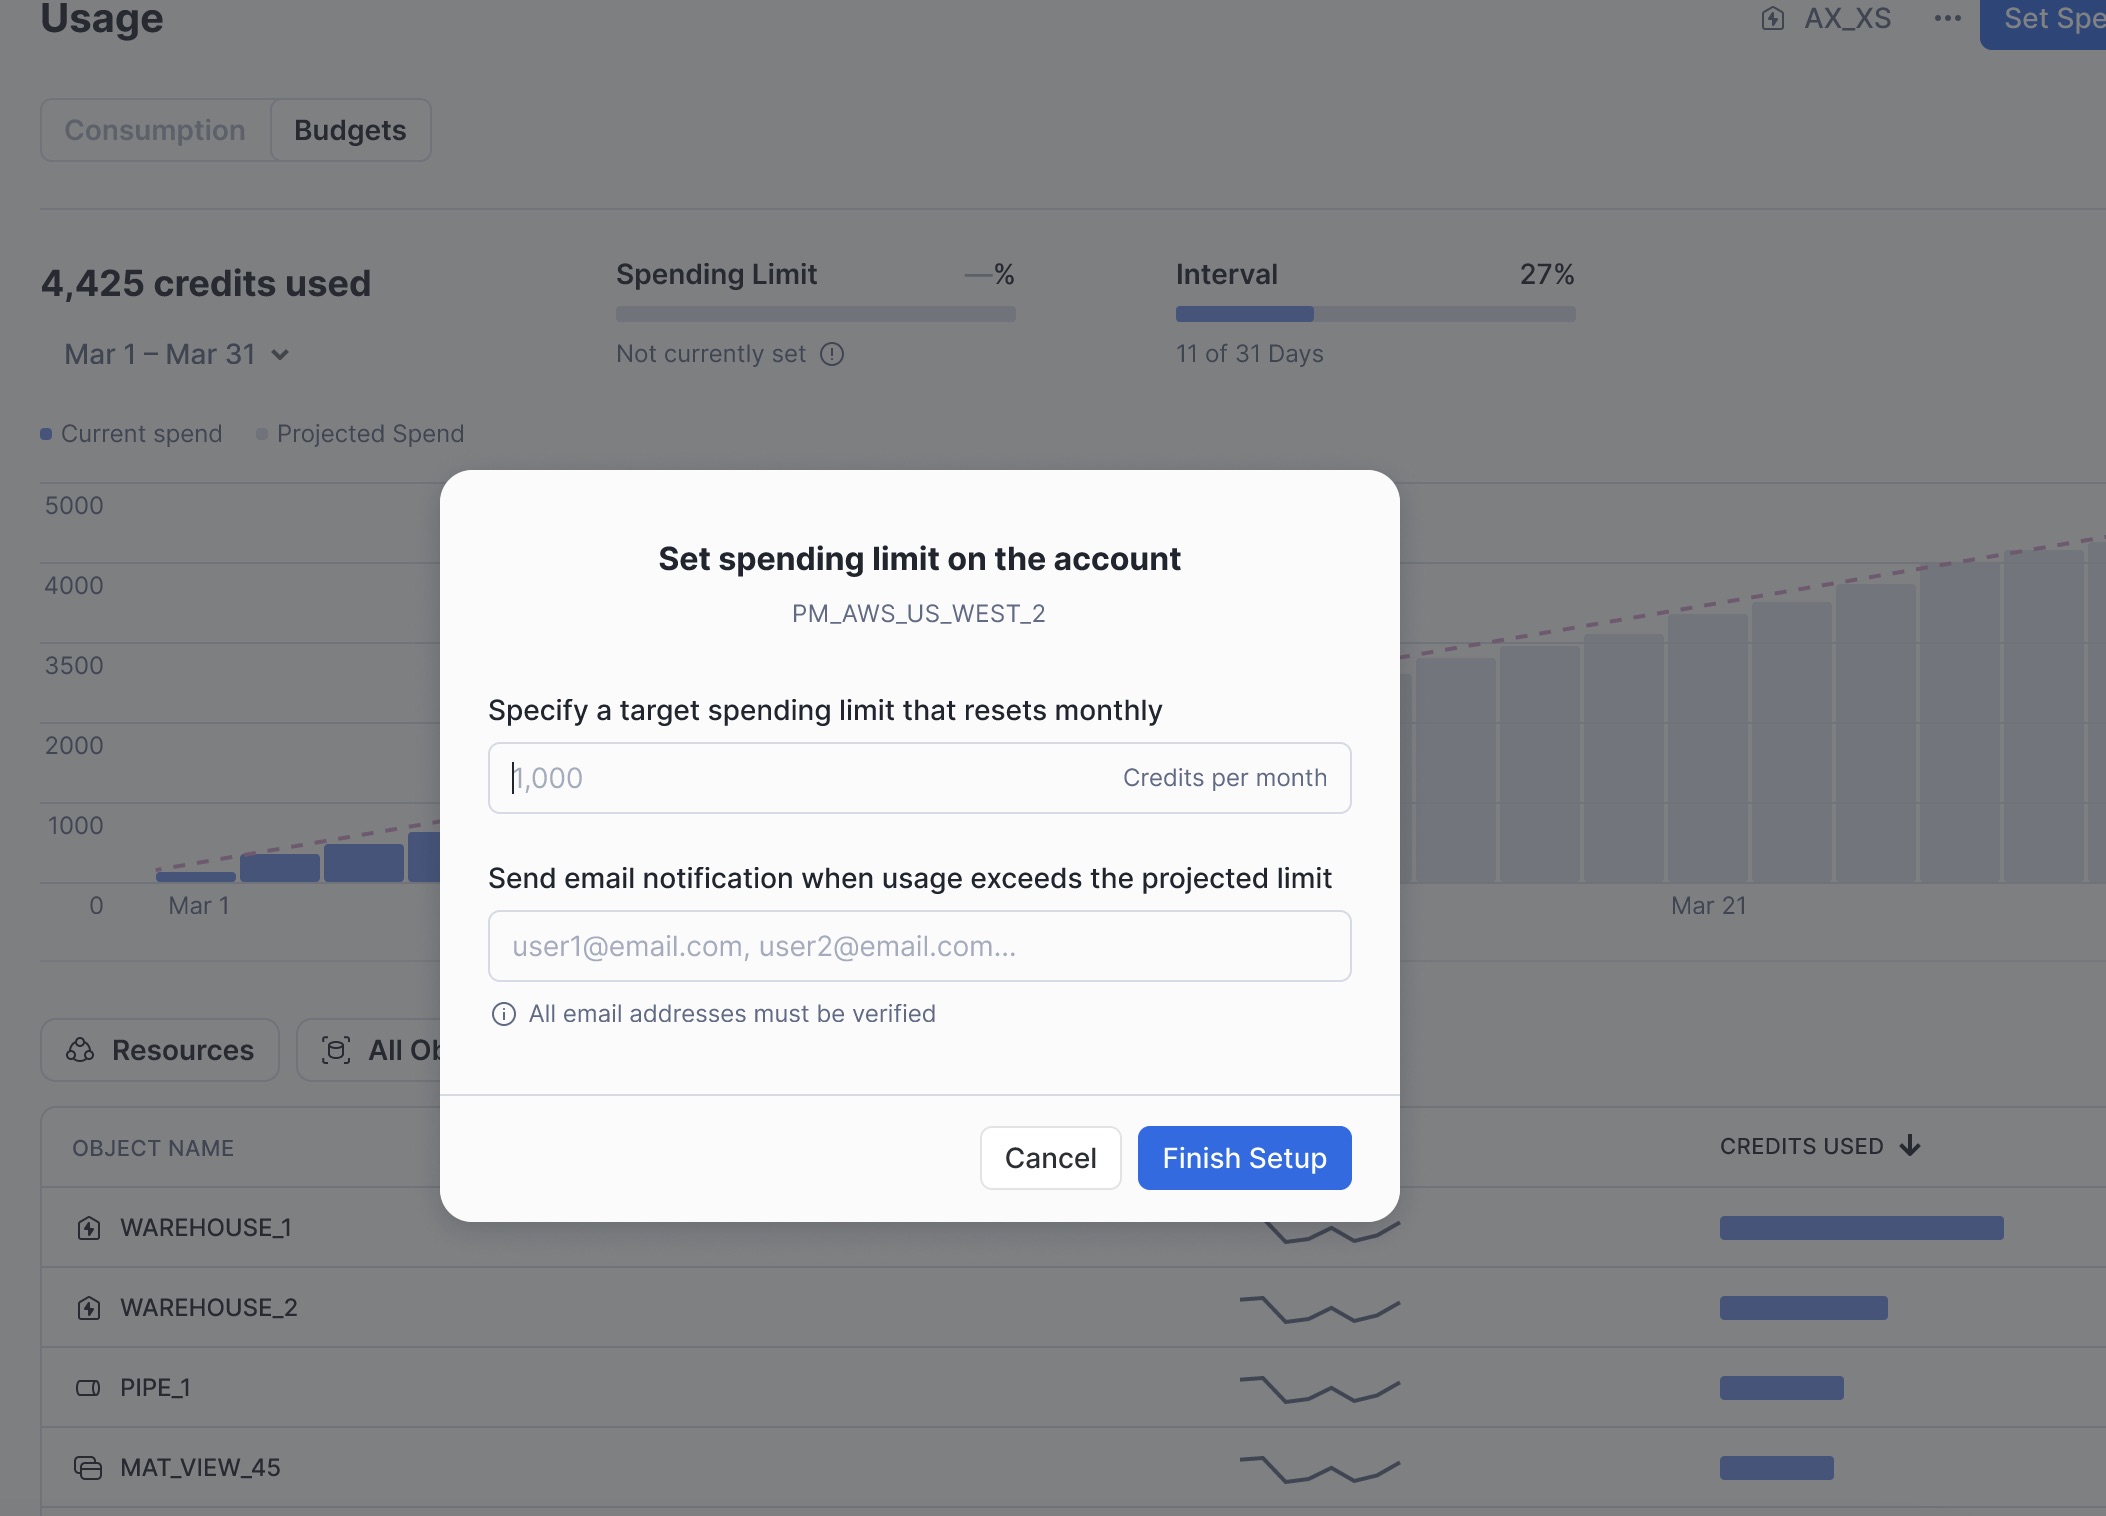
You can either set up the account-level Budget programmatically or via the user interface (UI). If you are using the UI, your first step is to go to the Admin -> Usage -> Budgets (Preview) tab and activate the account-level Budget. To help you get started with what spending limit to set, we provide you with some guidance on what your credit spend has been for the past three months and an estimate of what your current spend might be (in case you are activating the account-level budget in the middle of the month).
Once you have set up a spending limit and have provided an email address for account-level Budget notifications, you will notice the chart below. The black dotted line is the extrapolated spend limit trend line from the beginning of the month to the end. This is used as the daily threshold for monitoring spend. The blue bars are the cumulative actual observed spend within that account, and the gray bars are the cumulative forecast of your spend for the rest of the month, based on the actual observed spend until now. Right below the chart, you can see the list of resources that the Budget is monitoring within that account.
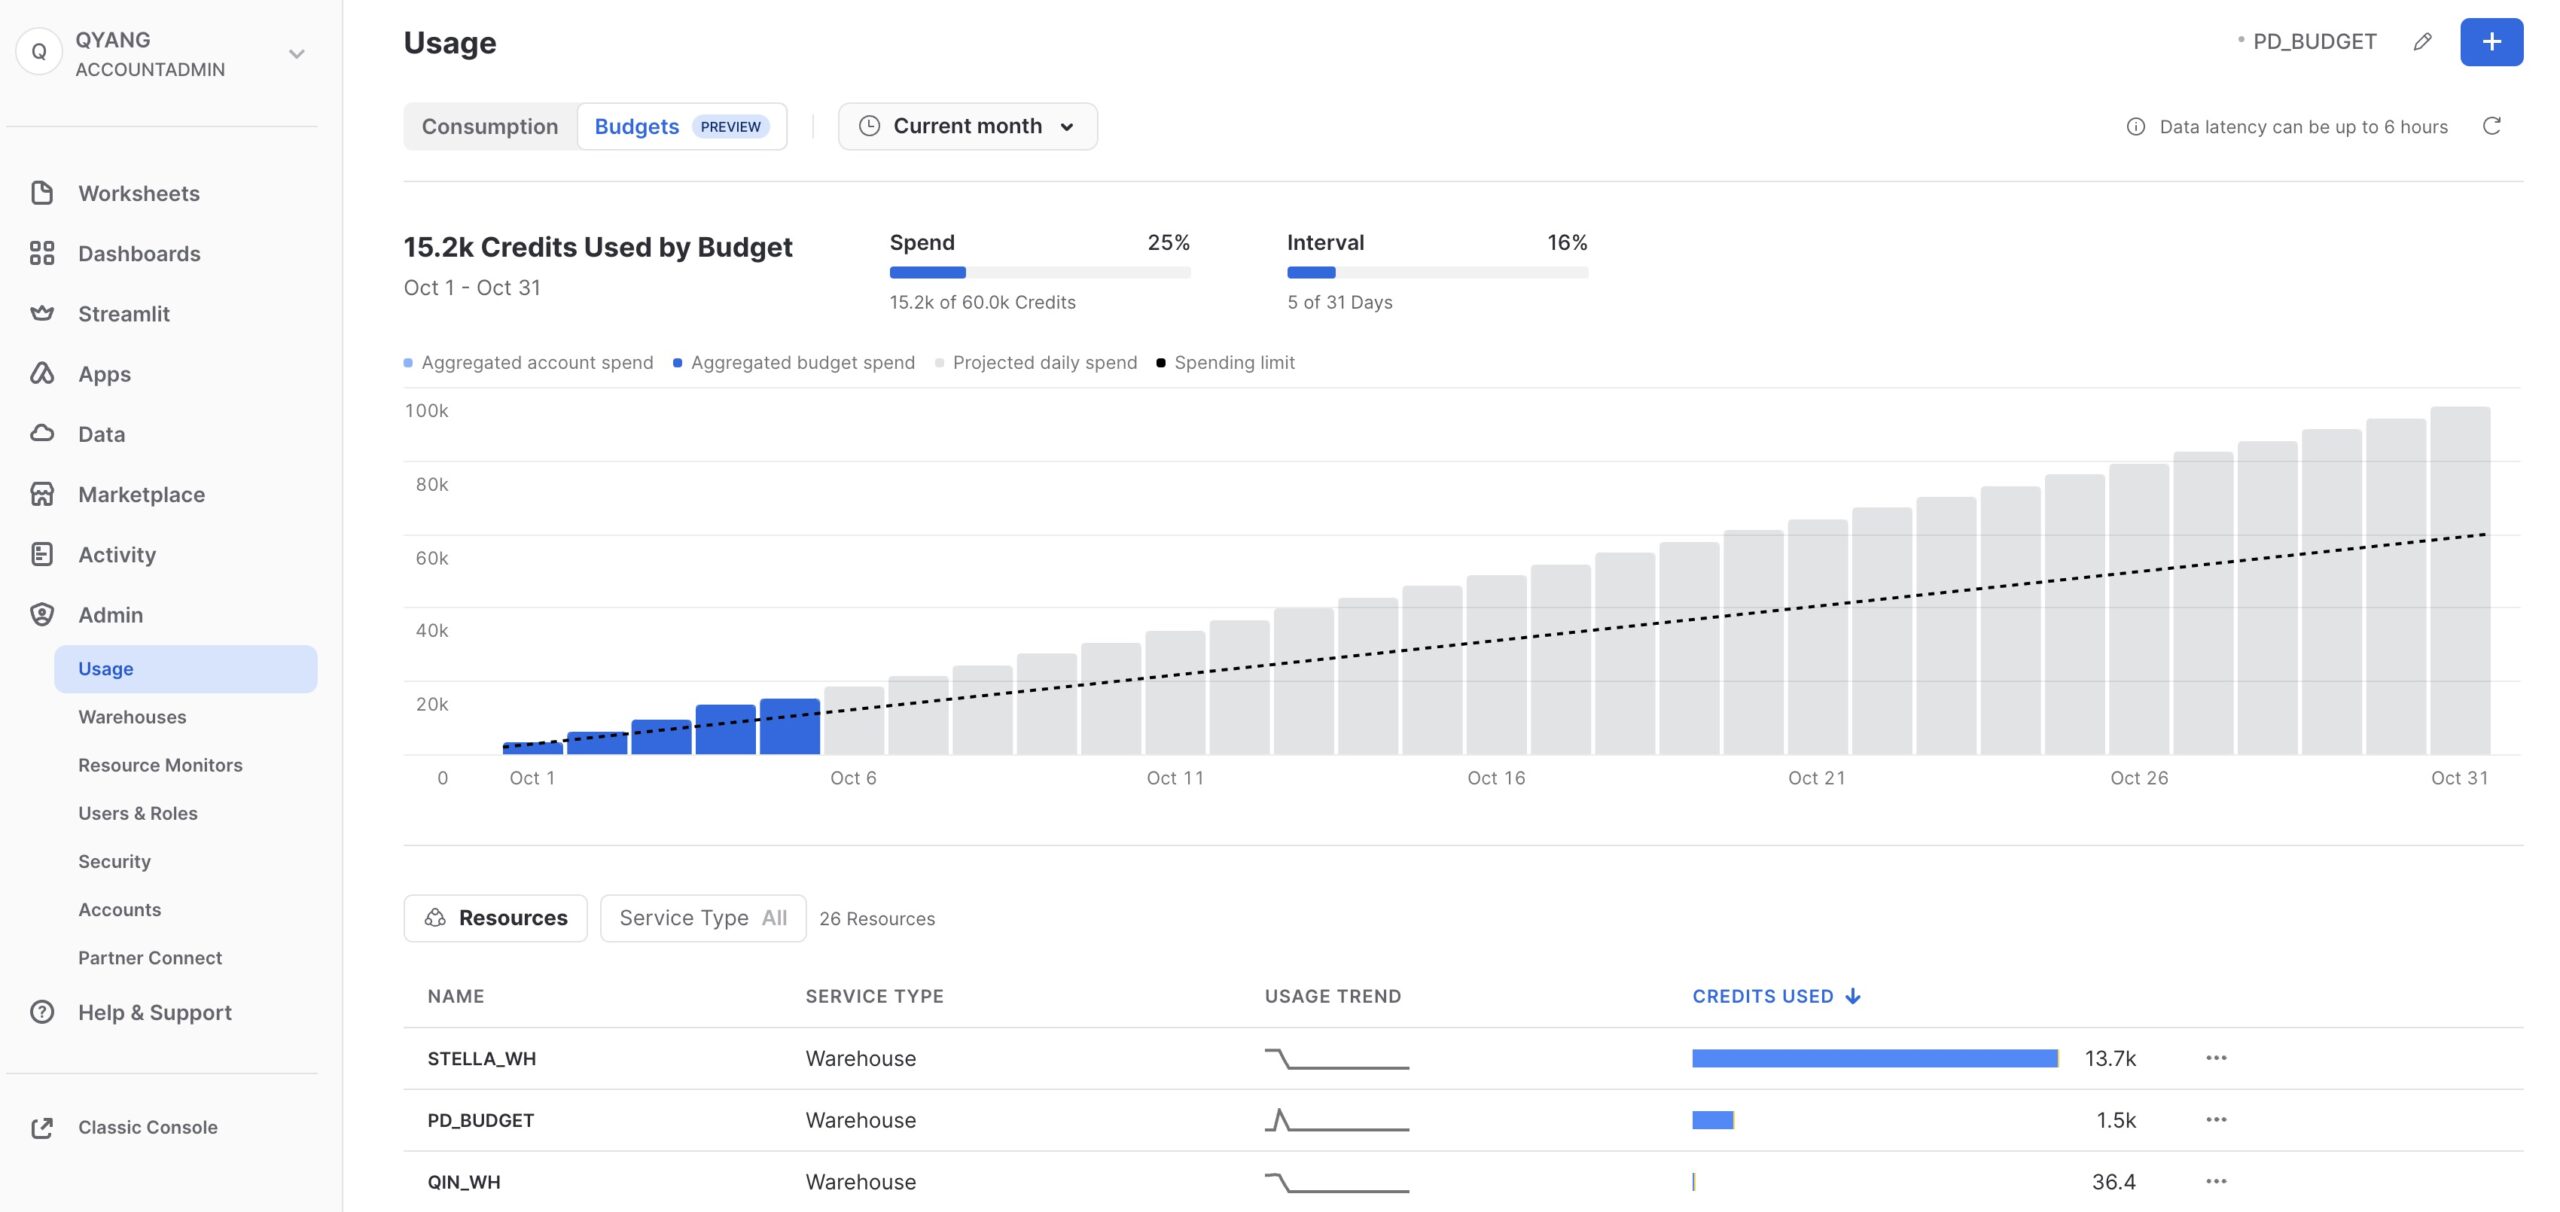
In the above example, you can see that the actual observed spend exceeded the spend limit line on October 3 and, as such, we would send you a notification email similar to the one below:
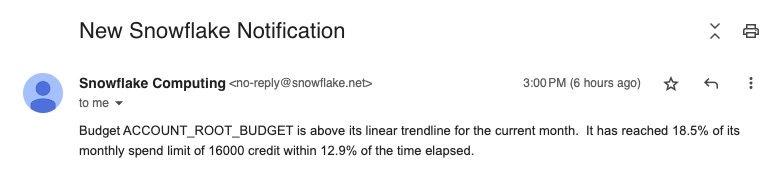
If the current trend of overspending the Budget continues, we would continue sending you a daily notification.
Custom budgets
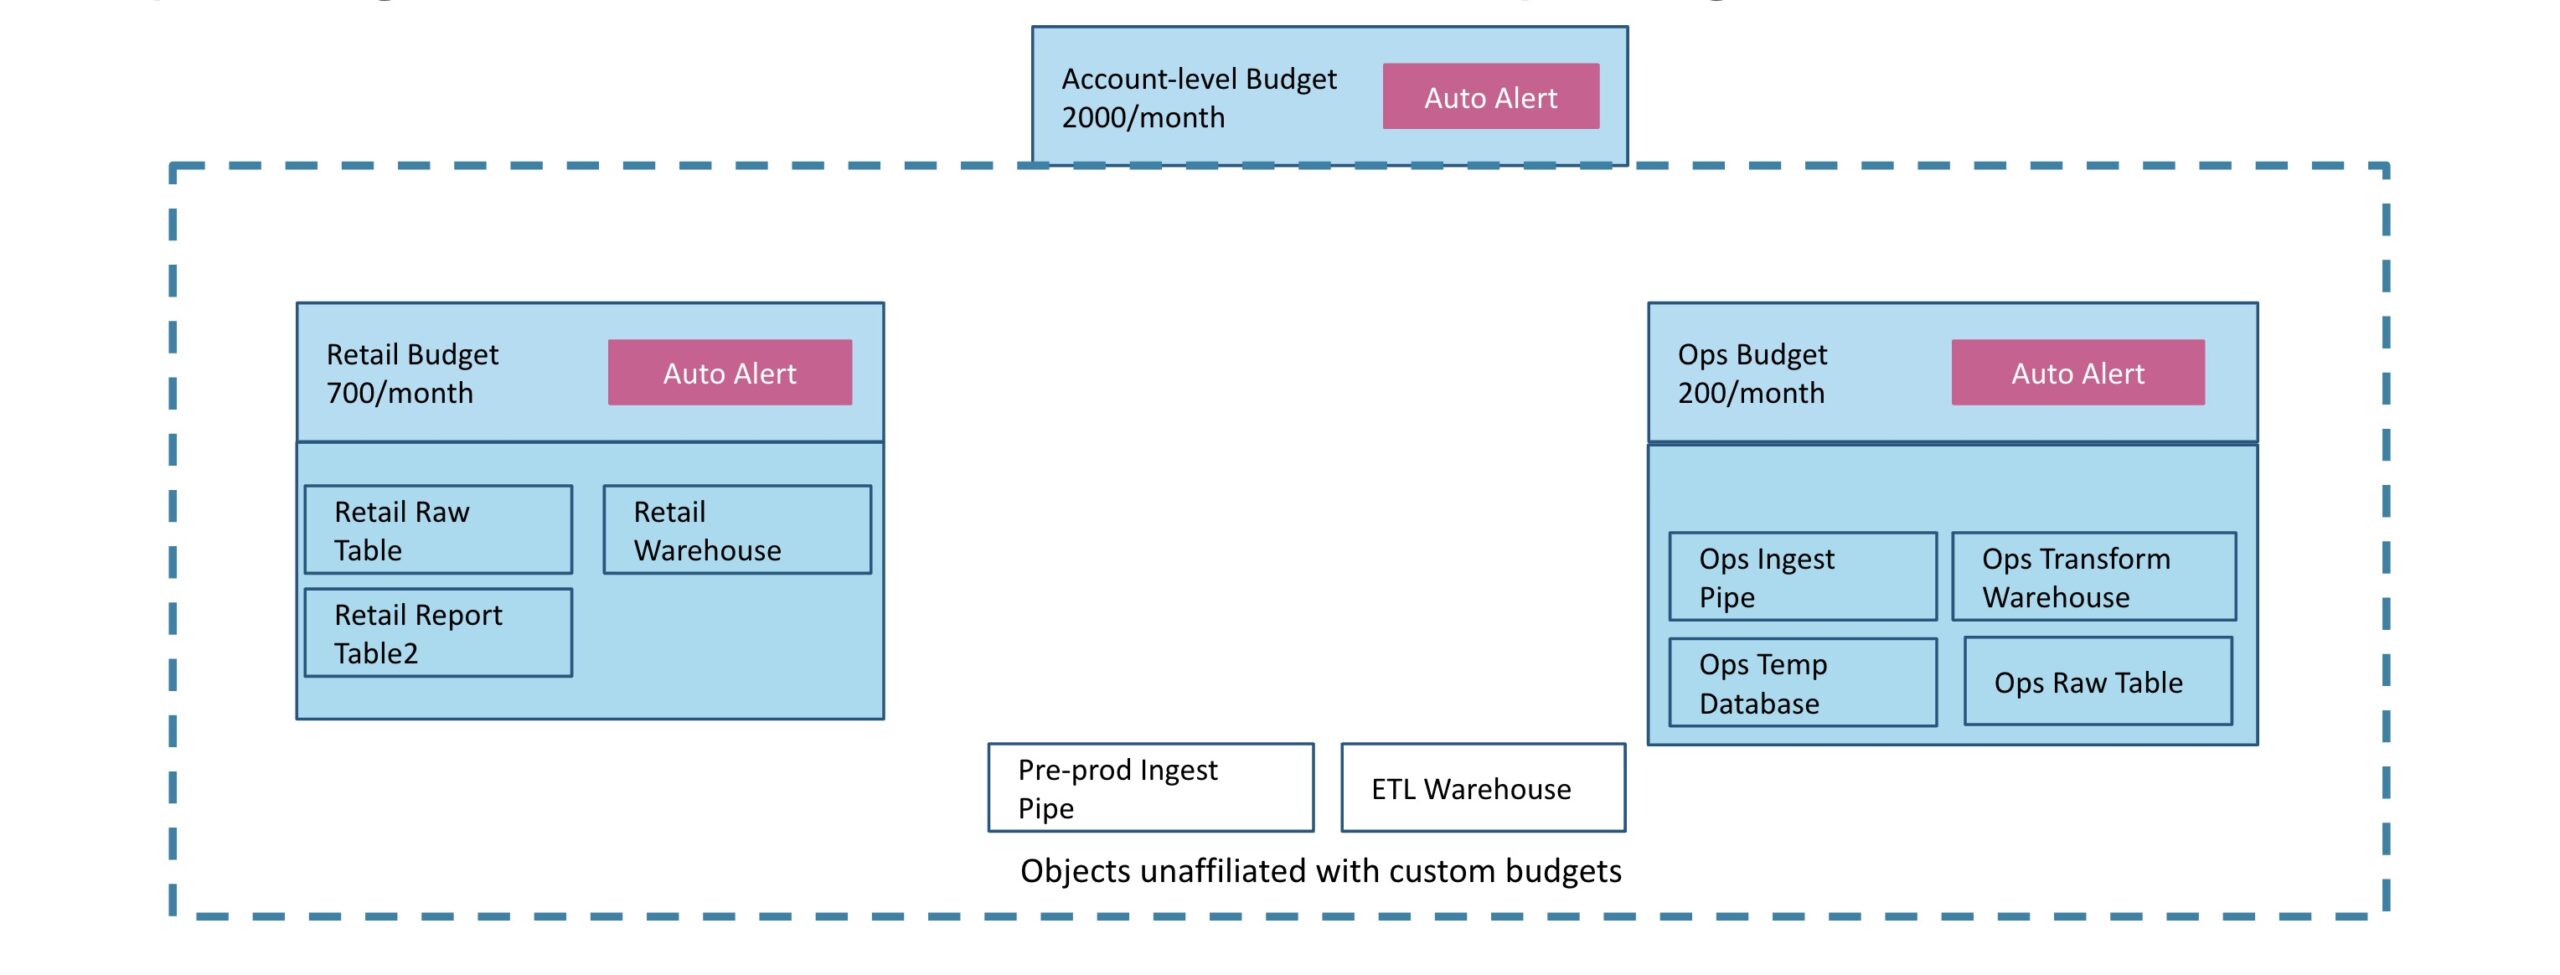
You can even create a custom Budget by grouping a set of Snowflake objects within an account, corresponding to a department, function, business unit or workload. The custom Budget monitors the credit spend for those specific resources only. A resource can only be part of a single custom Budget at any point of time. Similar to the account budget, we will proactively send you daily alert notifications, if you are projected to overspend during any day of the month.
In the diagram below, you have an account-level Budget that is monitoring all the compute resources within your account for the entire month. Within that account, you have two business units, which are represented by two custom Budgets (1. Retail, and 2. Ops) that monitor the compute resources associated only with each respective business unit.
Setting up a custom budget
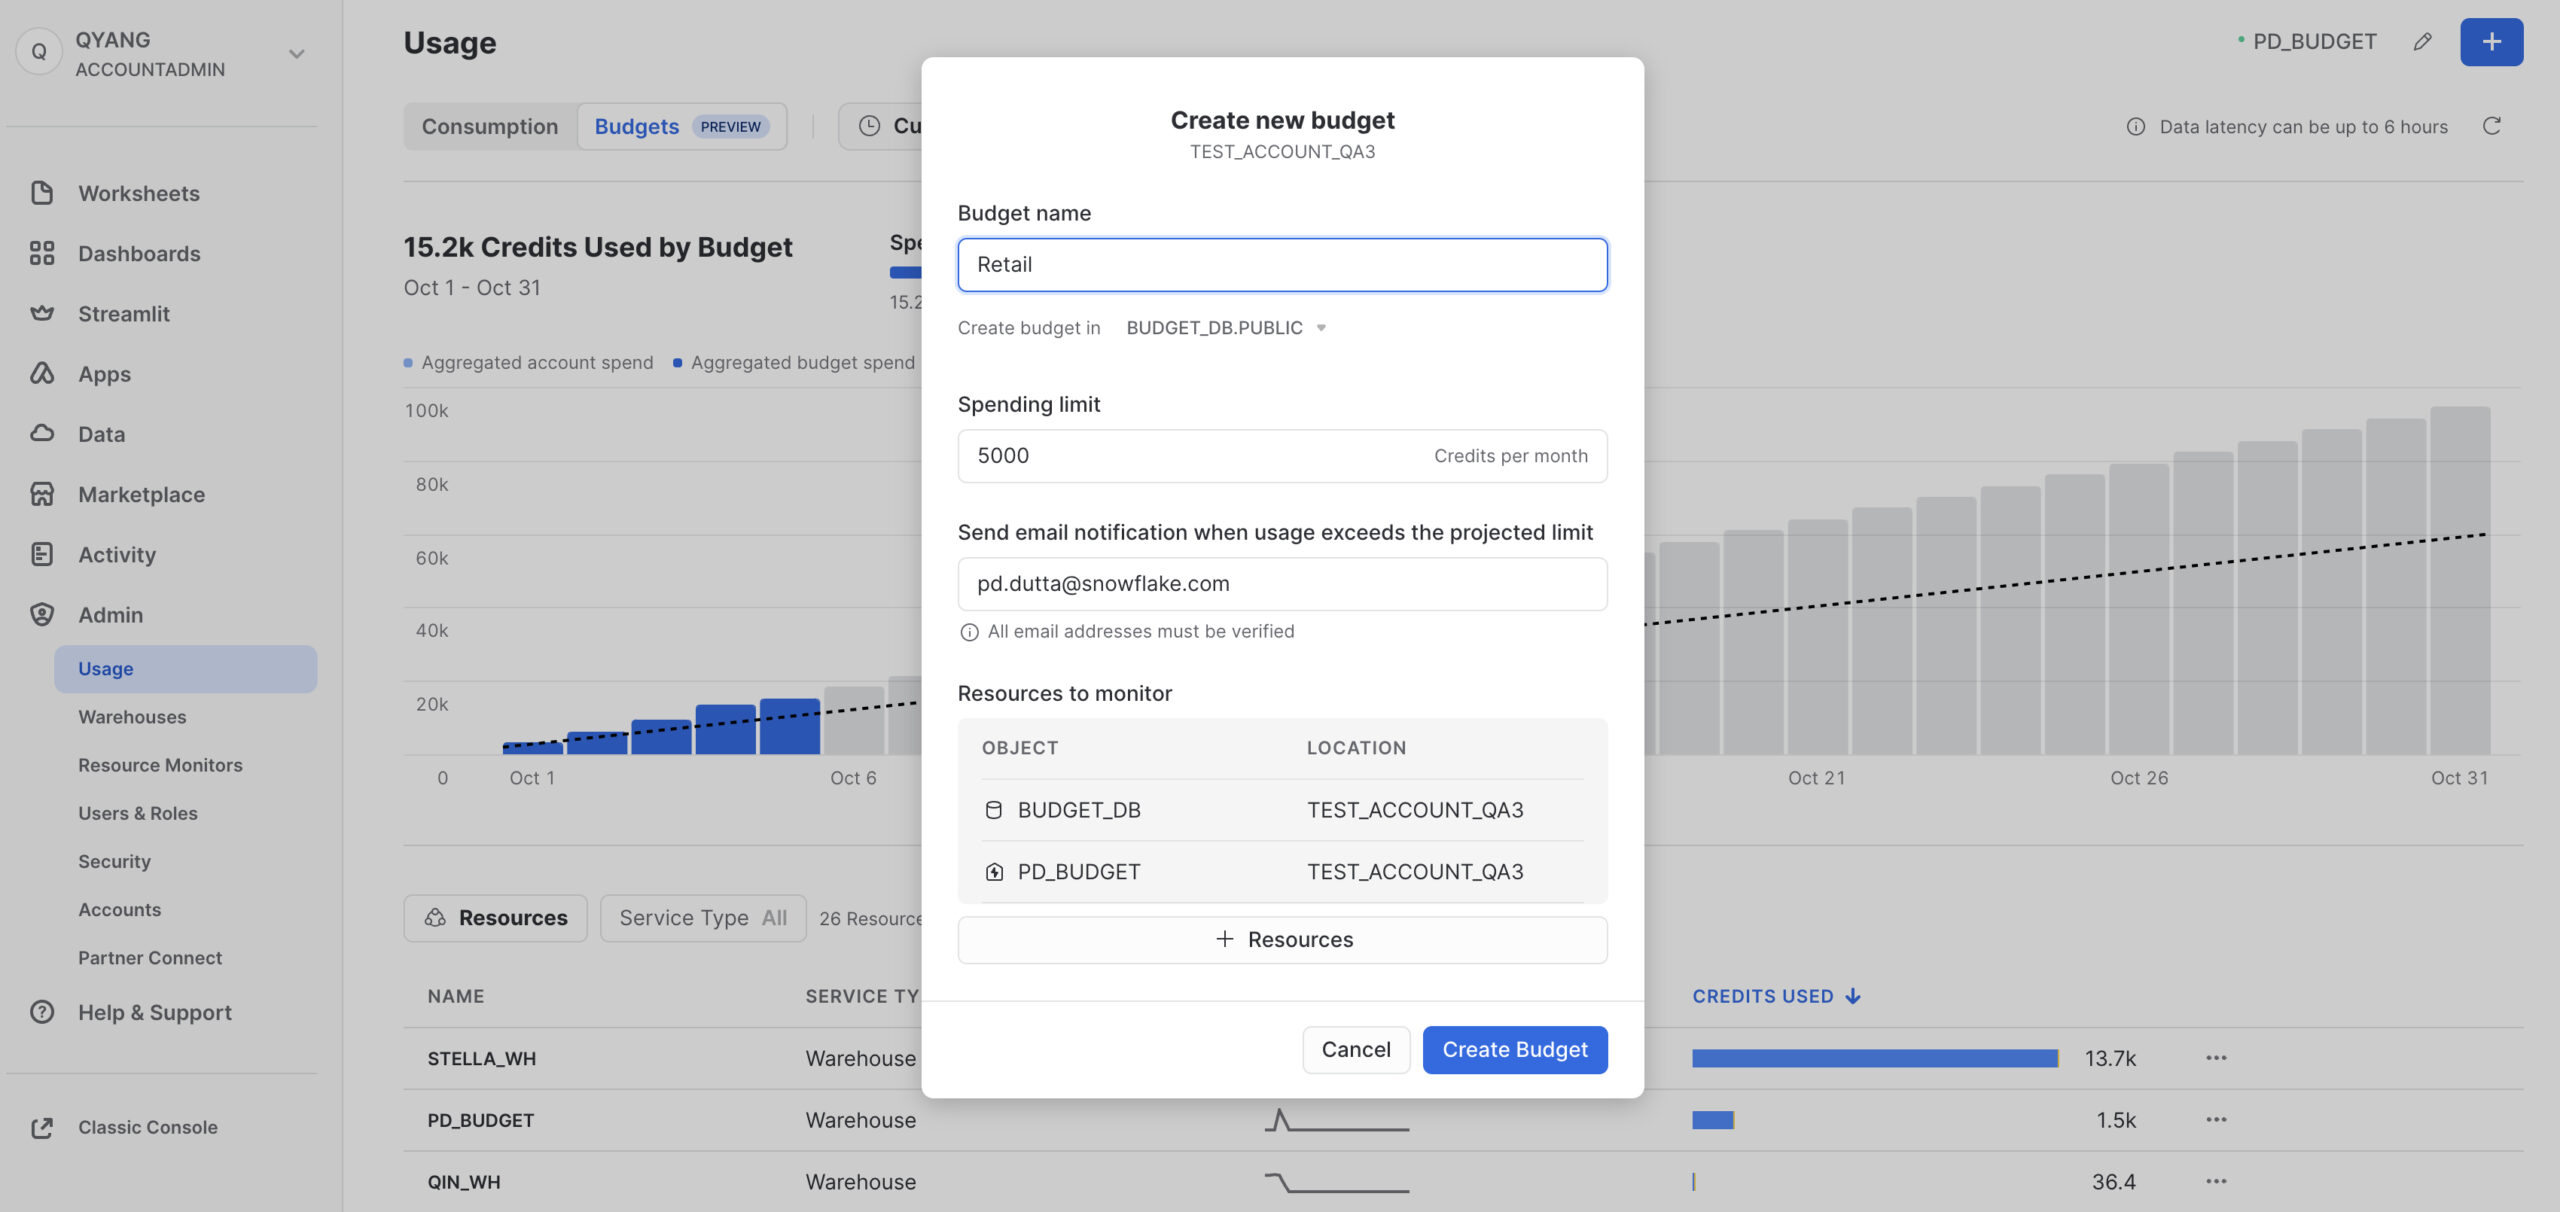
You can set up a custom Budget called Retail, by clicking the + sign on the top right-hand corner. This Budget will only monitor the resources that you have assigned to it, namely the PD_BUDGET warehouse and the BUDGET_DB database, and notify you if the credit usage from these two resources exceed the limit.
Get started today
Budgets provide an easy and intuitive way for you to monitor and control your Snowflake spend, and we are committed to adding more functionality in the future to help you further optimize your cost. The Budgets public preview was launched on AWS in early October 2023 and is available on Microsoft Azure and GCP on November 3, 2023.
Set up an account level or custom Budget today!