
PLEASE NOTE: This post was originally published in 2018. It has been updated to reflect currently available features and functionality.
In part two of this four-part series, we learned how to create a Sagemaker Notebook instance. In part three, we’ll learn how to connect that Sagemaker Notebook instance to Snowflake. If you’ve completed the steps outlined in part one and part two, the Jupyter Notebook instance is up and running and you have access to your Snowflake instance, including the demo data set. Now you’re ready to connect the two platforms.
You can review the entire blog series here: Part One > Part Two > Part Three > Part Four.
The Sagemaker console
The first step is to open the Jupyter service using the link on the Sagemaker console.

There are two options for creating a Jupyter Notebook. You can create the notebook from scratch by following the step-by-step instructions below, or you can download sample notebooks here. If you decide to build the notebook from scratch, select the conda_python3 kernel. Alternatively, if you decide to work with a pre-made sample, make sure to upload it to your Sagemaker notebook instance first.

The next step is to connect to the Snowflake instance with your credentials.
import snowflake.connector
# Connecting to Snowflake using the default authenticator
ctx = snowflake.connector.connect(
  user=<user>,
  password=<password>,
  account=<account>
)
Here you have the option to hard code all credentials and other specific information, including the S3 bucket names. However, for security reasons it’s advisable to not store credentials in the notebook. Another option is to enter your credentials every time you run the notebook.
Rather than storing credentials directly in the notebook, I opted to store a reference to the credentials. The actual credentials are automatically stored in a secure key/value management system called AWS Systems Manager Parameter Store (SSM).
With most AWS systems, the first step requires setting up permissions for SSM through AWS IAM. Please ask your AWS security admin to create another policy with the following Actions on KMS and SSM with the following:
<script src=”https://gist.github.com/sfc-gh-rfehrmann/d826f3aa20b415d5c0e191a9583427e7.js”></script>
Adhering to the best-practice principle of least permissions, I recommend limiting usage of the “Actions by Resource.” Also, be sure to change the region and accountid in the code segment shown above or, alternatively, grant access to all resources (i.e., “*”).
In the code segment shown above, I created a root name of “SNOWFLAKE”. This is only an example. You’re free to create your own unique naming convention.
Next, check permissions for your login. Assuming the new policy has been called SagemakerCredentialsPolicy, permissions for your login should look like the example shown below:
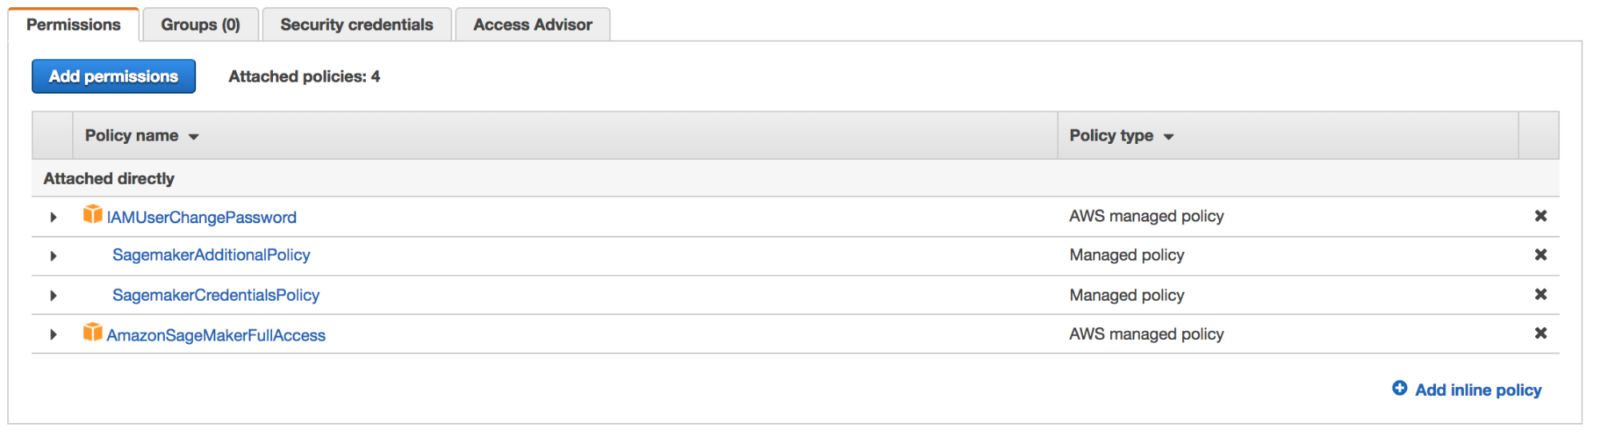
With the SagemakerCredentialsPolicy in place, you’re ready to begin configuring all your secrets (i.e., credentials) in SSM. Be sure to take the same namespace that you used to configure the credentials policy and apply them to the prefixes of your secrets.
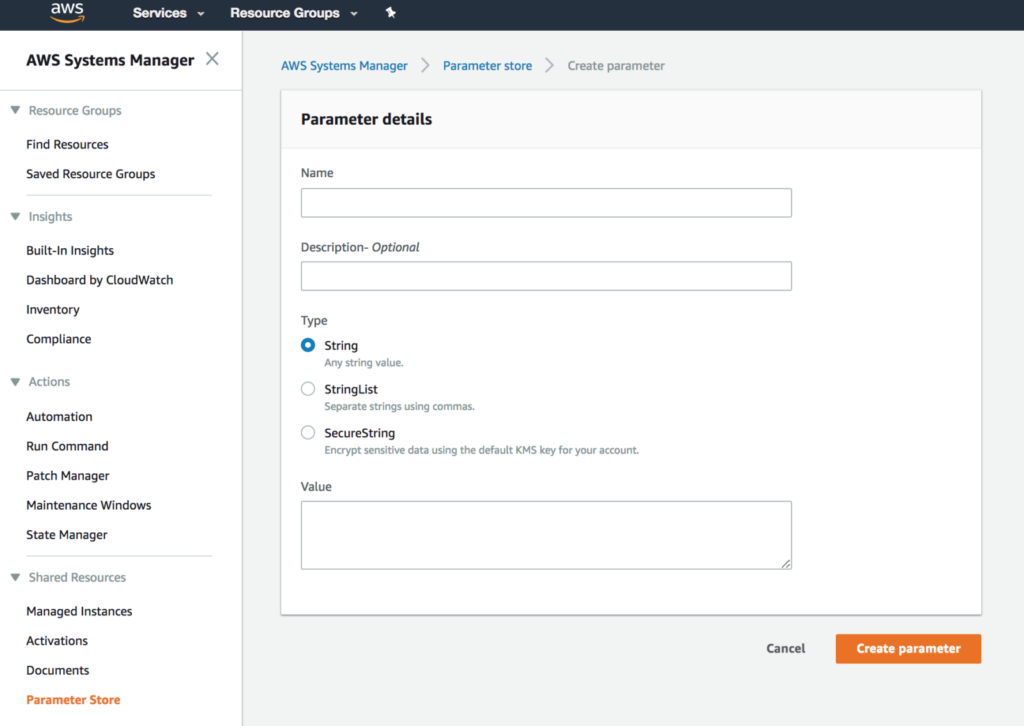
After setting up your key/value pairs in SSM, use the following step to read the key/value pairs into your Jupyter Notebook.
import boto3

params=['/SNOWFLAKE/URL','/SNOWFLAKE/ACCOUNT_ID'
        ,'/SNOWFLAKE/USER_ID','/SNOWFLAKE/PASSWORD'
        ,'/SNOWFLAKE/DATABASE','/SNOWFLAKE/SCHEMA'
        ,'/SNOWFLAKE/WAREHOUSE','/SNOWFLAKE/BUCKET'
        ,'/SNOWFLAKE/PREFIX']
region='us-east-1'

def get_credentials(params):
   ssm = boto3.client('ssm',region)
   response = ssm.get_parameters(
      Names=params,
      WithDecryption=True
   )
   #Build dict of credentials
   param_values={k['Name']:k['Value'] for k in  response['Parameters']}
   return param_values

param_values=get_credentials(params)
Instead of hard coding the credentials, you can reference key/value pairs via the variable param_values. In addition to the credentials (account_id, user_id, password), I also stored the warehouse, database, and schema.
import snowflake.connector
# Connecting to Snowflake using the default authenticator
ctx = snowflake.connector.connect(
  user=param_values['/SNOWFLAKE/USER_ID'],
  password=param_values['/SNOWFLAKE/PASSWORD'],
  account=param_values['/SNOWFLAKE/ACCOUNT_ID'],
  warehouse=param_values['/SNOWFLAKE/WAREHOUSE'],
  database=param_values['/SNOWFLAKE/DATABASE'],
  schema=param_values['/SNOWFLAKE/SCHEMA']
Now you’re ready to read data from Snowflake. To illustrate the benefits of using data in Snowflake, we will read semi-structured data from the database I named “SNOWFLAKE_SAMPLE_DATABASE”.
When data is stored in Snowflake, you can use the Snowflake JSON parser and the SQL engine to easily query, transform, cast, and filter JSON data before it gets to the Jupyter Notebook.
From the JSON documents stored in WEATHER_14_TOTAL, the following step shows the minimum and maximum temperature values, a date and timestamp, and the latitude/longitude coordinates for New York City.
cs=ctx.cursor()
allrows=cs.execute(
"select (V:main.temp_max - 273.15) * 1.8000 + 32.00 as temp_max_far, " +
"       (V:main.temp_min - 273.15) * 1.8000 + 32.00 as temp_min_far, " +
"       cast(V:time as timestamp) time, " +
"       V:city.coord.lat lat, " +
"       V:city.coord.lon lon " +
"from snowflake_sample_data.weather.weather_14_total " +
"where v:city.name = 'New York' " +
"and   v:city.country = 'US' ").fetchall()
The final step converts the result set into a Pandas DataFrame, which is suitable for machine learning algorithms.
import pandas as pd                               # For munging tabular data

data = pd.DataFrame(allrows)
data.columns=['temp_max_far','temp_min_far','time','lat','lon']
pd.set_option('display.max_columns', 500)     # Make sure we can see all of the columns
pd.set_option('display.max_rows', 10)         # Keep the output on one page
Data

Conclusion
Now that we’ve connected a Jupyter Notebook in Sagemaker to the data in Snowflake using the Snowflake Connector for Python, we’re ready for the final stage: Connecting Sagemaker and a Jupyter Notebook to both a local Spark instance and a multi-node EMR Spark cluster. I’ll cover how to accomplish this connection in the fourth and final installment of this series — Connecting a Jupyter Notebook to Snowflake via Spark.
You can review the entire blog series here: Part One > Part Two > Part Three > Part Four.